SEWING THE STITCHES
U
tility
S
titc
h
es
Sewing
S-29
S
2
e
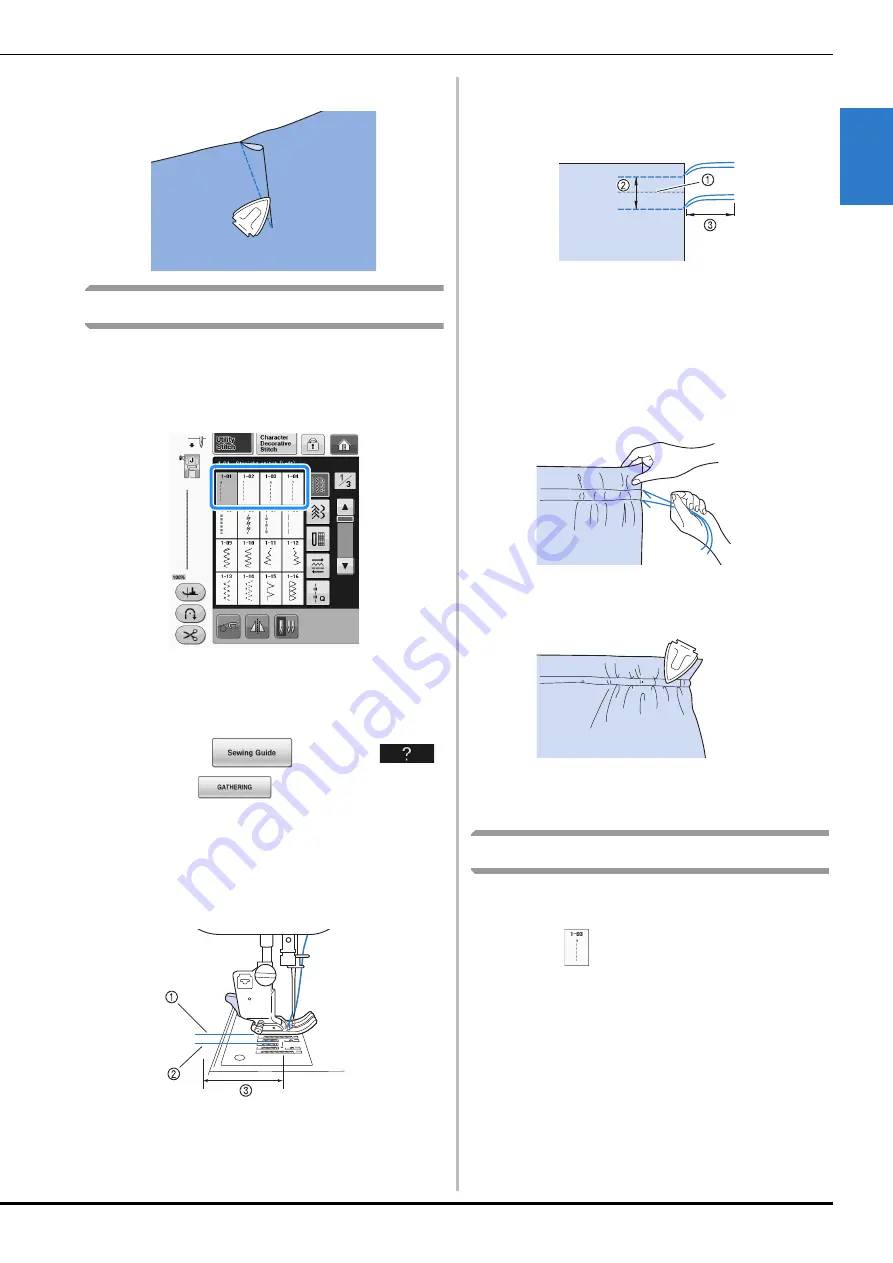
Iron the dart to one side so that it is flat.
Gathering
Use on waists of skirts, sleeves of shirts, etc.
a
Select a straight stitch and attach presser
foot “J”.
b
Set the stitch length to 4.0 mm (approx.
3/16 inch) and the thread tension to
approximately 2.0 (weaker tension).
*
If you press
after pressing
and then
, the stitch length will be set
automatically to 4.0 mm (approx. 3/16 inch) and the
thread tension will be automatically set to 2.0.
c
Pull the bobbin and upper threads out by
50 mm (approx. 2 inches) (“Pulling Up the
Bobbin Thread” of “Basic operations”).
a
Upper thread
b
Bobbin thread
c
About 50 mm (approx. 2 inches)
d
Sew two rows of straight stitches parallel to
the seam line, then trim excess thread
leaving 50 mm (approx. 2 inches).
a
Seam line
b
10 mm to 15 mm (approx. 3/8 inch to 9/16 inch)
c
About 50 mm (approx. 2 inches)
e
Pull the bobbin threads to obtain the
desired amount of gather, then tie the
threads.
f
Smooth the gathers by ironing them.
g
Sew on the seam line and remove the
basting stitch.
Flat Fell Seam
Use for reinforcing seams and finishing edges
neatly.
a
Select
and attach presser foot “J”.
b
Sew the finish line, then cut half of the seam
allowance from the side on which the flat
fell seam will lie.
*
When the automatic thread cutting and automatic
reinforcement stitching are preset, reinforcement
stitches will be sewn automatically at the beginning
of sewing. Press the “Reverse Stitch” button to sew a
Содержание 882-C50
Страница 89: ...USEFUL FUNCTIONS Sewing Basics Sewing S 19 S 1 ...
Страница 145: ...STITCH SETTING CHART Utility Stitches Sewing S 75 S 2 ...
Страница 182: ...USING STORED CUSTOM STITCHES S 112 ...
Страница 200: ...ATTACHING THE EMBROIDERY FRAME E 18 b Pull the embroidery frame toward you ...
Страница 237: ...EMBROIDERY APPLICATIONS Embroidery Embroidering E 55 E 1 ...
Страница 268: ...USING THE MEMORY FUNCTION E 86 ...
Страница 311: ......


