29
TECHNICAL INFORMATION
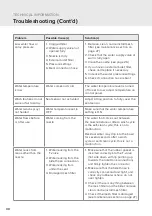
Troubleshooting
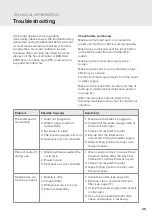
Problem
Possible Cause(s)
Solution(s)
The bidet seat is
not working
1. Bidet not plugged in
2. Water supply valve not
opened fully
3. No power to bidet
4. The incoming water is too hot
5. Seat sensor is not activated
1. Make sure the bidet is plugged in
2. Check that the water supply valve at
the wall is fully open
3. Check and reset GFCI outlet
4. Ensure that the bidet seat is
connected to the cold-water supply
5. Adjust sitting position to fully cover
the seat sensor
Product shuts off
during use
1. Washing time exceeded the
cycle time
2. Power failure
3. Seat sensor is not activated
1. Wash cycles run for 2 minutes. Press
the wash button after the wash has
finished to continue the wash cycle
2. Check and reset GFCI outlet
3. Adjust sitting position to fully cover
the seat sensor
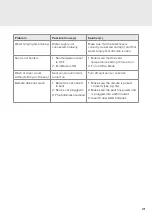
Nozzle does not
function properly
1. Nozzle is dirty
2. Clogged filter
3. Water pressure is too low
4. External bidet filter
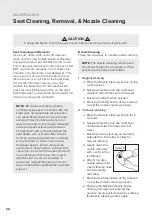
1. Clean the nozzle (see page 26)
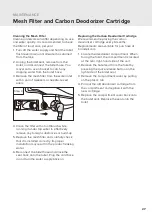
2. Remove, clean, and reinstall mesh
filter (see page 27)
3. Check that water supply valve at wall
is fully open
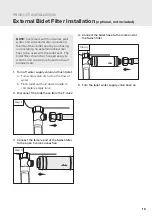
4. If you have an external bidet filter,
check and replace if necessary
If the bidet appears to be operating
abnormally, please review the troubleshooting
tips before calling the Brondell Service Center,
as most issues are easily resolved with a few
simple steps. If you are unable to resolve
the issue after checking the following items,
please call the Service Center at 888-542-
3355, Mon–Fri, 9am–5pm PST, or email us at
Check before continuing:
Make sure the bidet seat is connected to
power and that the outlet is working properly.
Make sure you check & test the reset button
on the GFCI outlet (Standard 120V GFCI
outlet).
Make sure the main water supply valve
is open.
Make sure the seat is not in standard or high-
efficiency eco mode.
Confirm that there are no leaks from the hoses
or water supply.
Make sure the mesh filter is clean and free of
build-up or debris (see maintenance section
on page 27).
After checking items above, refer to the
following troubleshooting chart for additional
solutions.

