Brivis 16
Evap AC IM
7.7 CHANGING AN IDENTIFICATION NUMBER
•
To change the ID number a cooler
MUST BE
powered and configured individually.
•
So, turn OFF the power to all the other coolers and heaters on the Network System�
Use the Installer Set-Up program as follows�
•
Turn the Brivis Networker OFF�
•
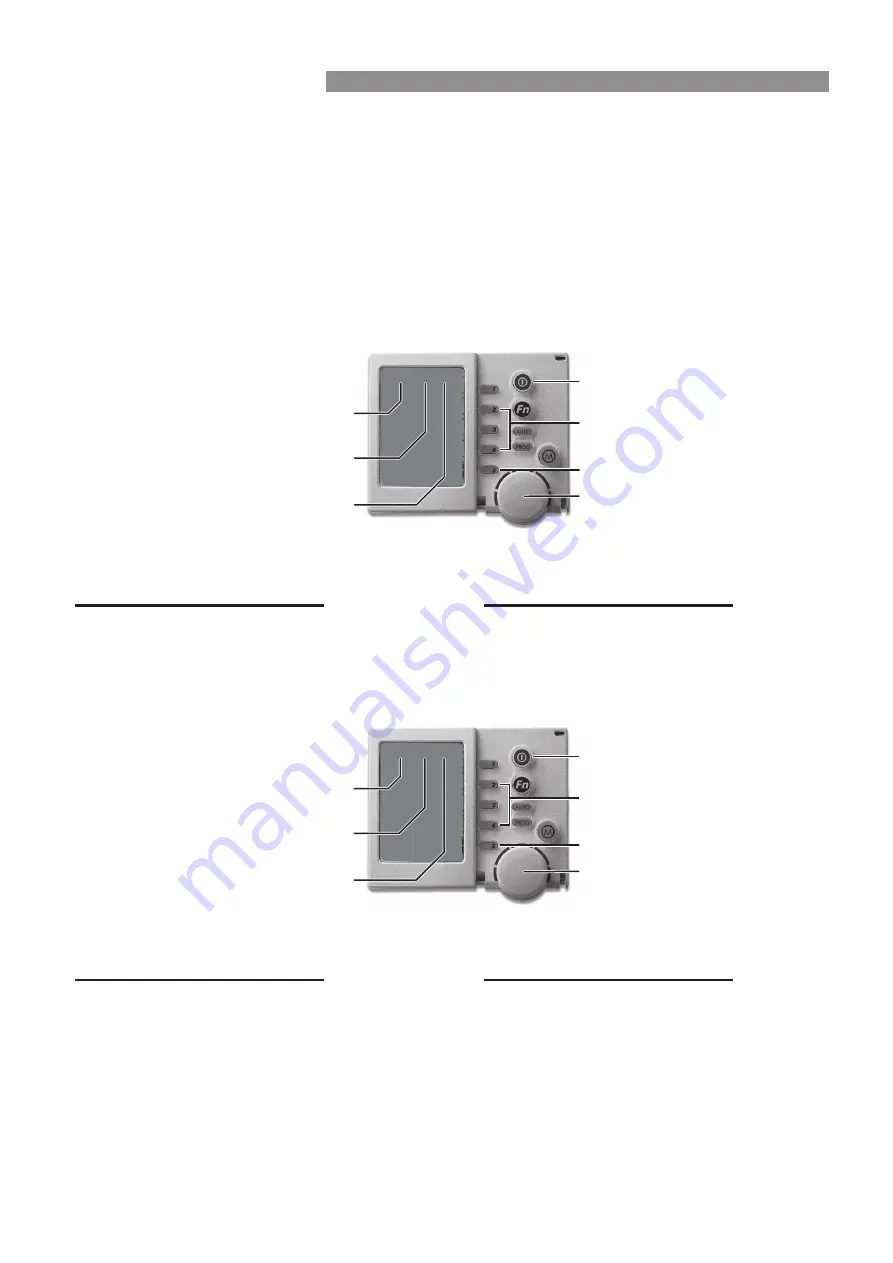
Press (clock) Key 5 and the screen will display the message “Clock setting mode”. After the message has
finished ensure that the time is flashing.
•
Now simultaneously press and hold the 2nd & 4th keys for 3-5 seconds until the message displays “Installer
parameter access”. After the message has finished the display will appear like this. If a Heater is also on the
system you will need to press the Mode button�
•
Rotate the rotary dial to change the parameter value displayed at the top right of screen to the unit number
required for this Cooler (as shown below by unit number “ 2”).
•
Wait one minute before proceeding to allow for the programming change�
•
Press the Brivis Networker ON/OFF button to exit the program�
•
Turn the power supply at the Cooler OFF to save the new ID number�
•
Repeat the sequence for each Cooler�
•
Then follow the Brivis Networker Advanced Programming Instructions to allocate the Coolers to their respective
zones�
On/Off Button
Keys 2 and 4
Rotary Dial
Key 5 (Clock)
Parameter Value
Parameter Number
Cooler Number
E0 1 ID07: 1
On/Off Button
Keys 2 and 4
Rotary Dial
Key 5 (Clock)
Parameter Value
Parameter Number
Cooler Number
E0 1 ID07: 2
Brivis Advance, Brivis Promina & Brivis Contour Models Only:
EO1
IDO7: 1
Cooler
Parameter Parameter
Number
Number Value
Brivis AD Models Only:
EO1
IDO9: 1
Cooler
Parameter Parameter
Number
Number Value
Brivis Advance, Brivis Promina & Brivis Contour Models Only:
EO1
IDO7: 2
Cooler
Parameter Parameter
Number
Number Value
Brivis AD Models Only:
EO1
IDO9: 2
Cooler
Parameter Parameter
Number
Number Value
7. NETWORK CONNECTION
Содержание AD BAL AD56
Страница 31: ...Brivis 31 Evap AC IM NOTES ...


