background image


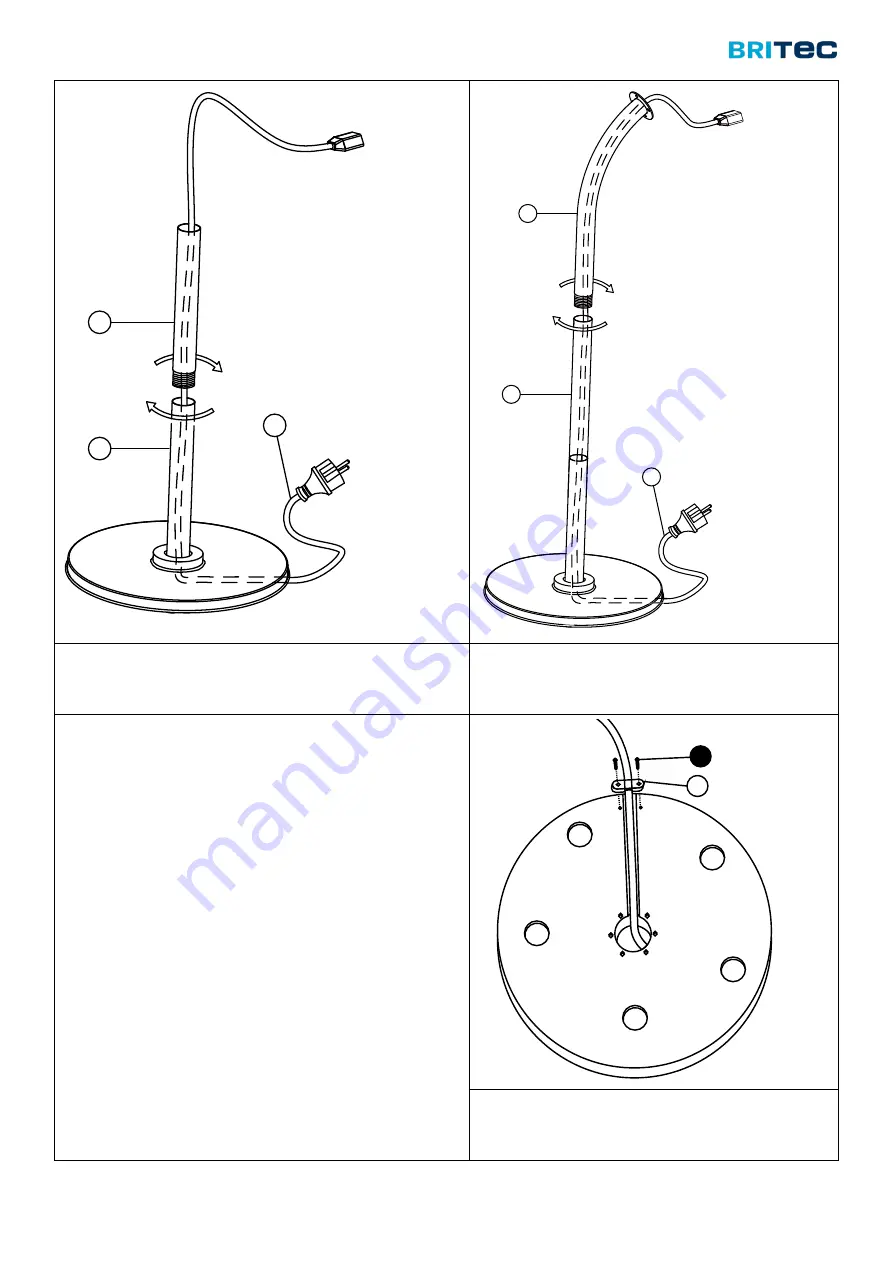
Screw the middle pole(3) tightly to the bottom pole (4). 
Lead power cord (6) through the middle pole (3) and the bottom 
pole (4). 

Screw the middle pole(2) tightly to the bottom pole (3). 
Lead power cord (6) through the middle pole (2) and the 
bottom pole (3). 


While holding the appliance, attach the power cord to the 
trench on the bottom of the base using 2 screws (D). 


4

3

6

2

6

3

D

8

Содержание PARIS

Страница 1: ...Instruction Manual FREESTANDING PATIO HEATER Mod PARIS SEH1 2000 ...

Страница 2: ... 3 years should keep a distance of the appliance unless constant supervision is provided Children aged from 3 to 8 years are allowed to switch the appliance on and off when the appliance is placed or installed in a normal position and these children have been given supervision or instruction concerning use of the appliance in a safe way and understands the hazards involved Cleaning and user mainte...

Страница 3: ...incorrectly The protective grill of this appliance is meant for blocking direct access to the heating elements and must be in proper position when the appliance is in use Do not cover or block the fire protection The protective grill does not provide complete protection for young children and weaker people Do not place the appliance under a socket The used socket must be visible and accessible Do ...

Страница 4: ...ents listed in this manual When the user causes changes to the heater including all components the power cable or the included accessories When poor maintenance negligence or abnormal use is not liable for damage or injury resulted from use of this unit either by the user s negligence All rights reserved Nothing may be copied from this publication stored in a database and or made public in any for...

Страница 5: ...nic devices should not be disposed of with household waste Please recycle where facilities exist Check with your Local Authority or retailer for recycling advice 1 2 7 3 4 5 6 9 8 10 1 x1 5 x1 6 x1 2 x1 7 x1 3 x1 8 x1 4 x1 9 x3 10 x1 ...

Страница 6: ...equired screwdriver Use a clean flat surface to assemble on The appearance of the appliance hardware may vary slightly from the schemes in the manual This is normal the appearance of our products is constantly being improved Assemble the bottom pole 4 to the base 5 using 4xA and 4xB Then place cover ring 10 onto the base 5 A B 10 4 5 x4 x4 x2 x2 x3 A B C D F M6x35 M8x10 M3 5 M6 ...

Страница 7: ...the middle pole 3 and the bottom pole 4 Screw the middle pole 2 tightly to the bottom pole 3 Lead power cord 6 through the middle pole 2 and the bottom pole 3 While holding the appliance attach the power cord to the trench on the bottom of the base using 2 screws D 4 3 6 2 6 3 D 8 ...

Страница 8: ... cord 6 with the plug then lock them in the box 7 Attach head of the appliance 1 with the assembled poles 2 with 2x C securely Secure the appliance to the ground using 3 anchors and 3 enclosed bolts F 1 2 6 F 5 9 ...

Отзывы: