background image

Instructions for Installation & Use

 - Series No. BS4900A-020130

Instructions for Installation & Use

 - Series No. BS4900A-020130

47

46

INSTALLATION  OF  CAR                                          

UPPER ANCHORAGE POINT

INSTALLATION OF CAR                                          

UPPER ANCHORAGE POINT

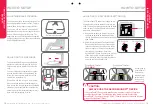
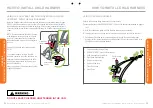
Extension Strap distance to be measured. 
Length 300mm (Use BRITAX Safe-n-Sound part 0035).  
Length 600mm (Use BRITAX Safe-n-Sound part 0036).
Available from all major child restraint retailers.

Measure distance 
from restraint upper 
anchorage attachment 
clip to the car anchor 
fitting.

The shaded areas of this diagram illustrate the possible locations of the upper anchorage point 
(car anchor fitting). Within each shaded area is an upper anchorage point showing the correct 
way to install the fitting. Ensure the upper anchorage point is aligned as illustrated unless 
stated otherwise in the vehicle owner’s handbook.

Adjustable upper
Anchorage strap.

Front of Vehicle

45°

IF THE CAR IS FITTED WITH CHILD 
RESTRAINT UPPER ANCHORAGE POINT

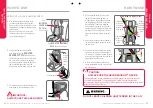
Locate the upper anchorage point behind the rear 
seating position. (Consult the car owners handbook for 
the location of the upper anchorage point). The upper 
anchorage point should be directly behind and central 
to the restraint. Remove thread plug from the parcel 
shelf/floor/roof, etc. and install attachment bolt and 
fitting as shown in Fig 1.  
CAUTION: DO NOT OVERTIGHTEN ATTACHMENT 
BOLT. OVERTIGHTENING MAY FRACTURE OR 
BREAK BOLT. MAXIMUM TORQUE IS 20 Nm(14.75 
ft.lb.)
Note: Minimum of five full turns of attachment bolt is 
required before tightening force is applied. 

IF THE CAR IS NOT FITTED WITH CHILD 
RESTRAINT UPPER ANCHORAGE POINTS
For Sedans only

 - Drill 9mm diameter hole in the 

parcel shelf on the centre line of the seating position 
as shown in Fig 3. Before drilling the hole, check the 
underside for accessibility. Install the attachment bolt as 
shown in Fig 2. It is recommended that this installation 
be carried out by a child restraint fitting station or 
licenced motor mechanic.

For vehicles other than Sedans 

- In Australia, 

consult your nearest child restraint  fitting station 
or traffic authority for vehicle inspection to  find the 
best, correct position for the placement of the upper 
anchorage point, and for the correct attachment bolt 
length and use of spacers. In New Zealand, consult the 
agent for the vehicle. Note to Queensland purchasers: 
The installation of anchorage points must be approved 
by authorised officers appointed by Queensland 
Transport. Authorised officers can be sourced from 
all Queensland Transport Customer Service and 
Queensland Ambulance Service Centres.

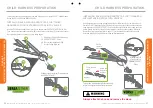
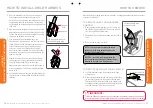
Front of Vehicle

Attachment Bolt

Anchor fitting

Spacer(s) if 
required
Vehicle metal 
structure
Reinforcing 
washer (cone 
downwards).
Lock washer
Secure nut

UPPER ANCHORAGE 

FITTINGS FOR SEDANS ONLY

Vehicle trim

UPPER ANCHORAGE FITTING

Attachment Bolt
Lock washer

Anchor fitting

Spacer(s) if 
required
Vehicle metal 
structure

Vehicle trim

Fig.1.

Fig.2.

Содержание Safe-n-Sound BS4900A-020130 Series

Страница 1: ...tion Use Series No BS4900A 020130 1 Instructions for Installation Use Series No BS4900A 020130 FORWARD FACING 4 years to 8 10 years approx BOOSTER SEAT IMPORTANT KEEP THIS BOOKLET IN THE PLACE PROVIDE...

Страница 2: ...lengthen base Unfold Seat Risk of trapping hand finger Raise Lower headrest Check and adjust SecureGuard Device Check and adjust headrest 30 mm 2 Lift 1 Push down and out 3 Push back TO SHORTEN TO LE...

Страница 3: ...ai c a em cao t i v ch ghi cao c a vai tr n c ng c a gh tr em Kh ng s d ng gh tr em booster n y cho n khi vai c a em tr n v ch ghi cao c a vai d i c ng 4 8 10 Da utilizzare con un cintura di sicurezza...

Страница 4: ...l marcador superior de la altura de los hombros con el reposacabezas en la posici n m s alta aproximadamente de 8 a 10 a os de edad Tambi n se puede utilizar con el arn s para ni os cuyo uso con este...

Страница 5: ...child seat It may be suitable for a child of approx 4 yrs old progressing from rearward facing child restraint Ensure the child s shoulders are above the lower height marker of this booster seat to e...

Страница 6: ...ears of age in a correctly fitted and approved ISOFIX compatible child restraint This child restraint is not approved for use with the car s ISOFIX low anchorages IMPORTANT Protect all webbing from ab...

Страница 7: ...ll have their shoulders in line or above the lowest shoulder height marker label A of this booster seat with the headrest in the lowest position If the child s shoulders are below this marker the chil...

Страница 8: ...h side of headrest 10 Shoulder slots for use with Child Harness 1 Side Impact Cushion Technology Headrest SICT 2 Adjustable Height Headrest 3 Adjustable Side Wings 4 Padded cover for comfort 5 Booster...

Страница 9: ...shown on pages 17 to 19 Extend seatbelt if required Check and adjust SecureGuard Check headrest position ADJUSTING THE HEADREST A The headrest can be adjusted to lock into different height locations...

Страница 10: ...1 Lift 2 Push back ADJUSTING THE SECUREGUARD DEVICE The SecureGuard Device crotch strap must be adjusted so that it fits the seatbelt correctly to the child The crotch strap length adjuster can be fo...

Страница 11: ...e Point B A Fully press Adjuster Button A while pulling top tether strap B to lengthen Pull to remove slack Always attach the hook and remove slack C Tighten adjustable top tether strap by pulling adj...

Страница 12: ...t G A loose or poorly fitted seatbelt may cause preventable injuries if instructions are not followed HOW TO USE Lap part of seat belt in recess area B Position the lap sash belt over the child follow...

Страница 13: ...must be positioned on the lap belt so that the child cannot slump or slouch Feed all the lap belt slack and sash belt slack back to retractor Adjust headrest so it is close to the shoulders Seatbelt a...

Страница 14: ...NSTALLING SAFE N SOUND PROTECTA PLUS HARNESS WITH EXTENSION STRAP INTO VEHICLE An adjustable extension strap is supplied with the Child Harness Hook the Safe n Sound Protecta PLUS Harness clip first o...

Страница 15: ...eft hand Harness Strap Cross Strap through the shoulder slots that are just above the child s shoulders Make sure that the Attachment Clip also feeds through to the back of the restraint Feed left han...

Страница 16: ...in a crash CAUTION ALWAYS FOLLOW THE CHILD HARNESS INSTRUCTIONS HOW TO INSTALL CHILD HARNESS HOW TO INSTALL CHILD HARNESS CONVERTING A LAP SASH SEATBELT FOR USE WITH THE CHILD HARNESS With the booste...

Страница 17: ...Slide slot B C Ensure the lap portion of the seatbelt is nearest to the child FITTING THE GATED SLIDE TO THE LAP SASH SEATBELT D Feed the straps through the gated slide to remove any slack This has no...

Страница 18: ...he shoulder straps must be in the slots which are nearest to the child s shoulders the headrest should be adjusted to suit the child but shoulder straps should not be lower than the child s shoulders...

Страница 19: ...lt is not lifted off the child s lap when the harness is adjusted Once adjusted further adjustments are necessary only to accommodate the growth of the child G Finally roll up the free end of the harn...

Страница 20: ...parts on this booster seat that require user maintenance ONLY USE BRITAX SAFE N SOUND SEAT COVERS AND ACCESSORIES THAT ARE DESIGNED AND TESTED FOR USE WITH THIS PRODUCT TO CLEAN THE COVER The restrain...

Страница 21: ...ok the elastic from behind the red sash guides at headrest rear see illustration Peel away from headrest C Remove seat base cover by releasing elastic loops from rear of seat base Feed through the Sec...

Страница 22: ...shions and tuck behind Attach the elastic loops to the hooks at the back of the red sash guides Refit cover around headrest Ensure that the headrest is tucked in the channel around the red sash guides...

Страница 23: ...nt of purchase A variety of Britax Safe n Sound accessories are available from various retailers of Britax Safe n Sound products INSTALLATION OF CAR UPPER ANCHORAGE POINT Consult the vehicle owner s h...

Страница 24: ...ING MAY FRACTURE OR BREAK BOLT MAXIMUM TORQUE IS 20 Nm 14 75 ft lb Note Minimum of five full turns of attachment bolt is required before tightening force is applied IF THE CAR IS NOT FITTED WITH CHILD...

Страница 25: ...h covers or partially covers the replacement of your child restraint Contact your insurance company for further details Your insurance company may require you to keep the child restraint for assessmen...

Страница 26: ...hat any seat that may have experienced a severe crash is taken out of the market There is no method of determining if the restraint has been damaged in a severe crash so the restraint should be destro...

Страница 27: ...hildcare Pty Ltd Australia The BRITAX trademark are the property of Britax Childcare Holdings Ltd UK We reserve the right to alter this product without notice 2012 2016 Britax Childcare Pty Ltd This p...

Отзывы: