- 19 -
Alignment and Orientation
VI
All objects of the sky can thus be precisely defined by their celestial coordinates in right
ascension and declination.
Finding the celestial pole
To get a rough idea of where the points of the compass are at an observation site, you
should be aware of the directions where the sun rises (east) and sets (west) every day.
After it has become dark at your place of observation, turn north - you achieve this by
pointing with your left shoulder in the direction where the sun went down earlier. In order
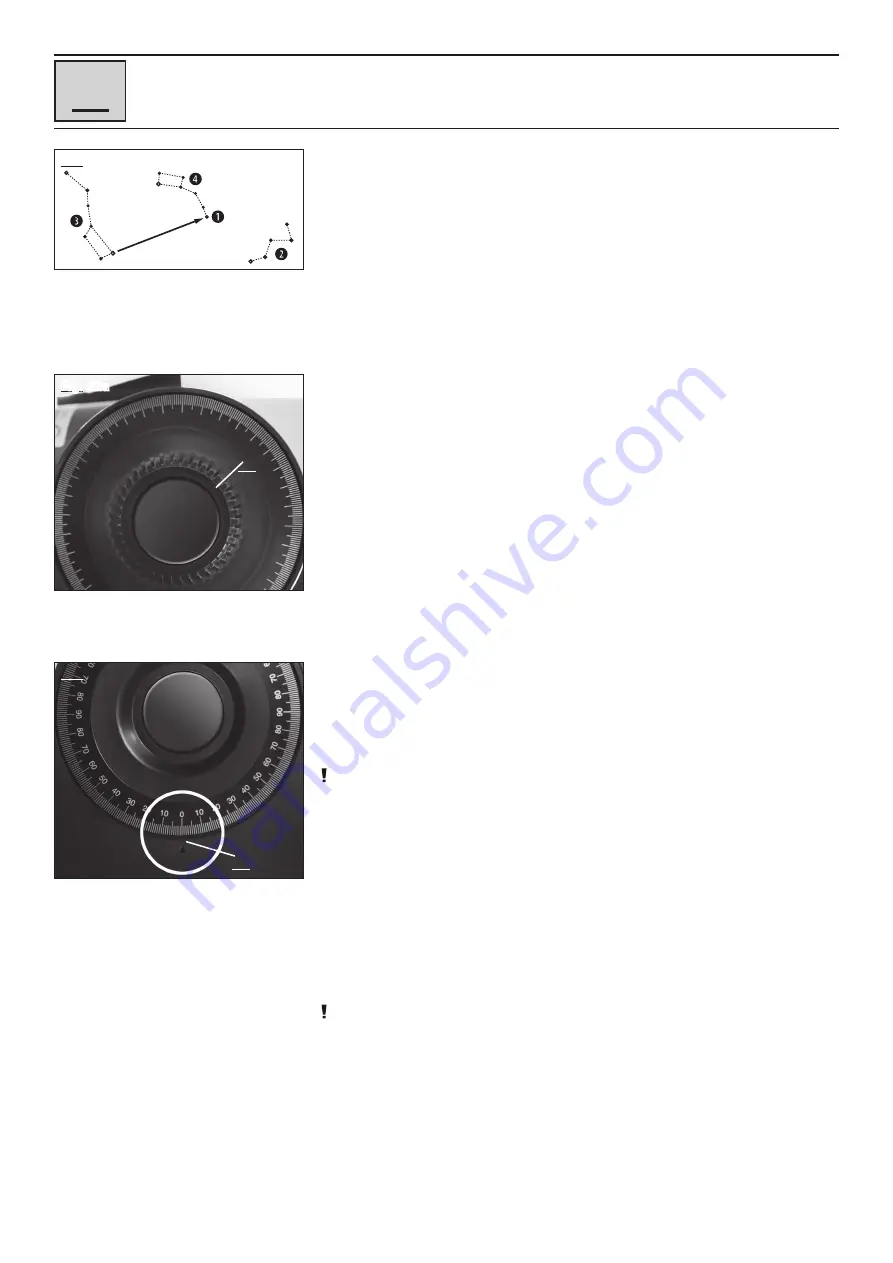
to find the pole exactly, you should now locate the polar star - use the Big Dipper as the
leading star image for this purpose (fig. 31).
Alignment of the MCX to the celestial pole
While the earth rotates once around its axis in about 24 hours, all astronomical objects
seem to wander on arcs across the sky. This apparent movement (see "sidereal speed"
on page 19) is hardly noticeable to the unarmed eye. But when viewed through a powerful
telescope like the MCX, it does indeed appear very quickly. If the motor-driven tracking
was not activated, an object that was just visible in the middle of the telescope eyepiece
disappears completely from view within a few seconds.
For a comfortable tracking of astronomical objects you should align your MCX telescope
to the celestial pole.
1. Make sure that the telescopic sight is adjusted with respect to the ETX main tube (see
"The LED Viewfinder" on page 10).
2. Determine the geographical latitude of your observation location from a road map
or an atlas. The determination of the geographical latitude to the nearest degree is
completely sufficient.
3. Loosen the locking screw for the scale stick (3, fig. 29) and adjust the required pole
height by adjusting the tilt plate. Then tighten the locking screw again.
4. Bring the MCX telescope into the starting position (Fig. 29).
NOTE!
The following steps 5 and 6 are absolutely necessary to prevent the telescope from
moving against the mechanical stops during automatic initialization and to prevent
damage to the drive motors.
5. Release the axis clamping of the horizontal clamping (right ascension clamping) (9,
fig. 2) and carefully turn the telescope mount manually counterclockwise until the
mechanical stop is reached.
6. Turn the telescope mount back to its starting position (Fig. 29) and tighten the axle
clamp by hand.
7. Release the clamp of the vertical axis (1, fig. 32a) on the right fork arm and move the
tube to the zero degree position (2, fig. 32b - Pitch circle scale on the left fork arm).
NOTE!
For a fast observation in parallactic mode the adjustment of the pole height and the
height axis by scale and pitch circle is completely sufficient. To achieve even more precise
positioning and tracking, we recommend optimizing the start position (see "Optimized
start position" on page 20)
8. Initialize the handheld computer.
9. Select a predefined observation location or enter a user-defined location (see "Initializing
the controller" on page 24).
10. In the main menu "Settings", select the menu item "Tracking mode" and set "EQ
Telescope".
Fig. 31
Search map for the Polarstern.
(1 = Polar star; 2 = Cassiopeia; 3 = Big car; 4 =
Small car)
Release the clamping of the height axis.
Fig. 32a
b
Zero position
Fig. 32b
c
Содержание MCX Goto Series
Страница 30: ...30 Computerised Handset with LED display VII Fig 35...
Страница 39: ...39...


