


68
8.1.1
FIRMWARE UPDATE STEP
1.
Download the latest version firmware to your PC/Mac.
2. Set the console into AP (access point) mode then connect the PC/Mac to the console (refer to
section
6.1
and
6.2
).
3. From the SETUP page, press ADVANCED to enter advance setting
4.
Under the firmware upload section, press
Browse
to locate the firmware file saved on your PC/Mac.
5. Press
Upload
to start firmware update.
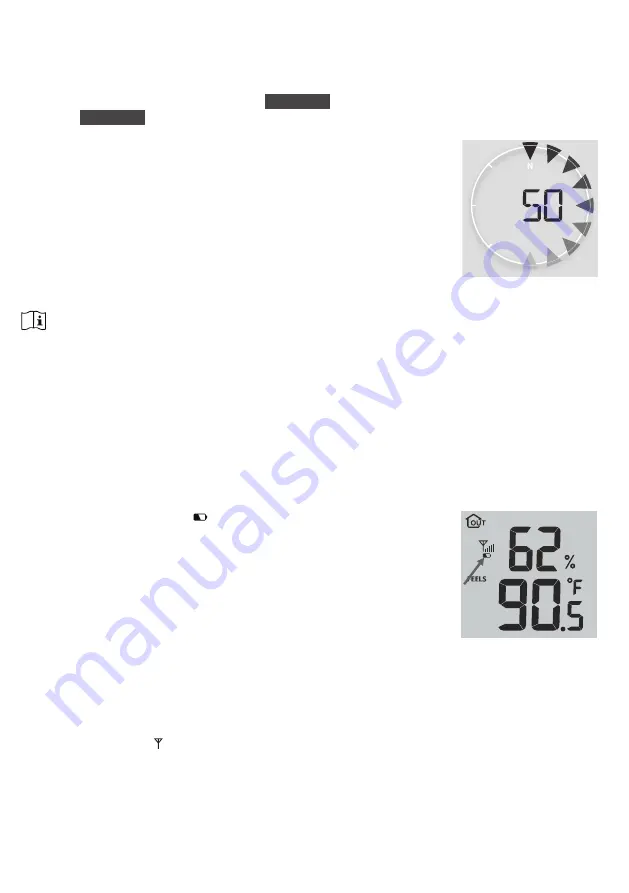
The update time is around 5 ~ 10 minutes. While updating, the progress
will be displayed (i.e. 100 is completion).
6. The console will restart once the update is completed.
7. The console will stay in
AP mode
for you to check the firmware version and all the current setting.
Simply press and hold
[ SENSOR / WI-FI ]
key for 6 seconds to exit AP mode.
IMPORTANT NOTE:
-
Please keep connecting the power during the firmware update process.
- Please make sure your PC/Mac's WI-FI connection is stable.
-
When the update process start, do not operate the PC/Mac and console until the update finished.
-
During firmware update the console will stop upload data to the cloud server. It will reconnect to your WI-
FI router and upload the data again once the firmware update succeed. If the console cannot connect to
your router, please enter the SETUP page to setup again.
-
After the firmware update, If the setup informations are missing, please input the setup information again.
- Firmware update process have potential risk, which cannot guarantee 100% success. If the update fail,
please redo the above step to update again.
8.2 BATTERY REPLACEMENT
When low battery indicator “
” is displayed near the antenna icon
of the sensor(s), it indicates that the outdoor 7-IN-1 sensor and/or
current channel sensor(s) battery power is low respectively. Please
replace with new batteries.
8.2.1
RE-PAIRING THE SENSOR(S) MANUALLY
Whenever you changed the batteries of the 7-in-1 weather sensor array or other additional
sensors, re-synchronization must be done manually.
1. Change all the batteries to new ones in the low battery sensor(s).
2. Press
[ SENSOR / WI-FI ]
key on the console to enter sensor synchronization mode (as indicated by
the flashing antenna
).
8.3 RESET AND FACTORY RESET
To reset the console and start again, press the
[ RESET ]
key once or remove the backup battery and then
unplug the adapter.
To resume factory settings and remove all data, press and hold the
[ RESET ]
key for 6 seconds.


