


63
4. Click the "
Edit
" on the top right corner of the station tab.
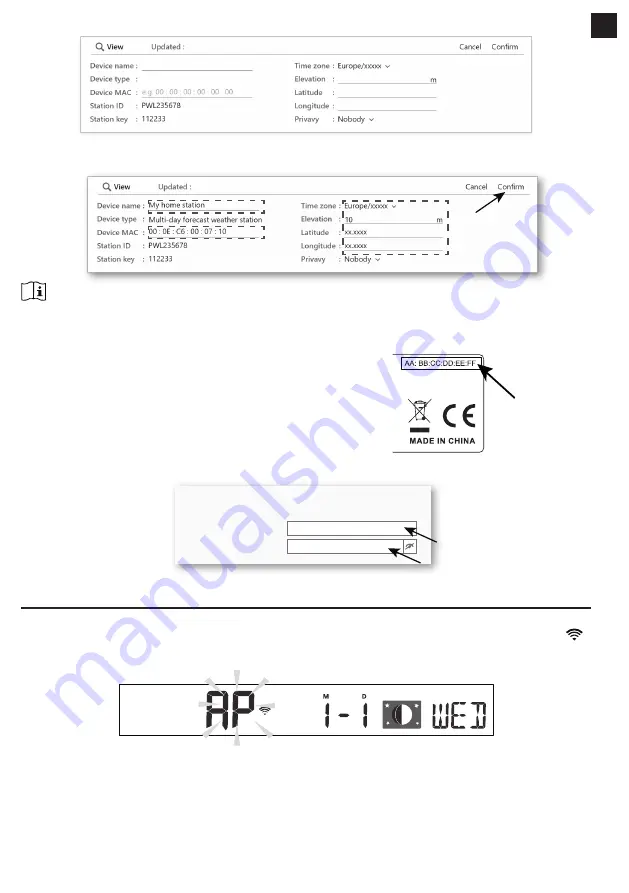
5. Key-in the "Device name", "Device MAC address", "Elevation", "Latitude", "Longitude" and select your
time zone in the station tab, them click "confirm" to save the setting.
NOTE:
Enter a negative sign for Latitudes or Longitudes when it’s South or West respectively.
For example,
33.8682 South is “-33.8682” ; 74.3413 West is “-74.3413”
The device Mac address can be found on the backside of the
console or in the "SETUP" page mentioned in
section 6.3
.
The weather forecast and weather condition will be based on
the Latitudes and Longitudes entered, which are also used for
calculations of sunrise, sunset, moon rise and moon set times.
Mac address
of the device
6. In the "SETUP" page mentioned in
section 6.3
, enter the Station ID and key assigned by
ProWeatherLive.
ProWeatherLive
Station ID:
Weather server setup
Station key:
PWL2345678
112233
6. CONNECT CONSOLE TO WI-FI
6.1 CONSOLE IN ACCESS POINT MODE
1.
When you power up the console for the first time, the console LCD will show flashing "AP" and "
"
icon to signify that it has entered AP (Access Point) mode, and is ready for WI-FI settings. User can also
press and hold the
[ SENSOR / WI-FI ]
key for 6 seconds to enter AP mode manually.
EN