Page 13
Page 12
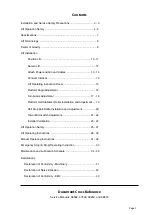
Aux.
TO
LIFT
Bat.
Pos.
Neg.
Aux.
Bat.
Bat.
Pos.
Neg.
Aux.
TO
LIFT
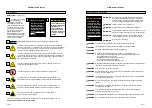
WA
RNING
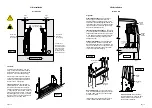
7
6
1
4
5
8
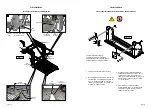
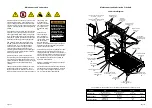
1. Drill two mounting holes
(holes
6
and
7
).
2. Temporarily secure lift using
two mounting bolts (holes
6
and
7
).
3. Manually deploy lift and
check lift clearance. Drill
remaining mounting holes.
4. Install below floor mounting
hardware per instructions
supplied in kit.
5. Tighten mounting bolts 1
through 8 per sequence
detailed above. Note deflec
-
tion detail below.
Mounting Bolt Torque Tar-
get:
40 Nm.
Check for obstruc-
tions such as gas
lines, wires, exhaust,
etc. before drilling
or cutting. Failure to
do so may result in
serious bodily injury
and/or property
damage.
3
2
Secure lift
Figure G
Dimensions
MUST
be Equal
90˚
90˚
32879-005.ai
To Correct:
To Correct:
TIGHTEN
LOOSEN
LOOSEN
LOOSEN
TIGHTEN
TIGHTEN
LOOSEN
TIGHTEN
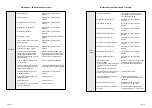
Loosen
Tighten
Tighten
Tighten
Loosen
Loosen
Figure H
Lift Installation
Dimensions
MUST
be Equal
90˚
90˚
32879-005.ai
To Correct:
To Correct:
TIGHTEN
LOOSEN
LOOSEN
LOOSEN
TIGHTEN
TIGHTEN
LOOSEN
TIGHTEN
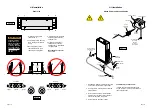
Floor
Grommet
Rubber
Boot
Star Washer
3/8” Hex Nut
Power
Feed Stud
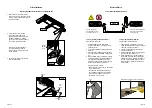
1. Drill 28.5mm diameter grommet access hole.
Check under the vehicle for obstructions.
2. Insert grommet. Secure grommet with two
self-tap screws.
3. Route ground and power cables through
grommet. Route cables clear of exhaust,
other hot areas and moving parts.
4. Connect ground and power cables.
Lift Installation
Attach Power and Ground Cables
Figure I
Vehicle Battery Positive Cable:
Install in-line circuit protection device as
shown in Figure I. Attach power cable and
lead cable as shown.
Circuit
Protection
Device
Lead Cable
OEM (+) Cable
Ground Cable
to Chassis
4 Gauge
(21.1mm2)
(not supplied)
Vehicle
Battery
OEM (-) Cable
Battery Cable to
Circuit Protection
Device
Ground Cable
to Chassis
36513


