Section 5 • Care & Maintenance
250 Outrage
Rubrail Care
The rubrail on your boat is constructed of an injected
high density
PVC vinyl
material which laboratory
tests have proven to be highly resistant to staining,
fading and cracking.
As resilient as this material is, you still need to follow
some basic maintenance precautions.
General maintenance requires a thorough cleaning
with mild soap & water.
DO NOT
use any cleaning
agents which contain chemicals.
Although the outer shell is tough and durable, there
is a chance that it can be breached. Use care when
docking or exposing the rubrail to conditions which
may cause damage such as docking against heavily
barnacle-encrusted pilings.
Cleaning Fiberglass & Non-Skid
To protect your deck and non-skid areas from the
deteriorating aff ects of the sun, oxidation, water
spots and pollution, use a good quality “fi berglass
and non-skid deck” wax every two to three months.
When applied to your deck and non-skid areas, as
recommended by the manufacturer, the wax forms a
protective non-slick surface which will keep debris
from sticking. Dirt, soot, bird droppings, and even
fi sh blood will rinse right off .
The cleaner your stainless trim and fi ttings can
be kept, the greater the assurance of optimum
corrosion resistance. Without proper care even
the best stainless steel will corrode.
Stainless steel is strong and corrosion resistant, but
still requires maintenance to keep its appearance.
Frequent routine cleaning of your stainless steel
with a mild soap and water solution and coating with
a good grade cleaning wax will help maintain the
fi nish.
• Wash with mild soap and cold or
lukewarm water.
Stainless Steel Care
NOTICE
Masking tape is NOT recommended for the types
of paint you will be using.
NOTICE
NEVER use abrasive cleaners, detergents or soft
scrub type cleaners to wash your boats surfaces.
NEVER use abrasive pads, brushes or sponges
to attempt to remove stubborn stains.
NEVER use strong solvents or detergents which
contain chlorine.
preparing the old painted surface following the paint
manufacturer’s recommendations.
Follow the paint manufacturer’s recommendation for
applying the paint. Humidity and weather will play
a role in how and when the paint is applied. Several
thin layers are better than one thick layer.
To determine the waterline, you will need to place the
boat in water with a full load of fuel and gear.Mark
the waterline and measure above the marked line
1 to 3 inches for placement of the tape line.
Make sure that there is enough paint left to cover
areas that were not accessible, (slings, jack stands
etc.) and paint accordingly. Follow the
paint
manufacturer’s recommendation for do’s and dont’s
after the painting is complete.
NOTICE
Painting your boat’s hull will adversely aff ect
the boat’s speed and performance and may
require re-propping if the maximum engine
RPMs drop below the engine model/mfg
recommended operating range.
Some tears (cleanly sliced) can be repaired with a
“Super Glue” type product.
Thoroughly clean and dry the aff ected area. Apply
glue and hold the surfaces together.
Areas which have been torn or are aff ected by heavy
abrasion will have to have the damaged section
replaced. Please see your Boston Whaler
®
dealer for
this type of repair.
Содержание 250 OUTRAGE
Страница 1: ...i R 250 Outrage 250 Outrage ...
Страница 2: ...ii R ...
Страница 18: ...xviii î ï ð ñ ò ó ô õ ö R ø ù ú û ü ý þ ÿ ú ø ÿ ø ú ý ÿ ø ý ...
Страница 42: ...1 24 Ë Ì Í Î Ï Ð Ñ Ò Ó Ô R Õ Ö Ø Ù Ú Û Ü Ý Õ Ü Ý Õ Þ Ý Ú ß ß à ß Ü á Õ â ß Ú Ý ã ...
Страница 54: ...2 12 w x y z R ª ª ª ª ª ª ª ª ª µ ª º ª º µ ...
Страница 72: ...2 30 µ R º À À Á À Â Ã À Ä ...
Страница 109: ...250 Outrage Section 4 Electrical System Transducer Location Diagram Transducer Location Fig 4 7 1 TRANSDUCER ...
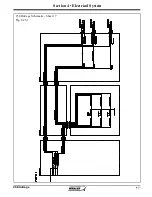
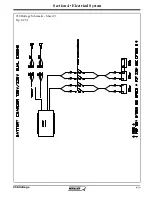
Страница 111: ...250 Outrage Section 4 Electrical System 250 Outrage Schematic Sheet 1 Fig 4 9 1 ...
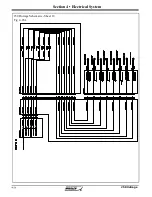
Страница 112: ...250 Outrage Section 4 Electrical System 250 Outrage Schematic Sheet 2 Fig 4 10 1 ...
Страница 113: ...250 Outrage Section 4 Electrical System 250 Outrage Schematic Sheet 3 Fig 4 11 1 ...
Страница 114: ...250 Outrage Section 4 Electrical System 250 Outrage Schematic Sheet 4 Fig 4 12 1 ...
Страница 115: ...250 Outrage Section 4 Electrical System 250 Outrage Schematic Sheet 5 Fig 4 13 1 ...
Страница 116: ...250 Outrage Section 4 Electrical System 250 Outrage Schematic Sheet 6 Fig 4 14 1 ...
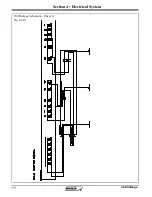
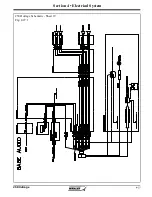
Страница 117: ...250 Outrage Section 4 Electrical System 250 Outrage Schematic Sheet 7 Fig 4 15 1 ...
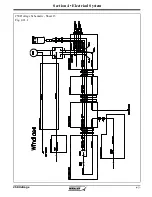
Страница 118: ...250 Outrage Section 4 Electrical System 250 Outrage Schematic Sheet 8 Fig 4 16 1 ...
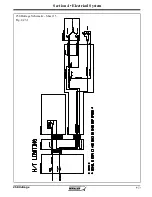
Страница 119: ...250 Outrage Section 4 Electrical System 250 Outrage Schematic Sheet 9 Fig 4 17 1 ...
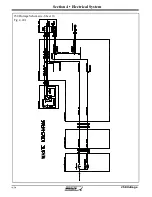
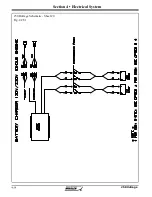
Страница 120: ...250 Outrage Section 4 Electrical System 250 Outrage Schematic Sheet 10 Fig 4 18 1 ...
Страница 121: ...250 Outrage Section 4 Electrical System 250 Outrage Schematic Sheet 11 Fig 4 19 1 ...
Страница 122: ...250 Outrage Section 4 Electrical System 250 Outrage Schematic Sheet 12 Fig 4 20 1 ...
Страница 123: ...250 Outrage Section 4 Electrical System 250 Outrage Schematic Sheet 13 Fig 4 21 1 ...
Страница 124: ...250 Outrage Section 4 Electrical System 250 Outrage Schematic Sheet 14 Fig 4 22 1 ...
Страница 125: ...250 Outrage Section 4 Electrical System 250 Outrage Schematic Sheet 15 Fig 4 23 1 ...
Страница 126: ...250 Outrage Section 4 Electrical System 250 Outrage Schematic Sheet 16 Fig 4 24 1 ...
Страница 127: ...250 Outrage Section 4 Electrical System 250 Outrage Schematic Sheet 17 Fig 4 25 1 ...
Страница 128: ...250 Outrage Section 4 Electrical System 250 Outrage Schematic Sheet 18 Fig 4 26 1 ...
Страница 129: ...250 Outrage Section 4 Electrical System 250 Outrage Schematic Sheet 19 Fig 4 27 1 ...
Страница 130: ...250 Outrage Section 4 Electrical System 250 Outrage Schematic Sheet 20 Fig 4 28 1 ...
Страница 131: ...250 Outrage Section 4 Electrical System 250 Outrage Schematic Sheet 21 Fig 4 29 1 ...
Страница 132: ...250 Outrage Section 4 Electrical System THIS PAGE INTENTIONALLY LEFT BLANK ...
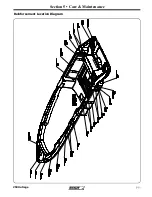
Страница 143: ...Section 5 Care Maintenance 250 Outrage Reinforcement Location Diagram ...

