5-3
Section 5 • Care & Maintenance
R
190 Montauk
will be dragged into the scratches and will reduce
the adhesion properties of the paint.
Remove any mold release wax that may be present
using fiberglass surface prep solvent and a scrub
pad. Scrub only a few square feet at a time. Flush
with fresh water. If the water beads up or separates,
continue scrubbing the surface. When the water
sheets off, the wax contaminate has been removed.
After the de-waxing is complete, application of a
primer coat is recommended. Pay close attention to
scratches, nicks and dings in the surface. If necessary,
fill any repair areas with a watertight epoxy filler.
After filler is cured, sand with 80 grit paper until
smooth. Remove the sanding residue using a
fiberglass solvent wash.
The paint can be applied after sanding and cleaning
is complete. Follow the paint manufacturer’s
recommendations for application.
Bottom
Painting a Pre-Painted Hull
If the hull bottom is already painted, you must be
sure to test the paint’s adhesion to the already painted
surface. If the paints are incompatible, the new paint
will not adhere to the hull bottom or the paint will
“lift
” the old paint.
NEVER
apply paint without first
preparing the old painted surface following the paint
manufacturer’s recommendations.
Follow the paint manufacturer’s recommendation for
applying the paint. Humidity and weather will play
a role in how and when the paint is applied. Several
thin layers are better than one thick layer.
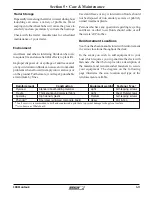
To determine the waterline, you will need to place the
boat in water with a full load of fuel and gear. Mark
the waterline and measure above the marked line
1 to 3 inches for placement of the tape line.
!
WARNING
Proper ventilation and capture of the dust
created by sanding is essential. The dust
created by sanding is toxic and should not be
breathed. A proper fitting respirator must be
used.
DO NOT use a paper filter mask.
!
WARNING
Bottom paint is designed to resist algae growth
which means it has chemicals embedded in
the paint that are harmful if ingested. Take all
necessary precautions required before painting
or repainting your boat’s hull.
If your boat will spend most of its time in the water,
painting the bottom of your boat’s hull is a good way
to slow the formation of hull blisters and to keep
bottom growth (fouling) under control.
If you will be trailering the boat to and from the
water, you might want to forgo the painting.
Following is an abbreviated section on painting your
hull bottom. Your Boston Whaler
®
dealer should
have information on properly painting your boat’s
hull or recommendations on businesses that will
paint your hull for you.
Bottom Painting a Bare Hull
Since the boat has never been painted preparation is
the key to successful hull painting. Take extra care
and time in preparation before proceeding to paint.
Begin by scrubbing the surface thoroughly with a
stiff brush using an all-purpose marine soap and
water to remove loose dirt and contamination. Flush
with fresh water to remove all soap residue.
The gelcoat will have to be de-waxed of mold release
wax before sanding can begin, otherwise the wax
DO NOT paint over zinc plates. This action will
render them useless and lead to deterioration
of the underwater metal parts of your boat.
Some bottom paints contain metals that can
cause corrosion of the outboard engine. Leave
a minimum of 3/4” unpainted around all engine
parts. Use only a paint specifically designed for
aluminum engines as anti fouling protection.
!
CAUTION
Содержание 190 Montauk
Страница 1: ...190 Montauk Owner s Manual ...
Страница 43: ...1 22 190 Montauk Section 1 Safety R THIS PAGE INTENTIONALLY LEFT BLANK ...
Страница 69: ...2 26 190 Montauk Section 2 General Information R THIS PAGE INTENTIONALLY LEFT BLANK ...
Страница 81: ...3 12 190 Montauk Section 3 Systems Components Overview Operation R THIS PAGE INTENTIONALLY LEFT BLANK ...
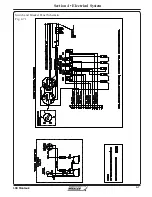
Страница 87: ...4 6 190 Montauk Section 4 Electrical System R Switch and Breaker Panel Schematic Fig 4 6 1 ...
Страница 88: ...4 7 190 Montauk Section 4 Electrical System R Switch and Breaker Panel Schematic Fig 4 7 1 ...
Страница 89: ...4 8 190 Montauk Section 4 Electrical System R THIS PAGE INTENTIONALLY LEFT BLANK ...
Страница 103: ...5 14 Section 5 Care Maintenance R 190 Montauk THIS PAGE INTENTIONALLY LEFT BLANK ...

