background image

30

Connecting the water

ã

Caution!

Do not immerse the Aqua-Stop safety device in water.

²

– To prevent leaks and water damage, you must follow the 

instructions in this section.

– Only operate the washing machine using cold drinking water.
– Do not connect to the mixer tap of an unpressurised hot-

water boiler.

– Do not use a used inlet hose. Only use the inlet hose 

supplied or one that was purchased from an authorised 
specialist retailer.

– If in doubt, have the appliance connected by a specialist.

Water supply

²

Do not bend, squash, modify or cut through the water supply 
hose (otherwise its strength is no longer guaranteed).

Optimum water pressure in the supply network: 100-1000 kPa 
(1-10 bar)

Ø

When the tap is open, the water flow is at least 8 l/min.

Ø

If the water pressure is higher than this, a pressure reducing 
valve must be installed.

1.

Connect the water supply hose.

ã

Caution!
The thread on the screw connection may be 
damaged

If the screw connections are tightened too much with 
a tool (pliers), the thread may be damaged.
Only tighten the screw connections by hand.

At the tap (¾" = 26.4 mm):

At the appliance:

PLQPP

PD[

ƒ

PD[

ƒ

Содержание WOT24455BY

Страница 1: ...en Instruction Manual and Installation Instructions Washing machine ...

Страница 2: ... and services contact out after sales service centres If the operating and installation instructions describe different models any differences will be pointed out at the relevant points in the text Read these operating and installation instructions before switching on the appliance Explanation of the symbols ã Warning This combination of symbol and signal word indicates a potential hazardous situa...

Страница 3: ... Before each washing 12 Ø Washing 15 Ø After washing 16 Cleaning and maintenance Ø Care and maintenance 17 Ø Faults what to do 20 Ø Customer service 24 Installing the appliance Ø Standard accessories 25 Ø Installation 27 Ø Remove transportation protection devices 29 Ø Connecting the water 30 Ø Alignment 33 Ø Electrical connection 34 Ø Before the 1st washing 35 Ø Transportation e g if moving house ...

Страница 4: ...gents cleaning aids cleaning products and cleaning agents always follow the manufacturer s instructions Ø The washing machine may be operated by children from 8 years of age by persons who have limited physical sensory or mental abilities and by persons who have inadequate experience or knowledge provided they are supervised or have been instructed by a responsible person Ø Keep pets away from the...

Страница 5: ...heir lives at risk For appliances that have reached the end of their service life Disconnect the mains plug Cut through the mains cable and remove complete with plug Destroy the lock on the lid Children must not perform cleaning or maintenance work unsupervised Children may become wrapped in packaging film or packing parts if allowed to play with them or pull them over their head and suffocate Kee...

Страница 6: ...isk of scalding if you come into contact with hot water e g if hot water is being drained into a wash basin or if you have to empty the appliance in the event of a fault Allow the water to cool down ã Caution Risk from damage to the appliance The lid may break Do not climb onto the washing machine ã Caution Risk from contact with liquid detergents care products Take care when opening the lid when ...

Страница 7: ...ramme Ø If the laundry is subsequently dried in a tumble dryer select the spin speed according to the tumble dryer manufacturer s instructions Information about the EU regulation In accordance with regulation EU 1015 2010 further product information is provided below The background to this is the energy saving regulations that all appliances sold in the EU must comply with A sample energy label is...

Страница 8: ...may deviate from the stated programme temperature for energy saving reasons Ø Residual moisture in the laundry The spin efficiency class of your appliance can be seen on the energy label The percentage of residual moisture for the spin efficiency class in question can be seen in the following table Correct selection of detergent The care label is crucial for the correct selection of detergent temp...

Страница 9: ...fibres synthetic fibres N 20 C max 60 C Detergent for colours del icates without optical brighteners Delicate fine fabrics silk or viscose O 20 C max 40 C Detergent for delicates WoolW 20 C max 40 C Detergent for woollens Reduced temperature and de tergent quantity as per the rec ommended dosage for light soiling Light No visible dirt or stains Clothing has taken on some body odour e g light summe...

Страница 10: ...V QQXDO HQHUJ FRQVXPSWLRQ 1RLVH YDOXH GXULQJ ZDVK F FOH 1RLVH YDOXH GXULQJ VSLQ F FOH QQXDO ZDWHU FRQVXPSWLRQ RDG 6SLQ HIILFLHQF FODVV 0XFK PRUH LPSRUWDQW LQIRUPDWLRQ FDQ EH IRXQG LQ RXU RSHUDWLQJ DQG LQVWDOODWLRQ LQVWUXFWLRQV ...

Страница 11: ... exceed the MAX mark in each compartment HWHUJHQW GLVSHQVHU UXP 7UDQVSRUW DLG GHSHQGLQJ RQ PRGHO 3XPS DFFHVV ZLWK ILOWHU LG Compartment I detergent for prewash Compartment II detergent for the main wash water softener stain re mover compartment i fabric softener starch bleach ...

Страница 12: ...w the manufacturer s instructions Keep detergents and agents for the pretreatment of washing e g stain remover prewash sprays away from the surfaces of the washing machine Using a damp cloth immediately remove any fine spray residue and other residue droplets Empty pockets Remove metal parts paper clips etc Wash delicates in the net bag tights underwired bras Close zips button up covers Brush sand...

Страница 13: ...lt and promotes creasing Mix large and small items of laundry Laundry items of different sizes distribute themselves better during the spin cycle Do not press laundry into the drum with the drum flaps 4 To close place both drum flaps over the drum opening with the rear one on top of the front one then push them both down gently until the locking mechanism engages Make sure that the drum flaps lock...

Страница 14: ...our water supply company Size of load half load 3 4 dosage minimum load 1 2 dosage Using too much detergent results in increased foaming and has an adverse effect on the cleaning action Using too little detergent causes the laundry to turn grey and results in limescale build up Add highly concentrated powder and liquid detergents directly to the drum 3 To add detergent and care products Do not fil...

Страница 15: ...e display if present Ø Changing the programme If you have accidentally started the wrong programme 1 Select Start The indicator lamp flashes 2 Select a different programme option temperature or spin speed 3 Select Start The new programme starts in the same phase in which the previous programme was interrupted Ø Cancelling the programme 1 Press and hold clear for approx 3 seconds 2 rES appears in t...

Страница 16: ...e laundry Do not leave any items of laundry in the drum They could shrink in the next wash or discolour another item Leave the lid and drum open so that any remaining water can dry Always wait for the end of the programme otherwise the appliance will still be locked 3 Turn off the tap ...

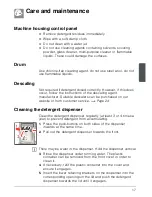
Страница 17: ...calers can be purchased on our website or from customer service Page 24 Cleaning the detergent dispenser Clean the detergent dispenser regularly at least 3 or 4 times a year to prevent detergent from accumulating 1 Press the push buttons on both sides of the dispenser inwards at the same time 2 Pull out the detergent dispenser towards the front There may be water in the dispenser Hold the dispense...

Страница 18: ...n Turn off the tap so that no more water can flow in and has to be drained via the drain pump 1 Switch off the appliance Disconnect the mains plug 2 Open the access to the pump e g with a screwdriver 3 Place a bowl underneath 4 Slowly turn the filter anti clockwise Do not remove it yet 5 Allow the water to drain out 6 Unscrew the filter completely 7 Clean the filter and filter compartment 8 Make s...

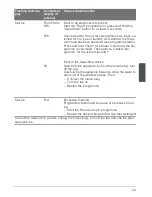
Страница 19: ... hose back onto the tap Do not use pliers 5 Connect the mains plug Supply hose Regularly check for brittleness and cracks and replace if necessary The Aqua Stop supply hose fig left has a safety valve that protects against the uncontrolled supply of water If the inspection window see horizontal arrow on this valve turns red the safety mechanism has been triggered The hose must be replaced after sa...

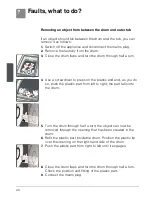
Страница 20: ... on the plastic end and as you do so push the plastic part from left to right the part falls into the drum 5 Turn the drum through half a turn the object can now be removed through the opening that has been created in the drum 6 Refit the plastic part inside the drum Position the plastic tip over the opening on the right hand side of the drum 7 Push the plastic part from right to left until it eng...

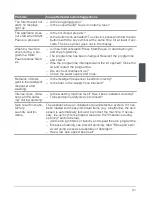
Страница 21: ...art the programme Are any fault displays lit up Check the water supply and hose Remains of deter gent in the detergent dispenser after washing Is the detergent dispenser inserted correctly Is the filter in the supply hose blocked Intense noise vibra tions and wander ing during spinning Is the washing machine level Has it been installed correctly Transportation safety device removed Spin result not...

Страница 22: ... the wet laundry Add several items of laundry of various sizes and start the Rinse spin programme Flashing fault dis play Contents of display if present Cause remedial action Tap closed No water supply or water supply insufficient Tap off not turned on fully Supply hose kinked trapped Water pressure too low Clean the filter For models with an Aqua Stop hose if the colour in the inspection window o...

Страница 23: ...the type of laundry Fault in the Aqua Stop device Switch off the appliance pull out the mains plug turn off the tap Carefully tip the appliance forwards Allow the water to drain out of the appliance base Then Connect the mains plug Turn the tap on Restart the programme Service Fod Excessive foaming Programme interrupted because of excessive foam ing Start the Rinse and spin programme Restart the d...

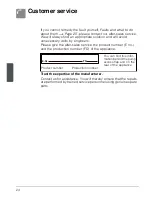
Страница 24: ...y engineers Please give the after sales service the product number E no and the production number FD of the appliance Trust the expertise of the manufacturer Contact us for assistance You will thereby ensure that the repairs are performed by trained service personnel using genuine spare parts You can find this infor mation behind the pump access flap and on the rear of the appliance Product number...

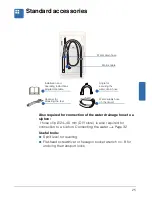
Страница 25: ... for connection to a siphon Connecting the water Page 32 Useful tools Ø Spirit level for levelling Ø Flat head screwdriver or hexagon socket wrench no 8 for undoing the transport locks 0DLQV FDEOH DWHU GUDLQ KRVH 6SDQQHU IRU DGMXVWLQJ WKH IHHW QVWDOODWLRQ DQG RSHUDWLQJ LQVWUXFWLRQV SURJUDPPH WDEOH QJOH IRU VHFXULQJ WKH ZDWHU GUDLQ KRVH DWHU VXSSO KRVH LQ WKH GUXP ...

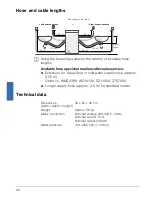
Страница 26: ...m Order no WMZ2380 WZ10130 CZ11350 Z7070X0 Ø Longer supply hose approx 2 5 m for standard model Technical data HIW KDQG FRQQHFWLRQ RU 5LJKW KDQG FRQQHFWLRQ HSHQGLQJ RQ WKH PRGHO PD FP a FP a FP a FP a FP a FP a FP Dimensions width x depth x height 40 x 65 x 90 cm Weight Approx 58 kg Mains connection Nominal voltage 220 240 V 50 Hz Nominal current 10 A Nominal output 2300 W Water pressure 100 1000 ...

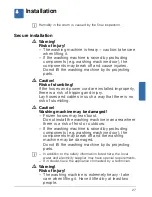
Страница 27: ...ch a way that there is no risk of stumbling ã Caution Washing machine may be damaged Frozen hoses may tear burst Do not install the washing machine in an area where there is a risk of frost or outdoors If the washing machine is raised by protruding components e g washing machine door the components may break off and the washing machine may be damaged Donot lift the washing machine by its projectin...

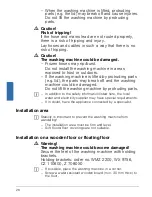
Страница 28: ... washing machine could be damaged Do not lift the washing machine by protruding parts In addition to the safety information listed here the local water and electricity supplier may have special requirements If in doubt have the appliance connected by a specialist Installation area Stability is important to prevent the washing machine from wandering The installation area must be firm and level Soft...

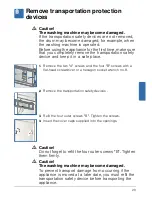
Страница 29: ...safe place 1 Remove the two A screws and the four B screws with a flat head screwdriver or a hexagon socket wrench no 8 2 Remove the transportation safety devices 3 Refit the four outer screws B Tighten the screws 4 Insert the cover caps supplied into the openings ã Caution Do not forget to refit the four outer screws B Tighten them firmly ã Caution The washing machine may become damaged To preven...

Страница 30: ...ppliance connected by a specialist Water supply Do not bend squash modify or cut through the water supply hose otherwise its strength is no longer guaranteed Optimum water pressure in the supply network 100 1000 kPa 1 10 bar Ø When the tap is open the water flow is at least 8 l min Ø If the water pressure is higher than this a pressure reducing valve must be installed 1 Connect the water supply ho...

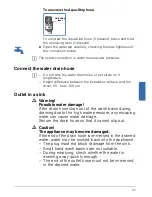
Страница 31: ...m Outlet in a sink ã Warning Possible water damage If the drain hose slips out of the wash basin during draining due to the high water pressure any escaping water can cause water damage Secure the drain hose so that it cannot slip out ã Caution The appliance may become damaged If the end of the drain hose is immersed in the drained water water may be sucked back into the appliance The plug must no...

Страница 32: ...hen draining the washing machine leaking water may cause damage Connection point must be secured with hose clip Ø 24 40 mm specialist outlet Connecting Outlet to a plastic pipe with rubber bushing ã Warning Possible water damage If the drain hose slips out of the plastic pipe during draining due to the high water pressure any escaping water may cause water damage Secure the drain hose so that it c...

Страница 33: ...y turning the appliance feet All appliance feet must stand firmly on the ground The washing machine must not wobble 3 Tighten the lock nut against the housing In doing so hold the foot tight and do not adjust its height The lock nuts on all of the appliance feet must be screwed tightly against the housing Intense noise vibrations and wandering may be the result of incorrect levelling ...

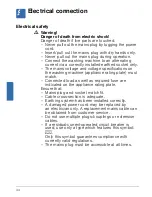
Страница 34: ... machine appliance rating plate must match Connected load as well as required fuse are indicated on the appliance rating plate Ensure that Mains plug and socket match fit Cable cross section is adequate Earthing system has been installed correctly A damaged power cord may be replaced by an electrician only A replacement mains cable can be obtained from customer service Do not use multiple plugs co...

Страница 35: ...emove the protective film from the display if present 3 Connect the mains plug 4 Turn the tap on 5 Open the lid make sure that the drum flaps are closed correctly do not load any laundry 6 Select the cottons programme 7 Set the temperature to 60 C 8 Add 1 3 of the amount of standard detergent recommended by the manufacturer for light soiling to compartment II To prevent foaming only use approximat...

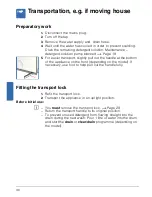
Страница 36: ...he handle at the bottom of the appliance on the front depending on the model If necessary use foot to help pull out the handle fully Fitting the transport lock 1 Refit the transport lock 2 Transport the appliance in an upright position Before initial use You must remove the transport lock Page 29 Return the transport handle to its original position To prevent unused detergent from flowing straight...

Страница 37: ...nt dispenser 17 Filter 19 the siphon 19 Connecting the water 30 Customer service 24 D Descaling 17 Detergent dispenser 11 Drain pump blocked 18 E Electrical connection 34 F Faults what to do 20 G Getting to know your appliance 11 H Hose and cable lengths 26 I Installation 27 Intended use 4 M Maintenance 17 O Object between the drum and outer tub 20 Old appliance 7 ...

Страница 38: ...on of the environment 7 S Safety instructions 5 Saving tips 7 Sorting the washing 12 Standard accessories 25 Starting the programme 14 T Technical data 26 Transport bolts 29 Transport locks Fitting 36 W Water connection Drain 31 Water supply 30 ...

Страница 39: ......

Страница 40: ...be made under the warranty if the appliance and Aqua Stop have been correctly installed and connected according to our instructions this also includes a correctly installed Aqua Stop extension original accessory 4 Our guarantee does not apply to defective cables hoses or to fittings up to the connection on the tap 5 Appliances which feature Aqua Stop can be left unattended during operation and it ...

Отзывы: