58300000111195_ARA_en_f.doc – 02.06.09
Seite 88 von 102
7.4.6 Diagnostic
plug
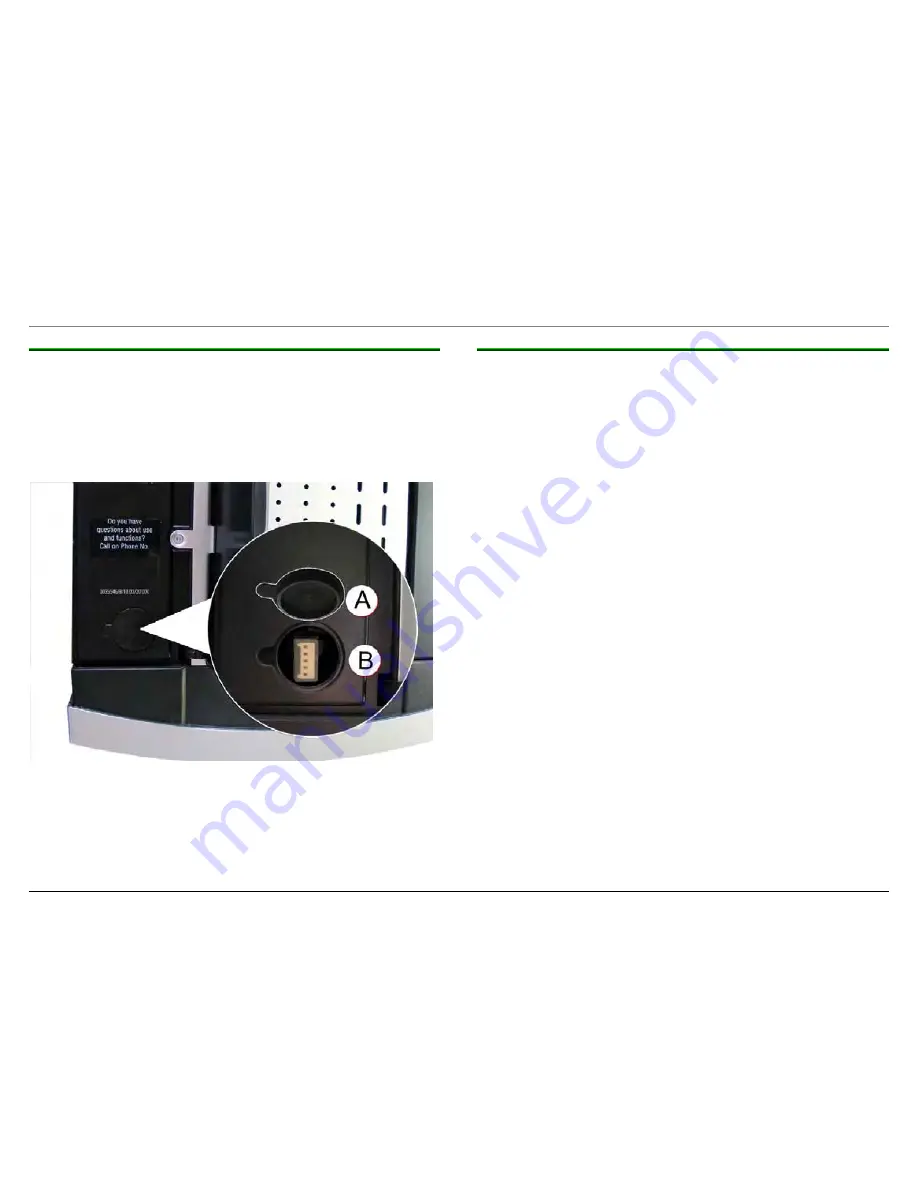
The diagnostic plug on the appliance will be accessible when the left
appliance flap is opened and the cover
(A)
is removed. The
transparent protective cap over the diagnostic plug must be removed
before the scanner is connected.
To ensure that the connecting cable is connected securely to the
scanner and the diagnostic plug
(B)
on the appliance, the diagnostic
plug can be pulled up slightly out of the appliance.
When the diagnostic sequence has run, disconnect the cable, press
the diagnostic plug back into the guide in the appliance, re-attach the
transparent protective cap and close off access to the diagnostic plug
by re-attaching the cover
(A)
.
7.4.7 Input
diagnostic
Data is read out. (Production, statistical, service, customer data)
The difference on the counter since the last service is deleted.
The latest, current factory settings are transferred from the PC to the
machine.
The internal appliance faults are analysed (service fault bits)
Then either a static diagnostic or a dynamic diagnostic is run, similar
to the final inspection during production, however without
external power and temperature measurements and without
evaporation.
This depends on the settings which are entered in the individual test
configuration of the input diagnosis.
Finally a report is prepared which can either be saved or printed out.
Apart from the information mentioned under line 1, the report also
includes service suggestions depending on the number of
brewing processes, as well as max. 3 service stamps if the
last ones were implemented on the corresponding appliance.


