background image

26

Hob

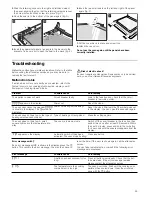
Replacing the bulb in the oven ceiling light

If the bulb in the oven light fails, it must be replaced. Heat-

resistant, 40 watt spare bulbs can be obtained from our after-

sales service or a specialist retailer. Only use these bulbs.

Risk of electric shock!

Switch off the circuit breaker in the fuse box.

1.

Place a tea towel in the oven when it is cold to prevent 

damage.

2.

Remove the glass cover. To do this, press back the metal 

tabs with your thumb (Fig. A).

3.

Unscrew the bulb and replace it with one of the same type 

(Fig. B).

4.

Refit the glass cover. When doing this, insert it on one side 

and press firmly on the other side. The glass cover will click 

into place.

5.

Remove the tea towel and switch on the circuit breaker.

Normal noise while the appliance is working

Induction heating technology is based on the creation of 

electromagnetic fields that generate heat directly at the base of 

the pan. Depending on how the pan has been manufactured, 

certain noises or vibrations may be produced such as those 

described below:

A deep humming sound as in a transformer

This noise is produced when cooking on a high power level. It 

is caused by the amount of energy transferred from the hob to 

the pan. The noise disappears or becomes faint when the 

power level is lowered.

A low whistling sound

This noise is produced when the pan is empty. It disappears 

when water or food is added to the pan.

A crackling sound

This noise occurs in pans which are made from different 

materials superimposed on one another. It is caused by the 

vibrations that occur in the ajoining surfaces of the different 

superimposed materials. The noise comes from the pan. The 

amount of food and cooking method can vary.

A high-pitched whistling sound

This noise is produced mainly in pans made from different 

materials superimposed on one another, and it occurs when 

such pans are heated at maximum power on two hotplates at 

the same time. The whistling disappears or becomes fainter as 

soon as the power level is lowered.

Noise from the fan

For proper use of the electronic system, the temperature of the 

hob must be controlled. For this purpose, the hob has a fan 

that starts working when detecting excess temperatures at 

different power levels. The fan may also work due to inertia 

after the hob has been switched off, if the temperature detected 

is still too high.

Rhythmic sounds similar to a clock's hands

This noise is only produced when 3 or more hotplates are 

working and disappears or is reduced when one of the 

hotplates is switched off.
The noises described are normal, they are part of induction 

heating technology and not a sign of malfunction.

Glass cover

You must replace a damaged glass cover. Suitable glass 

covers may be obtained from the after-sales service. Please 

specify the E number and FD number of your appliance.

Problem

Possible cause

Remedy/information

The appli-

ance does 

not work.

The circuit 

breaker is defec-

tive.

Look in the fuse box and 

check that the circuit breaker 

is in working order.

Power cut

Check whether the kitchen 

light or other kitchen appli-

ances are working.

 is flashing The control panel 

is damp or an 

object is resting 

on it.

Dry the control panel or 

remove the object.

Ҥ

 + num-

ber 

š

 + number 

¡

 + number  

or 

”‹

/

”Š

Electronic fault.

Switch the appliance off and 

back on again after about 

30 seconds using either the 

household fuse or the circuit 

breaker in the fuse box. Con-

tact the after-sales service if 

this appears in the display 

again.

”ƒ

The electronics 

have overheated 

and have 

switched off the 

corresponding 

hotplate.

Wait until the electronics 

have cooled down suffi-

ciently. Touch any symbol 

relating to this hotplate. The 

display goes out.*

”…

The electronics 

have overheated 

and have 

switched off the 

corresponding 

hotplate.

Wait until the electronics 

have cooled down suffi-

ciently. Touch any symbol on 

the control panel.*

”‰

The hotplate was 

in operation for 

too long and has 

switched itself off.

You can switch the hotplate 

back on again immediately.

—‚

Incorrect connec-

tion

The appliance must be con-

nected by a licensed expert.

—ƒ

/

—„

The hotplate has 

overheated and 

switched itself off 

to protect the hob

Wait until the hotplate has 

cooled down.

* Do not place hot pans close to or on the control panel.

%

$

Содержание HCE8584.1A

Страница 1: ... en Instruction manual Free standing cooker HCE8584 1A ...

Страница 2: ......

Страница 3: ...bath mode 19 Starting Sabbath mode 19 Childproof lock 19 Basic settings 20 Changing the basic settings 20 Automatic switch off 21 Self cleaning 21 Important notes 21 Before self cleaning 21 Setting the cleaning level 22 After self cleaning 22 Care and cleaning 22 Cleaning agents 22 Detaching and refitting the rails 23 Detaching and attaching the oven door 23 Removing the door cover 24 Removing and...

Страница 4: ...aught is created when the appliance door is opened Greaseproof paper may come into contact with the heating element and catch fire Do not place greaseproof paper loosely over accessories during preheating Always weight down the greaseproof paper with a dish or a baking tin Only cover the surface required with greaseproof paper Greaseproof paper must not protrude over the accessories Risk of fire H...

Страница 5: ...s supplied by the manufacturer available as optional accessories Risk of injury When cooking in a bain marie the hob and cooking container could shatter due to overheating The cooking container in the bain marie must not directly touch the bottom of the water filled pot Only use heat resistant cookware Risk of injury Saucepans may suddenly jump due to liquid between the pan base and the hotplate A...

Страница 6: ...compartment floor Do not cover the cooking compartment floor with any sort of foil or greaseproof paper Do not place ovenware on the cooking compartment floor if a temperature of over 50 ºC has been set This will cause heat to accumulate The baking and roasting times will no longer be correct and the enamel will be damaged Water in a hot cooking compartment do not pour water into the cooking compa...

Страница 7: ...nly be used in conjunction with a safety earth terminal A type H 05 VV F or equally rated lead must be used to connect the appliance Levelling the cooker Always place the cooker directly on the floor The cooker has height adjustable feet This allows you to raise the plinth by about 15 mm Please observe the special installation instructions Wall fixing To prevent the cooker from tipping over you mu...

Страница 8: ...ue to thermal inertia the temperature displayed may differ slightly from the actual temperature in the cooking compartment Residual heat The temperature indicator shows the residual heat in the cooking compartment when the appliance is switched off If all the bars are filled the temperature in the cooking compartment is approximately 300 C Once the temperature has dropped to approximately 60 C the...

Страница 9: ...they will go so that the accessories do not touch the door panel The accessories can be pulled out approximately halfway until they lock in place This allows dishes to be removed easily When sliding the accessories into the cooking compartment ensure that the indentation is at the back They can only lock in place from this position Note The accessories may deform when they become hot Once they coo...

Страница 10: ...Pizza tray HEZ317000 Ideal for pizza frozen products or large round cakes You can use the pizza tray instead of the universal pan Place the baking tray on the wire rack and proceed according to the details in the tables no Bakestone HEZ327000 The bakestone is perfect for preparing home made bread bread rolls and pizzas which require a crispy base The bakestone must always be preheated to the recom...

Страница 11: ... soft dish cloth Cooking with induction Your hob is equipped with induction hotplates Benefits of cooking with induction When cooking with induction heat is generated directly in the base of the pan The hotplate does not become hot This provides many benefits for you Time saving when boiling and frying Cookware is heated directly There is no heat loss Energy saving Easier care and cleaning Spilled...

Страница 12: ... setting 3 Use or A to change the heat setting Switching off the hotplate Touch and hold the or A symbol until the appears The hotplate switches off If the hotplate has become hot from the base of the pan the residual heat indicator or œ will appear after a few seconds The heat setting flashes There is no cookware on the hotplate it is the wrong size or made of unsuitable material To stop the heat...

Страница 13: ...s Frozen vegetables Cooking in pressure cooker 2 3 2 3 4 5 4 5 6 7 3 4 2 3 3 4 4 5 15 30 25 35 25 30 15 25 6 10 15 60 10 20 7 20 Braising Roulades Pot roast Goulash 4 5 4 5 3 4 50 60 60 100 50 60 Frying Cutlet plain or breaded Frozen cutlets Chop plain or breaded Steak 3 cm thick Poultry breast 2 cm thick Poultry breast frozen Fish and fish fillet plain Fish and fish fillet breaded Fish and fish f...

Страница 14: ...witch off the automatic timer for a hotplate or change the cooking time To do this touch the 0 symbol repeatedly until x lights up brightly above the relevant heat setting display Use the or A symbol to change the cooking time or reset it to min Timer The timer is independent of all other settings on the hob It operates in the same way as a normal kitchen timer When the set time has elapsed a sign...

Страница 15: ...e and how you set rapid heating Types of heating A large number of types of heating are available in your oven This allows you to select the ideal way of preparing every dish ˆ Power management function Limits the total power of the hob There are 18 levels Moving down a level decreases the power of the hob by 500 W Š 1000 W minimum setting 1500 9000 W 9500 W maximum setting Reset to the basic sett...

Страница 16: ...old the n button until 3D hot air and 160 C appear You can now change the settings Setting the cooking time See section Time setting options setting the cooking time Setting a later end time See the section entitled Time setting options Setting a later end time Setting rapid heating Rapid heating is not suitable for all types of heating Suitable types of heating A short signal sounds to indicate t...

Страница 17: ... will hear a short audible signal Setting the timer The timer runs independently of the oven You can use it as a kitchen timer and set it at any time regardless of whether oven is switched on or off 1 Press the 0 button The time setting options menu appears The U symbol in brackets shows that the timer function is selected 2 Set the running time for the timer using the rotary selector 3 Press the ...

Страница 18: ...oven is in p standby The end time is shown in the clock display As soon as operation starts you will see the cooking time counting down The cooking time has elapsed A signal sounds The oven stops heating is shown on the clock display You can stop the audible signal by pressing the 0 button Correcting the end time This is only possible as long as the oven is in p standby Press the 0 button to open ...

Страница 19: ...Turn the rotary selector anti clockwise to f Sabbath mode 3 Use the X button to switch to the temperature and set the desired temperature using the rotary selector 4 Use the 0 button to open the Time setting options menu and switch to r Cooking time with the X button 27 00 hours are suggested 5 Turn the rotary selector to set the required cooking time 6 Press the 0 button The time setting options ...

Страница 20: ...rn the rotary selector to select the required basic setting 3 Press the X button 4 Change the basic setting by turning the rotary selector Function Basic setting Options Audible signal after a cooking time has elapsed ƒ 2 minutes 10 seconds ƒ 2 minutes 5 minutes ƒ Confirmation tone when a button is pressed off off on Exception A tone always sounds when switching the appliance on and off Brightness...

Страница 21: ...utside during the Self cleaning cycle Never touch the appliance door Allow the appliance to cool down Keep children at a safe distance Risk of fire The appliance will become very hot on the outside during the Self cleaning cycle Never hang flammable objects e g tea towels on the door handle Do not place anything against the front of the appliance Before self cleaning The cooking compartment must b...

Страница 22: ...sult these edges can be rough This will not impair the anti corrosion protection Cleaning agents Damage to the various different surfaces caused by using the wrong cleaning agent can be avoided by observing the following instructions Do not use for the hob undiluted washing up liquid or dishwasher detergent abrasive materials scouring sponges aggressive cleaners such as oven spray or stain remover...

Страница 23: ...ap shut with great force Ensure that the locking levers are always fully closed or when detaching the oven door fully open Detaching the door 1 Open the oven door fully 2 Fold up the two locking levers on the left and right figure A 3 Close the oven door as far as the limit stop With both hands grip the door on the left and right hand sides Close the door a little further and pull it out figure B ...

Страница 24: ...ble the panels in the correct sequence use the numbers that appear on each panel Removal 1 Detach the oven door and lay it on a cloth with the handle facing down 2 Unscrew the cover at the top of the oven door To do this unscrew the left and right screws fig A 3 Lift the top panel up and pull it out and remove the two small seals fig B 4 Unscrew the retaining clips on the right and left Lift the p...

Страница 25: ...fter sales service You can take remedial action yourself if the following error messages are displayed Problem Possible cause Note remedy The appliance does not work Circuit breaker faulty Look in the fuse box and check that the circuit breaker is in working order appears in the display Power cut Reset the clock The oven door cannot be opened is shown in the display The L symbol is displayed Power...

Страница 26: ...om the fan For proper use of the electronic system the temperature of the hob must be controlled For this purpose the hob has a fan that starts working when detecting excess temperatures at different power levels The fan may also work due to inertia after the hob has been switched off if the temperature detected is still too high Rhythmic sounds similar to a clock s hands This noise is only produc...

Страница 27: ...ll evenly around the cooking compartment You can achieve successful baking roasting and cooking without having to preheat the oven Notes Place the items in the empty cooking compartment before it has heated up Otherwise energy optimisation will not have any effect Only open the oven door during cooking when required Table The table contains a selection of dishes best suited to Hot air eco It provi...

Страница 28: ...basting and the cooking compartment remains clean The cooking result depends on the quality of the meat and the size and type of ovenware Use an oven cloth or oven gloves when you take the finished dish out of the cooking compartment The ovenware will be very hot Take care when opening the ovenware as hot steam will escape Ovenware Automatic programmes are only suitable for roasting meat in ovenwa...

Страница 29: ...the ovenware with a lid Place it on the wire rack at level 2 For some dishes it is not possible to set a later end time These dishes are marked with an asterisk Always place the ovenware into the cooking compartment without preheating it Programmes Poultry Place poultry in the roasting dish breast side up The programme is not suitable for stuffed poultry When cooking several drumsticks set the wei...

Страница 30: ... so much mix the meat in among the vegetables When cooking a stew with meat set the weight of the meat If you want the vegetables to be softer set the total weight Firm types of vegetables are suitable for making vegetable stew such as carrots green beans white cabbage celery and potatoes The smaller you cut the vegetables the softer they will become So that the vegetables are not browned too much...

Страница 31: ... selector 3 Press the X button A weight is suggested in the clock display 4 Use the rotary selector to specify the weight of the dish 5 Press the n button The programme length is shown The programme starts You will see the cooking time r counting down on the clock display Programmes Programme num ber Weight range in kg Add liquid Weight setting Meat loaf Made from fresh beef P30 0 3 3 0 No Total w...

Страница 32: ...rtment Always use oven gloves when taking hot accessories or ovenware out of the cooking compartment Cakes and pastries Baking on one level When baking cakes the best results can be achieved using Top bottom heating When baking with 3D hot air use the following shelf heights for the accessory Cakes in tins level 2 Cakes on trays level 3 Baking on two or more levels Use 3D hot air Shelf heights for...

Страница 33: ...150 170 20 30 Sponge flan 6 eggs preheat springform cake tin 2 150 170 40 50 Shortcrust pastry base with crust springform cake tin 1 180 200 25 35 Fruit tart cheesecake pastry base springform cake tin 1 160 180 70 90 Swiss flan pizza tray 1 220 240 35 45 Ring cake ring cake tin 2 150 170 60 70 Pizza thin base with light topping pre heat pizza tray 1 280 300 10 15 Savoury cakes springform cake tin ...

Страница 34: ... 5 3 1 100 120 40 50 Meringue baking tray 3 80 100 100 150 Muffins wire rack with muffin tray 3 180 200 20 25 2 wire racks with muffin trays 3 1 160 180 25 30 Choux pastry baking tray 2 210 230 30 40 Puff pastry baking tray 3 180 200 20 30 universal pan baking tray 3 1 180 200 25 35 2 baking trays universal pan 5 3 1 170 190 35 45 Leavened cake baking tray 2 190 210 20 30 universal pan baking tray...

Страница 35: ...milar items in the baking tables as a guide How to establish whether sponge cake is baked through Approximately 10 minutes before the end of the baking time specified in the recipe stick a cocktail stick into the cake at the highest point If the cocktail stick comes out clean the cake is ready The cake collapses Use less fluid next time or set the oven temperature 10 degrees lower Observe the spec...

Страница 36: ...g 2 180 200 130 2 0 kg 2 170 190 150 Knuckle of veal 1 5 kg uncovered 2 210 230 140 Pork Joint without rind e g neck 1 0 kg uncovered 1 4 190 210 120 1 5 kg 1 4 180 200 150 2 0 kg 1 4 170 190 170 Joint with rind e g shoulder 1 0 kg uncovered 1 4 190 210 130 1 5 kg 1 4 180 200 160 2 0 kg 1 4 170 190 190 Fillet of pork 500 g wire rack univer sal pan 3 1 4 230 240 30 Pork joint lean 1 0 kg uncovered ...

Страница 37: ...ature in C grill set ting Cooking time in minutes Poultry Weight Accessories and ovenware Level Type of heating Temperature in C grill set ting Cooking time in minutes Chicken whole 1 2 kg wire rack 2 4 220 240 60 70 Poulard whole 1 6 kg wire rack 2 4 210 230 80 90 Chicken halved 500 g each wire rack 2 4 220 240 40 50 Chicken portions 150 g each wire rack 3 4 210 230 30 40 Chicken portions 300 g e...

Страница 38: ...Table All tender joints of poultry beef veal pork and lamb are suitable for slow cooking The slow cooking times depend on the thickness and the core temperature of the meat The table does not contain information for the weight of the joint Select the next lowest weight from the instructions and extend the time How to tell when the roast is ready Use a meat thermometer available from specialist sho...

Страница 39: ...d meat does not cool so quickly warm the plates and serve the gravy very hot If you wish to keep slow cooked meat warm After slow cooking turn the temperature down to 70 C Small pieces of meat can be kept warm for up to 45 minutes larger pieces for up to 2 hours Dish Accessories and ovenware Level Type of heating Temperature in C grill set ting Cooking time in minutes Bakes Bake sweet ovenproof di...

Страница 40: ...60 C This enables precise temperature regulation Chips universal pan 3 6 190 210 20 30 universal pan baking tray 3 1 180 200 30 40 Croquettes universal pan 3 6 190 210 20 25 Rösti stuffed potato pockets universal pan 3 6 200 220 15 25 Baked items frozen Bread rolls baguette universal pan 3 6 180 200 10 20 Pretzels dough universal pan 3 6 200 220 10 20 Baked items prebaked Part cooked rolls part co...

Страница 41: ...d 180 C 6 Start operation Preserving Fruit After approx 40 to 50 minutes small bubbles begin to form at short intervals Switch off the oven After 25 to 35 minutes of residual heat remove the preserving jars from the cooking compartment If they are allowed to cool for longer in the cooking compartment germs could multiply promoting acidification of the preserved fruit Vegetables As soon as bubbles ...

Страница 42: ...n instead of on the wire rack Note For baking use the lower of the temperatures indicated first Tips for keeping acrylamide to a minimum when preparing food General Keep cooking times to a minimum Cook meals until they are golden brown but not too dark Large thick pieces of food contain less acrylamide Baking With top bottom heating max 200 C With 3D hot air or hot air max 180 C Biscuits With top ...

Страница 43: ...ngform cake tins dia 20 cm 1 180 200 70 90 2 wire racks 2 spring form cake tins dia 20 cm 3 1 170 190 70 90 Dish Accessories and tins Level Type of heating Temperature in C Cooking time in minutes Do not use rapid heating to preheat the appliance Dish Accessories Level Type of heating Grill setting Cooking time in minutes Toast Preheat for 10 minutes Wire rack 5 3 2 Beefburgers 12 pieces do not pr...

Страница 44: ...920724 9000796717 9000796717 Robert Bosch Hausgeräte GmbH Carl Wery Straße 34 81739 München Germany www bosch home com ...

Отзывы: