Installation Manual
Bosch Climate 5000 AA Series Inverter Multi Split-Type Ductless Air Conditioner / Heat Pump
| 15
Bosch Thermotechnology Corp.
|
01.2017
Data subject to change
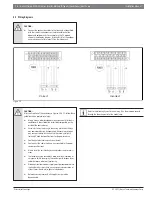
8 Wiring
WARNING:
Be sure to disconnect the power supply before working on
the unit.
All electrical wiring must be done according to local and
national regulations.
Electrical wiring must be done by a qualified technician.
Improper connections may cause electrical malfunction,
injury and fire.
An independent circuit and single outlet must be used for this
unit. DO NOT plug another appliance or charger into the same
outlet.If the electrical circuit capacity is not enough or there
is a defect in the electrical work, it can lead to shock, fire, unit
and property damage.
Connect the power cable to the terminals and fasten it with a
clamp. An insecure connection may cause fire.
Make sure that all wiring is done correctly and the control
board cover is properly installed. Failure to do so can cause
overheating at the connection points, fire, and electrical
shock.
Ensure that main supply connection is made through a switch
that disconnects all poles, with contact gap of a least 3mm
(0.118”).
DO NOT modify the length of the power cord or use an
extension cord.
CAUTION:
Connect the outdoor wires before connecting the indoor
wires.
Make sure you ground the unit. The grounding wire should be
away from gas pipes, water pipes, lightning rods, telephone
or other grounding wires. Improper grounding may cause
electrical shock.
DO NOT connect the unit with the power source until all wiring
and piping is completed.
Make sure that you do not cross your electrical wiring
with your signal wiring, as this can cause distortion and
interference.
Follow these instructions to prevent distortion when the compressor starts:
The unit must be connected to the main outlet. Normally, the power supply
must have a low output impedance of 32 ohms.
No other equipment should be connected to the same power circuit.
The unit’s power information can be found on the rating sticker on the
product.
8.1 Outdoor unit wiring
WARNING:
Before performing any electrical or wiring work, turn off the
main power to the system.
1.
Prepare the cable for connection
a. You must first choose the right cable size before preparing it for
connection. Be sure to use SOOW type cables.
Rated Current of Appliance (A)
AWG
≤ 7
18
7 - 13
16
13 - 18
14
18 - 25
12
25 - 30
10
Table 9
b. Using wire strippers, strip the rubber jacket from both ends of signal/
power cable to reveal about 15cm (5.9”) of the wires inside.
c. Strip the insulation from the ends of the wires.
d. Using a wire crimper, crimp u-lugs on the ends of the wires.
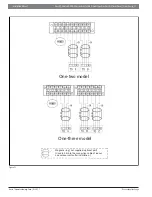
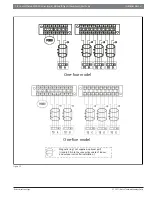
While connecting the wires, please strictly follow the wiring diagram
(found inside the electrical box cover).
2.
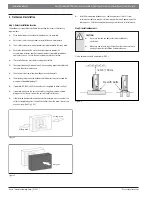
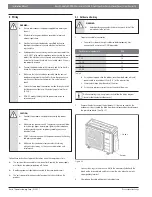
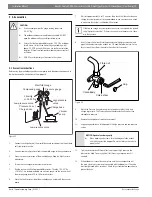
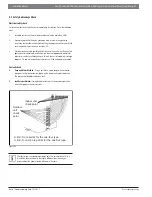
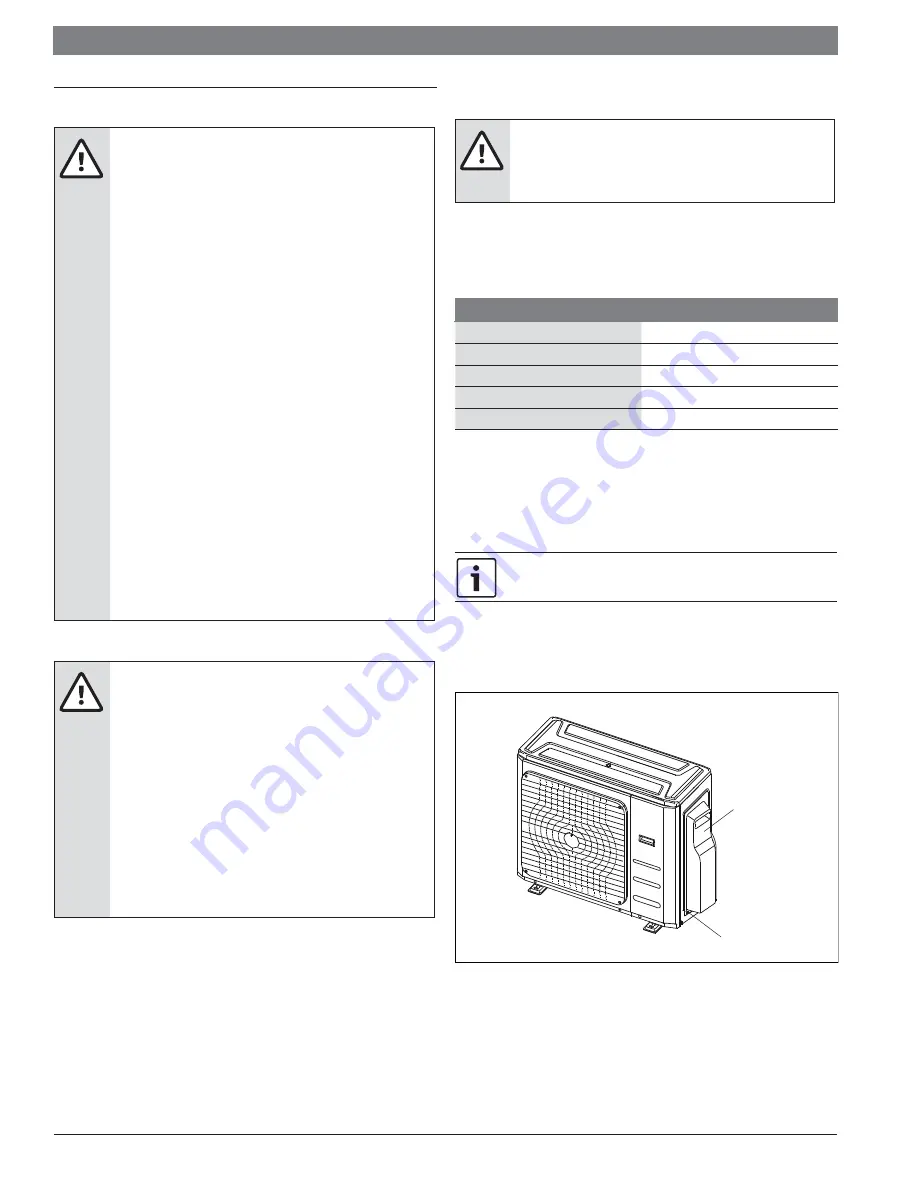
Remove the electric cover of the outdoor unit. If there is no cover on the
outdoor unit, disassemble the bolts from the maintenance board and remove
the protection board. (See Fig. 19)
Cover
Screw
Figure 19
3.
Connect the u-lugs to the terminals. Match the wire colors/labels with the
labels on the terminal block, and fi rmly screw the u-lug of each wire to its
corresponding terminal.
4.
Clamp down the cable with designated cable clamp.


