background image

en

Repair instruction

A/C Service Unit

ACS 653 - ACS 653-P - ACS 663 - ACS 663-P 

ACS 663-RI

Содержание ACS 653

Страница 1: ...en Repair instruction A C Service Unit ACS 653 ACS 653 P ACS 663 ACS 663 P ACS 663 RI ...

Страница 2: ...ACS 653 ACS 663 Service Manual SP00D00624 2021 04 08 Robert Bosch GmbH 2 Robert Bosch GmbH Robert Bosch GmbH Franz Oechsle Straße 4 1119D 73201 Plochingen SERVICE bosch prueftechnik bosch com ...

Страница 3: ...dule 30 Diagnostics and Testing 31 Functional Check 32 Diagnostics and Testing 36 Depressurizing the Unit 47 Troubleshooting 48 Error Messages 61 Electrical System Operation and Repair 66 Electrical System Operation 67 Electrical System Repair 74 Plumbing and Mechanical System Operation and Repair 83 Plumbing and Mechanical System Operation 84 Plumbing and Mechanical System Repair 86 Component App...

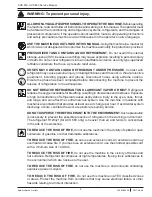
Страница 4: ...s an imminently hazardous situation which if not avoided will result in death or serious injury WARNING Indicates a potentially hazardous situation which if not avoided could result in death or serious injury CAUTION Indicates a potentially hazardous situation which if not avoided may result in minor or moderate injury CAUTION Used without the safety alert symbol indicates a potentially hazardous ...

Страница 5: ...frigerant reduces the oxygen available for breathing resulting in drowsiness and dizziness Exposure to high concentrations of refrigerant causes asphyxiation injury to the eyes nose throat and lungs and can affect the central nervous system Use the machine in locations with mechanical ventilation that provides at least one air change per hour If accidental system discharge occurs ventilate the wor...

Страница 6: ...than those indicated on the technical data plate It is also recommended to buy it from specialized companies that guarantee its good quality DO NOT USE THIS MACHINE OUTDOORS DURING RAIN OR HIGH HUMIDITY Protect the machine from conditions that may cause electrical failure or other hazards relating to ambient interaction DO NOT USE THIS MACHINE IN DIRECT SUNLIGHT Position the machine far from heat ...

Страница 7: ...amper the interlock switch During normal operation the rear service door must always be closed and the above panel in place PED directive 2014 68 EU The machine includes parts subject to PED EU directive 2014 68 EU Pressure Equipment Directive PED directive regulates all the pressurized part defining for them categories based on volume pressure ratio and based on fluid refrigerant type Those parts...

Страница 8: ...zed by Robert Bosch GmbH in servicing the ACS 653 ACS 663 For specific work the service technician needs the following additional qualifications country specific Electrotechnical knowledge for working on electrotechnical systems and equipment as per EN 50110 1 and EN 50110 2 see accident prevention regulation for electrical systems and equipment e g DGUV V3 in Germany and qualified in ESD protecti...

Страница 9: ...tenance for ACS 663 RI only 17 Vacuum Pump Maintenance 17 Edit Print Header 18 Replace Printer Paper only for variants with printer 18 Calibration Check 19 Scales Reset 19 Pressure Decay Leak Test for R1234yf only 20 Lockout 20 Printer kit installation ACT1234 PIK 21 Refrigerant Identifier kit installation ACT1234 RIK 21 N2H2 Manifold kit installation ACT1234 NIK 23 Calibration check kit installat...

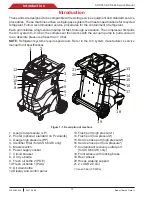
Страница 10: ...OTE Refrigerant systems require special oils Refer to the A C system manufacturer s service manual for oil specifications 1 2 5 6 4 3 7 12 11 10 8 9 15 16 17 19 20 18 14 13 21 1 Gauge low pressure LP 2 Printer optional standard on P variants 3 Gauge high pressure HP 4 Identifier Filter for ACS 663 RI only 5 Master switch 6 Power supply socket 7 Circuit breaker 8 UV dye bottle 9 Fresh oil bottle 2 ...

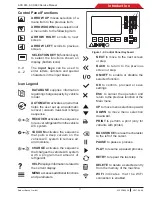
Страница 11: ... vehicle A C system VACUUM activates the sequence that pulls a deep vacuum on the vehicle A C system to remove air and moisture CHARGE activates the sequence that charges the vehicle A C system with a programmed amount of refrigerant HELP displays information related to the current display MENU accesses additional functions and parameters NEXT to move to the next screen or step BACK to return to t...

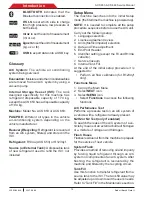
Страница 12: ...oil and impurity by forcing liquid refrigerant through an A C system or components of an A C system After flushing the refrigerant is recovered by the machine and filtered by the recycling circuit Tank Fill Use this function to transfer refrigerant from a source tank to the ISV The tank fill value may be adjusted up or down to suit the user s needs Refer to Tank Fill in the Maintenance section Glo...

Страница 13: ...to lock out and not function Select this Settings Menu item and follow the prompts before the trial period expires Oil Load Cells To enable or disable the operation of the exhausted oil scale Dye injection adjust To double or halve the default amount about 7 5 ml of UV dye Refrigerant Identifier except the RI and R134a variants To enable or disable the purity test of the external refrigerant ident...

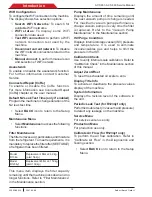
Страница 14: ...lacement filter at 68 kg alert 56 kg Model R1234yf Replacement filter at 150 kg alert 138 kg This menu item displays the filter capacity remaining until the machine locks down and no longer functions Refer to Filter Maintenance in the Maintenance section Pump Maintenance Displays the amount of time remaining until the next vacuum pump oil change is needed For maximum vacuum pump performance change...

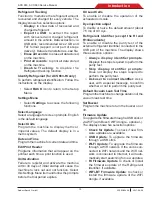
Страница 15: ... set with 2 2 kg dead space first 2 2 kg are not shown on display anymore If the source tank is empty or has insufficient refrigerant for transfer tank fill will stop 6 Connect the low pressure service hose blue to the liquid connector on a full source tank 7 Position the source tank in such a way that liquid refrigerant is supplied to the connection Open the source tank valve 8 Select OK icon to ...

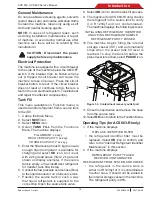
Страница 16: ... has been incorrectly entered or the filter has already been used in this machine 2 Use the keypad to enter the serial number that appears on the new filter and select OK icon to continue The machine clears the existing filter and displays TURN POWER OFF AND REPLACE FILTER 1 Figure 1 4 Filter Location 3 Switch off the machine 4 Open the service rear door 5 Remove the old filter 1 by turning it cou...

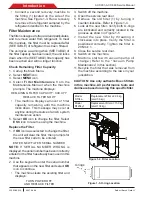
Страница 17: ... the sample hose assembly during every filter change and also if prompted by an error message saying the hose is clogged See Figure 1 6 1 Switch off the machine 2 Open the service rear door 3 Remove the rear cover above the service door by pushing it up and extract it by pulling it out 4 Disconnect the existing sample hose assembly 2 between the rear side of the manifold and the refrigerant identi...

Страница 18: ...e at the time of disposal The user must ensure compliance with all applicable laws and regulations 1 3 2 Figure 1 7 Oil Ports Edit Print Header To make changes to the printer text available in Setting menu appearing in the header on each printout 1 Call up the Main Menu 2 Select NEXT icon 3 Select MENU icon 4 Select Edit Print Header in the Settings Menu The cursor is in the first field 5 Update t...

Страница 19: ...HINE 8 Remove calibration weight from magnet located on the bottom of machine 9 Select OK icon to continue ALERT Do not touch the unit in this phase If the display shows Calibration passed the scale is calibration Select OK icon to return to the Maintenance Menu If the display shows Calibration failed the scale is out of calibration Select RETRY icon to retry If calibration continues to fail conta...

Страница 20: ...s held for five minutes and monitored for decay There is not a default pressure value The machine monitors the pressure reached during the pressurization Minutes and seconds count down on the display If an acceptable pressure decay is detected the machine recovers refrigerant until 0 44 bar and returns to the Maintenance Menu ready for normal operation If an unacceptable pressure decay is detected...

Страница 21: ...nt in hoses Point hoses away from you and anyone nearby For the refrigerant identifier kit installation follow instructions hereby 1 Clear service hoses and remove them 2 Switch off the machine 3 Remove the 3 screws 1 either from left and right side of the machine and the 2 screws 2 underneath the frontal panel see Figure 1 12 4 Remove the front plastic cover 5 Open the service rear door 6 Remove ...

Страница 22: ...anifold 7 and place the solenoid body 6 Tighten at 9 Nm torque 12 Tighten the solenoid coil 6 at 4 Nm torque 13 Fix the refrigerant identifier 12 by 2 screws as per Figure 1 14 Tighten at 0 4 Nm torque Figure 1 14 Refrigerant identifier assembly 8 6 11 10 12 7 9 14 Remove the cap 8 from the manifold 7 15 Fix the hose with fitting coming with the refrigerant identifier in 8 and tighten at 7 5 Nm to...

Страница 23: ...ing it out 14 13 Figure 1 15 Control panel removal 18 Remove the cap 13 and the visible screw from the hole 19 Remove the control panel 14 20 Connect the USB cable to the connector 9 of the refrigerant identifier 12 and to the J6 connector of the control board see Figure 1 14 21 Re fix the control panel 14 22 Screw back the screw and place the cap 13 23 Insert the rear cover so that the 4 holes on...

Страница 24: ...san hose from fitting 4 of the injection manifold and connect it to fitting 6 of N2H2 manifold 10 Connect the rilsan hose coming with the kit within fitting 5 of N2H2 manifold and fitting 4 of the injection manifold 11 Connect faston S19 and S20 of solenoids harness to the solenoids on N2H2 manifold 12 Insert the rear cover so that the 4 holes on the sides the cover fit into the 4 clips on the mac...

Страница 25: ...u and enter password then select OK icon 5 Select AC unit emptying and select OK icon to start the function NOTE To empty the A C unit make use of a second recovery machine with same refrigerant and suitable free capacity 6 Connect the two A C units as indicated on display Turn on the recovery unit and select OK icon 7 Start the recovery function from the recovery unit 1 1 1 2 2 NOTE In case of re...

Страница 26: ... 8 and tighten at 0 35 Nm torque 27 Open the service rear door 28 Remove the rear cover above the service door by pushing it up and extract it by pulling it out 29 Install the air flow sensor unit outside view see Figure 1 22 by securing it to the fan assembly with two nuts 30 Loosen 2 screws outside the frame to move the fan assembly 31 Connect the connector air flow sensor to the air flow harnes...

Страница 27: ...th quick couplers Tighten at 7 9 Nm torque 43 Connect the unit to a power source and place the power switch on 44 Follow the instructions on display to replace filter refer to Filter Maintenance in the Maintenance section and vacuum pump oil refer to the Vacuum Pump Maintenance in the Maintenance section NOTE If theA C unit never recovered refrigerant then it won t be asked to replace the filter n...

Страница 28: ...0 C 60 C Unit Operating Temperature Range 10 C 50 C 10 C 50 C 10 C 50 C Humidity non condensing 32 2 C 90 F 86 RH 32 2 C 90 F 86 RH 32 2 C 90 F 86 RH Maximum Altitude 2000 m 6561 66 ft 2000 m 6561 66 ft 2000 m 6561 66 ft IP Protection Rating IP20 IP20 IP20 Pollution dregree 2 2 2 Noise 70 dB A 70 dB A 70 dB A Dimensions 105 x 75 x 77 cm 105 x 75 x 77 cm 105 x 75 x 77 cm Weight empty tank accessori...

Страница 29: ...CK COUPLER FOR COMMERCIAL TANK 1 4 SAE TANK ADAPTER R134a 21 8 14 G 1 4 Compressor Power 1 4 HP 1 4 HP 1 4 HP Displacement 8 85 cm3 8 85 cm3 8 85 cm3 Recovery performance maximum liquid phase Power Supply 230 Vac 1 50 60 Hz 230 Vac 1 50 60 Hz 230 Vac 1 50 60 Hz Vacuum Pump Free Air Displacement 170 l min 6 CFM 170 l min 6 CFM 170 l min 6 CFM Ultimate Vacuum min 40 microns 40 microns 40 microns Oil...

Страница 30: ...scales must be calibrated by an authorized service center Setting to zero of the oil drain scale Wheneveritisnecessary Referto ScalesReset in the Maintenance section of this manual Check machine for leaks Automatic every 10 days Refer to Pressure Decay Leak Test in the Maintenance section of this manual for R1234yf only Every yearly performed by an authorized service center for R134a only Air flow...

Страница 31: ...lt Precharge Leak Test Time 46 Service hose length 46 Nx Leak Test 46 Dye inject enable 46 Enter plate only 46 Refrigerant tracking password 46 Customer configuration 46 Database configuration 46 Tank check valve test 46 AC unit emptying 46 Convert unit refrigerant 46 Depressurizing the Unit 47 Unit is Functional 47 Unit is Not Functional 47 Troubleshooting 48 Grounding Noise and Power Issues 48 W...

Страница 32: ...inutes 12 Reboot the unit when prompted 13 When the unit reboot confirm the installation procedure by press Yes button when the bootloader black and white screen is shown 14 The unit will go through a file updating period it can take several minutes to finalize the entire update procedure then will display the Main Menu Install Current Software with WiFi Once WiFi connection has been established s...

Страница 33: ...ed The machine displays the following screens INITIALIZING REFRIGERANT IDENTIFIER ANALYZING REFRIGERANT SAMPLE REFRIGERANT PURITY PASSED 9 The unit will run low side clearing then enter into a 1st stage Recovery 10 When the system has recovered to 0 4 bar the vacuum pump starts and runs until recover is complete 11 2th stage recovery Unit perform special deep recovery function where pump and compr...

Страница 34: ... input Oil inject Yes or No If select No unit don t inject any oil Oil amount xxx ml is possible set as ml oz or lb Oil type 2 option PAG or POE Type the measured ambient temperature and set the viscosity of oil being used 4 Select OK icon to continue Machine is asking to input Select ON OFF icon to enable the UV dye injection 5 Confirm with OK icon and begin the charge process Moving or bumping t...

Страница 35: ...le The charge is complete 10 Select OK icon then the unit will begin a hose clearing process to remove refrigerant from the hoses followed by a short recovery 11 At the end unit shows the charged data and print out option 12 If the charge was cancelled Charge complete will change to Charge cancelled and the values on the display will disappear 13 Select OK icon to exit 14 The unit will begin a hos...

Страница 36: ...oot sequence 2 Select NEXT icon 3 Select MENU icon 4 Select MAINTENANCE 5 From the maintenance menu scroll up and find SERVICE MENU 6 Enter password then select OK icon The following displays Service Menu Calibrate Load cell Output test Input Test Calibrate air flow ISV Purge condition A C unit internal clearing Service vacuum End user install Maintenance counters Keypad test Set boot mode Reset B...

Страница 37: ...ration 5 Use the calibration weight as displayed for this step The first weight should be 0 as displayed on the screen Select OK icon to save the displayed weight value NOTE DO NOT DISTURB unit during weight calibration After 5 seconds 6 Place a 10 kg editable weight on the scale and enter the weight using the keypad When finished select OK icon to save the entered weight value 7 If the calibratio...

Страница 38: ...enu Follow all remaining calibration instructions displayed First point calibration without nothing Second point calibration with 500 g editable Check with 250 g not editable and confirm with OK icon NOTE DO NOT DISTURB unit during weight calibration 8 If the calculation is accepted the following is displayed 9 Typically adding 1 00 kg 2 lb is sufficient to perform this test 10 If OK icon is selec...

Страница 39: ...Solenoid S2 Oil Drain Solenoid S3 Low Side Inlet Solenoid S4 High Side Inlet Solenoid S5 High Side Charge Solenoid S6 Low Side Charge Solenoid S7 Recycle Solenoid S8 Vacuum Solenoid S9 Recover Solenoid S11 Deep Recover Solenoid S12 Oil Return Solenoid S13 POE Solenoid S14 Dye Solenoid S15 Identifier solenoid S17 for ACS 663 RI only N2H2 inlet solenoid S19 only if enabled N2H2 vent solenoid S20 onl...

Страница 40: ...ulator Pressure ISV Press X XYYY ISV Pressure ISV Temp X X0 Y ISV Temperature HP Sw X High Pressure Switch Overfill X ISV Liquid Quantity Air Flow XXXXrpm Fan Air Flow for R1234yf only 3 Scroll through the sensors or devices to observe their values When finished select BACK icon to return to the Service Menu Calibrate air flow for R1234yf only The air flow inside the unit must be present at the co...

Страница 41: ...d to evacuate service hoses oil separator and dryer filter compressor discharge not cleared Components ON 1 LS inlet Solenoid S4 2 HS Inlet Solenoid S5 3 Recover Solenoid S11 4 Compressor 5 The vacuum pump should turn on and the time begins to count down Process will stop early if sufficient vacuum level is achieved To pause at any point during the process select PAUSE icon At the Pause function t...

Страница 42: ...on The following displays End User Install The End User Install allows the service technician to access review and or change the parameters set during the initial setup of the machine The functions include Language selection License agreement review Units Metric Imperial selection Date and Time adjustment Edit Print Header Identifier setting except the RI and R134a variants Service Vacuum Internal...

Страница 43: ...plays the total quantity of refrigerant filtered by the station Filtered cycles displays the number of times the dryer filter has been changed Vacuum cycles displays the number of times the dryer filter has been changed Vac pump working time displays the total operating hours of the vacuum pump Vac pump oil changed displays the number of times the vacuum pump oil has been changed Vac pump oil time...

Страница 44: ... After each key is tested the next key will scroll up automatically This test cannot be aborted Once complete the display will automatically return to the service menu Set Boot Mode Setting the Boot Mode makes it possible to boot into a mode other than Normal default The choices to boot are Normal Filter Change Required Leak Test Required and End User Install 1 From the Service Menu scroll to Set ...

Страница 45: ...or external refrigerant identifer Refrigerant Identifier for R1234yf only The Refrigerant Identifier is used to enable disable the refrigerant identifer Charge Leak Test The Charge Leak Test is used to enable disable the pre charge leak test 10 Days Leak Test for R1234yf only The 10 Days Leak Test is used to enable disable the periodical leak test Default Vacuum Time The Default Vacuum Time is edi...

Страница 46: ...injection Enter plate only The Enter plate only is used to enable disable the vehicle data input page where only license plate is present as mandatory field Refrigerant tracking password The Refrigerant tracking password is used to enable disable the access with password for the refrigerant tracking menu Customer configuration To set some special features requested by a specific customer or dealer...

Страница 47: ...to the lateral contamination port for ACS 663 RI only or by quick coupler adapter connection 2 Open service menu and go into Output test Refer to Output test in the Diagnostics and Testing section 3 Enable Tank liquid solenoid S22 Low Side Charge Solenoid S7 and or High Side Charge Solenoid S6 Unit is Not Functional 1 Disconnect the high and low side service hosesfromvehicleorservicetank whichever...

Страница 48: ...aries with the type and intensity of the noise Power Issues The power applied to the unit must be from a stable low impedance source Long term stability must be within 10 of the nominal voltage For a nominal 230 V line the limits are 207 V to 253 V The unit will operate above and below the voltage limits However problems in operation may appear if the voltage drops sags below or rises above surges...

Страница 49: ...f no continuity check the power switch for proper operation Repair or replace as required 4 Connect the unit to a proper AC power source and place the unit power switch on The display should illuminate If the unit is still inoperative perform the following voltage checks a Measure the voltage at the output of the power supply from PSJ2 pin 2 to pin 3 Voltage should be 12 VDC If 12V is not present ...

Страница 50: ...clearing Low side clearing activates the compressor only and runs until the accumulator transducer reads 0 45 bar 13 in HG plus 15 seconds The unit will then go into the first stage of recovery There is no high side clearing in these units If a unit gets stuck in the clearing process use the following procedure to troubleshoot this condition 1 Attach a calibrated gauge to the accumulator test port...

Страница 51: ... as it will be pulling in air and adding it to the ISV Be sure to purge the air from the ISV once the machine is repaired 17 If the unit doesn t complete clearing test the compressor as reccomended procedure Refer to Compressor Troubleshooting in the Compressor section of this manual Will Not Recover NOTE The compressor should be running during this test If it does not run refer to Compressor trou...

Страница 52: ...per power source circuit breaker and electrical connectors for damage or corrosion Replace or repair as required 2 Connect the unit power cable directly to the power source Do not use an extension cord 3 Check for 230 V at the vacuum pump connector pins 2 and 3 If voltage is present replace vacuum pump assembly If voltage is not present continue to next step NOTE When checking voltage to the vacuu...

Страница 53: ... Purge 1 Verify the air purge solenoid S1 is receiving power and opening properly If not receiving power check the continuity of the wiring between solenoid and power board Repair as needed If the wiring is correct and no power is being applied to the solenoid replace the power board NOTE Verify the tank temperature sensor and pressure transducer are functioning properly To verify tank pressure tr...

Страница 54: ... If the wiring is correct and no power is being applied to the solenoid replace the power board 6 Check the PAG S2 POE S14 and dye S15 solenoids for bleed through and proper operation This can be done by checking for suction at the oil dye inject tube in the oil dye inject bottle Remove the oil dye inject bottle during the vacuum process and check for suction at oil dye inject tube or watch for oi...

Страница 55: ...erify low side inlet transducer reading Compare the low side transducer reading shown in the service menu with the reading on the low side panel gauge The readings should match assuming the low side panel gauge is accurate If the low side inlet transducer is reading pressure while the system is in a vacuum replace the transducer Verify the replacement transducer reads zero at atmosphere by pluggin...

Страница 56: ...e next vehicle to be serviced contains a different type of A C system oil than the previous vehicle serviced 1 Verify the service hoses are properly attached to the unit storage ports without any restrictions and coupler valves are open 2 Check Tank Liquid solenoid evacuating the tank with a recovery service unit in advance and tank hoses are properly connected to the ISV 3 If there is no pressure...

Страница 57: ... board at CBP19 If printer still does not print replace the control board Printer Does Not Have Power Verify the printer is receiving power at harness connector Test for 5 VDC across the RED pin 1 or YELLOW pin 2 and BLACK pins 3 4 wires If voltage is present replace the printer assembly and retest If not check for printer power at CBP15 The control board receives power from the power board PBP2 t...

Страница 58: ...he accumulator port low side hose and by accessing the tank The tank pressure transducer can be checked by charging a hose and comparing to the low side transducer or the gauges They should be reasonably close initially but the gauge or low side reading should drop quickly if the tank is warm Control Board Troubleshooting 1 Possible reasons to replace control board Repeated read errors Repeated Co...

Страница 59: ...or start components Repair as needed If voltage is not present replace the power board 8 Perform functional check Compressor Testing Procedure 1 Disconnect unit from the power source 2 Open the service rear door 3 Remove all three lines attached to the compressor 4 Cap off the compressor oil return port 5 Connect a manifold set to the compressor high side to the compressor discharge and the low si...

Страница 60: ...tput test and verify fan operation If the fan is not functioning check verify wiring switches and circuit breaker If the fan is functioning replace the power board If voltage is not present replace the power board NOTE If fan works power is present at the power board The fan vacuum pump and compressor use the same power source 9 Perform functional check 10 Reinstall the plastic frontal cover 11 At...

Страница 61: ...Drain Oil Oil drain halted Pressure error Pressure insufficient to push oil out of separator Select RETRY or ESC icon Drain Oil Oil drain halted Flow error Oil drain timed out Select RETRY or ESC icon Enter Password Invalid password Password entered is incorrect Verify function password is correct Select RETRY or ESC icon Fast Charge Charge stalled Check connections and valves XX XXXYY of XX XXXYY...

Страница 62: ... Fault System missing date time information Select ESC icon to run RTC routine System Flush Insufficient refrigerant 6 00 kg required for system flush Select ESC icon then perform tank fill System Flush Pressure too high for flush System must be recovered Select ESC icon then perform recovery Tank Fill Source tank is empty Filled XX XXYY Source tank emptied during the tank fill process Connect new...

Страница 63: ...filter is broken White paper filter is clogged White paper filter is disconnected 4 Identifier air intake or air exhaust clogged 5 Identifier solenoid leaking during calibration Refrigerant Identification Identifier Unstable Reading Error 2 Possible reasons 1 Sampling path problem Brass filter clogged and or sample hose clogged Sample hose is broken cracked or punctured Sample hose is disconnected...

Страница 64: ... filter defective White paper filter is broken White paper filter is clogged White paper filter is disconnected 4 Identifier air intake or air exhaust clogged 5 Identifier solenoid leaking during calibration Refrigerant Identification Identifier Refrigerant Flow Error Possible reasons 1 Sampling path problem Brass filter clogged and or sample hose clogged Sample hose is broken cracked or punctured...

Страница 65: ...frigerant Identification Identifier Factory Calibration Expired Possible reason 1 Refrigerant identifier analysis parameters calibration expired Refrigerant Identification Identifier Communication Error Possible reasons 1 Identifier power supply chain issue Identifier internal power supply issue Identifier power supply cable issue Power supply output for Identifier issue 2 Identifiercommunicationc...

Страница 66: ...ol Board Connector Assignments 68 Control Board Functions 68 Sensors and Transducers 69 Control Board Software Updating Methods 69 Electrical System Repair 74 Replacement Power Board 74 Replacement Control Board 75 Replacement High Pressure Cut Out Switch 76 Replacement Fan Assembly 77 Replacement Air Flow Sensor for R1234yf only 78 Replacement Scale Assembly 79 Scale Calibration Load Cells 79 Rep...

Страница 67: ...1 P5 Fan P6 Vacuum Pump Compressor Figure 3 1 Power Board P7 High Pressure Switch P8 Solenoids S1 S2 S3 S14 S15 and S17 is used on ACS 663 RI unit only P9 Solenoids S4 S5 S6 S7 S8 S9 S11 S12 S13 and S22 The Power Board PB receives AC voltage at PBP3 from the power switch and circuit breaker to PBP3 pins Pin 1 Unit ground Pin 2 AC low Pin 3 AC high The input voltage is immediately applied to the Po...

Страница 68: ...y Afourth regulated power source supplies voltage to the optional printer P6 P12 J7 J3 P13 J8 P17 J2 J1 P19 P18 P15 P3 P2 P9 P10 P8 P7 P11 P1 J5 J6 Control Board Functions 1 Reads Keypad If a key does not respond it s most likely that 1 it isn t supposed to respond at that time 2 the keypad is faulty replace keypad 3 Operates Display The display contrast changes with temperature and light conditio...

Страница 69: ... the oil being drained separated from the vehicle A C system 5 Refrigerant Identifier ID identifies R1234yf refrigerant and tests refrigerant for purity internal on the ACS 663 RI external through the USB port on the ACS 663 function disabled on ACS 653 Transducers include 1 Low side Pressure LSP measures the pressure in the low side of the vehicle A C system 2 Accumulator Pressure AP measures the...

Страница 70: ...3 CB1 CB2 7 PS3 J7 J3 P13 J8 P17 J2 J1 P19 6 1 V ADJ J1 J2 P2 P2 P1 P1 P2 P1 P3 Figure 3 4 Electrical Connections Sheet 1 of 4 NOTE Internal refrigerant indentifier is included on ACS 663 RI unit only POWER SUPPLY CONTROL BOARD POWER BOARD BRN BLU BLU BLU BRN BRN GRN YEL GRN YEL BRN Internal Refrigerant Identifier Door Switch Power Socket Circuit Breaker Main Switch ...

Страница 71: ...8 P17 J2 P7 P11 P18 J1 J6 J5 P19 P1 P5 P2 NOTE Air Flow Sensor AF is included on ACS 663 unit only Internal refrigerant indentifier ID is included on ACS 663 RI unit only LOW SIDE PRESSURE TRANSDUCER LSP ISV TANK TEMPERATURE SENSOR TT ISV TANK PRESSURE TRANSDUCER TP ACCUMULATOR PRESSURE TRANSDUCER AP CONTROL BOARD OIL DRAIN LOAD CELL REFRIGERANT IDENTIFIER ID SCALE ASSEMBLY AIR FLOW SENSOR AF ...

Страница 72: ...ly Figure 3 4 Electrical Connections Sheet 3 of 4 POWER BOARD MAIN MANIFOLD INJECTION MANIFOLD ISV S3 Oil drain S4 Low side inlet S5 High side inlet S6 High side charge S7 Low side charge S8 Recycle S9 Vacuum S11 Recover S12 Deep recover S13 Oil return S17 Identifier High pressure switch S15 Dye S14 Oil inject 2 POE S2 Oil inject 1 PAG S22 Tank liquid S1 Air purge BRN VIO WHT WHT VIO YEL YEL BLU B...

Страница 73: ...ctrical Figure 3 4 Electrical Connections Sheet 4 of 4 ss01907 P3 P1 P2 P4 P2 GND P6 P8 P12 P3 P2 P9 P10 J7 J3 P15 P13 J8 P17 J2 P7 P11 P18 J1 P19 P8 P5 P9 P1 P7 J1 P4 P3 P6 P2 P4 P3 P1 GND PRINTER ASSEMBLY if present VACUUM PUMP BRN BLU FAN COMPRESSOR CONTROL BOARD POWER BOARD ...

Страница 74: ...sting Power Board 1 Disconnect unit from the power source 2 Open the service rear door 3 Remove the rear cover above the service door by pushing it up and extract it by pulling it out 4 Remove the cover from power box 5 Disconnect all wires from power board 6 Remove screws securing power board in place and remove power board Install Replacement Power Board 1 Install new power board and secure in p...

Страница 75: ...ion Install Replacement Control Board NOTE All control boards are shipped from the factory without any software on board Service centers must follow these installation procedures to set the board and get unit ready to use 1 Attach the display and keypad ribbon cables to the control board 2 Connect wires as shown in Figure 3 6 3 Close and fix the front plastic dashboard with 8 screws 4 Screw back t...

Страница 76: ...Unit ask to RESET the board erasing all the data and calibrations stored press YES and please wait After that service routine starts with required settings 14 Select Languages and confirm 15 SelectAC ACS model unit require the input 2 times and confirm 16 Set time date and confirm 17 Set serial number unit require the input 2 times Take the one in the unit data plate and confirm 18 Perform air flo...

Страница 77: ...ation of the fan blades 6 Disconnect the FAN connectors and fan ground connector from the fan assembly 7 Remove the fan assembly and then the fan grid 8 Install the fan grid on the replacement fan 9 Fasten the fan ground connector to the ground screw on the replacement fan body 10 With the fan blades properly oriented as noted in step 5 install the replacement fan assembly by securing it to the la...

Страница 78: ... securing the air flow sensor to the fan assembly 5 Disconnect the connector from the air flow sensor unit inner view see Figure 3 9 6 Loosen 2 screws outside the frame to move the fan assembly 7 Remove the air flow sensor 8 Install the replacement air flow sensor unit outside view see Figure 3 9 by securing it to the fan assembly with two nuts 9 Connect the connector to the air flow sensor unit i...

Страница 79: ...ge solenoid tank liquid solenoid and pressure transducer wires 12 Reconnect liquid and vapor hoses to tank 13 Secure the tank to the scale with two bolts 14 Reinstall the plastic frontal cover 15 Attach the outside high red and low side blue service hoses Tighten at 7 9 Nm torque 16 Perform a functional test check for leaks Replacement Scale Assembly WARNING Disconnecttheunitfrom the power source ...

Страница 80: ...er block internal side of the panel and outside the panel see Figure 3 11 7 Remove the load cell Installing the Load Cell 1 Connect the new load cell to the adapter block and secure in place with screws arrow going down see picture 2 Be sure adapter or load cell don t toching the external frame 3 Connect the load cell wire harness to the control board 4 Close and fix the front plastic dashboard wi...

Страница 81: ...ury WARNING Use extreme caution when disconnecting hoses Pressurized refrigerant may be present in hoses Point hoses away from you and anyone nearby 1 Clear service hoses and remove them 2 Switch off the machine 3 Remove the 3 screws 1 either from left and right side of the machine and the 2 screws 2 underneath the frontal panel see Figure 3 12 4 Remove the front plastic cover 5 Open the service r...

Страница 82: ...tion and check if identifier field shown the produce name and firmware 24 Test the identifier with a charge in service hose and recovery 7 Disconnect USB cable power cable and sample hose from refrigerant identifier 4 8 Unscrew the refrigerant identifier 4 by 2 screws 3 9 Replace the refrigerant identifier 4 and sample hose if needed 10 Fix the refrigerant identifier 4 by 2 screws 3 taking care th...

Страница 83: ...and Mechanical System Repair 86 Replacement Compressor 86 Replacement Vacuum Pump 88 Replacement ISV Assembly 90 Replacement Main Manifold 91 Replacement Injection Manifold 93 Replacement Flush Manifold 94 Repairing or Replacing a Solenoid 95 Replacing Check Valve 96 Component Application Charts 97 Flow Diagrams 99 Tank Fill 99 Low side Clearing 100 Refrigerant Identification 101 Recovery 102 Deep...

Страница 84: ...his manual Vacuum Pump The vacuum pump is used in this unit for the recovery and vacuum processes For vacuum pump specifications see Unit Specifications chapter of this manual Internal Storage Vessel ISV The ISV stores the refrigerant from the vehicle A C system and from the external refrigerant source tank Sensors solenoids and transducers on the ISV include Air Purge S1 Tank liquid S22 ISV Press...

Страница 85: ...and POE Solenoid S14 and as the dye injection point through Dye Inject Solenoid S15 Flush Manifold This assembly serves as the attachment ports for the high and low side service hoses Oil Drain Bottle This bottle provides a reservoir for used oil and must be drained when the user is instructed to do so by the control panel Operators should drain this bottle prior to each use of the unit to make su...

Страница 86: ...compressor WARNING There may be pressure in the copper line 4 Remove the compressor mounting nuts and washers 5 Disconnect the hoses from the compressor 6 Disconnect the compressor pigtail from the COMP connector on the main harness 7 Remove the compressor from the unit CAUTION To prevent personal injury use caution when removing the compressor The capacitor may still be energized Installing Repla...

Страница 87: ...1 04 08 Robert Bosch GmbH 87 Plumbing and Mechanical Figure 4 1 Compressor Interconnection Diagram NOTES 1 Apply Loctite 222 to equivalent to threads 2 Torque hose fittings to 8 5 0 5Nm ss01942 MAIN MANIFOLD ASSEMBLY COMPRESSOR OIL DRAIN ASSEMBLY ...

Страница 88: ...e two plastic lines from the vacuum pump 6 Remove the four bolts fastening the vacuum pump to the pump shelf 7 Disconnect the vacuum PUMP connector from the main harness 8 Remove the vacuum pump from the unit Installing Replacement Vacuum Pump 1 Place the vacuum pump into the unit 2 Secure the vacuum pump to the unit with four screws 3 Connect the electrical connector PUMP from the vacuum pump to ...

Страница 89: ...h GmbH 89 Plumbing and Mechanical ss01943 Figure 4 3 Plumbing Interconnection Diagram Main Manifold Side View ISV Assembly Vacuum pump High side gauge Low side gauge Liquid Vapor Main Manifold Top View Injection Manifold Reference Only Flush Manifold Reference Only ...

Страница 90: ...lue service hoses Tighten at 7 9 Nm torque Replacement ISV Assembly WARNING Disconnecttheunitfrom the power source before beginning service work Incorrect use or connections can cause electrical shock WARNING Wear safety goggles when working with refrigerants Refrigerants can cause eye injury WARNING Use extreme caution when disconnecting hoses Pressurized refrigerant may be present in hoses Point...

Страница 91: ...ifold is being repaired refer to the Repairing or Replacing a Solenoid or Replacing Check Valve as needed When installing hoses solenoids and check valves replace the O rings and use thread sealant where necessary Removing Main Manifold 1 Clear service hoses and remove them 2 Disconnect unit from the power source 3 Remove the front plastic cover 4 Open the service rear door 5 Remove the rear cover...

Страница 92: ... Side Charge Solenoid S6 Low Side Charge Solenoid S7 Vacuum Solenoid S9 Identifier Solenoid S17 Recycle Solenoid S8 Deep Recover Solenoid S12 Main Manifold Assembly Top View Injection Manifold Assembly PAG Solenoid S2 Dye Solenoid S15 POE Solenoid S14 4psi Relief Check Valve for Vacuum Pump Low Side Pressure Transducer LSP Oil Drain Solenoid S3 Main Manifold Assembly Side View ISV Assembly Side Vi...

Страница 93: ... unit from the power source 3 Remove the front plastic cover 4 Open the service rear door 5 Remove the rear cover above the service door by pushing it up and extract it by pulling it out 6 Disconnect all hoses from the injection manifold 7 Disconnect the wires from the injection manifold solenoids 8 Remove the two screws securing the injection manifold to the unit 9 Remove the injection manifold f...

Страница 94: ...s and remove them 2 Disconnect unit from the power source 3 Remove the front plastic cover 4 Open the service rear door 5 Remove the rear cover above the service door by pushing it up and extract it by pulling it out 6 Remove the two screws securing the flush manifold to the unit 7 Remove the flush manifold from the unit Installing the Flush Manifold 1 Install the flush manifold and secure with tw...

Страница 95: ...as been remove a special tool 14 mm stud remover has to be used to dismount the plunger only for new solenoid valves p n SP00101437 8 Remove the solenoid assembly 9 Check the manifold block for any debris before installing a repaired or replacement solenoid Installing Solenoid 1 Lubricate the O rings and threads on the new solenoid assembly 2 Install the repaired or replacement solenoid assembly a...

Страница 96: ...the O rings on the new check valve 2 Install the new check valve and hand tighten 3 Torque the check valve to 8 9 Nm 70 80 in lb 4 Insert the rear cover so that the 4 holes on the sides the cover fit into the 4 clips on the machine Push down to hook the rear cover 5 Close the service rear door 6 Reinstall the plastic frontal cover 7 Attach the outside high red and low side blue service hoses Tight...

Страница 97: ... the compressor and recycle solenoid cycle to build tank pressure COMPONENT APPLICATION CHARTS Manifold Component Application Chart ACS 653 ACS 663 RI and ACS 663 Function Component Tank Fill Low side Clearing Refrigerant Identification Recover Deep Recover Oil Drain Vacuum Vacuum Leak Test Air Purge Oil Inject 1 PAG Oil Inject 2 POE UV Dye Inject Pre Charge Charge Recycle Power Charge Hose Flush ...

Страница 98: ... Identification for ACS 663 RI only 4 9 Recover 4 10 Deep Recover 4 11 Oil Drain 4 12 Vacuum 4 13 Vacuum Leak Test 4 14 Air Purge 4 15 Oil Inject 1 PAG 4 16 Oil Inject 2 POE 4 17 UV Dye Inject 4 18 Pre charge for R1234yf only if enabled 4 19 Charge 4 20 Recycle Power charge 4 21 Hose Flush 4 22 Periodic leak test for R1234yf only 4 23 Fluid Flow Diagram Locations ...

Страница 99: ... Drier High Pressure Cutout Swtich Main Manifold Pump Exhaust Check Valve Oil Return Solenoid LS Charge Solenoid LS Charge Check Valve HS Charge Solenoid HS Charge Check Valve Recycle Solenoid Recover Check Valve Recover Solenoid Heat Exchanger System Oil Separator Compressor Oil Separator LS Inlet Solenoid HS Inlet Solenoid Vacuum Solenoid Oil Inject 1 Solenoid Oil Inject 1 Check Valve Oil Drain ...

Страница 100: ...id LS Charge Solenoid LS Charge Check Valve HS Charge Solenoid HS Charge Check Valve Recycle Solenoid Recover Check Valve Recover Solenoid Heat Exchanger System Oil Separator Compressor Oil Separator LS Inlet Solenoid HS Inlet Solenoid Vacuum Solenoid Oil Inject 1 Solenoid Oil Inject 1 Check Valve Oil Drain Solenoid Service Port ID Orifice Refrigerant Identifier RI Filter Oil Inject 2 Solenoid Oil...

Страница 101: ...t least two more times Low Side Service Hose Vacuum Pump Compressor Oil 1 Inject Bottle Oil Drain Bottle High Side Service Hose Injection Manifold Accumulator Transducer Deep Recover Solenoid HS Gauge Vacuum Pump Exhaust Filter Drier High Pressure Cutout Swtich Main Manifold Pump Exhaust Check Valve Oil Return Solenoid LS Charge Solenoid LS Charge Check Valve HS Charge Solenoid HS Charge Check Val...

Страница 102: ... Swtich Main Manifold Pump Exhaust Check Valve Oil Return Solenoid LS Charge Solenoid LS Charge Check Valve HS Charge Solenoid HS Charge Check Valve Recycle Solenoid Recover Check Valve Recover Solenoid Heat Exchanger System Oil Separator Compressor Oil Separator LS Inlet Solenoid HS Inlet Solenoid Vacuum Solenoid Oil Inject 1 Solenoid Oil Inject 1 Check Valve Oil Drain Solenoid Service Port ID Or...

Страница 103: ...ier High Pressure Cutout Swtich Main Manifold Pump Exhaust Check Valve Oil Return Solenoid LS Charge Solenoid LS Charge Check Valve HS Charge Solenoid HS Charge Check Valve Recycle Solenoid Recover Check Valve Recover Solenoid Heat Exchanger System Oil Separator Compressor Oil Separator LS Inlet Solenoid HS Inlet Solenoid Vacuum Solenoid Oil Inject 1 Solenoid Oil Inject 1 Check Valve Oil Drain Sol...

Страница 104: ...Valve Oil Return Solenoid LS Charge Solenoid LS Charge Check Valve HS Charge Solenoid HS Charge Check Valve Recycle Solenoid Recover Check Valve Recover Solenoid Heat Exchanger System Oil Separator Compressor Oil Separator LS Inlet Solenoid HS Inlet Solenoid Vacuum Solenoid Oil Inject 1 Solenoid Oil Inject 1 Check Valve Oil Drain Solenoid Service Port ID Orifice Refrigerant Identifier RI Filter Oi...

Страница 105: ...old Pump Exhaust Check Valve Oil Return Solenoid LS Charge Solenoid LS Charge Check Valve HS Charge Solenoid HS Charge Check Valve Recycle Solenoid Recover Check Valve Recover Solenoid Heat Exchanger System Oil Separator Compressor Oil Separator LS Inlet Solenoid HS Inlet Solenoid Vacuum Solenoid Oil Inject 1 Solenoid Oil Inject 1 Check Valve Oil Drain Solenoid Service Port ID Orifice Refrigerant ...

Страница 106: ...fold Pump Exhaust Check Valve Oil Return Solenoid LS Charge Solenoid LS Charge Check Valve HS Charge Solenoid HS Charge Check Valve Recycle Solenoid Recover Check Valve Recover Solenoid Heat Exchanger System Oil Separator Compressor Oil Separator LS Inlet Solenoid HS Inlet Solenoid Vacuum Solenoid Oil Inject 1 Solenoid Oil Inject 1 Check Valve Oil Drain Solenoid Service Port ID Orifice Refrigerant...

Страница 107: ... Oil Return Solenoid LS Charge Solenoid LS Charge Check Valve HS Charge Solenoid HS Charge Check Valve Recycle Solenoid Recover Check Valve Recover Solenoid Heat Exchanger System Oil Separator Compressor Oil Separator LS Inlet Solenoid HS Inlet Solenoid Vacuum Solenoid Oil Inject 1 Solenoid Oil Inject 1 Check Valve Oil Drain Solenoid Service Port Low Side Storage Port High Side Storage Port ID Ori...

Страница 108: ...uum Pump Exhaust Filter Drier High Pressure Cutout Swtich Main Manifold Pump Exhaust Check Valve Oil Return Solenoid LS Charge Solenoid LS Charge Check Valve HS Charge Solenoid HS Charge Check Valve Recycle Solenoid Recover Check Valve Recover Solenoid Heat Exchanger System Oil Separator Compressor Oil Separator LS Inlet Solenoid HS Inlet Solenoid Vacuum Solenoid Oil Inject 1 Solenoid Oil Inject 1...

Страница 109: ...uum Pump Exhaust Filter Drier High Pressure Cutout Swtich Main Manifold Pump Exhaust Check Valve Oil Return Solenoid LS Charge Solenoid LS Charge Check Valve HS Charge Solenoid HS Charge Check Valve Recycle Solenoid Recover Check Valve Recover Solenoid Heat Exchanger System Oil Separator Compressor Oil Separator LS Inlet Solenoid HS Inlet Solenoid Vacuum Solenoid Oil Inject 1 Solenoid Oil Inject 1...

Страница 110: ...d Pump Exhaust Check Valve Oil Return Solenoid LS Charge Solenoid LS Charge Check Valve HS Charge Solenoid HS Charge Check Valve Recycle Solenoid Recover Check Valve Recover Solenoid Heat Exchanger System Oil Separator Compressor Oil Separator LS Inlet Solenoid HS Inlet Solenoid Vacuum Solenoid Oil Inject 1 Solenoid Oil Inject 1 Check Valve Oil Drain Solenoid Service Port ID Orifice Refrigerant Id...

Страница 111: ... Valve Oil Return Solenoid LS Charge Solenoid LS Charge Check Valve HS Charge Solenoid HS Charge Check Valve Recycle Solenoid Recover Check Valve Recover Solenoid Heat Exchanger System Oil Separator Compressor Oil Separator LS Inlet Solenoid HS Inlet Solenoid Vacuum Solenoid Oil Inject 1 Solenoid Oil Inject 1 Check Valve Oil Drain Solenoid Service Port ID Orifice Refrigerant Identifier RI Filter O...

Страница 112: ...Manifold Pump Exhaust Check Valve Oil Return Solenoid LS Charge Solenoid LS Charge Check Valve HS Charge Solenoid HS Charge Check Valve Recycle Solenoid Recover Check Valve Recover Solenoid Heat Exchanger System Oil Separator Compressor Oil Separator LS Inlet Solenoid HS Inlet Solenoid Vacuum Solenoid Oil Inject 1 Solenoid Oil Inject 1 Check Valve Oil Drain Solenoid Service Port ID Orifice Refrige...

Страница 113: ... LS Charge Solenoid LS Charge Check Valve HS Charge Solenoid HS Charge Check Valve Recycle Solenoid Recover Check Valve Recover Solenoid Heat Exchanger System Oil Separator Compressor Oil Separator LS Inlet Solenoid HS Inlet Solenoid Vacuum Solenoid Oil Inject 1 Solenoid Oil Inject 1 Check Valve Oil Drain Solenoid Service Port ID Orifice Refrigerant Identifier RI Filter Oil Inject 2 Solenoid Oil I...

Страница 114: ... HS Gauge Vacuum Pump Exhaust Filter Drier High Pressure Cutout Swtich Main Manifold Pump Exhaust Check Valve Oil Return Solenoid LS Charge Solenoid LS Charge Check Valve HS Charge Solenoid HS Charge Check Valve Recycle Solenoid Recover Check Valve Recover Solenoid Heat Exchanger System Oil Separator Compressor Oil Separator LS Inlet Solenoid HS Inlet Solenoid Vacuum Solenoid Oil Inject 1 Solenoid...

Страница 115: ...ld Pump Exhaust Check Valve Oil Return Solenoid LS Charge Solenoid LS Charge Check Valve HS Charge Solenoid HS Charge Check Valve Recycle Solenoid Recover Check Valve Recover Solenoid Heat Exchanger System Oil Separator Compressor Oil Separator LS Inlet Solenoid HS Inlet Solenoid Vacuum Solenoid Oil Inject 1 Solenoid Oil Inject 1 Check Valve Oil Drain Solenoid Service Port ID Orifice Refrigerant I...

Страница 116: ... and recharging DISPLAY CONTROL BOARD Front display panel and main control of the unit FAN Keeps the compressor from exceeding its normal operating temperature The fan runs whenever the power switch is turned on FILTER DRYER SPIN ON Used to remove moisture and particles from refrigerant Must be changed every time 150 kg R1234yf 68 kg R134a of refrigerant is recovered GAUGE HIGH SIDE Monitor high s...

Страница 117: ...ver Vacuum and Leak Check process SOLENOID S6 HIGH SIDE CHARGE When energized allows refrigerant from ISV to enter high side of system being serviced SOLENOID S7 LOW SIDE CHARGE When energized allows refrigerant from ISV to enter low side of system being serviced SOLENOID S8 RECYCLE Whenenergized increases tank pressure to assist the charging function SOLENOID S9 VACUUM When energized allows a vac...

Страница 118: ...pressor and separates the refrigerant oil TANK TEMPERATURE SENSOR Monitors the temperature inside the ISV TRANSDUCER ACCUMULATOR SYSTEM OIL SEPARATOR Measures the pressure within the system oil separator TRANSDUCER AIR PURGE Measures the pressure within the ISV TRANSDUCER LOW SIDE Measures the pressure of incoming refrigerant from the A C system Pressure readings are then relayed to the control bo...

Страница 119: ...ACS 653 ACS 663 Service Manual SP00D00624 2021 04 08 Robert Bosch GmbH 119 Notes Notes ...

Страница 120: ...Robert Bosch GmbH Automotive Service Solutions Franz Oechsle Straße 4 73207 Plochingen DEUTSCHLAND www bosch com bosch prueftechnik bosch com SP00D00624 2021 04 08 ...

Отзывы: