


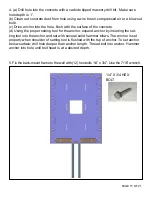


4. (a) Drill hole into the concrete with a carbide tipped masonry drill bit . Make sure
hole depth is 1”.
(b) Clean out concrete dust from hole using a wire brush, compressed air or a blow out
bulb.
(c) Drive anchor into the hole, flush with the surface of the concrete.
(d) Using the proper setting tool for the anchor, expand anchor by inserting the set-
ting tool into the anchor and set with several solid hammer blows. The anchor is set
properly when shoulder of setting tool is flushed with the top of anchor. To set anchor
below surface; drill hole deeper than anchor length. Thread bolt into anchor. Hammer
anchor into hole until bolt head is at a desired depth.
5. Fix the back-mount frame to the wall with (12) hex bolts 1/4” x 3/4”. Use the 7/16” wrench.
1/4” X 3/4 HEX
BOLT
PAGE 15 OF 21
Содержание Inmate QX7
Страница 1: ...QX7 Inmate Mounting Instructions VER 4 January 25 2006...
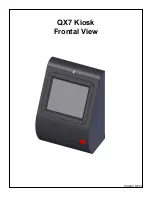
Страница 3: ...QX7 Kiosk Frontal View PAGE 3 OF 21...
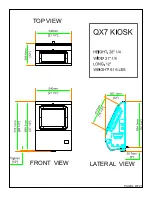
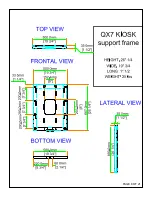
Страница 4: ...TOP VIEW FRONT VIEW LATERAL VIEW PAGE 4 OF 21...
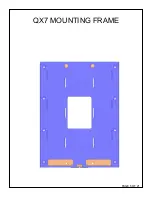
Страница 5: ...QX7 MOUNTING FRAME PAGE 5 OF 21...
Страница 6: ...PAGE 6 OF 21...
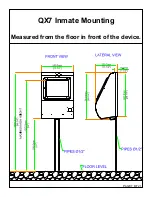
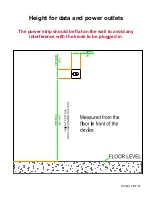
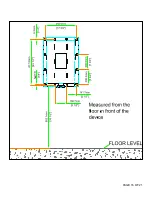
Страница 7: ...QX7 Inmate Mounting Measured from the oor in front of the device PAGE 7 OF 21...
Страница 8: ...PAGE 8 OF 21...
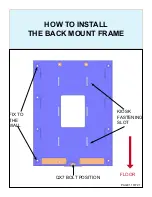
Страница 11: ...HOW TO INSTALL THE BACK MOUNT FRAME PAGE 11 OF 21 FIX TO THE WALL KIOSK FASTENING SLOT QX7 BOLT POSITION FLOOR...
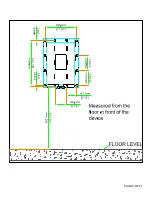
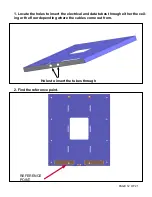
Страница 13: ...PAGE 13 OF 21 REFERENCE POINT...
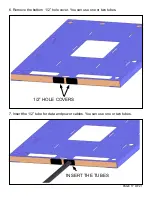
Страница 16: ...PAGE 16 OF 21...
Страница 18: ...8 When the nails are tted on the back mount frame push down on the QX7 kiosk PAGE 18 OF 21...
Страница 19: ...PAGE 19 OF 21...
Страница 21: ...PAGE 17 OF 21 11 Lock the kiosk with the padlock 12 Close the lock PAGE 21 OF 21...


