


EN
29
29
device as customised entries such as company
name and address. For this purpose connect the
Glass
Buddy
to your PC with the USB cable (see
point 5).
DELETE DATA
If the arrows
> <
are in front of the menu item
Delete data,
you can delete all the data entries by
pressing . You will be asked if you really want to
delete all measuring results.
By pressing again, all the saved measuring
results will be deleted. Press to return to the
menu without deleting the data.
SHOW DATA
If the arrows
> <
are in front of the menu item
Show data,
you can display a list of your previously
saved measurements by pressing . Use the arrow
>
to select the measurement result of your choice
and display it by pressing .
08 Glass Analysis with the
Glass
Buddy
The glass must always be clean and dry. Even a
fingerprint can cause unwanted refraction and con-
sequently incorrect measurement results.
Glass that is laid flat should always be placed on a
dark, non-reflecting base (e.g. a black felt cloth) for
analysis, as incorrect results can occur on reflective
bases.
Already installed insulated glass panes should be
preferably analysed in the marginal areas.
Switch on the Glass
Buddy
, select the glass type
(see point 5) and place it on top of the glass surface
in a way that all plastic feet touch the glass and
keep the device from slipping.
Press
. The light turns off and
Measuring
-- please wait ...
is shown on the display of the
Glass
Buddy
.
Note:
The Glass
Buddy
should not be moved during
the measuring procedure as this could lead to inac-
curate measuring results.
After 1-2 seconds, the light will turn on again and
you can remove the Glass
Buddy
from the glass.
The measurement result is shown on the display.
Use
to scroll through the measuring results.
After the rounded individual measurements, the
single values (accurate to 0.1 mm) are displayed.
Afterwards the structure of the glass pane is
shown graphically. The graphical display shows
the structure from left to right as analysed by the
Glass
Buddy
. The measuring results are shown in a
scrolling display.
The measuring result can be rejected with .
When pressing , you can choose between the
following options:
Save
If the arrows
> <
are moved to the menu item
Save
,
the current measuring result can be saved in the
Glass
Buddy
by pressing . The result is saved
under the number shown in the top left of the
Glass
Buddy
display with the result.
Reject
If the arrows
> <
are moved to the menu item
Reject,
you can delete the current measuring result
by pressing . You can always directly delete the
result by pressing .
09 Reading the Measurement
Results
After the measuring procedure described above, the
Glass
Buddy
shows the result on the illuminated
display. You can page up and down the measuring
results row-by row with the
keys.
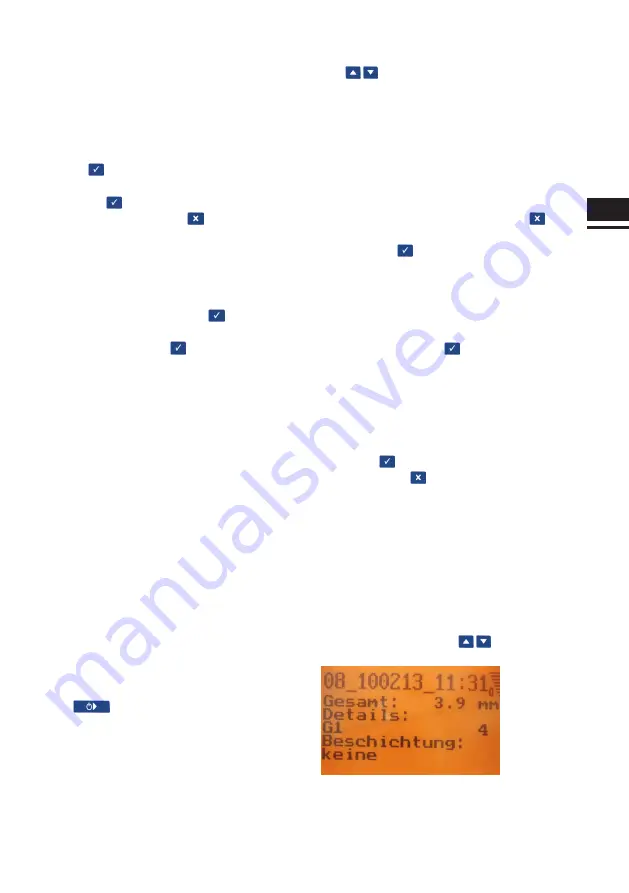
Row 1
In the first row, the Glass
Buddy
shows the position
under which the measuring result is saved (here
position 08; there are a total of 99 memory slots
available). After this you can see the date and the
Содержание GlassBuddy Basic
Страница 1: ...GlassBuddy Plus GlassBuddy Basic...
Страница 2: ......
Страница 3: ...EN Bedienungsanleitung Seiten 4 18 Operating Instructions Pages 20 34 DE...
Страница 19: ...DE 19...


