


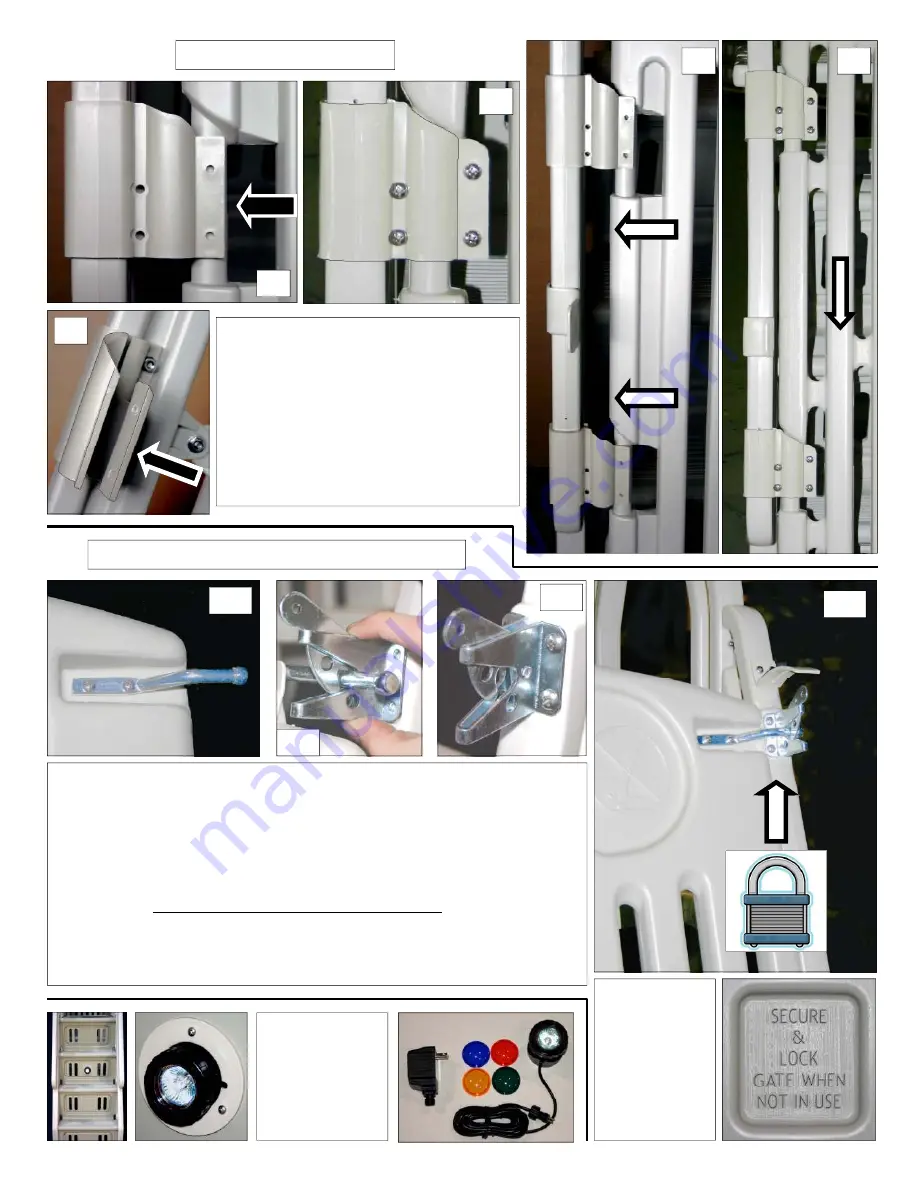
Before attaching striker bar & latch, be sure gate is closed and pushed
DOWN
within
hinge sets (see Detail 9.5 above). Attach striker bar to gate (see Detail 10.1). The striker
bar is to be outside of gate, angled appropriately. Secure with 3/16 x 3/4" bolts,
washers inside & nuts. Tighten hardware. With gate closed, down entirely, & striker bar
in latch; position the latch in the center of the handrail and mark holes with pencil. Make
certain striker bar is centered in latch correctly & latch is closed (see Detail 10.2). Pre-
drill 1/8" holes & secure using #10 x 3/4" screws (see Detail 10.3).
DO NOT
over
tighten screws as plastic may strip. Test gate to be sure it operates properly - self-closes
and self-latches.
LOCK GATE WHEN POOL IS NOT IN USE (10.4) - LOCK NOT
INCLUDED.
Proceed to GATE LATCH SHIELD installation (following page).
BE SURE
TO REVIEW ALL INSTRUCTIONS FOR PROPER USE AND SAFETY WITH ALL
INDIVIDUALS USING THIS POOL ENTRY SYSTEM. ALWAYS SWIM SAFELY
AND REMEMBER, NOTHING REPLACES PARENTAL SUPERVISION
Gently pry open gate hinge sets & fit gate be-
tween the inner & outer hinge parts (see Detail
9.1 - 9.5). The “round” posts of the gate will fit
through the gap of the hinges (outlined in details
above). Secure gate hinges using the remaining
1/4 x 3/4 bolts, washers & nuts. Note that the
center holes only require the bolt & nut (no
washers will fit). Use washers on both sides for
the remaining hardware positions (9.3). Tighten
all hardware & make certain gate opens and
closes smoothly.
Step 9: FIT & SECURE GATE
9.4
9.2
9.1
Step 10: ATTACH GATE STRIKER BAR & LATCH
ADD AN OPTIONAL
IN-POOL LIGHT TO
YOUR MODEL AF
POOL ENTRY.
ILLUMINATE AT
NIGHT FOR SAFE
ENTRY & EXIT OF
YOUR POOL
10.1
10.2
10.3
9.5
10.4
OBEY
ALL
SAFETY
SIGNS
9.3


