background image

PacketShaper 12000 Series Maintenance Guide

13

PS12000 LAN Expansion Module

This section describes how to install upgrade/replacement LAN expansion modules (LEM) for 
the PacketShaper 12000 Series appliance.

The PacketShaper 12000 Series appliance is equipped with two PCI slots on a riser card: the 
LEM (LAN expansion module) slot and the main slot. The LEM supports full-height PCI-E 
expansion cards; while the main slot supports a low-profile PCI-E card, which accommodates 
the included dual-port (single bridge) Ethernet Gigabit copper card. You can replace this card 
with an optional LEM, depending on your deployment requirements.

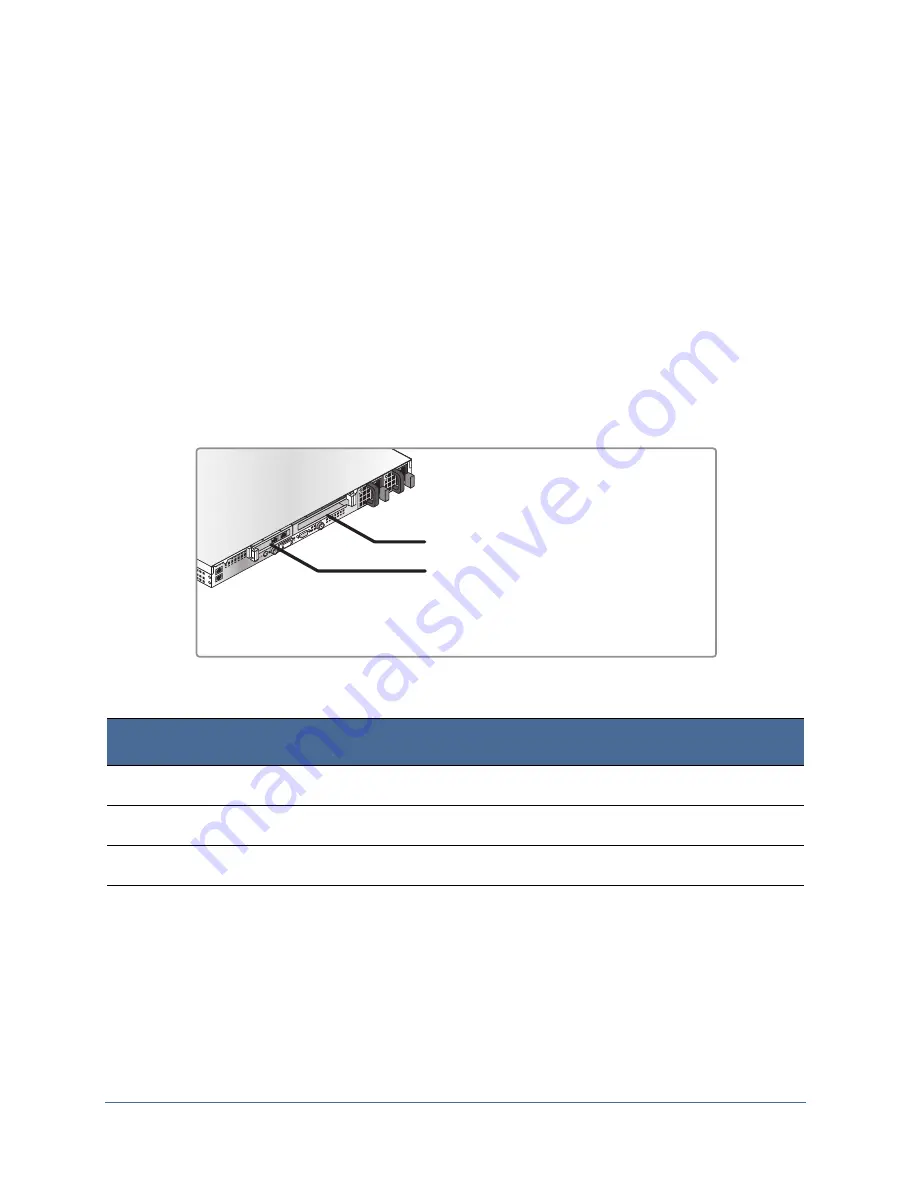
The diagram below shows the location of the expansion slots: 

Pre-Installation Checklist

Item

Description

Tools Required

Phillips head screwdriver

Components Supplied

Upgrade / replacement network card

Safety Notices

Read “Safety Warnings and Cautions” on page 5 

LEM (LAN Expansion Module) Slot

Main Slot*

*The PS12000 comes equipped with a dual-port (single bridge) 1000BaseT card in the main PCI slot.  

Содержание PacketShaper PS12000 Series

Страница 1: ...B E T A D R A Blue Coat PacketShaper Maintenance and Upgrade Guide PS12000 Series Document Number 231 03152 Rev B 0...

Страница 2: ...d to any electronic medium or other means without the written consent of Blue Coat Systems Inc All right title and interest in and to the Software and documentation are and shall remain the exclusive...

Страница 3: ...EM Card Listing 14 Replacing the LEM Card Bracket Optional 16 Installing a LEM Card 18 Replacing the Main Slot LEM Card 23 Verifying the LEM Installation 27 PS12000 Fan Assembly 29 Pre Installation Ch...

Страница 4: ...4 PacketShaper 12000 Series Maintenance Guide Replacing the Power Supply Unit PSU 42 Verifying Power Supply Replacement 42 PS12000 Front Bezel 43 Pre Installation Checklist 43 Replacing the Bezel 44...

Страница 5: ...If your system uses more than one AC power cord make sure all AC power cords are unplugged before you open the chassis or add or remove any non hot plug components The power supply in this product co...

Страница 6: ...ving access cover s Upon completion of accessing the inside of the product refasten access cover with original screws or fasteners Do not access the inside of the power supply There are no serviceable...

Страница 7: ...tShaper 12000 Series System Diagram The following illustrations show the location of the replaceable components on the Blue Coat PacketShaper 12000 Series appliance 1 System HDD Data HDD Power Supply...

Страница 8: ...located on the front panel of the appliance The rear panel includes the power supply adapter LED which indicates proper functioning of the power supply units and the ID LED that is used to locate the...

Страница 9: ...ts e g a disconnected power cord can also cause a critical fault error see the Alerts panel in the Sky UI for more information Red flickering System errors non fatal faults e g a non critical threshol...

Страница 10: ...unitfailure oroneofthetwo power supply units is not connected to an AC power source Amber flickering Warning event for any of the following conditions high temperature high current high power slow fan...

Страница 11: ...w direct standby feature 2 Inside port 10 100 1000 Base T interface pass through interface 3 Outside port 10 100 1000 Base T interface pass through interface 4 Management port Onboard 10 100 1000 Bas...

Страница 12: ...About This Guide 12 PacketShaper 12000 Series Maintenance Guide...

Страница 13: ...in slot supports a low profile PCI E card which accommodates the included dual port single bridge Ethernet Gigabit copper card You can replace this card with an optional LEM depending on your deployme...

Страница 14: ...E T Copper LEM 1 Bridge The PS12000 comes equipped with this card in the main slot Main slot low profile replaces existing card None LEM PS12000 2GigE SX Dual port module 1000BASE SX Fiber Optic LEM 1...

Страница 15: ...R Dual port module 10GBASE SR Fiber Optic LEM 1 Bridge LEMormainslot usingtheincluded low profile bracket see Replacing the LEM Card Bracket Optional on page 16 for more information Requires PacketWis...

Страница 16: ...me with the full height bracket preinstalled onto the circuit board If you want to install the LEM into main you must first replace the bracket with the optional low profile bracket To replace the ful...

Страница 17: ...Phillips head screws that were removed in the previous step Next If you are installing a full height network card into your appliance see Installing a LEM Card on page 18 If you are installing a low p...

Страница 18: ...pliance and disconnect both power cords Unplug the power cords from the AC power outlet and then from the appliance 2 Remove the rear top cover a Remove the screw on the top cover b Slide and lift the...

Страница 19: ...e PCI riser card assembly a Loosen the thumbscrews b Unlock the release clips c Lift the PCI riser card assembly out of the appliance 4 Unlock the securing tab and remove the dummy expansion slot cove...

Страница 20: ...w card by holding the edges of the card and gently inserting into the LEM slot It might be necessary to lightly rock the LEM card into position Verify that the PCI card has been fully seated and is al...

Страница 21: ...and gently press down until fully seated b Verify that the alignment notch at the front of the riser card is properly aligned and that the blue release clips have locked into place c Tighten the thum...

Страница 22: ...PS12000 LAN Expansion Module 9 Install the appliance cabling a Connect the network cabling as necessary for your deployment b Reconnect the power cords Next VerifythatyouhavecorrectlyinstalledtheLEMca...

Страница 23: ...C power outlet and then from the appliance 2 Remove the rear top cover a Take off the screw on the top cover b Slide and lift the top cover off the appliance by pressing the blue button and sliding th...

Страница 24: ...by opening the securing latch and gently pulling out the card 5 Insert the new card by holding the edges of the card and gently inserting into the main slot It might be necessary to lightly rock the L...

Страница 25: ...efully reinstall the PCI riser card into the chassis a Align the connectors on the riser card with those on the system board and gently press down until fully seated b Verify that the alignment notch...

Страница 26: ...es on the chassis b Slide the cover to the front until the gap closes c Secure the top cover with the screw 9 Install the appliance cabling a Connect the network cabling as necessary for your deployme...

Страница 27: ...Shaper Sky UI navigate to the Info tab and review the information in the Alerts and Settings panel 3 If the card was successfully installed status information about the new adapter NIC ports are displ...

Страница 28: ...28 PacketShaper 12000 Series Maintenance Guide PS12000 LAN Expansion Module...

Страница 29: ...the motherboard the backplane and the disk drives The fan assemblies are numbered from left to right as indicated in the diagram below Note Fan assemblies are not hot swappable power off the appliance...

Страница 30: ...the Alerts panel with either of the following errors Below Lower Critical Above Upper Critical Note Both fan related alerts require fan assembly replacement Replacing the Fan Assembly To replace a fa...

Страница 31: ...r and lifting out of the appliance 4 Remove the defective fan assembly by holding the front and back of the fan assembly and lifting off the system board 5 Install the new fan assembly by matching the...

Страница 32: ...press down into place 7 Replace the rear top cover a Align the top cover along the notches on the chassis b Slide the cover to the front until the gap closes c Secure the top cover with the screw 8 R...

Страница 33: ...een correctly installed and is operational check the status of the device in the PacketShaper Sky UI 1 Log into the PacketShaper 12000 Series appliance 2 From the PacketShaper Sky UI navigate to the I...

Страница 34: ...34 PacketShaper 12000 Series Maintenance Guide PS12000 Fan Assembly...

Страница 35: ...d disk drives will result in system boot failure Take precautions to avoid mixing the HDDs when removed from the chassis The Data disk drive can be replaced without any reconfiguration of the applianc...

Страница 36: ...session b Change directory using the following command cd 9 258 c If you receive errors after issuing the command the data drive might require replacement 2 Check the System hard disk drive necessary...

Страница 37: ...onnect both power cords Unplug the power cords from the AC power outlet and then from the appliance 2 Remove the faulty HDD assembly from the appliance a Unlock the HDD using a flathead screwdriver Do...

Страница 38: ...into the drive bay by pushing the drive body b Snap the locking lever into place c Optional Lock the drive using a flathead screwdriver Do not overtorque the locking mechanism 4 Reinstall the applian...

Страница 39: ...EM Drive Replacement Function Check When the System hard disk drive has been correctly installed the backup configuration file located on the Data disk is automatically installed onto the new System d...

Страница 40: ...40 PacketShaper 12000 Series Maintenance Guide PS12000 Hard Disk Drive...

Страница 41: ...UI navigate to the Info tab Review the information in the Alerts panel 3 If a PSU is no longer running according to specifications or has failed it will be listed in the Alerts panel with the followi...

Страница 42: ...le b towards you 3 Insert the new PSU into the appliance The PSU will click into place 4 Connect a power cord between the new PSU and a power source Verifying Power Supply Replacement To verify that a...

Страница 43: ...nstallation Checklist Item Description Tools Required Phillips head screwdriver Components Supplied Front bezel assembly Plasticbagcontainingastickerforthehardwaremodelidentificationandblanklabels for...

Страница 44: ...rew that secures the top cover b Slide and lift the top cover off the appliance While pressing the blue button slide the top cover towards the rear of the appliance Slide the cover out about an inch a...

Страница 45: ...ining clip pull the retaining clip to the right and lift it out of the appliance b Lift the bracket off the appliance 4 Remove the screws that secure the old bezel into place and remove the existing b...

Страница 46: ...attach the hardware model identification sticker in the recess located at the lower right hand corner of the bezel The sticker is included in the plastic bag that ships with the bezel 6 Reattach the b...

Страница 47: ...intenance Guide 47 PS12000 Front Bezel 7 Replace the covers a Reattach the front cover b Raise the blue locking tabs to lock the front cover in place c Reattach the rear cover and secure the cover wit...

Страница 48: ...48 PacketShaper 12000 Series Maintenance Guide PS12000 Front Bezel...

Страница 49: ......

Страница 50: ...www bluecoat com 231 03152 REV B 0...

Отзывы: