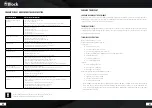
background image

58

59

System settings

Press the „Menu“ button on your remote control or on the device and select the System settings item. In the 
following menu you carry out the following settings:

Internet settings:

In this menu, you can change the settings you have made for your Internet connection, e.g. when you change the 
location. You can also restart the assistant wizard, or manually set up the connection. 

Language:

Select your desired display language for the device.

Default settings:

Selecting and confirming this item resets all settings back to the factory settings. Please use this feature if mas-
sive problem occurs with the receipt of data from the Internet or the general operating software of the device. 
You should also perform this function if you want to resell the device. After running the factory settings, a new 
start requires a restart of the device wizard.

Software Update:

The CVR-10 checks regularly whether there is any update available on the Internet and points it out. You can then 
choose to run the update. You can disable this feature (not recommended), or check the operating software for 
update process.

Setup Wizard:

Selecting and confirming this item starts the setup wizard. All the settings you then make override the old set-
tings. You can also use the setup wizard to update the time settings (summer and winter time) if problems occur 
during the automatic changeover.

Info:

Selecting and confirming this point will show you technical information about the installed software version, 
the manufacturer ID of the device, and the name under which your device appears on the network.

Additional comfort features

Press the „Menu“ button on your remote control or on the device and select „Main menu“. In the following menu 
you can also select „Snooze“ and „Alarm clock“ in addition to the already known signal sources:

Slumber:

Select „Snooze“ on your remote control using the arrow keys and confirm with „Enter“. The „Sleep“ indicator ap-
pears. Use the arrow buttons to set the desired time when the device will automatically switches to standby mode. 
Confirm your selection with „Enter“. Exit this menu by pressing the „Menu“ button again.

Alarm clock:

Select „Alarm clock“ on your remote control using the arrow keys and confirm with „Enter“. The „Alarm“ menu 
appears. You can now set two different alarms. For example, e.g. the first alarm clock. In the next menu, you can 
switch the alarm on and off, set the clock, select between daily, individual days, weekends, etc., the signal source 
with which you want to wake up and adjust the volume. Press the „Back“ button to return to the previous menu. 
The alarm function is now active.

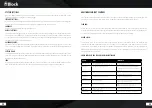
Error Messages and Troubleshooting (Network) 

Message

Cause

Troubleshoot

No connection

1. Incorrect password
2. Correct password, no contact to the router

1. Enter the correct password
2. Disable the Mac filter on the router

Format Error

The file format is not recognized

Make sure the stream is encoded in WMA, MP3, 
or FLAC with no more than 48 KHz. If not, please 
re-encode.

Network Error

Wrong information is received from the network

The data from the server are not readable, possibly 
restart the CVR-10 and the router

Network not 
available

Problems connecting the router

Switch on or restart the router

Network timeout

No response off-line

The selected station is currently not available, 
please change the transmitter

No UPnP found

No UPnP server was found

Make sure your media server is on the same net-
work as your CVR-10 and is powered on.

Not
authorized

Wrong entry with the password or not registered 
with the UPnP server

Enter the correct password.

update failed

Software update failed

Check your network settings, or try again later.

Содержание CVR-10

Страница 1: ...2018 CVR 10 Bedienungsanleitung Manual ...

Страница 2: ...weitere Fragen zu Ihrem Gerät haben nehmen Sie bitte Kontakt zu einem autorisierten Fachhändler oder zu unserem Service Center auf Im Falle eines Defektes der durch Fehlbedienung Missbrauch oder Nicht beachten der Bedienungsanleitung auftritt bitten wir um Verständnis dass die Garantie für diesen Defekt erlischt Ebenfalls kann kei ne Haftung für Folgeschäden übernommen werden Dieses Produkt ist EM...

Страница 3: ...den Benutzer darauf aufmerksam machen dass die Beschreibung die mit dem Gerät ausgeliefert wird wichtige Bedienungs und Wartungshinweise enthält Umgang mit Batterien Batterien können brennbare Stoffe enthalten Bei unsachgemäßer Behandlung können Batterien auslaufen sich stark erhitzen entzünden oder gar explodieren was Schäden für Ihr Gerät und Ihre Gesundheit zur Folge haben könnte Befolgen Sie f...

Страница 4: ...beaufsichtigt elektrische Geräte benutzen Halten Sie auch die Verpackungsfolien von Kindern fern Es besteht Erstickungsgefahr Sicheres Aufstellen Verwenden Sie das Gerät ausschließlich in trockenen Räumen Wenn Sie das Gerät von einer kalten in eine warme Umgebung bringen kann sich im Inneren des Gerätes Feuchtigkeit niederschlagen Warten Sie in diesem Fall etwa zwei bis drei Stunden bevor Sie es i...

Страница 5: ... Durch links rechts Drehung wird die Lautstärke angehoben oder abgesenkt Im Menümodus nach Drücken der Menütaste werden durch Drehung die einzelnen Punkte angewählt und durch Drücken des Mul tifunktionsdrehknopfes aktiviert 8 Fernbedienungs Infrarotsensor 9 Slot in CD Fach 10 Taste Menü Durch Drücken dieser Taste ge langen Sie in das Systemmenü 11 Taste Source Durch wiederholtes Drücken der Taste ...

Страница 6: ...7 Taste Volume Vermindert die Lautstärke 18 Taste Pause 19 Taste Stopp 20 Taste Zurück Im Radio Betrieb sucht das Gerät den nächst tieferen Sender Im CD und Medienabspieler Modus springt das Gerät zum vorherigen Titel 21 Taste Vorwärts Im Radio Betrieb sucht das Gerät den nächst höheren Sender Im CD und Medienabspieler Modus springt das Gerät zum nächsten Titel 22 Taste Schneller Rücklauf Nur für ...

Страница 7: ...en In beiden Fällen sollten beide Geräte anschließend verbunden sein Aufbau des Gerätes Schließen Sie die UKW DAB Wurfantenne am Gerät an Seite 11 Punkt 14 Schließen Sie Ihre Lautsprecher an Sie können entweder die Verschraubung lösen und abisolierte Ka belenden einklemmen oder passende Lautsprecherkabel mit Bananensteckern direkt in die Anschlüsse stecken Seite 11 Punkt 3a und 3b Sie können am CV...

Страница 8: ...ktiviert haben wählen Sie bitte DHCP inaktiv aus In diesem Fall müssen Sie das Netzwerk anschließend selbstständig konfigurieren die dafür geltenden Regeln und Angaben sollten Ihnen bekannt sein Für die erweiterte Konfiguration benö tigen Sie eventuell die MAC Adresse Ihres Block Gerätes Diese finden Sie unter Hauptmenü Systemeinstellungen Interneteinstellungen Einstellungen anzeigen Mac Adresse D...

Страница 9: ...iegenden Kombiantenne für UKW und DAB Empfang als auch mit einer Hausantenne betreiben Ein Anschluss an das Kabelnetz ist zur Zeit nicht möglich da die DAB Sender leider nicht eingespeist werden Das DAB Radio können sie sowohl mit der Fernbedienung Taste DAB Seite 10 Punkt 4 als auch am Gerät durch mehrmaliges Drücken der Taste Source Seite 9 Punkt 5 aktivieren Erstes Einrichten Drücken Sie die Ta...

Страница 10: ...ben hier auch die Möglichkeit nach einem Sender durch Eingabe des Namens zu suchen Sie können neben der Markierung als Favoriten aber auch wie bei der UKW oder DAB Funktion beschrie ben Sender auf den Nummernblock der Fernbedienung speichern Das Radio verfügt über digitale Textfunktionen es werden aktuelle Informationen zum Programm wie z B Titel Genre etc im Display angezeigt Durch ein bis mehrma...

Страница 11: ...ufallswiedergabe Drücken Sie einmalig die Taste RAN Seite 10 Punkt 26 auf Ihrer Fernbedienung um die Zufallswiedergabe zu starten Drücken Sie ein zweites Mal die Taste RAN um die Zufallswiedergabe zu stoppen DER MEDIENSPIELER USB FRONTANSCHLUSS Sie können einen Wechseldatenträger z B USB Stick oder USB Festplatte an dem USB Frontanschluss Ihres CVR 10 anschließen Dieses Speichermedium muss FAT 32 ...

Страница 12: ...Betriebsanleitung Ihres Routers MUSIK STREAMEN Unter dem Streamen von Musik im Heimbereich versteht man das Übertragen von Musikdaten von einem externen Gerät wie einem Computer Tablet PC oder Smartphone an ein Abspielgerät wie z B Ihrem CVR 10 Voraussetzung ist dass diese Geräte sich im selben Netzwerk befinden WLAN oder LAN Wir stellen Ihnen hier kurz für die gängigsten Geräte Streaming Lösungen...

Страница 13: ... folgt vor Drücken Sie die Taste Menü am Gerät für 3 Sekunden das Gerät geht dann in den Lernmodus Im Display erscheint Taste auf Block FB drücken Drücken Sie nun eine Taste auf der Block Fernbedie nung um eine zu übertragende Funktion auszuwählen Im Display erscheint Code von Block FB akzeptiert und kurz danach Bitte Taste Fremd FB drücken Drücken Sie nun die Taste auf der Fremdfernbedienung die ...

Страница 14: ...hpegel Audiosignale in analoger Form Dieser Anschluss ist geeignet für Plattenspieler mit MM System gebräuchlich nicht aber für MC Sys teme selten Bitte ziehen Sie die Bedienungsanleitung des externen Gerätes für den Anschluss zu Rate Bitte schließen Sie ein gegebenenfalls vorhandenes Erdungskabel an den Plattenspieler und den CVR 10 an um ein Brummen zu verhindern Ein geeignetes Plattenspieler Ci...

Страница 15: ...n Drücken Sie auf Ihrer Fernbedienung oder am Gerät die Taste Menü und wählen Sie den Punkt Hauptme nü aus Im folgenden Menü können Sie neben den schon bekannten Signalquellen auch Schlummer und Wecker auswählen Schlummer Wählen Sie Schlummer auf ihrer Fernbedienung mit den Pfeiltasten aus und bestätigen Sie mit Enter Es erscheint die Anzeige Schlummer Aus Mit den Pfeiltasten können Sie nun die ge...

Страница 16: ...rreichbar Versuchen Sie es zu einem späteren Zeitpunkt noch einmal Der Router lässt keinen Anschluss zu da das Gerät noch keine Adresse bekommen hat Starten Sie den Netzwerkassistenten Kontrollieren Sie die Entfernung zwischen Router und dem Gerät Ändern Sie die ausgewählte Verschlüsselungsmethode des Routers Stellen Sie fest ob eine Firewall das Gerät ablehnt Kontrollieren Sie wenn verwendet das ...

Страница 17: ...strictly followed in order to ensure the long term and safe functioning of the pro duct Please take some time to peruse the manual carefully The operating instructions should be retained in a safe place for future reference to be given with a resale Due to software updates or technical developments with third manufactures e g Apps parts of this manual can be updated Every now and then please visit...

Страница 18: ...ople through an electrical shock The exclamation mark shall draw the attention of the user to the fact that the manual delivered together with the device contains important operating and maintenance instructions Handling batteries Batteries may contain flammable substances Improper handling can cause batteries to leak strongly heat ignite or even explode what could damage your device and your heal...

Страница 19: ...m the power socket and remove the aerial cable from the device if you do not use the unit for a long time or when a thunderstorm is approaching The net cable shall not be wrapped around the device during operation nor in touch to hot surfaces Avoid humidity to enter the housing Never touch the device the net cable or the net plug with wet hands There is a risk of electric shock Should an item or l...

Страница 20: ...hanges to CD operation mode 7 Multifunction knob with left right rotation the volume can be raised or lowered Press the menu key on the menu mode the single points are selected by turning and activated by pres sing the multifunction rotary knob 8 Remote control infrared senso 9 CD slot in 10 Menu button by pressure of this key you reach in the system menu 11 Source button by pressing this button r...

Страница 21: ...device searches the previous lower transmitter On CD and media player mode the unit jumps to the previous track 21 Forward button on radio mode the device searches the next higher transmitter On CD and Media Player mode the device jumps to the next track 22 Fast backward button only on CD mode 23 Fast forward button only on CD mode 24 Tone button activates the treble and bass settings To adjust th...

Страница 22: ...ter Alternatively you can also choose skip WPS and subsequently enter the network password WEP or WPA Afterwards in both cases the device should be finally connected Design of the device Connect the FM DAB cable antenna to the device Connect your speakers You can either loose the screw connection and connect the stripped cable end or connect the loudspeakers cables with banana plugs directly into ...

Страница 23: ...should be connected and an Internet connection should exist Connec ted shall appear on the display Should you have disconnected the DHPC function on you router select please DHPC inactive In this case you must configure the Network the rules and specification should be known by now For the configuration you may need the MAC address of your Block device You can find this under Menu System settings ...

Страница 24: ... radio with the enclosed combination aerial for FM and DAB reception as well as with a house antenna A connection to the cable network is not possible at the moment because the DAB transmitters are unfortunately not fed You can activate the DAB radio with the remote control DAB button as well as by pressing repeatedly the Source button Initial Set up Press the DAB button on your remote control It ...

Страница 25: ... You also have the option to search for a transmitter by entering the name Just as described in FM or DAB function other than to Favourites you can also save stations to the remote control s number block The radio disposes of digital text functions up to date information about the program such as title genre etc appears on the display Pressing the Info button on your remote control once or several...

Страница 26: ...aylists or the entire content will be replayed Shuffle When the function is activated tracks are played within a Playlist or the entire content will be replayed according to the random principle The CD player The integrated CD player is equipped with a sturdy CD drive which plays the media CD MP3 CD CD R CD RW and HD CD The CD player can be activated with the CD key on the remote control or by pre...

Страница 27: ...he transfer of music data from an external device such as a computer tablet PC or smartphone to a player such as your CVR 10 The prerequisite is that these devices shall be located in the same network WLAN or LAN We briefly introduce you here to the most common device streaming solution Apple PC Mac OS X The use of the Airplay function of iTunes is not possible with the CVR 10 Nevertheless you can...

Страница 28: ...e learning mode Press on Block FB button will appear on the display Press a button on the remote control to select a function to transfer The following appears on the display Code from Block FB accepted and shortly afterwards Please press external FB key Now press the button on the extern remote control to release the function to be transferred Key code has been transmitted appears on the display ...

Страница 29: ...or of the CVR 10 processes electrical high level audio signals in analogue form This connection is suitable for record players with MM system common but not for MC systems rare For the con nection please consult the operating instruction of the external device To prevent a hum please connect an existing earth cable to the record player and the CVR 10 A suitable disc player cinch cable with groundi...

Страница 30: ...following menu you can also select Snooze and Alarm clock in addition to the already known signal sources Slumber Select Snooze on your remote control using the arrow keys and confirm with Enter The Sleep indicator ap pears Usethearrowbuttonstosetthedesiredtimewhenthedevicewillautomaticallyswitchestostandbymode Confirm your selection with Enter Exit this menu by pressing the Menu button again Alar...

Страница 31: ...possible The network is currently unavailable Please try again later The router does not allow any port since the device is not yet Address Start the network wizard Check the distance between the router and the device Change the selected encryption method of the router Determine whether a firewall rejects the device Check if used the network cable Care and transport Care and cleaning of the applia...

Страница 32: ...www audioblock com Audioblock GmbH Auf der Striepe 3a 27798 Hude Tel 49 0 44 84 920 090 10 E Mail block audioblock com ...

Отзывы: