16
If You Use a TopTier
tm
Brewing Stand:
Blichmann Engineering
tm
offers a utility shelf (10” X 10”) that readily supports two controllers. We also offer a
TopTier
tm
installation kit for installing your Tower permanently to the stand. See fig 14 on page 9.
Controller Operation
The TOWER of POWER
tm
controller uses a digital PID temperature controller to maintain the set temperature
of the liquid returning to the TOP of your mash. Again, it is VITAL that you do NOT put the sensor directly
into the mash. For your HLT it is recommended to install it directly into your tank.
When heat is needed, the controller simultaneously activates an ignition sequence (sparking on the electrode),
turns on the gas flow by opening the gas solenoid valve, and activates an alarm horn letting you know the
burner is about to ignite.
When a flame is established, the ignition system detects a change in resistance in the lead wire and turns off
the sparking, but leaves the gas valve open. If the flame is lost (eg, a gust of wind) it will automatically
reactivate the spark to reignite the flame. If at any time a flame cannot be established within 10 sec it will
stop the ignition trial and will sound an alarm horn.
Warning!
Always make sure that your pot is filled with sufficient liquid before turning on your controller.
Adding heat to an empty pot will cause permanent damage!
Warning!
If you are unable to ignite after 10 sec turn the selector switch to RESET immediately. This will
deactivate the gas valve and ignition sequence. Check fuel tank level, and that all gas valves and regulators
are on. Check that the solenoid valve is installed in the correct direction, and that the ignition and ground
wires are properly installed. At this time you can return the selector switch back to AUTO mode.
Note:
you need to have the selector switch in RESET mode for at least 3 sec to reset the ignition controller.
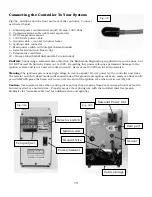
Changing Temperature Setting:
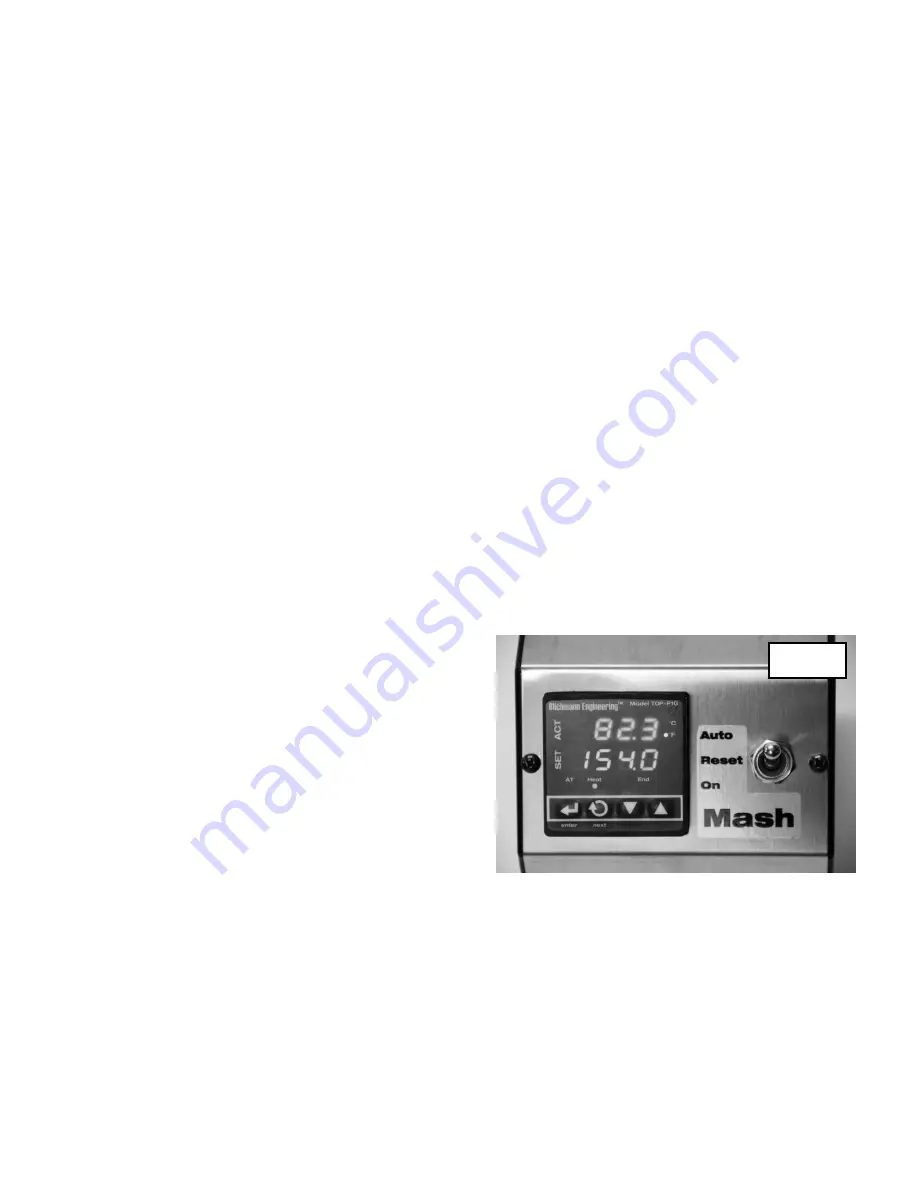
Refer to Fig 30. ACT
will display the sensor temperature. SET will display
your desired temperature. Press the up and down arrows
to increase or decrease the temperature. Leaving the
button depressed will increase/decrease the temperature
rapidly. While changing the SET temperature, the SET
temp display will flash. When you have reached your
desired temperature depress the enter button to accept
the value and the SET value will stop flashing.
Important:
if the SET value is flashing it is NOT
activated. Always press the enter button after changing
the SET point.
Changing Units F/C
– see appendix at the end of this manual
Selector Switch Modes
(ref fig 30)
AUTO
– Use this position to let the PID controller automatically turn your burner on/off
RESET
– Use to reset the ignition system if you are unable to generate a flame within10 sec. (3 sec
reset) This mode can also be used to disable the flame/ignitor if desired.
MANUAL
– Use this mode to override the PID controller and turn on the flame to add heat.
Fig. 30

