background image

4

3

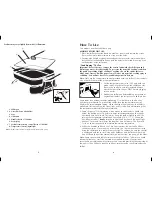
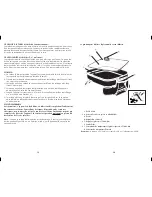
    1.  Skillet pan
  † 2.  Glass lid (Part # SK200C-01)
    3.  Vent
    4.  Lid handle
  † 5.  Handles (Part# 177804-00)
    6.  Probe/plug 
  † 7.  Variable temperature control (Part# 177805-00)
    8.  Temperature control/signal light
Note: † 

indicates consumer replaceable/removable parts

Product may vary slightly from what is illustrated. 

How To Use

This product is for household use only.

ASSEMBLE BEFORE FIRST USE

1.  Place the skillet pan upside down on a table or counter and remove the screws. 

Be sure the metal washers remain in place over the holes.

2.  Position each handle overhanging the edge of the counter for easier assembly so 

that the holes in the handles line up with the holes in the raised “mounting” area 

on the bottom of the skillet pan.

“Conditioning” The Pan

Important: Before first use, remove the control and wash the skillet pan and 

lid in soapy water; dry thoroughly. To preserve the nonstick coating, condition 

the pan by spreading a light coating of cooking oil over the inside surfaces. 

Wipe away excess oil with a paper towel. Do not use nonstick cooking spray to 

condition. You will not have to re-condition again after first use.
Note:

 Only use the temperature control provided with this skillet. Other controls 

may fit but will not provide proper performance.

1.  Set the temperature control to “Off” and push the 

probe firmly into the socket on the skillet pan 

(A)

Be sure the control is securely inserted. Always 

attach the control to the pan FIRST before plugging 

into an outlet.

2.  Preheat the skillet pan before adding any grease or 

vegetable oil unless the recipe says to add fats first.

Some foods do not require skillet preheating. Use the charts in this book as 

a guide for procedures. To preheat the skillet, turn the temperature control 

knob to the recommended setting. When the signal light goes out, the skillet is 

preheated. During cooking, the signal light will cycle on and off indicating that 

the temperature selected is being maintained.
3. Some recipes call for simmering which means to cook foods in liquid just 

below the boiling point. The simmer point varies depending on the type of 

liquid and amount of food. To simmer, bring the food or liquid to a boil by 

turning the temperature control knob to around 350°F (177°C).  When the 

liquid begins to boil, 

slowly

 turn the control knob back until the signal light 

goes out. Cover and simmer for the length of time necessary. The light will 

cycle on and off frequently to maintain the simmer temperature. 

4. While the handles and base “feet” are heat-resistant, do not cook on heat-

sensitive surfaces. Once cooking is complete, you can remove the control to 

bring the skillet pan to a table for easy serving. To remove, be sure the control 

is unplugged and set at Off. Using a pot holder or mitt, hold the Skillet with 

one hand and the pull the temperature control out from the pan with the other.

Note:

 Some counter and table surfaces are sensitive to heat. Take care to avoid 

damaging linoleum, vinyl tile, painted or varnished surfaces. Heat-resistant 

formica and porcelain enamel surfaces are not affected providing the underside of 

the pan is clean. When in doubt, use a heat-resistant pad or hot plate under the 

skillet.

A

Содержание SK200 Series Multi-Cuisine & Deep Dutch

Страница 1: ...ada 1 800 231 9786 Mexico 01 800 714 2503 www prodprotect com applica Multi Cuisine Skillet Sartén eléctrico Poêle à frire Register your product online at www prodprotect com applica for a chance to WIN 100 000 For US residents only Registre su producto por Internet en www prodprotect com applica y tendrá la oportunidad de GANAR 100 000 Solamente para residentes de EE UU Inscrivez votre produit en...

Страница 2: ...g which will only fit into a three prong outlet Do not attempt to defeat this feature Improper connection of the grounding conductor may result in the risk of electric shock Consult a qualified electrician if you are in doubt as to whether the outlet is properly grounded POLARIZED PLUG US Models Only This appliance has a polarized plug one blade is wider than the other To reduce the risk of electr...

Страница 3: ...t pan before adding any grease or vegetable oil unless the recipe says to add fats first Some foods do not require skillet preheating Use the charts in this book as a guide for procedures To preheat the skillet turn the temperature control knob to the recommended setting When the signal light goes out the skillet is preheated During cooking the signal light will cycle on and off indicating that th...

Страница 4: ...Setting Used to keep foods that have been prepared in the skillet at serving temperature for a short period of time Adjust temperature up to keep foods warm for longer periods of time Low Heat 200 F to 250 F 93 C 121 C Use for warming simmering steaming and gentle boiling Some foods are started at higher temperatures then reduced to low heat to finish the cooking process Use for cooking special de...

Страница 5: ...2 3 tablespoons hot bacon fat about 6 177 C or vegetable oil Cook and brown 1 8 32 cm thick turning frequently slices SANDWICHES Grilled Up to 6 No 350 F 6 8 Spread cheese or other favorite filling 177 C between bread slices Lightly spread softened butter or margarine on outside of bread place in COLD skillet Grill each side until browned about 3 4 minutes side SAUSAGE Links or patties No 325 F 15...

Страница 6: ... previsto CONSERVE ESTAS INSTRUCCIONES Este aparato eléctrico es para uso doméstico únicamente ENCHUFE DE TIERRA Sólo en los modelos de Canada Este producto cuenta con un enchufe de tierra que tiene tres contactos No trate de alterar esta medida La conexión inapropiada del conductor de tierra puede resultar en un riesgo de choque eléctrico Si tiene alguna duda consulte con un eléctricista califica...

Страница 7: ...y empuje el contacto con firmeza dentro del enchufe en el sartén A Asegúrese que el control esté bien introducido Siempre conecte PRIMERO el control al sartén antes de enchufar el cable a la toma de corriente 2 Precaliente el sartén antes de añadir la grasa o el aceite vegetal a menos que la receta indique lo contrario Algunos alimentos no requieren que el sartén esté caliente de antemano Use las ...

Страница 8: ...ón con detergente líquido No use ningún tipo de limpiador áspero ni abrasivo ni almohadillas metálicas para no dañar el acabado antiadherente de las superficies Después de lavar el sartén séquelo con especial atención al área del enchufe No utilice almohadillas metálicas para limpiar los contactos eléctricos Gamas de temperaturas Graduación caliente Use esta temperatura para mantener por un corto ...

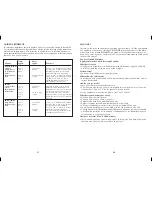
Страница 9: ...Precalentar Aprox Aprox Direcciones JAMON Rebanadas Si 325 F 5 8 Corte el borde con grasa a precocinadas hasta 163 C intervalos de 5 cm 2 para 2 con grosor de evitar que las rebanadas pierdan 1 27cm 1 2 a su forma Fría el jamón por 1 91cm 3 4 ambos costados hasta dorarse HAMBURGUESAS Hasta 10 cada una Si 350 F 12 15 Coloque las hamburguesas en el de 11 kg 1 4 lb 177 C media sartén precalentado Dór...

Страница 10: ...prise murale Pour débrancher l appareil mettre le sélecteur à la position hors tension OFF puis débrancher le cordon de la prise murale Utiliser l appareil seulement aux fins qu il est prévu CONSERVER CES MESURES L appareil est conçu pour une utilisation domestique seulement 17 18 GUIA PARA ASAR Debido a las variaciones en los sartenes y los diferentes cortes de carne y aves es importante usar un ...

Страница 11: ...ence c Lorsqu on utilise un cordon d alimentation amovible ou de rallonge plus long il faut s assurer que 1 la tension nominale du cordon d alimentation amovible ou de rallonge soit au moins égale à celle de l appareil et que 2 lorsque l appareil est de type mis à la terre il faut utiliser un cordon de rallonge mis à la terre à trois broches et 3 le cordon plus long soit placé de sorte qu il ne so...

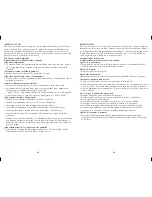
Страница 12: ...ntielle uniquement ASSEMBLAGE AVANT LA PREMIÈRE UTILISATION 1 Déposer la poêle à l envers sur une table ou un comptoir et retirer les vis S assurer que les rondelles métalliques restent en place autour des trous 2 Placer chaque poignée pour qu elle dépasse du bord du comptoir afin d en faciliter l assemblage de sorte que les trous des poignées s alignent sur ceux de la surface élevée de montage du...

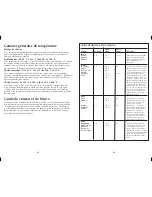
Страница 13: ...réchauffée Faire cuire les filets jusqu à ce qu ils soient dorés de chaque côté Gammes générales de température Réglage de chaleur Pour conserver les aliments préparés dans la poêle à la température de service pour une courte durée Régler la température à la hausse pour conserver les aliments au chaud longtemps Faible chaleur De 93 C à 121 C de 200 F à 250 F Pour réchauffer faire mijoter cuire à l...

Страница 14: ... autre côté POMMES DE TERRE Oui 350 F 25 30 Déposer les tranches dans 1 13 kg 2 1 2 lb 177 C 2 à 3 c à table de gras de environ 6 bacon chaud ou d huile végétale Tranches de chaude Les faire dorer en les 0 32 cm 1 8 po retournant souvent d épaisseur CÔTÊLETTES DE PORC Oui 350 F 10 Retirer la graisse Dorer les avec os 177 C côtelettes en les tournant à jusqu à 10 de Doré l occasion Réduire la 1 27 ...

Страница 15: ...ific legal rights and you may also have other rights that vary from state to state or province to province 27 28 Temp Durée Aliment approx approx Directives Morceau de bœuf à braiser 400 F 30 minutes Verser 1 2 c à table d huile Réchauffer Croupe sans os 204 C dorage la poêle à 204 C 400 F Dorer toute ou extérieur de Doré la viande Égoutter le gras accumulé ronde de la poêle Réduire la température...

Страница 16: ...0 NECESITA AYUDA Para servicio reparaciones o preguntas relacionadas al producto por favor llame gratis al número 800 que aparece en la cubierta de este manual No devuelva el producto al establecimiento de compra No envíe el producto por correo al fabricante ni lo lleve a un centro de servicio También puede consultar el sitio web que aparece en la cubierta de este manual Dos años de garantía limit...

Страница 17: ...ommerce déposée de la société The Black Decker Corporation Towson Maryland É U Copyright 2007 2008 Applica Consumer Products Inc Made in People s Republic of China Printed in People s Republic of China Fabricado en la República Popular de China Impreso en la República Popular de China Fabriqué en République populaire de Chine Imprimé en République populaire de Chine ...

Отзывы: