background image

10

9

•  Trim excess fat from meat and score edges to prevent curling.
•  Brush foods to be broiled with oil and season as desired before broiling.
•  Fish fillets and steaks are delicate and should be broiled on bake pan/drip tray without the  

broiler rack.

•  There is no need to turn fish fillets during broiling.  Carefully turn thick fish steaks midway 

through broiling cycle.

•  If broiler “pops” during broiling, reduce the temperature or lower the food in the oven.

•  Wash bake pan/drip tray and clean inside of oven after each use 

with non-abrasive cleaner and hot soapy water. Too much grease 

accumulation will cause smoking

 (I)

TOASTING
It is not necessary to preheat the oven for toasting.

1.  Open oven door and insert slide rack into the lower slot position with the rack up.
2.  Engage the integrated hooks on the door as directed in gETTIng STARTED.
3.  Place desired number of pieces of bread or bagel to be toasted directly on slide rack and close 

the door.

4.  Turn temperature selector dial to TOAST.

5.  Turn cooking function selector to TOAST.
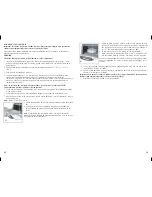
6.  Turn toast shade selector to 20 and then turn back to 

desired toast shade 

(J)

.

Note

:  You must set the toast shade selector as desired for the 

oven to begin toasting. 
7.  For best results on first toasting cycle, set the toast selector 

dial to medium, midway between light and dark setting, 

then readjust for next cycle to lighter or darker to suit your 

preference.

8.  The On indicator light comes on and remains on until 

toasting cycle is complete.

  9.  When toast cycle is complete, there will be an audible signal. The oven and the On indicator  

    light will go off.
 10.  Open the oven door.  Using oven mitts or pot holders, slide the rack out to remove the toast.

Important: This oven gets hot. When in use, always use oven mitts or potholders when touching 

any outer or inner surface of the oven.

 11.  Unplug appliance when not in use.

TOAST TIPS

1.  You must turn the toast shade selector to OFF to discontinue toasting.
2.  For best results, when making consecutive batches of toast, allow a short cool down period 

between toasting cycles.

I

J

KEEP WARM

1.  Turn temperature selector between 150°F to 200°F
2.  Turn cooking function selector to KEEP WARM.
3.  Turn time selector to 20 and then turn back to desired warming time, including preheat time.  

(Select STAY On to control cooking time yourself.  Be sure to use a kitchen timer.)

Note:

 This feature is designed to keep already cooked foods warm after they have been cooked. 

This function should only be used for short periods of time. To prevent food from drying out, cover 

with foil.
4.  When cycle is complete, there will be an audible signal. The oven and the On indicator light 

will go off.

5.  If not using the oven timer, turn the oven to OFF once warming cycle is complete.
6.  Unplug appliance when not in use.

Care and Cleaning

This product contains no user serviceable parts. Refer service to qualified service personnel.

CLEANING YOUR OVEN
Important: Before cleaning any part, be sure the oven is off, unplugged, and cool. Always dry 

parts thoroughly before returning to oven after cleaning.

1.  Clean the glass door with a sponge, soft cloth or nylon pad and sudsy warm water. Do not use a 

spray glass cleaner.

2.  To remove the slide rack, open the door, and pull the rack forward and out. Wash the slide rack 

in sudsy warm water. To remove stubborn spots, use a polyester or nylon pad.

3.  Wash the bake pan/drip tray and broil rack in sudsy warm water. To minimize scratching, use a 

polyester or nylon pad.

CRUMB TRAY

1.  Pull out crumb tray

 (K)

.

2.  Dispose of crumbs and wipe tray with a dampened cloth, or wash 

in sudsy warm water.

3.  Be sure to dry thoroughly before inserting the tray back into  

the oven.

EXTERIOR SURFACES
Important: The oven top surface gets hot. Be sure the oven has cooled 

completely before cleaning.

Wipe the top and exterior walls with a damp cloth or sponge. Dry thoroughly. 

ADDITIONAL TIPS FOR CLEANING THE INTERIOR OF YOUR OVEN

•  Heat oven to 200°F; turn oven off and unplug. Place shallow glass bowl containing ½ cup 

ammonia on rack. Close oven door and let stand overnight.  next day, open oven, remove bowl 

and wipe interior of oven with moist paper towels.

•  To refresh air inside oven, lay strips of orange or lemon peel on rack. Heat oven to 350°F and 

bake for 30 minutes. Turn oven off and let stand until oven is completely cool. Remove peel.

Note:

 We strongly recommend that the bake pan/drip tray and the broil rack be washed by hand 

with warm sudsy water, as opposed to washing in the dishwasher. Washing these pieces in the 

dishwasher will cause them to discolor, but will not affect their functionality. 

K

Содержание Perfect Broil Toast-R-Oven TRO4200B

Страница 1: ...a 1 800 738 0245 USA Canada 1 800 231 9786 Mexico 01 800 714 2503 www applicaconsumerproductsinc com Register your product online at www prodprotect com applica for a chance to WIN 100 000 For US residents only Registre su producto en la Internet en el sitio Web www prodprotect com applica y tendrá la oportunidad de GANAR 100 000 solamente para los residentes de EE UU Inscrivez votre produit en li...

Страница 2: ...sing containers constructed of other than metal or glass Do not store any material other than manufacturer s recommended accessories in this oven when not in use Do not place any of the following materials in the oven paper cardboard plastic wrap and the like IMPORTANT SAFEGUARDS SAVE THESE INSTRUCTIONS GROUNDED PLUG As a safety feature this product is equipped with a grounded plug which will only...

Страница 3: ...any outer or inner surface of the oven D Note Before first use run this oven empty for 15 minutes to remove burn off any possible residues from manufacturing You may notice some slight smoke and odor escaping from the oven This is normal and will disappear with use 1 On indicator light 2 Temperature selector Part CTO4300B 01 3 Cooking function selector Part CTO4300B 02 4 60 minute Timer Toast shad...

Страница 4: ...en timer Note You must set the timer or select STAY ON for the oven to function 5 The blue ON indicator light comes on and will remain lit during the entire baking time 6 The heating elements will cycle on and off to maintain even heat distribution 7 Once oven has preheated open oven door and insert food Close oven door Note You can bake 3 ways Use the bake pan drip tray pan placed on the slide ra...

Страница 5: ...edges of the bake pan drip tray to prevent grease dripping onto the heating elements Be sure the top of the food is at least 1 inches from the top heating element 5 Insert food into oven and close door leaving it ajar at about inch from the fully closed position 6 Broil food according to recipe or package directions and check for doneness at minimum suggested broiling time 7 If using the oven time...

Страница 6: ...or to 20 and then turn back to desired warming time including preheat time Select STAY ON to control cooking time yourself Be sure to use a kitchen timer Note This feature is designed to keep already cooked foods warm after they have been cooked This function should only be used for short periods of time To prevent food from drying out cover with foil 4 When cycle is complete there will be an audi...

Страница 7: ...sprigs of dill if desired Delicious served with cooked brown and white rice and steamed asparagus Makes about 3 servings TROUBLE SHOOTING PROBLEM POSSIBLE CAUSE SOLUTION Unit is not heating or stops heating Electrical outlet is not working or oven is unplugged Check to make sure outlet is working Both the temperature control and the timer must be set in order for the oven to function Second toasti...

Страница 8: ... SAUCE cup mayonnaise 1 green onion chopped about 2 tbsp 1 medium clove garlic minced tsp saffron threads 1 tbsp lime juice 6 loin or rib lamb chops cut about 1 inch thick Salt Garlic pepper Preheat oven on BROIL at 450 F In small bowl combine mayonnaise green onion garlic saffron and lime juice Cover and let stand at room temperature to blend flavors Place lamb chops on broil rack in bake pan dri...

Страница 9: ...ack position with rack down and oven door slightly ajar for 5 minutes or until bread is golden Remove from oven and spoon filling evenly over cut halves of roll Return to oven and broil until cheese is melted and beginning to brown lightly Makes 2 to 4 servings BROILED CURRIED CHICKEN FINGERS cup bottled ranch dressing cup chopped green onions 2 tbsp chopped parsley 1 cup Japanese dry breadcrumbs ...

Страница 10: ...aparato se enfríe antes de instalar o retirar los accesorios No se debe utilizar ningún aparato eléctrico que tenga el cable o el enchufe averiado que presente un problema de funcionamiento o que esté dañado Devuelva el aparato al centro de servicio autorizado más cercano para que lo examinen reparen o ajusten También puede llamar gratis al número apropiado que aparece en la cubierta de este manua...

Страница 11: ...e no cuelgue del mostrador o de la mesa para evitar que un niño tire del mismo o que alguien se tropiece accidentalmente Si el aparato es del tipo que es conectado a tierra el cable de extensión deberá ser un cable de tres alambres conectado a tierra TORNILLO DE SEGURIDAD Advertencia Este aparato cuenta con un tornillo de seguridad para evitar la remoción de la cubierta exterior del mismo A fin de...

Страница 12: ... calor fluya sin dañar armarios y paredes Inserte la bandeja de migas por debajo de la puerta de cristal Inserte la rejilla deslizante en la parte central en la posición inferior de rejilla C Levante la puerta del horno para sacar los ganchos y a continuación deslice la rejilla hasta que encaje con estos ganchos Importante La rejilla no se deslizará hacia adelante a menos que se encuentre dentro d...

Страница 13: ...distribución de calor convencional 1 Inserte la rejilla deslizante en la posición inferior del horno uniéndola a los ganchos como hemos explicado previamente Si lo desea puede utilizar también la posición de rejilla de la parte superior 2 Ponga el selector de temperatura a la temperatura deseada entre 65 C 150 F y 230 C 450 F 3 Seleccione la función BAKE hornear 4 Ponga el temporizador a 20 y a co...

Страница 14: ...iseñado para proporcionar una función de asador con la puerta entreabierta Además puede seleccionar la temperatura óptima para la función de asador dependiendo de cada alimento 1 Ponga el selector de temperatura entre 170 C 350 F y 230 C 450 F a la temperatura que desee 2 Coloque el selector de función de cocinado en asar BROIL 3 Ponga el temporizador en 20 y a continuación muévalo hacia adelante ...

Страница 15: ...l horno hace un ruido seco durante el proceso reduzca la temperatura o coloque el alimento más abajo en el horno Lave la bandeja de horno bandeja de goteo y limpie el interior del horno después de cada utilización con un producto no abrasivo y con agua caliente con jabón La acumulación de un exceso de grasa puede causar humo I TOSTAR No es necesario precalentar el horno para tostar 1 Abra la puert...

Страница 16: ...r 2 Para sacar la rejilla deslizante abra la puerta y tire de la rejilla hacia adelante y hacia afuera Lave la rejilla con agua templada con jabón Para limpiar manchas persistentes utilice un estropajo de poliéster o nailon 3 Lave la bandeja de horno y la rejilla para asar en agua templada con jabón Para minimizar la posibilidad de que se raye utilice un estropajo de poliéster o nailon Bandeja par...

Страница 17: ...rta por 20 minutos o hasta que el pescado esté bien cocido Sirva con el aderezo y adórnelo con ramitas de eneldo fresco si lo desea Resulta delicioso cuando se sirve con una mezcle de arroz blanco e integral cocido y con espárragos al vapor Aproximadamente 3 raciones DETECCIÓN DE FALLAS PROBLEMA POSIBLE CAUSA SOLUCIÓN El aparato no calienta o deja de calentar La toma de corriente no funciona o el ...

Страница 18: ...lleta troceada aproximadamente 10 ml dos cucharaditas 1 diente de ajo normal picado 1 ml cucharadita de hebras de azafrán 5 ml 1 cucharadita de zumo de lima 6 chuletas o costillas de cordero cortadas con un grosor de aproximadamente 30 mm 1 pulgada Pimienta de ajo Precaliente el horno a 232 C 450 F en la posición BROIL En un bol pequeño mezcle la mahonesa la cebolleta el ajo el azafrán y el zumo d...

Страница 19: ...o largo Coloque la parrilla en la posición superior y oriéntela hacia abajo Cocine por 5 minutos con la puerta del horno entreabierta o hasta que el pan se dore Saque el pan del horno y rellene uniformemente las dos mitades del pan con la mezcla que habíamos preparado Vuelva a meterlo en el horno y ponga en marcha el asador hasta que el queso se funda y empiece a adquirir un ligero tono tostado 2 ...

Страница 20: ...enfant ou lorsque ce dernier s en sert Débrancher l appareil lorsqu on ne s en sert pas et avant de le nettoyer Le laisser refroidir avant d y ajouter ou d en retirer un accessoire Ne pas utiliser un appareil dont la fiche ou le cordon est abîmé qui présente un problème de fonctionnement qui est tombé par terre ou qui est endommagé Retourner le produit au centre de service de la région pour qu il ...

Страница 21: ... comptoir ou la table d où des enfants pourraient le tirer ni placé de manière à provoquer un trébuchement par inadvertance Lorsque l appareil est de type mis à la terre il faut utiliser un cordon de rallonge mis à la terre à trois broches VIS INDESSERRABLE Avertissement L appareil est doté d une vis indesserrable empêchant l enlèvement du couvercle extérieur Pour réduire les risques d incendie ou...

Страница 22: ...ES À PROPOS DU FOUR Lorsque le four est mis en marche le témoin de fonctionnement bleu s allume et reste allumé jusqu à ce que le four soit éteint soit manuellement soit automatiquement si la minuterie a été utilisée La sélection du temps de cuisson pour un produit ou une recette en particulier doit inclure le délai de préchauffage Le four est muni d une minuterie de 60 minutes Si la cuisson d un ...

Страница 23: ...re glisser la grille coulissante sur les rainures inférieures du four jusqu à ce qu elle soit bien positionnée dans les crochets comme il est indiqué ci dessus Il est également possible de placer la grille en position supérieure si désiré 2 Tourner le sélecteur de température à la température désirée de 65 C 150 F à 230 C 450 F 3 Tourner le sélecteur de fonction de cuisson à BAKE cuisson par conve...

Страница 24: ...çu pour fonctionner pendant que la porte du four est légèrement entrouverte Vous pouvez aussi sélectionner la température de grillage optimale pour chaque aliment 1 Tourner le sélecteur de température à une température variant entre 175 C 350 F et 230 C 450 F au choix 2 Tourner le sélecteur de fonction de cuisson à BROIL gril 3 Régler la minuterie à la position 20 puis tourner le bouton vers la ga...

Страница 25: ...cluant le délai de préchauffage Sélectionner l option STAY ON fonctionnement continu pour contrôler le temps de réchaud vous même Ne pas oublier d utiliser une minuterie de cuisine CONSEILS POUR LE GRILLAGE En plaçant l aliment sur la grille de la lèchefrite le jus de cuisson tombe dans le plat de cuisson plateau d égouttage ce qui aide à prévenir la formation de fumée dans la rôtissoire Pour obte...

Страница 26: ...r l intérieur du four avec du papier essuie tout humide Pour aérer l intérieur du four déposer des pelures d orange ou de citron sur la grille Faire chauffer le four à 175 C 350 F durant 30 minutes Éteindre le four et le laisser refroidir complètement Retirer les pelures Nota Nous vous recommandons fortement de laver le plat de cuisson plateau d égouttage et la grille de lèchefrite à la main à l e...

Страница 27: ... thé de poivre noir Préchauffer le four en mode BROIL gril à 204 C 400 F Dans un bol moyen mélanger la mayonnaise les oignons verts l aneth le gingembre et la confiture d oranges Réserver Placer le saumon dans le plat de cuisson plateau d égouttage dans le four Badigeonner d huile d olive Saler et poivrer Faire griller le poisson pendant 20 minutes ou jusqu à ce qu il soit cuit en veillant à place...

Страница 28: ...tron 3 ml c à thé de sel assaisonné 3 ml c à thé de poivre noir 3 ml c à thé de sel d ail 30 ml 2 c à table d huile de maïs 1 58 kg 3 lb de poulet à rôtir Préchauffer le four en mode BAKE cuisson à 191 C 375 F Dans un petit bol combiner le persil l assaisonnement pour poulet le zeste de citron le sel assaisonné 1 ml c à thé de poivre 1 ml c à thé de sel d ail et l huile Bien mélanger Assaisonner l...

Страница 29: ...e poivre noir 0 45 kg 1 lb de filet de poulet en lanières Antiadhésif en vaporisateur Sauce trempette 50 ml de tasse de vinaigrette Ranch en bouteille 30 ml 2 c à table de moutarde au miel 3 ml c à thé de cari en poudre Préchauffer le four en mode BROIL gril à 204 C 400 F Dans un bol moyen mélanger 85 ml tasse de vinaigrette l oignon vert et le persil Dans un plat peu profond mélanger la chapelure...

Страница 30: ...re à pâte et le sel et remuer jusqu à l obtention d un mélange uniforme Incorporer les dattes et les noix Étendre uniformément dans un moule carré de 8 po non beurré Faire cuire pendant 30 minutes jusqu à ce que le dessus soit doré et qu un cure dents inséré au centre en ressorte propre en veillant à placer la grille dans les rainures supérieures et à abaisser la grille Laisser refroidir dans la p...

Страница 31: ...ce Save your receipt as proof of the date of sale Check our on line service site at www prodprotect com applica or call our toll free number 1 800 231 9786 for general warranty service If you need parts or accessories please call 1 800 738 0245 What does your warranty not cover Damage from commercial use Damage from misuse abuse or neglect Products that have been modified in any way Products used ...

Страница 32: ... NECESITA AYUDA Para servicio reparaciones o preguntas relacionadas al producto por favor llame gratis al número 800 que aparece en la cubierta de este manual No devuelva el producto al establecimiento de compra No envíe el producto por correo al fabricante ni lo lleve a un centro de servicio También puede consultar el sitio web que aparece en la cubierta de este manual Un año de garantía limitada...

Страница 33: ... Chine Imprimé en République populaire de Chine is a trademark of The Black Decker Corporation Towson Maryland USA Marca registrada de The Black Decker Corporation Towson Maryland E U Marque de commerce déposée de la société The Black Decker Corporation Towson Maryland É U 2008 1 15 11E S F 1500 W 120 V 60 Hz CAT NO EHB500 TYPE 1 160 W 120 V AC ONLY 60Hz Printed on recycled paper Impreso en papel ...

Отзывы: