10/32
The appliance must not be used in dusty environments or in the presence of floating
materials or used in a room where there is a fire risk.
Stand the appliance on a smooth, horizontal surface or table; do not place it on a
inclined surface (the appliance could fall over).
ASSEMBLY
Attention: the fan can be used only when completely and correctly assembled, that is
complete with its base and support and protection grid.
Attention: always unplug the appliance before you assemble.
If in doubt, have the appliance checked or assembled by a qualified professional person.
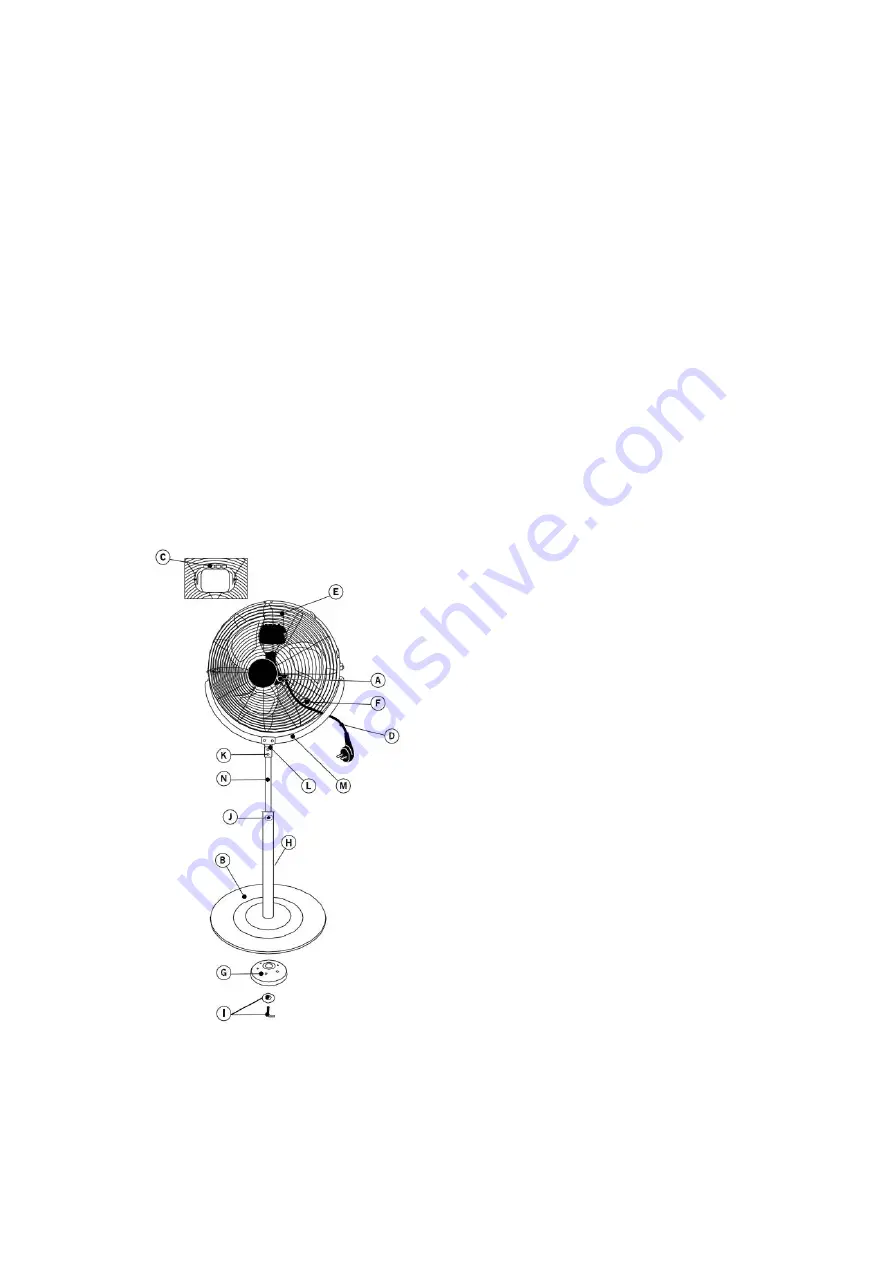
Take figures as a reference for assembly.
Fix the pole (H) to the base (B) and to the counterweight (G) by inserting it into its seat,
with the four screws supplied and with the screw (I). At the end of the work, make sure
that auction and the base (with counterbalance) are firmly united.
Lengthen the adjustable column (N) to the desired height and fasten the ring so tight
fixing column (J).
Place the "head of the fan" column adjustable, so as to fix the support (M) column with
the two junction plates (L), combine the two plates and secure them with the 4 screws,
4 washers (2 on the screws and washers on 2) and 4 nuts (K). At the end of the work,
make sure the support column and are firmly united.
A. Motor body
B. Base
C. Selectors
D. Cable electric
E. Carrying Handle
F. Cord storage
G. Counterweight
H. Fixed shaft
I. Screw "L" with washer
J. collet column
K. Screws fastening plates
L. Platelets junction
M. Support
N. Adjustable column


