11
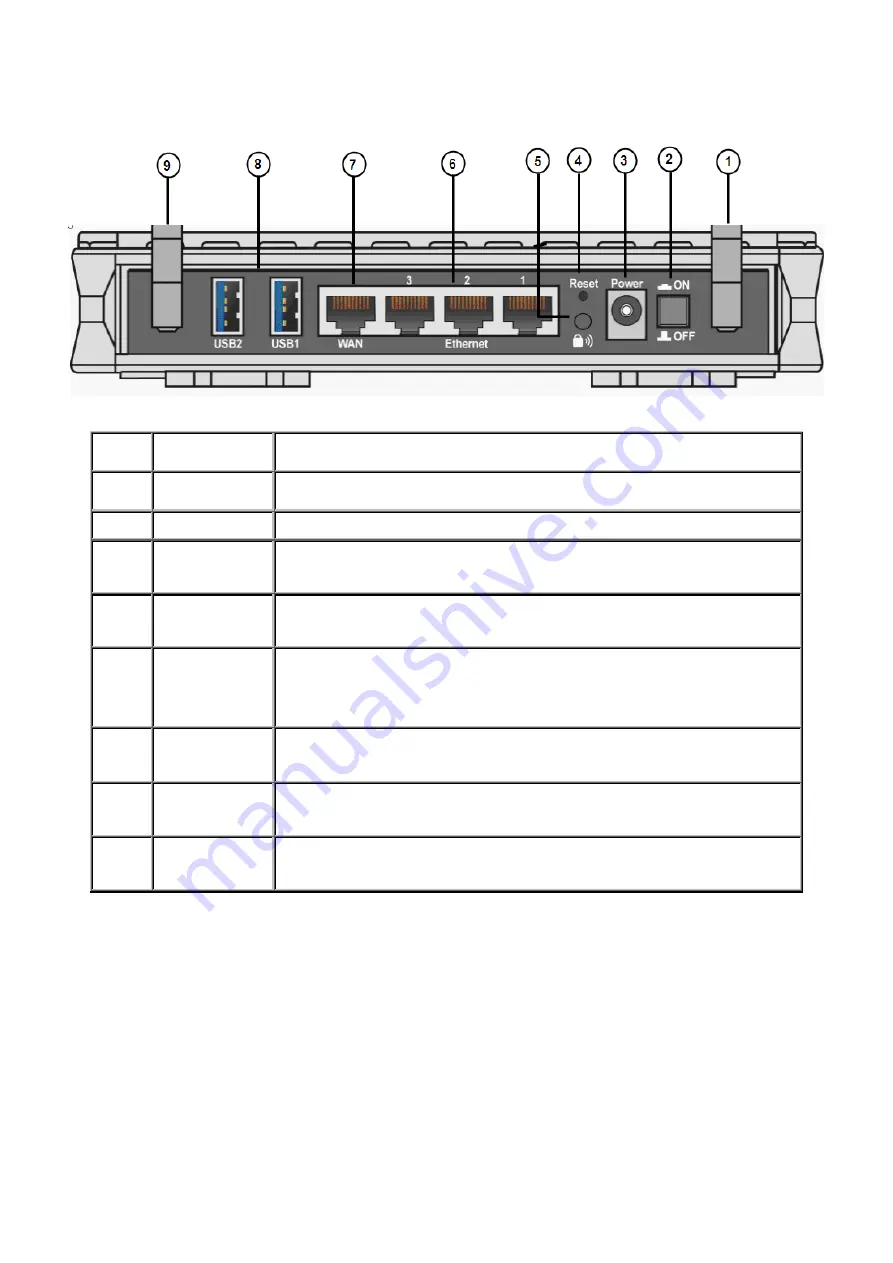
The Rear Ports
1
Wi-Fi
antenna
Connect the Wi-Fi detachable antenna to this port.
2
Power
Switch
Power ON/OFF switch
3
Power Jack
Connect the supplied power adapter to this jack.
4
Reset
Button
Press it to reset the device or restore to factory default settings.
5 WPS
Push WPS button to trigger Wi-Fi Protected Setup function.
6
Ethernet
Connect your computer to a LAN port, using the included
Ethernet cable.
7
WAN
Connect to a Cable modem, xDSL modem, Fiber (PON) modem.
8 USB
Both USB1 and USB2 can be connected to a USB device, such
as Printer, HDD, WebCam.
9 3G
antenna
Connect the 3G detachable antenna to this port.
Содержание BiPAC 6200WZL R2
Страница 11: ...7 Applications of 6200WZL R2...
Страница 12: ...8 Chapter 2 Product Overview Important note for using this router...
Страница 65: ...61 the parameters on both Wireless Configuration and Wireless Security Configuration page are as follows...
Страница 95: ...91 3 Choose the directory which you want to delete then click Delete to romove this directory...
Страница 96: ...92 Samba Server...
Страница 101: ...97 Set up of Printer client Step 1 Click Start and select Printer and Faxes Step 2 Click Add a Printer...
Страница 102: ...98 Step 3 To continue click Next Step 4 Select network printer and apply Next button...
Страница 104: ...100 Step 7 Click Finish to complete the add printer...
Страница 107: ...103 4 The following page appears Note if you find the Web cam icon is grey please return to the steps previous to enable...
Страница 108: ...104 Click Web Cam to play Click the radio button on the left top corner to adjust the image size...
Страница 124: ...120 Enter the necessary message and press Reload Delete...


