17
4. CLEANING THE SQUEEGEE
Ensure the squeegee is always clean, to improve drying results.
To clean:
A. Remove the squeegee vacuum hose from the squeegee shoe adapter.
B. Remove the cotter pins that attach the pins of the squeegee shoe.
C. Disassemble the squeegee from its support.
D. Loosen the wing nuts (
1
).
E. Remove the squeegee band clamp and squeegee blade.
F. Replace the squeegee blades.
To reassemble the squeegee, repeat the operations in the reverse order.
WARNING: Always wear gloves when doing this operation to pro-
tect yourself from contact with hazardous chemicals.
5. DISASSEMBLING THE BRUSH
To remove the brushes:
A. Turn the key to position "0".
B. Apply the parking break using the side lever (
1
).
ATTENTION: Before performing any maintenance, remove the keys
from the panel and disconnect the batteries.
C. Loosen the wing nut (
1
).
D. Rotate the side splash guard (
2
) and remove the side skirt (
3
).
E. Remove the idle hubs.
F. Remove the brushes and clean them.
WARNING: This operation must be carried out wearing protective
gloves to protect against contact with dangerous solutions.
6. REPLACING THE SQUEEGEE BLADES
Check the state of wear of the squeegee blades and, if necessary, replace them.
To replace:
A. Remove the squeegee hose from the squeegee shoe adapter.
B. Push the release lever and release the right hand stud.
C. Remove the squeegee vacuum from the squeegee yoke.
D. Loosen the wing nuts.
E. Remove the squeegee band clamp and squeegee blade.
F. Replace the squeegee blades.
To reassemble the squeegee, repeat the operations in the reverse order.
WARNING: Always wear gloves when doing this operation to pro-
tect yourself from contact with hazardous chemicals.
DAILY MAINTENANCE
Содержание E29941-00
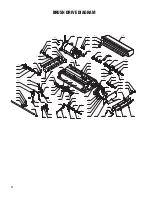
Страница 20: ...20 BRUSH DECK DIAGRAM 1 12 21 5 10 7 18 15 2 19 9 11 18 7 10 4 3 8 20 13 14 16 6 17 12 5 23 24 22 24 ...
Страница 36: ...36 SOLUTION CONTROL DIAGRAM 11 23 9 19 21 13 20 6 5 15 16 4 1 22 10 3 14 8 1 8 2 17 12 18 2 ...
Страница 40: ...40 ELECTRICAL COMPONENTS DIAGRAM 3 1 18 21 5 14 15 11 7 8 12 16 2 11 8 24 9 17 6 13 20 4 22 19 10 ...
Страница 42: ...42 ELECTRICAL DIAGRAM ...
Страница 51: ...51 ...


