background image

4

57

REGOLAZIONI

ADJUSTMENTS

CONTROLLO E REGOLAZIONE
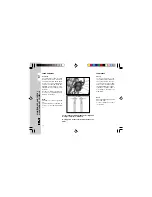
GIOCO STERZO

Verificare periodicamente il gioco
del cannotto di sterzo muovendo
avanti e indietro le forcelle come
illustrato in figura. Qualora si avver-
ta del gioco, procedere alla rego-
lazione operando nel modo seguen-
te:
- svitare le viti 

A

- allentare il dado 

B

- recuperare il gioco intervenendo

sulla ghiera 

C

Per il ribloccaggio procedere nel
modo inverso.

Nota:

 Una corretta regolazione, ol-

tre a non lasciare del gioco, non
deve causare indurimenti o irrego-
larità durante la rotazione del ma-
nubrio.

B

A

C

CHECK AND ADJUSTMENT OF
STEERING GEAR

Periodically check the play in the
steering sleeve by moving the fork
back and forth as shown in the fig-
ure. Whenever you feel play, adjust
as described below:
- Unscrew the screws 

A

- Loosen nut 

B

- Take up the play by means of ring

nut 

C

For reassembly, proceed in the re-
verse order.

Note: 

Correct adjustment, in addi-

tion to not leaving any play, should
not cause difficulty or irregularity in
turning the handlebar.


Содержание RR 125 ENDURO

Страница 1: ...questo manuale abbiamo voluto darle le informazioni necessarie per un corretto uso e una buona manutenzione della sua moto RR 125 cc ENDURO MOTARD We would like to congratulate you on your purcase Let us also take this opportunity to thank you for putting your trust in us we will no let you down ...

Страница 2: ...guidare in maniera regolare senza forti accellerazioni e decelerazioni GUIDA SICURA rispettare il codice stradale indossare sempre casco omologato ed allacciato mantenere sempre la visiera pulita indossare indumenti senza le estremità penzolanti non viaggiare con in tasca oggetti acuminati o fragili regolare correttamente lo specchietto retrovisore guidare sempre seduti e con entrambe le mani sul ...

Страница 3: ...ncer 41 Removing the plastics 48 Removing the fuel tank 48 Maintenance schedule 52 CAP 1 CONOSCENZA DEL VEICOLO Elementi principali 6 Dati identificazione veicolo 7 Comandi 8 Indicazioni su LCD 9 Commutatore 18 Bloccasterzo 18 Dati tecnici 19 Schema elettrico 22 Dispositivi elettrici 26 Lubrificanti e liquidi consigliati 30 CAP 2 FUNZIONAMENTO E UTILIZZO Controlli e manutenzione prima e dopo l uti...

Страница 4: ...ke 54 Adjustment of clutch 55 Adjustment of idling speed 56 Adjusting the fuel flow 56 Adjusting the throttle play 56 Check and adjustment of steering gear 57 Tightening the chain 58 Adjustment of rear shock absorber 59 Adjusting the headlight 60 SECTION 5 REPLACEMENTS Replacing the headlight bulbs 62 Replacing the rear light bulbs 64 Replacing the indicators 65 SECTION 6 WHAT TO DO IN AN EMERGENC...

Страница 5: ...icolo Comandi Indicazioni su LCD Commutatore Bloccasterzo Dati tecnici Schema elettrico Dispositivi elettrici Lubrificanti e liquidi consigliati INDEX Main parts Vehicle identification data Hand drive LCD display Ignition switch Steering lock Technical data Electrical diagram Electrical devices Recommended lubricants and liquids ...

Страница 6: ...1 Plug tank 2 Air filter 3 Stand 4 Fuel tap 5 Fuel tank 6 Silencer 7 Kick starter 8 Muffler ELEMENTI PRINCIPALI 1 Tappo serbatoio 2 Filtro aria 3 Cavalletto 4 Rubinetto carburante 5 Serbatoio carburante 6 Silenziatore 7 Kick starter 8 Marmitta 1 2 3 5 4 7 6 8 ...

Страница 7: ...to di sterzo nel lato destro Identificazione motore I dati di identificazione del motore B sono impressi sul semicarter sinistro VEHICLE IDENTIFICATION DATA Frame identification Frame identification code A is stamped on the right side of the steering head tube Motor identification Motor identification data B are stamped on the l h side half crank case B A ...

Страница 8: ...9 Commutatore luci 10 Pulsante abbaglianti 11 Pulsante indicatori di di rezione 12 Pulsante accensione 13 Pulsante stop motore 1 LCD display 2 MODE button 3 Indicator warning light 4 Highbeamwarninglight 5 Neutral indicator 6 Stand down warning light 7 Clutch lever 8 Horn button 9 Dip switch 10 High beam switch 11 Indicator switch 12 Start button 13 Engine stop button luci anabbaglianti low light ...

Страница 9: ...e manutenzione ICONA Temperatura acqua non attiva BARRA Livello tensione in uscita dall alternatore Se accesa indica il corretto funzionamento dell alternatore LCD DISPLAY Operation and display of pages and icons INSTANT SPEED ODO Total counter TRP Trip counter CLK Clock formats hh mm 23h 59mm LAP Stopwatch formats mm ss SPEED max Maximum speed ICON Battery ICON Hours to oil change ICON Fuel ICON ...

Страница 10: ...ità istantanea max 199 Km h o Mph ODO totalizzatore dei Km o miglia percorsidalprimosetup max99999 Km o miglia Parametro non azzerabile Order of pages on LCD display The different pages can only be viewed in succession starting from the default page Page 1 TEST General check of all the icons and bars on the LCD display and warn ing light test The test lasts 3 seconds At the end of the test the def...

Страница 11: ...MINUTI 00 00 Regolabile tramite MODE a mezzo fermo come di seguito descritto Page 3 TRP To bring up page 3 press the MODE button for a short time while page 2 is being displayed and the vehicle is stationary The new page is displayed as soon as the button is released Displays Instant speed max 199 Km h or Mph TRP Trip counter max 999 9 km or miles The counter can be reset manually or automatically...

Страница 12: ... 6 6 Rilasciare il pulsante MODE a minuti raggiunti e dopo 2 l orario verrà assunto Clock setting procedure 1 Press the MODE button until the hour digits start blinking 2 Releasing the button and then pressingitagainincreasesthehours by one unit Holding down the but ton causes the figures to change rapidly Leaving the button inac tive skips to step 4 3 Release the MODE button when the correct hour...

Страница 13: ...do MODE premuto si ripresen tailtempodiLAPerilasciandoMODE si passa alla pagina successiva Page 5 LAP Stopwatch minutes seconds To bring up page 5 press the MODE button for a short time while page 4 is being displayed and the vehicle is stationary Thenewpageisdisplayed as soon as the button is released Displays Instant speed max 199 Km h or Mph LAP Displays MINUTES SECONDS 00 00 Operation Thefunct...

Страница 14: ... vuol oscurare e mantenerlo premu to per un tempo di 10 Al rilascio del pulsante e alla ricerca successiva la pagina non sarà più visibile Page 6 SPEED max To bring up page 6 press the MODE button for a short time while page 5 is being displayed and the vehicle is stationary Thenewpageisdisplayed as soon as the button is released Displays Instant speed max 199 Km h or Mph SPEED max Maximum speed r...

Страница 15: ...icomparsa del numero precedente si passa alla pagina successiva conservando i valori LAP To display the pages again PressMODE whilepage2 defaultpage isdisplayed and hold it down for 10 seconds or longer If no page had been blanked out all pages will be blanked out with the exception of page 2 To display the pages again repeat the above pro cedure Resetting the TRP SPEED max and LAP parameters The ...

Страница 16: ...o potrebbe non funzionare più corret tamente anche lo strumento La bat teriadovràesseresostituitadauncon cessionario Betamotor autorizzato SERVICE ICONS The service icons are automatically activated as soon as 90 per cent of the set value is reached The icons will be displayed on all pages ini tially fixed and then when the set value is exceeded blinking These values are set when the vehicle is fi...

Страница 17: ...nte l unità di misura prescelta premere MODE e mantenerlo pre muto fino alla comparsa rila sciandolo ricompare la figura indi cata SELECTING Km h or Mph Press and hold down the MODE button until is displayed As soon as the button is released only Km h or Mph will be displayed to denote which unit is active at that moment Briefly press MODE to toggle be tween units To confirm the current selection ...

Страница 18: ... è inserito Per l inserimento del bloccasterzo occorre sterzare il manubrio a sini stra premere sulla chiave ruotarla completamente in senso antiorario e dopo rilasciarla The vehicle is supplied with four keys with related spares to be used for the ignition switch and the steering lock Warning Do not keep the spare key inside the wehicle but in a safe place We suggest you note the code number stam...

Страница 19: ...1 230 mm interasse 1 370 mm altezza sella 920 mm luce a terra 310 mm altezza pedane poggiapiedi 378 mm Telaio Acciaio a doppia culla chiusa TECHNICAL DATA Vehicle weight dry weight ENDURO MOTARD 85 kg Dimensions ENDURO total length 2 030 mm total width 790 mm total height 1 230 mm wheelbase 1 325 mm saddle height 930 mm clearance from ground 365 mm footrest height 440 mm Dimensions MOTARD total le...

Страница 20: ...5 ENDURO MOTARD a disco Ø 260 mm con comando idraulico Freno posteriore RR 125 ENDURO MOTARD a disco Ø 220 mm con comando idraulico Filling capacity RR 125 ENDURO MOTARD fuel tank 5 7 lt including reserve of 1 lt engine oil 1 2 lt Front suspension RR 125 ENDURO MOTARD hydraulic fork with 41 mm Ø rods Oil content in shafts right oil level with tube at the end of its stoke at 185 mm 400 cc left oil ...

Страница 21: ...ante benzina verde frizione a dischi multipli in bagno d olio trasmissione primaria Z 20 68 trasmissione secondaria Z 14 50 cambio 5 velocità olio motore Sint Motocompetition Engine RR 125 ENDURO MOTARD type single cylinder four stroke air cooled bore x stroke 54x54 mm displacement cm3 124 cc compression ratio 10 1 air cooling ignition electronic Moriyama F5HH kick starter spark plug NGK BR9 ES lu...

Страница 22: ...stra lampada 12V 10W 12 Fanale posteriore lampada 12V 5 21W 13 Freccia posteriore destra lampada 12V 10W 14 Generatore 15 Candela 16 Centralina elettronica 17 Regolatore 12V 18 Spia folle 19 Freccia anteriore destra lampada 12V 10W 20 Clacson 12V 21 Sensore Folle 22 Sensore giri ruota 23 Pulsante stop freno anteriore 24 Gruppo comandi DX pulsante avviamento inter ruttore arresto motore 25 Relè cav...

Страница 23: ...SCENZA DEL VEICOLO Bi Bianco Ve Verde Ma Marrone Vi Viola Bl Blu Ne Nero Gi Giallo Rs Rosso Ar Arancio Az Azzurro Ro Rosa Gr Grigio 1 3 4 5 6 7 2 8 23 10 11 12 13 14 15 16 17 18 19 20 21 22 9 24 25 26 27 28 29 30 26 31 32 33 34 35 ...

Страница 24: ...ndicator 12V 10W bulb 12 Rear light 12V 5 21W bulb 13 RH rear indicator 12V 10W bulb 14 Dynamo 15 Spark plug 16 Electronic control unit 17 12V regulator 18 Neutral indicator 19 RH front indicator 12V 10W bulb 20 12V HORN 21 Neutral sensor 22 Wheel revolution sensor ELECTRICAL DIAGRAM 23 Front brake light button 24 RH control set start button engine stop switch 25 Stand relay 26 Engine earth connec...

Страница 25: ...OSCENZA DEL VEICOLO Bi White Ve Green Ma Brown Vi Purple Bl Blue Ne Black Gi Yellow Rs Red Ar Orange Az Light blue Ro Pink Gr Grey 1 3 4 5 6 7 2 8 23 10 11 12 13 14 15 16 17 18 19 20 21 22 9 24 25 26 27 28 29 30 26 31 32 33 34 35 ...

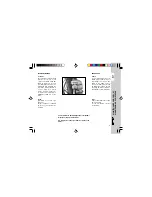
Страница 26: ... verso l esterno vedi figu ra e collegare il polo negativo per ultimo alla batteria Riagganciare l elastico B A B ELECTRICAL DEVICES Battery Maintenance free battery A is in stalled underneath the right hand front side panel There is no need to check the level of the electrolyte or top up with water Keep the battery terminals clean If necessary protect them with a thin film of acid free grease Rem...

Страница 27: ... ogni 15 gg La batteria deve essere tenuta in ambien te asciutto a temperatura 5 35 C e fuori dalla portata dei bambini WARNING Exercise extreme caution if for any reason the elec trolyte sulphuricacid shouldcomeoutofthebattery The electrolyte can cause serious burns In case of contact with the skin rinse abundantly with water Should the electrolyte come into contact with the eyes rinse with water...

Страница 28: ...specializzata BETAMOTOR Attenzione Non montare in nessun caso un fusi bileconmaggiorepotenzaotenta re di aggiustare lo stesso fusibile Interventi non appropriati potreb bero causare il guasto dell intero impianto elettrico A C B D CONTROL UNIT Electronic control unit A is located underneath the battery in the front of the vehicle on the right side To remove the control unit simply pull it off the ...

Страница 29: ...latore di ten sione E al teleruttore d avviamento F e alla bobina A T G è necessario rimuovere il serbatoio vedi Smon taggio serbatoio carburante pag 49 REGULATOR RELAY SWITCH STARTING SYSTEM HV COIL Remove the fuel tank as directed on page 49 to gain access to volt age regulator E starting relay switch F and HV coil G ...

Страница 30: ...IQUIDS For better operation and longer vehicle life we advise you to use the products listed in the following chart TIPO DI PRODOTTO SPECIFICHE TECNICHE TYPE OF PRODUCT TECHNICAL SPECIFICATION OLIO MOTORE BARDAHL XTM 15W50 ENGINE OIL OLIO TRASMISSIONE SINT MOTOCOMPETITION TRANSMISSION OIL OLIO FRENI DOT 4 BRAKE OLIO PER FORCELLE FLIQUI MOLY RACING SUSPENSION OIL SAE 10 FORK OIL GRASSO PER SNODI E ...

Страница 31: ...N 2 CAPITOLO 2 INDICE ARGOMENTI Controlli e manutenzione prima e dopo l utilizzo Rifornimento carburante Rodaggio Avviamento del motore Cavalletto laterale INDEX Checks and maintenance before and after use Fueling Breaking in Starting the engine Sidestand ...

Страница 32: ... consigliabile prima della partenza fare scaldare il motore facendolo funzionare al mini mo per alcuni istanti Ogni volta che il veicolo viene utilizzato in fuoristrada occorre lavarlo accuratamente CHECKS AND MAINTENANCE BEFORE AND AFTER USE In order to avoid problems connected to the operation of the vehicle it is advisable to perform a number of checks and maintenance operations before and afte...

Страница 33: ...y 5 7 liters 1 liters of which is reserve Breather pipe C is designed to allow the outflow of gases from the tank RIFORNIMENTO CARBURANTE Rimuovere il tappo A La capacità del serbatoio è di circa 5 7 litri di cui 1 di riserva Il serbatoio è munito di un tubo di sfiato C per la fuoriuscita dei gas C A ...

Страница 34: ...as per più di 3 4 Attenzione Dopo 500 km di percorrenza sostituire l olio del motore Dopo la prima uscita fuoristrada provvedere a risentire tutta la bulloneria BREAKING IN Breaking in takes approximately 500 km 350 miles During this time Avoid travel at high speeds Change speed often so that the parts will break in uniformly and in a shorter time Avoid turning the throttle more than 3 4 of the wa...

Страница 35: ...n bring the lever back to its home position B AVVIAMENTO DEL MOTORE Ruotare la chiave nel commuta tore in senso orario ed assicurarsi che la spia del folle N posta sul cruscotto sia accesa Attenzione Ricordarsi prima di gi rare la chiave di posizionare il pul sante deviatore luci in posizione anabbagliante vedi pag 8 in maniera da ridurre il più possibile il consumo della batteria Ruotare il rubin...

Страница 36: ... dispositivo A e di una spia sul cruscotto vedi pagina 8 che impediscelamessainmotonelcaso in cui la posizione della stampella fosse abbassata Attenzione Nonsostaresedutisulmotociclopar cheggiato col cavalletto abbassa to A SIDESTAND Important Before parking on the side stand ensure that the ground is firm and level Soft ground gravel sun softened tarmac etc can cause a parked motorbike to topple ...

Страница 37: ...no anteriore Freno posteriore Tubo raccolta fumi Smontaggio marmitta Rimozione delle plastiche Smontaggio serbatoio carburante Manutenzione programmata INDEX Engine oil Brake pump oil Removing the passenger seat and the air filter Spark plug Front brake Rear brake Fume collecting pipe Removing the silencer Removing the plastics Removing the fuel tank Maintenance schedule ...

Страница 38: ...r ripristinare il livello proce derealrabboccoattraverso il tappo di carico A Note Change the engine oil after the first 500 km 350 miles For subsequent oil changes follow the instructionsgivenonthechartonpage52 usingthe lubricants recommended on page 30 Nota dopo i primi 500 km di percorrenza sostituire l olio motore Per le successive sostituzioni attenersi alla tabella a pag 52 utilizzando i lub...

Страница 39: ...o quin di RivolgeteVi subito al Vo stro rivenditore Nota Per le sostituzioni attenersi alla tabella a pag 52 utilizzando i lubrificanti consigliati a pag 30 Note For oil changes follow the instructions given on the chart on page 52 using the lubricants recommended on page 30 A B C BRAKE PUMP OIL Front brake Check the oil level by means of oil window A Minimum oil level must never be below the leve...

Страница 40: ...coattraverso il tappo di carico B Attenzione se si avverte morbidezza nel pedale potrebbe esserci una bolla d aria nel circuito quindi RivolgeteVi subito al Vostro rivenditore Note For oil changes follow the instructions given on the chart on page 52 using the lubricants recom mended on page 30 A B Rear brake Check oil level by means of oil container A Oil level must never be be low the minimum le...

Страница 41: ...ndicato in figura quindi pro cedere nel modo seguente Estrarre il coperchio C sollevando gli elastici D e sfilandolo dalla par te posteriore B A D C REMOVING THE PASSENGER SEAT AND THE AIR FILTER To access the filter you must re move the saddle by unscrewing screwAonthesaddletopandpush ingthesaddleindirectionBasshown in the figure After that follow these steps Lift rubber bands D and remove cover ...

Страница 42: ...ne Attenzione Dopo ogni intervento controllare cheall internodellascatoladelfiltro non ci sia rimasto nessun oggetto Eseguire la pulizia del filtro ogni vol ta che il mezzo viene utilizzato in fuoristrada F D E UnfastenfilterFbyreleasingspring E and removing rubber band D Pull the filter out of the box Wash it with soap and cold water Dry the filter Wet the filter with filter oil remov ing any exc...

Страница 43: ...izzo di olii di bassa qualità determina l aumento dei depositi carboniosi è quindi consigliabile utilizzare un olio di buona qualità Si raccomanda di utilizzare sempre candele NGK CR7 HSA SPARK PLUG Keeping the spark plug in good condition will reduce fuel consumption and increase engine performance To perform the check simply slide off the electrical connection tube and unscrew the spark plug Exa...

Страница 44: ...one Nota Effettuare il controllo ogni 2500 km Per la sostituzione contattare un nostroconcessionarioautorizza to Per la sostituzione delle pastiglie freni consigliamo di rivolgersi al proprio rivenditore We suggest to contact your dealer to replace the pads 2 mm FRONT BRAKE Check To check the wear of the front brake pads visually in spect the caliper from be low The lining on the visible ends of t...

Страница 45: ...ostitu zione Nota Effettuare il controllo ogni 2500 km Per la sostituzione contattare un nostro concessionario au torizzato Per la sostituzione delle pastiglie freni consigliamo di rivolgersi al proprio rivenditore We suggest to contact your dealer to replace the pads REAR BRAKE Check To check the wear of the rear brake pads visually inspect the caliper from below The lining on the visible ends of...

Страница 46: ...uire l olio o la mi scela di olio e benzina in un apposi to recipiente per il successivo smaltimento secondo le norme vi genti Nota Effettuarelosvuotamentoogni3 000 km A FUME COLLECTING PIPE Fume collecting pipe Ais located at the back of the vehicle on the right side It comes out of the lower part of the filter box and its purpose is to collect the fumes produced by the engine oil If any oil is f...

Страница 47: ...overe la vite B che fissa la marmitta al telaio allen tare la fascetta C di collegamento al tubo di scarico dopodichè sfilare la marmitta C B REMOVING THE SILENCER To remove the silencer first take down the left hand rear side panel see Removing the plastics on page 48 Then remove screw B fixing the si lencertotheframe loosenclampC connecting the silencer to the ex haust pipe and finally remove th...

Страница 48: ...ontaggio di queste protezioni occorre svitare le sei viti D laterali tre per parte e le quattro viti F due per parte che fissano la protezione anteriore al telaio A D F B C REMOVING THE PLASTICS To make some areas of the vehicle easier to check and service it is first necessary to remove parts of the bodywork as described below Removing the rear side panels UnscrewthefourfixingscrewsA two on each ...

Страница 49: ... tubo del rubinetto carburante e togliere il serbatoio sfilandolo verso la parte posteriore dai pioli antivibranti pre senti sul telaio REMOVING THE FUEL TANK Loosen screw F fixing the fuel tank to theframe disconnectthepipefrom the fuel cock and remove the tank by pulling it towards the back of the vehicle and off the anti vibration pegs on the frame F ...

Страница 50: ... vite di fissaggio A dopo aver rimosso le fiancate posteriori Per rimuovere la parte inferiore oc corre svitare le 3 viti di fissaggio B poste sotto il parafango Removing the rear mudguard The rear mudguard consists of two parts an upper coloured plastic section and a lower black section To remove the upper section re move the rear side panels and loosen fixing screw A To remove the lower section ...

Страница 51: ... posta sempre sotto il parafango di fissaggio del rinforzo parafango Rimuovere infine le due viti di fis saggio E del rinforzo parafango po ste sopra il rinforzo stesso Removing the front mudguard Remove the four screws C from un der the front mudguard Also remove mudguard brace fix ing screw D from under the mud guard Finally remove the two brace fixing screws E from the top of the brace ...

Страница 52: ...ni 2 anni c s c s c s c s c p p p p s p s p s s c c c c s c c c s c c c c c c c c c c c s s s s s s s s s s c c c c c c c c c c c c c c c c c c c c Ciclistica c c c c c c c c s c c c s c t t t t t t t t t t c c c c c c c c c c s s s s c c c c c c c c c c c c c c c c c c c c c c c c c c c c c c c c c c c c c c c c c c c c c c c c c c c c c c c c c c c c c c c c c c c c c c c c c c c pulire ogni 1 0...

Страница 53: ... gas Controllo e regolazione gioco sterzo Tensionamento catena Regolazione ammortizzatore posteriore Regolazione fascio luminoso INDEX Adjustment of brake Adjustment of clutch Adjustment of idling speed Adjusting the fuel flow Adjusting the throttle play Check and adjustment of steering gear Tightening the chain Adjustment of rear shock absorber Adjusting the headlight ...

Страница 54: ... Il freno posteriore è del tipo a disco con comando idraulico È possibile variare la posizione del pedale in altezza intervenendo sui registri A e B ADJUSTMENT OF BRAKES Front brake The front brake is disk type with hy draulic control and therefore re quires no adjustment Rear brake The rear brake is disk type with hy draulic control You may adjust pedal height by means of registers A and B B A ...

Страница 55: ...uesta regolazione agire sul registro B dopo aver solle vato la cuffia parapolvere in gom ma C La leva deve avere 5 mm di corsa a vuoto 5 mm A B C ADJUSTMENT OF CLUTCH Generally the only operation that is performed on the clutch is adjust ment of the position of lever A To perform the adjustment lift rub ber dust cover C and turn adjuster B The lever must have 5 mm of idle stroke ...

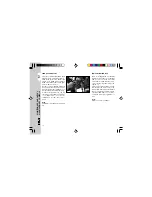
Страница 56: ...ti sul bordo della manopola stessa oc corre effettuarne la regolazione agendo sulla ghiera C del coman dogascomeindicatoinfiguradopo aversollevatolacuffiaparapolvere D ADJUSTMENT OF IDLING SPEED In order to perform this operation correctly we advise you to do it when the engine is hot connecting an electric revolution counter to the spark plug wire Then use a screw driver on register screw A to ca...

Страница 57: ...nverso Nota Una corretta regolazione ol tre a non lasciare del gioco non deve causare indurimenti o irrego larità durante la rotazione del ma nubrio B A C CHECK AND ADJUSTMENT OF STEERING GEAR Periodically check the play in the steering sleeve by moving the fork back and forth as shown in the fig ure Whenever you feel play adjust as described below Unscrew the screws A Loosen nut B Take up the pla...

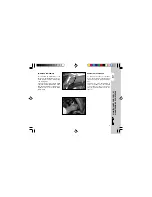
Страница 58: ...izione Verificarel allineamentodellaruo ta mediante gli indicatori D Ribloccare il dado A mantenendo il tendicatena in battuta sul regi stro Ribloccare il controdado B B C D A TIGHTENING THE CHAIN Checking the drive chain periodi cally to ensure longer chain life Alwayskeepitlubricatedandclean of deposited dirt If play exceeds 20 mm tighten the chain as follows Loosen nut A Loosen counternut B Tur...

Страница 59: ... 195 2 mm 190 2 mm Motard 193 mm 188 mm Per qualsiasi anomalia di funziona mento rivolgeteVi alla nostra cate na di assistenza autorizzata Y X A ADJUSTMENT OF REAR SHOCK ABSORBER Adjustment of spring load Turn ring nut A to adjust the damp ing action of the shock absorber The damping action is adjusted by alteringthestandardspringpreload as shown in the following table No of passengers 1 Y 2 X End...

Страница 60: ...i sulla moto e verificare che il fascio luminoso proiettato sulla parete sia di poco al di sotto della crocetta riportata sul muro ADJUSTING THE HEADLIGHT The light beam is adjusted manu ally by turning the headlight fix ing screws on the headlight fairing Periodically check the direction of the beam The beam can only be adjusted vertically Place the vehicle on level ground but not on the stand 10...

Страница 61: ...ICE ARGOMENTI Sostituzione lampade faro anteriore Sostituzione lampade faro posteriore Sostituzione indicatori di direzione CAPITOLO 5 SECTION 5 INDEX Replacing the headlight bulbs Replacing the rear light bulbs Replacing the indicators ...

Страница 62: ...ire la lampadina nuova 12V 55 60W avendo cura di non toc care il bulbo per evitare di compro metterne l efficienza e ruotare la flangia di fissaggio F in senso orario fino a battuta A D C E F REPLACING THE HEADLIGHT BULBS To replace the headlight bulb first remove the front fairing to which theheadlightisfastened Toremove the fairing pull off the two rubber side buttons A fixing the fairing to the...

Страница 63: ...e elettrico Riagganciarelamascheraportafa ro ai fori B sul parafango e fissarla al telaio con i bottoni di gomma A B Refit rubber cap E and reattach the electrical connector Reconnect the headlight fairing to mudguard holes B and fasten it to the frame with rubber buttons A ...

Страница 64: ...ssaggio La lampadina ha un fissaggio a baionetta quindi per rimuoverla basta premerla leggermente ruotare in senso antiorario di 30 e successivamente estrarla A C B REPLACING THE REAR LIGHT BULBS To replace the rear light bulb follow these steps Remove the two fixing screws A and glass B Replace faulty bulb C 12V 5 21W Refit glass B and fasten it with the two fixing screws A The bulb has a bayonet...

Страница 65: ...te al lampeggiatore danneggiato Sfilare il gruppo del lampeggiatore e staccarlo dal connettore elettri co Collegare il nuovo lampeggia tore e riposizionarlo sul supporto Avvitare il dado B A B REPLACING THE INDICATORS The indicators contain an LED In case of malfunction replace the whole indicator by following these steps Front indicators Releasethefrontfairingasdescribed on page 62 Unscrew nut A ...

Страница 66: ......

Страница 67: ...WHAT TO DO IN AN EMERGENCY COSA FARE IN CASO DI EMERGENZA 67 6 INDICE ARGOMENTI Ricerca del guasto INDEX Troubleshooting CAPITOLO 6 SECTION 6 ...

Страница 68: ...tuttoapertoinsistereperalcuni istantinellamessainmoto senonsiotten gono risultati occorre smontare la can dela ed asciugarla With gas completely open continue try ing to start engine for a few moments If enginestilldoesn tstart removethespark plug and dry it off INCONVENIENTE PROBLEM CAUSA CAUSE RIMEDIO REMEDY Il motore non si avvia Impiantodialimentazionecarburante tubi The engine doesn t serbato...

Страница 69: ...linder or on spark plug Il motore surriscalda Marmitta in parte ostruita e perde potenza Silencer partially obstructed Engine overheats and loses power Miscela troppo povera Mix too lean Accensione ritardata Delayed ignition Ripristinare la corretta distanza Restore correct distance Pulire o sostituire Clean or replace Verificare la fase Check phases RivolgersipressounnostroConcessionario Consult ...

Страница 70: ...alers Rivolgersi presso un nostro Concessionario Consult one of our Authorized Dealers Rivolgersi presso un nostro Concessionario Consult one of our Authorized Dealers Frenata ant scarsa Pastiglie usurate Weak front brake Worn pads Presenza di aria o umidità nel circuito idraulico Air or moisture in hydraulic circuit Frenata post scarsa Pastiglie usurate Weak rear brake Worn pads Presenza di aria ...

Страница 71: ... 30 Manutenzione programmata 52 Olio motore 38 Olio pompa freni 39 Regolazione ammortizzatore posteriore 59 Regolazione fascio luminoso 60 Regolazione freni 54 Regolazione frizione 55 Regolazione flusso benzina 56 Regolazione gioco gas 56 Regolazione minimo 56 Ricerca del guasto 68 Rifornimento carburante 33 Rimozione delle plastiche 48 Rimozione sella passeggero e filtro aria 41 Rodaggio 34 Schem...

Страница 72: ...al diagram 24 Engine oil 38 Fueling 33 Front brake 44 Fume collecting pipe 46 Hand drive controls 8 Ignition switch 18 LCD dispaly 9 Main parts 6 Maintenance schedule 43 Rear brake 45 Recommended lubricants and liquids 30 Removing the fuel tank 52 Removing the passenger seat and the air filter 41 Removing the plastics 48 Removing the silencer 41 Replacing the headlight bulbs62 Replacing the indica...

Страница 73: ...arle la información necesaria para un correcto uso y un adecuado mantenimiento de su moto RR 125 cc ENDURO MOTARD Nous vous remercions pour votre confiance et nous vous souhaitons beaucoup de joies avec votre nouvelle moto Pour une utilisation optimale et une longévité maximale nous vous conseillons de lire attentivement ce manuel d utilisation ...

Страница 74: ...s Conduire avec prudence en respectant le code de la route et la nature environnante mettre son casque sont des démonstrations de savoir vivre GUÍA ECOLÓGICA El ruido y la polución que produce cada vehículo depen den en gran medida en la forma de conducirlo Le recomendamos conducir de una forma regular sin aceleraciones y desaceleraciones bruscas GUIA DE SEGURIDAD Respetar el código de circulación...

Страница 75: ... des parties en plastiques 120 Démontage reservoir carburant 121 Tableau d entretien 124 CAPITULO 1 CONOCIMIENTO DEL VEHICULO Elementos principales 78 Datos identificación vehículo 79 Mandos 80 Indicaciones en LCD 81 Conmutador 90 Bloque manillar 90 Datos técnicos 91 Esquema eléctrico 94 Dispositivos eléctricos 98 Lubricantes y líquidos aconsejados 102 CAPITULO 2 FUNCIONAMIENTO Y UTILIZACION Contr...

Страница 76: ...or la cual se reserva el derecho de cambiar y modificar dicho modelo si lo cree oportuno Le constructeur se réserve le droit d apporter à tout moment les modifications qui lui semblent nécessaires sur les données et caractéristiques indiquées sur le présent manuel CAPITULO 4 REGULACIONES Regulación frenos 126 Regulación embrague 127 Regulacion mínimo ralentí 128 Regulación flujo de la gasolina 128...

Страница 77: ... Mandos Indicaciones en LCD Conmutador Bloque manillar Datos tecnicos Esquema eléctrico Dispositivos eléctricos Lubricantes y líquidos aconsejados INDEX Elements principaux Identification du véhicule Commandes Indications sur LCD Commutateur Bloc de direction Données techniques Schéma électrique Dispositifs electriques Lubrifiants et ingrédients ...

Страница 78: ...ervoir 2 Filtre à air 3 Béquille 4 Robinet d essence 5 Réservoir de carburant 6 Silencieux 7 Kick starter 8 Pot d échappement ELEMENTOS PRINCIPALES 1 Tapón depósito 2 Filtro aceite 3 Cabellette 4 Grifo gasolina 5 Deposito gasolina 6 Silenciador 7 Kick starter 8 Silencioso 1 2 3 5 4 7 6 8 ...

Страница 79: ...ión del lado derecho Identificación motor Los datos de identificación del mo tor B están grabados en el semicár ter izquierdo IDENTIFICATION DU VEHICULE Identification du cadre Le code d identification du châssis A est imprimé sur le tuyau de direc tion côté droit Identification moteur Les données d identification du moteur B sont imprimées sur le demi carter gauche B A ...

Страница 80: ...ador luces de carretera 11 Pulsador indicadores de dirección 12 Pulsador encendido 13 Pulsador parada motor 1 LCD 2 Touche MODE 3 Voyant indicateurs de direction 4 Voyant allumage feux de route 5 Voyant indicateur point mort 6 Voyant béquille baissée 7 Levier commande embrayage 8 Bouton avertisseur sonore 9 Commutateur feux 10 Bouton feux de route 11 Bouton indicateurs de direction 12 Bouton allum...

Страница 81: ...ura agua inactiva BARRA Niveltensióndesalidadel alternador Si está prendida indica el correc tofuncionamientodelalternador INDICATIONS SUR LCD Fonctionnement et visualisation pages et icônes VITESSE INSTANTANEE ODO Totaliseur TRP Totaliseur partiel CLK Horloge dans les formats hh mm 23h 59mm LAP Chronomètre dans les for mats mm ss SPEED max Vitesse max ICONE Batterie ICONE Heureschangementhuile IC...

Страница 82: ...zador de los Km o millas recorridos desde el primer ajuste max 99999 Km o millas En el parámetro no se puede llevar a cero el valor Succession pages sur LCD Toutes les pages à partir de la page de default peuvent être obtenues seulement dans leur séquence Page 1 TEST Contrôle général de tous les seg ments et de toutes les icônes pré sentes sur LCD et test des indica teurs lumineux Durée du test 3 ...

Страница 83: ...ph Reloj HORAS MINUTOS 00 00 Se puede regular a través deMODE con vehículo parado como descri to a continuación Page 3 TRP De la page 2 en pressant briève ment MODE à moto arrêtée on passe à la page 3 Le passage a lieu quand la com mande est relâchée Elle visualise Vitesse instantanée max 199 Km h ou Mph TRP Totaliseur partiel max 999 9 Km ou Milles Il est possible de mettre à zéro ce paramètre ma...

Страница 84: ...ndo llegan los minutos deseados y des pués de 2 se asumirá el horario Procédure de mise au point de l horloge 1 Presser MODE jusqu au cligno tement des chiffres indiquant les heures 2 Si on relâche et on presse à nouveaulebouton lesheuresavan centd unchiffre Sioncontinueàle presser les heures avancent auto matiquement Si on le laisse inactif on passe au point 4 3 Relâcher le bouton MODE une fois o...

Страница 85: ...ras el LAP se anula manteniendo MODE apretado se presenta nuevamente el tiempo de LAP y soltando MODE si pasa a la página siguiente Page 5 LAP Chronomètre minutes secondes De la page 4 en pressant briève ment MODE à moto arrêtée on passe à la page 5 Le passage a lieu une fois la commande relâchée Elle visualise Vitesse instantanée max 199 Km h ou Mph LAP Indique MINUTES SECONDES 00 00 Fonctionneme...

Страница 86: ...apáginaque se desea oscurecer y mantenerla apretada por un lapso de tiempo de 10 Soltando el pulsador y a la búsque da sucesiva la página no será más visible Page 6 SPEED max De la page 5 en pressant briève ment MODE à moto arrêtée on passe à la page 6 Le passage a lieu une fois la commande relâchée Elle visualise Vitesse instantanée max 199 Km h ou Mph SPEED max Vitesse max obtenue à la dernière ...

Страница 87: ...o MODE hasta que aparez cannuevamentelosnúmerosanterioressepasaala página siguiente conservando los valores LAP Pour réactiver les pages Appuyer sur MODE de la page 2 default et le garder appuyé pour un temps de 10 Si on n avait rendu invisible aucune page toutes les pages deviendront invisibles exception faite pour la page 2 Pour les réactiver répéter l opération Annulation paramètres TRP SPEED m...

Страница 88: ... correctamente tam bién el instrumento La batería de berá ser sustituida por el concesio nario Betamotor autorizado ICONES DE SERVICE Les icônes de service s activent automatiquement après avoir at teint 90 de la valeur établie Elles seprésenterontsurtouteslespages d abord fixes et une fois dépassée la valeur établie elles clignoteront Ces valeurs sont préétablies au pre mier entretien et changeme...

Страница 89: ...ntenerlo apre tado hasta que desaparezca soltando aparecerá la figura indicada SELECTION Km h ou Mph Appuyer sur MODE et continuer à l appuyer jusqu à l apparition des barres Une fois le bouton relâché il y aura une seule unité de mesure et c est justement cette unité de mesure qui sera active en ce moment par exemple Mph Si on presse MODE brièvement l unité de mesure sera remplacée par Km h Pour ...

Страница 90: ... la izquierda empujar la llave girarlatotalmenteenelsentidocon trario a las agujas del reloj y luego soltarla La moto est dotée de quatre clés multifonctions et des rechanges relatifs à utiliser pour le commuta teur et pour le verrou de direction ATTENTION ilestconseilléderanger la clef de secours en un endroit sûr et à portée de main Nous vous conseillons de noter le numéro de code gravé sur les ...

Страница 91: ...es 1 370 mm Altura sillín 920 mm Distancia al suelo 310 mm Altura estribo reposapiés 378 mm Chasis Acero con doble cuna cerrada DONNEES TECHNIQUES Poids véhicule poids sans essence ENDURO MOTARD 85 kg Dimensions ENDURO Longueur totale 2 030 mm Largeur totale 790 mm Hauteur totale 1 230 mm Empattement 1 325 mm Hauteur de selle 930 mm Garde au sol 365 mm Hauteur cale pieds 440 mm Dimensions MOTARD L...

Страница 92: ...2 mm Freno delantero RR 125 ENDURO MOTARD Disco Ø 260 mm con mando hidráulico Freno trasero RR 125 ENDURO MOTARD Disco Ø 220 mm con mando hidráulico Contenances RR 125 ENDURO MOTARD Réservoir carburant 5 7 lt dont réservea 1 lt Huile moteur 1 2 lt Suspension avant RR 125 ENDURO MOTARD Fourche hydraulique 41 mm Ø Contenance d huile par jambe droit niveau avec tube en fin de course 185 mm 400 cc gau...

Страница 93: ...misión primaria Z 20 68 Transmisión secundaria Z 14 50 Cambio 5 velocidades Aceite motor Sint Motocompetition Moteur RR 125 ENDURO MOTARD type Monocylindre 4 temps avec refroidissement à air Alésaage x course 54x54 mm Cylindrée cm3 124 cc Rapport de compression 10 1 refroidissement à air allumage Electronique Moriyama F5HH Démarreur par kick starter Bougie NGK BR9 ES lubrification Forcée avec pomp...

Страница 94: ...r izquierdo bombi lla 12V 10W 12 Piloto trasero bombilla 12V 5 21W 13 Indicador de dirección trasero derecho bombilla 12V 10W 14 Generador 15 Bujía 16 Centralita electrónica 17 Regulador 12V 18 Luz testigo punto muerto 19 Indicador de dirección delantero derecho bombi lla 12V 10W 20 Claxon 12V 21 Sensor punto muerto 22 Sensor giros rueda 23 Pulsador stop freno delantero 24 GrupomandosDER pulsadorp...

Страница 95: ...NTO DEL VEHICULO Bi Blanco Ve Verde Ma Marrón Vi Violeta Bl Azul ultramar Ne Negro Gi Amarillo Rs Rojo Ar Anaranjado Az Azul Ro Rosa Gr Gris 1 3 4 5 6 7 2 8 23 10 11 12 13 14 15 16 17 18 19 20 21 22 9 24 25 26 27 28 29 30 26 31 32 33 34 35 ...

Страница 96: ... lampe 12V 10W 12 Phare arrière lampe 12V 5 21W 13 Flèche de direction arrière droite lampe 12V 10W 14 Générateur 15 Bougie 16 Centrale électronique SCHEMA ELECTRIQUE 17 Régulateur 12V 18 Voyant point mort 19 Flèche de direction avant droite lampe 12V 10W 20 Klaxon 12V 21 Capteur point mort 22 Capteur tours roue 23 Bouton arrêt frein avant 24 Groupe commandes droit bouton démarrage in terrupteur a...

Страница 97: ...OCIMIENTO DEL VEHICULO Bi Blanc Ve Vert Ma Marron Vi Violet Bl Bleu Ne Noir Gi Jaune Rs Rouge Ar Orange Az Bleu clair Ro Rose Gr Gris 1 3 4 5 6 7 2 8 23 10 11 12 13 14 15 16 17 18 19 20 21 22 9 24 25 26 27 28 29 30 26 31 32 33 34 35 ...

Страница 98: ...o carla con los polos hacia afuera ver la figura y conectar el polo negativo a la batería por último Enganchar nuevamente el elástico B A B DISPOSITIFS ELECTRIQUES Batterie La batterie A se trouve sous la joue avantdroiteetellenenécessitepas d entretien Il ne faut pas contrôler le niveau de l électrolyte ou ajouter de l eau Nettoyer les pôles de la batterie et si nécessaire étendre une subtile cou...

Страница 99: ...debe ser guar dada en un ambiente seco a temperatura entre 5 35 C y fuera del alcance de los niños ATTENTION Si pour n importe quelle raison il y a une fuite d élec trolyte acide sulfurique de la batterie il est conseillé de prendre toutes les précautions nécessaires L élec trolyte peut provoquer des graves brûlures S il entre en contact avec la peau rincez abondamment à l eau Si l électrolyte ent...

Страница 100: ...tencia mayor o inten tar reparar el mismo fusible Intervenciones no apropiadas po drían producir daños en el interior de la instalación eléctrica A C B D CENTRALE La centrale électronique A est pla cée sous la batterie dans la partie avant droite de la moto Pour démonter la centrale il est suf fisant de l enlever de l étrier présent sur le support de la batterie FUSIBLE INTERMITTENCE RELAIS BEQUIL...

Страница 101: ...e E al telerruptor de arranque F y a la bobina A T G es necesario des montareldeposito verDesmontaje del deposito del carburante en la pág 121 REGULATEUR TELERUPTEUR DEMARRAGE BOBINE A T Pouraccéderaurégulateurdeten sion E au télérupteur de démarra ge F et à la bobine A T G il faut enlever le réservoir voir Démonta ge réservoir carburantà page 121 ...

Страница 102: ...ne longévité maxi male du véhicule il est recommandé d utiliser les pro duits énumérés ci dessous TIPO DE PRODUCTO ESPECIFICACION TECNICA TYPE DE PRODUIT SPECIFIQUE TECHNIQUE ACEITE MOTOR BARDAHL XTM 15W50 HUILE MOTEUR ACEITE TRANSMISIÓN SINT MOTOCOMPETITION HUILE DE TRANSMISSION ACEITE FRENOS DOT 4 HUILE HYDRAULIQUE DE FREIN ACEITE PARA HORQUILLA LIQUI MOLY RACING SUSPENSION OIL SAE 10 HUILE POUR...

Страница 103: ...LO 2 INDICE ARGUMENTAL Control y mantenimiento antes y después de su utilización Abastecimiento combustible Rodaje Puesta en marcha del motor Caballette lateral INDEX Contrôles et entretien avant et après usage Approvisionnement carburant Rodage Démarrage du moteur Bequille laterale ...

Страница 104: ...ar que el motor se caliente un poco haciéndolo girar al mínimo durante algunos segundos Cada vez que el vehículo se utilice por caminos procurar lavarlo correctamente CONTROLES ET ENTRETIEN AVANT ET APRES USAGE Il est conseillé d effectuer avant et après usage quel ques opérations de contrôle et d entretien En fait quelques minutes passées à ces opérations ren dent la conduite plus sûre et peuvent...

Страница 105: ... d envi ron 5 7 litres dont 1 de réserve Le réservoir est doté d un tuyau d aérage C pour l évacuation des gaz ABASTECIMIENTO COMBUSTIBLE Desenroscar el tapón A Controlar la capacidad del de pósito que es de aproximada mente de 5 7 litros de los cuales 1 litros son de reserva Eldepositotieneuntuborespiradero C para la salida de los gases C A ...

Страница 106: ...iar el aceite en el motor Después de la primera salida por caminos procurar repasar toda la tornillería RODAGE Le rodage est d environ 500 km pendant cette période il est conseillé de Evitez de circuler à vitesse continue sans changer de régime En faisant varier le régime moteur les différents com posants prendront leur place uniformément dans un meilleur temps Evitezd utiliserlevéhiculeaveclapoig...

Страница 107: ...er B démarrer la moto attendre quel ques secondes enfin remettre le levier en position initiale B PUESTA EN MARCHA DEL MOTOR Girar la llave del conmutador en el sentido contrario a las agujas del reloj y cerciorarse que la luz testigo del punto muerto N ubi cada en el panel de instrumen tos esté prendida Atención Recordarse antes de gi rar la llave de colocar el pulsador del cambio luces en la pos...

Страница 108: ...esta en marcha de la moto en el caso que la posición de la pata del caballete se encuentre bajada Atención Noquedarsesentadossobrelamoto estacionada con el caballete ba jado A BEQUILLE LATERALE Important Avant d actionner la béquille latérale vérifier la consistance adéquate et la planéité de la sur face d appui Terrains mous gravier et goudron amolli par le soleil etc peuvent en effet provoquer d...

Страница 109: ...or Freno posterior Tubo recolección humo Desmontaje escape Desmontaje de los plásticos Desmontaje del deposito del carburante Mantenimiento programado INDEX Huile moteur Huile hydraulique de freins Demontage selle passager et filtre air Bougie Frein avant Frein arrière Tube recolte fumees Demontage marmite Demontage des parties en plastiques Demontage reservoir carburant Tableau d entretien ...

Страница 110: ... motor caliente Colocar un recipiente de bajo del motor Desenroscar el tapón de llenado A y el de drenaje B Vaciar completamente el cárter Cerrar el tapón B Introducir 1200 c c de aceite Volver a cerrar el tapón de llenado A Atención Elaceitecalientepuedepro vocar graves quemaduras A B HUILE MOTEUR Contrôle Garder la moto en position verticale par rapport au sol Contrôler la présence d hui le Pour...

Страница 111: ...ller oficial Beta Nota Para la sustitución ver la tabla en la página 124 utilizando el lubricante aconsejado en la página 102 Note Pour la vidange et remplacement voir le tableau page 124 en utilisant les lubrifiants conseillés page 102 A B C HUILE HYDRAULIQUE DE FREINS Frein avant Contrôlez àtraversleregard le niveau d huile A Le niveau minimum d huile ne doit jamais être inférieur au regard A Po...

Страница 112: ...vidad en la palanca puede ser debido a una burbuja de aire en el circuito dirigirse inmediata menteauntalleroficialBeta Note Pour la vidange et le remplacement voir page 124 en utilisant les lubrifiants conseillés page 102 A B Frein arrière Contrôlez à travers le réci pient d huile A la présence d huile hydraulique Le niveau d huile ne doit ja mais être inférieur au niveau minimum indiqué sur le r...

Страница 113: ...en la figura luego proce der de la siguiente manera Extraer la tapa C levantando los elásticos D y extrayéndolos por la parte trasera B A D C DEMONTAGE SELLE PASSAGER ET FILTRE AIR Pour accéder au filtre il est néces saire de démonter la selle Dévisser la vis A placée sur la selle enlever la selle selon la direction B comme indiqué sur la figure enfin procéder de la façon suivante Enlever le couve...

Страница 114: ...nterior de la caja de filtronosehaya dejadoningúnobjeto Efectuar la limpieza del filtro cada vez que se utilice el vehículo por no carretera caminos F D E Libérer le filtre F en décrochant le ressortEetenenlevantl élastiqueD Extraire le filtre F de la boîte Lelaveravecdel eaufroideetdu savon Le sécher L imbiber d huile pour filtres en éliminant l excédent On recom mande de couvrir de graisse la pa...

Страница 115: ...r lo que es aconsejable utilizar un aceite de buena calidad Se recomienda de utilizar siempre la bujías NGK CR7 HSA BOUGIE Maintenir la bougie en bon état contribue à une dimi nution de consommation et à un fonctionnement opti mal du moteur Pour effectuer le contrôle il suffit d enlever le cabo chon antiparasite et dévisser la bougie Contrôleravecunjeudecalel écartementdesélectro des qui doit se s...

Страница 116: ...girseauno de nuestros concesionarios au torizados Para la sustitución de las pastillas de freno aconse jamos dirigirse al propio lugar de compra Pour le changement des plaquettes de freins il est recommandé de contacter un concessionnaire agrée 2 mm FREIN AVANT Contrôle L état d usure des plaquet tes de frein est visible en re gardantl extrêmitédes2pla quettes sur l étrier voir flè che qui devront...

Страница 117: ... uno de nuestros concesiona rios autorizados Para la sustitución de las pastillas de freno aconse jamos dirigirse al propio lugar de compra Pour le changement des plaquettes de freins il est recommandé de contacter un concessionnaire agrée FREIN ARRIERE Contrôle L état d usure des plaquet tes de frein est visible en re gardantl extrêmitédes2pla quettes sur l étrier voir flè che qui devront avoir a...

Страница 118: ...solina reco giéndolo en un recipiente adecua do para la eliminación del mismo de acuerdo a las normas en vigen tes Nota Efectuar el vaciado cada 3 000 km A TUBE RECOLTE FUMEES Le tube récolte fumées A se trouve dans la partie arrière à la droite de la moto entre la roue arrière et l amortisseur il sort de la partie infé rieure de la boîte filtre et il récolte les gaz produits par l huile moteur Si...

Страница 119: ...to quitar el tornillo B que fija el escape al chasis aflojar la abrazadera C de conexión al tubo de escape y luego extraer el esca pe C B DEMONTAGE MARMITE Pour démonter la marmite il faut enlever la joue arrière gauche voir Démontages des parties en plasti ques à page 120 A ce point enlever la vis B qui fixe la marmite au châssis desserrer le col lierCdejonctionautuyaud échap pementetenfinenlever...

Страница 120: ... protecciones es necesario desen roscar los seis tornillos D laterales tres por cada lado y los cuatro tornillos F dos por cada lado que fijanlaproteccióndelanteraalcha sis A D F B C DEMONTAGE DES PARTIES EN PLASTIQUES Pour effectuer aisément les contrô lesetlesopérationsnécessairesdans certaines zones de la moto il faut démonter les parties de la carrosse rie de la façon suivante Démontage joues ...

Страница 121: ...o del carburante y quitar el deposito extrayéndolo ha cia la parte posterior a través de las espigas antivibrantes que se en cuentran en el chasis DEMONTAGE RESERVOIR CARBURANT Dévisser la vis F de fixation du réser voir au châssis détacher le tuyau du robinet carburant et enlever le réservoir en l extrayant vers le côté arrière des tétons anti vibrants pré sents sur le châssis F ...

Страница 122: ...los pa neles laterales posteriores Para quitar la parte inferior es nece sario desenroscar los 3 tornillos de fijaciónBubicadosdebajodelguar dabarros Démontage garde boue arrière Le garde boue arrière est composé par deux parties Une plastique co lorée dans la partie supérieure et une partie inférieure noire Pour enlever la partie supérieure dévisser la vis de fixation A une fois les joues arrière...

Страница 123: ...ija el refuerzo del guardaba rros En fin quitar los dos tornillos de fijación E del refuerzo del guarda barros ubicado encima del mismo refuerzo Démontage garde boue avant Enlever les quatre visC placées sous le garde boue avant Par la suite enlever la vis D placée toujourssouslegarde boue defixa tion du renforcement du garde boue Enlever enfin les deux vis de fixa tion E du renforcement du garde ...

Страница 124: ... t t t t t c c c c c c c c c c s s s s c c c c c c c c c c c c c c c c c c c c c c c c c c c c c c c c c c c c c c c c c c c c c c c c c c c c c c c c c c c c c c c c c c c c c c c c c c c p cada1 000km cada 1 000km bougie filtre huile moteur embrayage jeu soupapes huile moteur et filtre huile réglage ralenti tuyaux huile moteur Moteur amortisseur arrière batterie boulonnerie paliers de direction ...

Страница 125: ... flujo de la gasolina Regulación juego gas Control y regulacion juego manillar Tensado cadena Regulacion amortiguador posterior Haz luminoso INDEX Réglage freins Réglage de l embrayage Réglage du ralenti Réglage flux essence Réglage jeu gaz Côntrole et réglage jeu direction Réglage tension chaîne Réglage amortisseur arrière Faisceau lumineux ...

Страница 126: ... es del tipo de disco con mando hidráulico Es posible variar la posición del pedal en altura actuando sobre el registro A y B REGLAGE FREINS Frein avant Le frein avant est à disque à commande hydraulique pour lequel aucun réglage n est nécessaire Frein arrière Le frein arrière est à disque à commande hydraulique Il est possible de varier la position de la pédale en hauteur en intervenant sur les r...

Страница 127: ...gistro B después de ha ber levantado la protección guar dapolvo de goma C La palanca debe tener 5 mm de carrera en vacío 5 mm A B C REGLAGE DE L EMBRAYAGE Généralement l unique opération sur l embrayage est le réglage de la position du levier A Pour effec tuer ce réglage agir sur le régleur B après avoir soulevé le protecteur pare poussière en caoutchouc C Le levier doit avoir 5 mm de course à vid...

Страница 128: ...uando en la tuer ca C del mando del acelerador como indicado en la figura des pués de haber levantado la pro tección guardapolvo D REGLAGE DU RALENTI Pour réaliser correctement cette opération il est conseillé de l effec tuer à moteur chaud en utilisant un compte toursélectroniquebranché au câble de la bougie Intervenir avecuntournevissurlavisderégleur A afin de régler le ralenti à 1900 tours REGL...

Страница 129: ...Nota Unacorrectaregulación ade más de no dejar juego tampoco debe causar endurecimiento o irre gularidad durante la rotación del manillar B A C CONTROLE ET REGLAGE JEU DIRECTION Vérifiez périodiquement le jeu de la colonne de direction en bougeant d avant arrière la fourche comme illustré sur la figure Dans le cas ou du jeu serait décelé procédez au réglage en opérant ainsi dévisser les vis A relâ...

Страница 130: ...uerca A manteniendo el tensor de cadena a tope sobre el registro Apretar nuevamente la contra tuerca B B C D A REGLAGE TENSION CHAINE Pour une meilleure longivité de la chaîne il est conseillé de contrôler périodiquement sa tension et de la tenir toujours propre et la lubrifier Si le jeu de la chaîne est supérieure à 20 mm voir figure procédez à sa tension Relâchez l écrou A Dévisser le contre écr...

Страница 131: ...m Motard 193 mm 188 mm Por cualquier anomalía de funcio namiento dirigirse a un concesio nario oficial BETA Y X A REGLAGE AMORTISSEUR ARRIERE Réglage de la précharge du ressort Pour régler la force de l amortisseur il faut agir sur la bague A Il est possible de varier la force en préchargeant le ressort par rapport à la mesure standard selon le ta bleau suivant Passangers 1 personne Y 2 personnes ...

Страница 132: ...arse en la moto y verificar que el haz luminosoproyectadoenlaparedestépocodebajodelacruzcolocada en la pared FAISCEAU LUMINEUX Le réglage du faisceau lumineux se fait manuellement après avoir dévissé les vis Allen qui se trouve sur les côtés de l optique L orientation du faisceau lumi neux doit être vérifiée fréquem ment Leréglageestuniquement vertical Mettre le véhicule au plat mais pas sur la bé...

Страница 133: ...APITRE 5 INDICE ARGUMENTAL Sustitución bombillas del farol delantero Sustitución bombillas piloto trasero Sustitución indicadores de dirección INDEX Remplacement lampe feu avant Rempalcement lampe phare arriere Remplacement indicateurs de direction ...

Страница 134: ...iencia y girar la brida de fijación F en el sentido de las agujas del reloj hasta el tope A D C E F REMPLACEMENT LAMPE FEU AVANT Pour remplacer la lampe du projec teur avant il faut enlever le masque frontal de la moto à laquelle le pro jecteur est fixé Pour démonter le masque il faut enlever les deux boutons latéraux en caoutchouc A qui le fixent au châssis et il faut extraire la partie inférieur...

Страница 135: ...amente la másca ra portafaro en los orificios B que se encuentran en el guardabarros y fijarla al chasis con los botones de goma A B Remonterlacalotteencaoutchouc E et le connecteur électrique Raccrocherlemasqueporte phare aux trous B sur le garde boue et le fixer au châssis au moyen des bou tons en caoutchouc A ...

Страница 136: ...s suficiente realizar una ligera presión sobre la misma girar la en el sentido contrario a las agu jas del reloj de 30 y luego extraerla A C B REMPALCEMENT LAMPE PHARE ARRIERE Pour remplacer la lampe du phare arrière effectuer les opérations sui vantes Enlever les deux vis A de fixation et l élément transparent B Remplacer la lampe défectueuse C 12V 5 21 Remonter l élément transparent B avec les d...

Страница 137: ...xtraer el conjunto del indicador de dirección y conectarlo Conectar el indicador de dirección nuevo y co locarlo nuevamente en el soporte Enroscar la tuerca B A B REMPLACEMENT INDICATEURS DE DIRECTION Les indicateurs de direction sont dotés de voyants lumineux En cas de mauvais fonctionnement il faut remplacer tout le clignoteur en ef fectuant les opérations suivantes Clignoteurs avant Libérer le ...

Страница 138: ......

Страница 139: ...QUE FAIRE EN CAS DE PANNE QUE HACER EN CASO DE EMERGENCIA 139 6 ÍNDICE ARGUMENTAL Búsqueda de la avería INDEX Recherche de la panne CAPITULO 6 CHAPITRE 6 ...

Страница 140: ... Si la panne persiste voir un concessionnaire Motor ahogado con el gas todo abierto insistir unos instantes en ponerlo en mar cha Sinoesasí procederadesmontarla bujía y limpiar Ouvrez la poignée gaz à fond insistez sur le démarreur démontez et séchez la bougie INCONVENIENTE PANNE CAUSA CAUSE REMEDIO SOLUTION El motor no arranca Instalación de alimentación del carburante Le moteur ne démarre pas tu...

Страница 141: ...ur la bougie El motor se calienta y Escape salida en parte obstruido pierde potencia Lumière d echappement obstruée Le moteur surchauffe et perd de la puissance Mezcla muy pobre Mélange trop pauvre Encendido retardado Allumage mal réglé trop de retard Corregir la correcta distancia Effectuez correctement le réglage Limpiar o sustituir La nettoyer ou remplacer Verificar la fase Vérifiez la phase Di...

Страница 142: ...icial Voir un concessionnaire agrée Dirigirse a un concesionario oficial Voir un concessionnaire agrée Frenada anterior escasa Pastilla desgastada Frein avant défectueux Plaquettes usées Presencia de aire o humedad en el circuito hidráulico Présence d air ou humidité dans le circuit hydraulique Frenada post escasa Pastiglie desgastada Frein arrière défectueux Worn pads Presencia de aire o humedad ...

Страница 143: ...to del carburante 121 Desmontaje escape 119 Dispositivos eléctricos 98 Elementos principales 78 Esquema eléctrico 94 Freno anterior 116 Freno posterior 117 Haz luminoso 132 Indicaciones en LCD 81 Lubricantes y líquidos aconsejados 102 Mandos 80 Mantenimiento programado 124 Puesta en marcha del motor 107 Regulación amortiguador posterior 131 Regulación embrague 127 Regulación flujo de la gasolina 1...

Страница 144: ...es 98 Données techniques 91 Eléments principaux 78 Faisceau lumineux 132 Frein arrière 117 Frein avant 116 Huile moteur 110 Huile hydraulique de freins 111 Identification du véhicule 79 Indications sur LCD 81 Lubrifiants et ingrédients 102 Remplacement indicateurs de direction 137 Remplacement lampe feu avant 134 Rempalcement lampe phare arriere 136 Recherche de la panne 140 Réglage amortisseur ar...

Страница 145: ...5 RR 125 cc ENDURO MOTARD Vielen Dank für das Vertrauen dass Sie uns gegeben haben Mit dieser Anleitung möchten wir Ihnen die nötigen Informationen für einen richtigen Gebrauch und einer guten Wartung Ihres Motorrads geben ...

Страница 146: ... Sich bei der Fahrt nie ablenken oder ablenken lassen Während der Fahrt nicht essen trinken mit dem Handy telefonieren usw Bei der Fahrt keine Musik über die Kopfhörer hören Niemals im Windschutz anderer Fahrzeuge fahren Nie abschleppen oder sich abschleppen lassen Stets den Sicherheitsabstand einhalten Auch tagsüber immer mit Abblendlicht fahren Fahren nur auf dem Hinterrad Schlangen oder Wellenl...

Страница 147: ...Auspuffs 189 Ausbau der Plastikteile 190 Ausbau Benzintank 191 Wartungsprogramm 194 ABSCHNITT 4 EINSTELLUNGEN Einstellung der Bremsen 196 Einstellung der Kupplung 197 Leerlaufeinstellung 198 Einstellung des Benzinflusses 198 Einstellung Gaszugspiel 198 Kontrolle und Einstellung Lenkerspiel 199 Spannen der Kette 200 Einstellung des hinteren Stoßdämpfers 201 Einstellen des Scheinwerfers 202 ABSCHNIT...

Страница 148: ......

Страница 149: ...SCHNITT 1 INHALTSVERZEICHNIS Die wichtigsten Bauteile Rahmen und Motornummer Lenkerarmaturen Anzeigen am LCD Zündschloss Lenkradschloss Technische Angaben Schaltplan Elektrische Bauteile Empfohlene Schmiermittel und Flüssigkeiten ...

Страница 150: ...150 1 DAS FAHRZEIG KENNEN DIE WICHTIGSTEN BAUTEILE 1 Tankdeckel 2 Luftfilter 3 Ständer 4 Benzinhahn 5 Benzintank 9 Schalldämpfer 7 Kickstarter 8 Auspuff 1 2 3 5 4 7 6 8 ...

Страница 151: ...151 1 DAS FAHRZEIG KENNEN B A RAHMEN UND MOTORNUMMER Rahmennummer DieRahmennummerAistrechtsauf dem Lenkrohr eingestanzt Motornummer Die Motornummer B ist auf der lin ken Gehäusehälfte eingestanzt ...

Страница 152: ...4 Fernlichtkontrolle 5 Leerlaufkontrolle 6 Kontrolle abgeklappter Ständer 7 Kupplungshebel 8 Hupenschalter 9 Licht Wechselschalter 10 Fernlichtschalter 11 Blinkerschalter 12 Anlasserschalter 13 Schalter zum Ausschalten des Motors Abblendlicht 2 1 6 5 4 3 8 9 7 Fernlicht 10 11 12 13 ...

Страница 153: ...ometerstand CLK Uhr in den Formaten hh mm 23h 59mm LAP Chronometer in den Formaten mm ss SPEED max Höchstgeschwindigkeit IKONE Batterie IKONE Stunden Ölwechsel IKONE Benzin IKONE Wartungsschlüssel IKONE Wasser Temperatur nicht aktiv BALKEN Spannungswert am Lichtmaschinen Ausgang Wenneingeschaltet wirdderrich tigeLichtmaschinenbetriebange zeigt ...

Страница 154: ...gen Der test dauert 3 Sekunden Nach dem test wird die Vorein stellungsseite angezeigt Seite 2 VOREINSTELLUNGSSEITE Die Voreinstellungsseite wird nach dem TEST automatisch angezeigt Es wird angezeigt Die richtige Ausgangsspannung an der Lichtmaschine Istgeschwindigkeit max 199 Km h oder Mph ODO Gesamt Kilometer oder Meilenstand ab erstem Setup max 99999 Km oder Meilen DieserParameterkannnichtaufNul...

Страница 155: ...Km oder Meilen KannmanuellaufNullzurückgestellt werden bzw stellt sich automatisch bei Erreichen von 999 9 Kilometern oder Meilen auf Null zurück Seite 4 CLK Uhr Stunden Minuten Von Seite 3 kann bei stehendem Fahrzeug durch kurzes Drücken auf die Taste MODE auf Seite 3 umge schaltet werden Das Umschalten erfolgt beim Los lassen der Taste Es wird angezeigt Istgeschwindigkeit max 199 Km h oder Mph U...

Страница 156: ... Bei gedrückt hal ten automatisches Vorstellen Ohne Drücken geht es zu Punkt 4 3 Ist die gewünschte Anzeige ein gestellt muss die Taste MODE los gelassen werden 4 Nach 2 Sekunden fängt die Minutenanzeige an zu blinken 5 Wie bei Punkt 2 vorgehen Ohne Drücken der Taste MODE geht es zu Punkt 6 6 st die gewünschte Minutenan zeige eingestellt muss die Taste MODE losgelassen werden Nach 2 Sekunden wird ...

Страница 157: ...m Fahr zeug durch kurzes Drücken auf die Taste MODE Automatisches Ein und Ausschal ten durch Radimpuls 3SekundennachdemdasRadsteht hört der Chronometer auf zu mes sen und berichtigt gleichzeitig die Verzögerungszeit Um auf die näch steSeitezugelangen ohnedieLAP Zeitzulöschen mussdieTasteMODE gedrückt und gedrückt gehalten werden Nach 1 5 Sekunden wird anstelle der Zeit angezeigt wenn die Taste MOD...

Страница 158: ...Dmax Höchstgeschwindigkeit Die nach dem letzten Nullstellen er reichteHöchstgeschwindigkeit Wird durch eine blinkenden km h Anzei geangezeigt KannmanuellaufNull zurück gestellt werden Verdunkeln der Seiten Werden Seiten nicht benötigt kön nen sie unsichtbar gemacht wer den Sie bleiben aber aktiv Eine Seite kann verdunkelt werden um die nächste Seite schneller zu errei chen Mit Ausnahme der Voreins...

Страница 159: ...P angezeigten Zeiten Das Löschen der Parameter kann bei stehendem Fahrzeug über die Taste MODE erfolgen Löschen von TRP und SPEED max Höchstgeschwindigkeit Bei Anzeige der zu löschenden Werte die Taste MODE drücken bis anstelle der Ziffern angezeigt wird Beim Loslassen wird dann 0 0 angezeigt Löschen von LAP Bei Anzeige von LAP die Taste MODE drücken Die Taste solange drücken bis die Balken angeze...

Страница 160: ... 10 5V Das Blinken des ersten senkrechten Balkens und das Aufleuchten der Ikone Batterie zeigen an dass die Lichtmaschinenspannung unter 10 5V liegt Bleibt die Anzeige län gere Zeit bestehen muss nach der Ursache gesucht werden Das Blin ken aller Balken und der Ikone Bat terie zeigt an dass die Spannung über 14 5V liegt Nicht aktiv ACHTUNG Das Instrument hat eine eigene interne Batterie mit der di...

Страница 161: ...e wird eine der beiden Einstellmöglichkeitenangezeigt Das ist die die derzeit eingeschaltet ist zum Beispiel Mph DurchkurzesDrückenaufMODEwird auf Km h umgestellt Zur Bestätigung der Einstellung auf MODE drücken wenn die ge wünschteEinstellungangezeigtwird und solange gedrückt halten bis angezeigt wird Beim Loslassen wird die angegebene Abbildung angezeigt ...

Страница 162: ...nensichdieSchlüs sel Kennnummer aufzuschreiben damit gegebenenfalls Zweitschlüs sel bestellt werden können ZÜNDSCHLOSS Kontrolliert den Zündstromkreis OFF Elektrisches System ausge schaltet ON Das Fahrzeug kann gestartet werden LENKRADSCHLOSS A DasLenkradschlossistentriegelt B Das Lenkradschloss ist verriegelt Zum Einrasten des Lenkschlosses muss der Lenker nach links gedreht werden Auf den Schlüs...

Страница 163: ...Gesamtbreite 820 mm Gesamthöhe 1 215 mm Radstand 1 370 mm Sitzbankhöhe 933 mm Bodenabstand 335 mm Höhe der Fußrasten 398 mm Fahrzeugmaße MOTARD Gesamtlänge 2 065 mm Gesamtbreite 820 mm Gesamthöhe 1 230 mm Radstand 1 370 mm Sitzbankhöhe 920 mm Bodenabstand 310 mm Höhe der Fußrasten 378 mm Rahmen Geschlossener Doppelschleifen Stahlrahmen ...

Страница 164: ...chäften Rechts Füllmenge mit Rohr am Anschlag185 mm 400 cc Links Füllmenge mit Rohr am Anschlag 185 mm 400 cc Hintere Radaufhängung Federung RR 125 ENDURO MOTARD EinzelstoßdämpfermiteinstellbarerFedervorspannung Stoßdämpfer Federweg 52 mm Vorderradbremse RR 125 ENDURO MOTARD Scheibenbremse mit hydraulischer Betätigung Ø 260 mm Hinterradbremse RR 125 ENDURO MOTARD Scheibenbremse mit hydraulischer B...

Страница 165: ...0 1 Luftkühlung Zündung Elektronisch Moriyama F5HH Kickstarter Zündkerze NGK R CR7 HSA Schmierung Schmierkreislauf mit Pumpe Benzinversorgung RR 125 ENDURO MOTARD Vergaser MIKUNI UCAL 5Nh Ø26 38 Betrieb mit bleifreiem Benzin Kupplung Ölbad Mehrscheibenkupplung Hauptantrieb Z 20 68 Nebenantrieb Z 14 50 Schaltgetriebe 5 Ganggetriebe Motoröl Sint Motocompetition ...

Страница 166: ... Rücklicht Lampe 12V 5 21W 13 Hinterer rechter Blinker Lampe 12V 10W 14 Lichtmaschine 15 Zündkerze 16 Zündelektronik 17 Regler 12V SCHALTPLAN 18 Leerlauf Kontrollleuchte 19 Vorderer rechter Blinker Lampe 12V 10W 20 Hupe 12V 21 Leerlauf Sensor 22 Raddrehzahlsensor 23 Bremslichtschalter an Vorderradbremse 24 Schaltereinheitrechts Anlasserschalter Schalterzum Abstellen des Motors 25 Ständerrelais 26 ...

Страница 167: ...EIG KENNEN Bi Weiß Ve Grün Ma Braun Vi Violett Bl Blau Ne Schwarz Gi Gelb Rs Rot Ar Orange Az Hellblau Ro Rosa Gr Grau 1 3 4 5 6 7 2 8 23 10 11 12 13 14 15 16 17 18 19 20 21 22 9 24 25 26 27 28 29 30 26 31 32 33 34 35 ...

Страница 168: ...ber halten Gegebenenfalls mit etwas säure freiem Fett schmieren Ausbau der Batterie Die rechte vordere Seitenverklei dung abmontieren siehe Ausbau der Plastikteile auf Seite 190 an schließend zuerst den Minuspol und dann den Pluspol von der Batterie trennen Das Gummiband B aushaken Die Batterie ausbauen Beim Wiedereinbau muss die Batte rie mit den Polen nach außen ein gebaut werden siehe Abbildung...

Страница 169: ...n Arzt aufsuchen Obwohl es sich um eine versiegelte Batterie handelt können explosive Gase austreten Funkenbildung vermeiden und offene Flammen von der Batterie fernhalten AltbatterienvonKindernfernhaltenundgesetzesmäßig entsorgen Nie die Schutzabdeckung entfernen Beim Einbau der Batterie auf die richtigen Polan schlüsse achten STILLLEGEN Bei längerem Stilllegen des Fahrzeugs die Batterie ausbauen...

Страница 170: ...ukönnen muss die Sitzbank ausgebaut werden Diese Bauteile sind mit Plastikhalte rungen am Fahrzeugrahmen befe stigt EinedurchgebrannteSicherungdarf nurdurcheineanderegleichwertige Sicherung ersetzt werden SolltedieErsatzsicherungnachdem Einbau ebenfalls durchbrennen müssen Sie sich unbedingt an eine BETAMOTOR Fachwerkstatt wen den Achtung Auf keinen Fall eine Sicherung mit größerer Leistung einbau...

Страница 171: ...IG KENNEN E G F REGLER ANLASSER FERNRELAIS ZÜNDSPULE Um an den Spannungsregler E das Anlasser Fernrelais F und an die Zündspule G gelangen zu können muss der Tank ausgebaut werden siehe Ausbau Benzintank auf Seite 191 ...

Страница 172: ...r Haltbarkeit des Fahrzeugs empfehlen wir möglichst die in der Tabelle aufgelisteten Produkte zu verwenden ART DES PRODUKTES TECHNISCHE ANGABEN MOTORÖL BARDAHL XTM 15W50 GETRIEBEÖL SINT MOTOCOMPETITION BREMSFLÜSSIGKEIT DOT 4 GABELÖL FLIQUI MOLY RACING SUSPENSION OIL SAE 10 FETT FÜR GELENKE UND ZÜGE BARDAHL MPG2 ...

Страница 173: ...FUNKTION UND BENUTZUNG 173 2 ABSCHNITT 2 INHALTSVERZEICHNIS Kontrollen und Wartung vor und nach dem Einsatz Tanken Einfahren Den Motor Starten Seitenständer ...

Страница 174: ...den Die wenigen Minuten die Sie diesen Arbeiten widmen machen das Fahren sicherer und helfen Zeit und Geld zu sparen Wie folgt vorgehen Den Reifendruck den allgemeinen Reifenzustand und die Profilstärke überprüfen Kontrollieren ob die Fahrzeugpapiere vorhanden sind An kalten Tagen sollte der Motor vorm Losfahren für kurze Zeit im Leerlauf warmlaufen Das Fahrzeug muss nach jedem Einsatz im Gelände ...

Страница 175: ...FUNKTION UND BENUTZUNG 175 2 TANKEN Den Deckel A entfernen Der Tank hat ein Fassungsvermö gen von 5 7 Litern davon 1 Liter Reserve Der Tank ist mit einem Entlüftungs schlauch C ausgestattet C A ...

Страница 176: ...Fahrten mit konstanter Geschwindigkeit vermeiden Durch Geschwindigkeitsänderungen werden die Bau teile gleichmäßiger und schneller eingefahren Vermeiden den Gasgriff mehr als 3 4 zu öffnen Achtung Nach 500 km muss das Motoröl gewechselt werden Nach der ersten Fahrt im Gelände alle Schrauben und Bolzen überprüfen ...

Страница 177: ...everbrauch so gering wie möglich ist Den Benzinhahn A drehen OFF geschlossen ON offen RES Reserve Elektrisches Starten Den Kupplungshebel ziehen und gleichzeitig den Anlasserschalter am Gasgriff drücken ohne dabei den Gasgriff zu drehen Starten mit Kickstarter Kräftig mit dem Fuß den Kickstar terhebeldurchdrücken anschlie ßend den Hebel auf Ausgangs stellung zurückstellen ANMERKUNG Bei kaltem Moto...

Страница 178: ...s das Hinterrad auf die Seite des Ge fälles weist Bei Einsatz des Seitenständers mit den Fuß auf das Ständerbein drüc ken Das Ständerbein mit dem Fuß vollständigausfahrenunddanndas Fahrzeugsoweitneigen bisderStän der auf dem Untergrund aufliegt Der Ständer ist bei diesem Fahrzeug mit einer Vorrichtung A und einer Kontrolllampe am Armaturenbrett ausgestattet siehe Seite 152 die ein Starten des Moto...

Страница 179: ...ALTSVERZEICHNIS Motoröl Bremsflüssigkeit Ausbau Beifahrersattel und Luftfilter Zündkerze Vorderradbremse Hinterradbremse Öldampf sammelleitung Ausbau des Auspuffs Ausbau der Plastikteile Ausbau Benzintank Wartungsprogramm ABSCHNITT 3 ...

Страница 180: ... Angaben aus der Tabelle auf Seite 194 beachten Die auf Seite 172 angegebenen empfohlenen Schmiermittel benutzen Wechseln Das Öl immer bei warmem Motor wechseln Einen Behälter unter dem Motor aufstellen Die Öl Einfüllschraube A und die Öl AblassschraubeBabschrauben Das Öl vollständig aus dem Ge häuse ablassen Die Öl Ablassschraube B wieder schließen 1200 cc Öl einfüllen Die Öl Einfüllschraube A wi...

Страница 181: ...envonBremsflüssigkeit die beiden Schrauben B abschrau ben den Deckel C anheben und Bremsflüssigkeit einfüllen Achtung Fühlt sich der Bremshebel bei Betä tig weich an können Luftblasen im Bremskreislauf sein Wenden Sie sich in diesem Fall sofort an Ihren Verkäufer Anmerkung Für das Wechseln die Angaben aus der Tabelle auf Seite 194 beachten Die auf Seite 172 angegebenen empfohlenen Schmiermittel be...

Страница 182: ...emsflüssigkeitsstand am BremsflüssigkeitsbehälterAüberprü fen Der Bremsflüssigkeitsstand darf nie unter die Markierung des Mindest standsamBremsflüssigkeitsbehälter abfallen ZumNachfüllenBremsflüssigkeitüber die Einfüllöffnung B einfüllen Achtung Fühlt sich das Bremspedal bei Betä tig weich an können Luftblasen im Bremskreislauf sein Wenden Sie sich in diesem Fall sofort an Ihren Verkäufer A B ...

Страница 183: ...er gelangen zu kön nen folgendes ausbauen Die Schraube A oben an der Sitz bank abschrauben und die Sitz bank zum Ausbau in der angege benen Richtung B herausziehen Anschließend wie folgt vorgehen Die Gummibänder D anheben und den Deckel C zum Ausbau nach hinten herausziehen B A D C ...

Страница 184: ...ie Kontakt wände mit dem Filtergehäuse mit Fett einzustreichen Gegebenenfalls das Filtergehäuse auch innen reinigen Beim Wiedereinbau in umgekehr ter Reihenfolge vorgehen F D E Anmerkung Ist der Filter sehr schmutzig zuerst mit dem entsprechenden Reini gungsmittel waschen Ist der Filter beschädigt muss er sofort ausgewechselt werden Achtung Nach jeder Arbeit prüfen dass kei ne Gegenstände im Filte...

Страница 185: ...d durch Verbiegen der Masseelektrode eingestellt werden Die Zündkerze auf Risse am Isolierteil und Korrosion an den Elektroden prüfen gegebenenfalls sofort wech seln Für die Kontrolle müssen die in der Tabelle auf Seite 194 aufgeführten Angaben beachtet werden DieZündkerzevonHandbiszumAnschlageinschrauben anschließend mit dem Kerzenschlüssel festschrauben Anmerkung Bei der Verwendung minderwertige...

Страница 186: ...d die Ränder der beiden Bremsbeläge zu sehen die eine Bremsbelagstärke von min destens 2 mm aufweisen müssen Ist die Bremsbelagstärke dünner müssen die Bremsbeläge sofort ge wechselt werden Anmerkung Diese Kontrolle alle 2500 km vorneh men Zum Wechseln einen autorisierten Vertragshändler aufsuchen WirempfehlenIhnensichzumWech seln der Bremsbeläge an Ihren Ver käufer zu wenden 2 mm ...

Страница 187: ...ort sind die Ränder der beiden Bremsbeläge zu sehen die eine Bremsbelagstärke von mindestens 2 mm aufweisen müssen Ist die Bremsbelagstärke dünner müssen die Bremsbeläge sofort gewechselt werden Anmerkung Diese Kontrolle alle 2500 km vorneh men Zum Wechseln einen autorisierten Vertragshändler aufsuchen WirempfehlenIhnensichzumWech seln der Bremsbeläge an Ihren Ver käufer zu wenden ...

Страница 188: ...fer SiewirdausderUnter seite des Filters herausgeführt und sammelt die Motoröldämpfe Sammelt sich Öl in der Leitung muss die Leitung entleert werden Dazu mit einer Zange den Verschluss am unterenEndeabschneidenunddas Benzin Ölgemisch in einen Behälter leiten der anschließend vorschrifts mäßig entsorgt werden muss ANMERKUNG Die Leitung alle 3 000 km entleeren A ...

Страница 189: ...fs muss die linke hintere Seitenverkleidung ab montiert werden siehe Ausbau der Plastikteile auf Seite 190 Jetzt die Schraube B entfernen mit der der Auspuff am Rahmen befe stigt ist Die Verbindungsschelle C zumAuspuffrohrlösenundanschlie ßend den Auspuff herausziehen C B ...

Страница 190: ...abschrauben unddiehinterenSeitenteileabmon tieren Mit der oberen Schraube ist außer dem hinteren Seitenteil auch der obere Teil des Kotflügels befe stigt Ausbau der vorderen Seitenteile Die vorderen Seitenteile B sind mit Nieten an den Frontverkleidungen C befestigt Zum Ausbau dieser Verkleidungen müssen die sechs seitlichen Schrauben D drei auf je der Seite und die vier Schrauben F zwei auf jeder...

Страница 191: ...NG UND KONTROLLEN AUSBAU BENZINTANK DieBefestigungsschraubeFdesBen zintanks am Rahmen abschrauben Die Leitung vom Benzinhahn tren nen und dann den Tank nach hin tenausdenVibrationsdämpfernam Rahmen herausziehen F ...

Страница 192: ...zwei Teilen Oben ein farbiges und unteren ein schwarzes Plastikteil Zum Abmontieren des oberen Teils zunächst die hinteren Seitenverklei dungen abbauen und dann die Befestigungsschraube A entfernen Zum Abmontieren des unteren Teils die 3 Befestigungsschrauben B un ter dem Kotflügel abschrauben ...

Страница 193: ...r Schrauben C unter dem vorderen Kotflügel abschrauben Anschließend die Befestigungs schraubeDderKotflügelversteifung abschrauben auch unterhalb des Kotflügels Zum Schluss die beiden Befesti gungsschraubenE der Kotflügelver steifung oberhalb der Versteifung abschrauben ...

Страница 194: ...artungscoupon 45 000 Km Hinterer Stoßdämpfer Batterie Schrauben und Bolzen Lenklager und Lenkspiel Luftfilter Vorderradgabel Elektrische Anlage Bremsanlage Bremsflüssigkeit alle 2 Jahre wechseln Reinigung Antriebskette Reifendruck und Abnutzung Spannen und Schmieren Antriebskette alle 1 000 km Bremsleitungen Alle 2 Jahre wechseln Bremsleitungen Alle 2 Jahre wechseln c s c s c s c s c p p p p s p s...

Страница 195: ...ung der Bremsen Einstellung der Kupplung Leerlaufeinstellung Einstellung des Benzinflusses Einstellung Gaszugspiel Kontrolle und Einstellung Lenkerspiel Spannen der Kette Einstellung des hinteren Stoßdämpfers Einstellen des Scheinwerfers ABSCHNITT 4 ...

Страница 196: ...remse ist eine Schei benbremse mit hydraulischer Betä tigung Diese Bremse muss nicht nachgestellt werden Hinterradbremse Die Hinterradbremse ist eine Schei benbremse mit hydraulischer Betä tigung Die Höhe des Bremspedals kann über die Stellvorrichtungen A und B eingestellt werden ...

Страница 197: ...NG Die einzige Arbeit die normalerwei se an der Kupplung vorgenommen wird ist die Einstellung des Kupp lungshebels A FürdieseEinstellungzuerstdenGum mi Staubschutz C anheben und dann die Stellvorrichtung B verstel len DerHebelmusseinenLeerhubvon5 mm haben ...

Страница 198: ...erdie Leerlauf Einstellschraube A die LeerlaufdrehzahlaufeinenWertvon ungefähr 1900 U Min einstellen EINSTELLUNG DES BENZINFLUSSES Zur Einstellung des Benzinflusses die Schraube B von vollständig ge schlossener Position um 1 1 2 Um drehungen öffnen EINSTELLUNG GASZUGSPIEL Hat der Gasgriff mehr als 3 mm Spiel am Gasgriffrand gemessen muss dasSpiel nachAnhebenderStaub schutzhülle D am Gewinde Einste...

Страница 199: ...l festgestellt für die Einstellung wie folgt vorgehen Die Schrauben A abschrauben Die Mutter B lösen Das Spiel durch Verstellen des Gewinderings C ausgleichen Zum Festziehen in umgekehrter Rei henfolge vorgehen Anmerkung Bei einer richtigen Ein stellung darf kein Spiel bleiben der Lenker darf nicht hart zu drehen sein und muss sich gleichmäßig drehen lassen ...

Страница 200: ...Kette größer als 20 mm muss die Kette gespannt werden Die Mutter A lösen Die Kontermutter B lösen Die Schraube C verstellen Auf der gegenüber liegenden Sei te die Schraube auf die gleiche Position einstellen DieAusrichtungdesRadesanhand der Position der Markierungen D prüfen Die Mutter A wieder festziehen Dabei muss der Kettenspanner in Anschlag an der Stellvorrichtung gehalten werden Die Kontermu...

Страница 201: ...ndering A ver stellt werden Die Stoßdämpfer stärke kann durch Änderung der Federvorspannung anhand der fol genden Tabelle im Verhältnis zum Standardwert eingestellt werden Mitfahrer 1 Person Y 2 Personen X Enduro 195 2 mm 190 2 mm Motard 193 mm 188 mm BeiallenBetriebsstörungenwenden Sie sich bitte an unser autorisiertes Kundendienstnetz Y X A A ...

Страница 202: ...llt wer den Der Scheinwerfer kann nur in der Höhe verstellt werden Das Fahrzeug in einem Abstand von 10 auf einem ebenen Unter grundvoreineWandstellen nicht auf den Ständer stellen Den Abstand der Scheinwerfer mitte vom Boden messen und die Wand in einem Abstand von 9 10 des gemessenen Wertes markie ren Das Fahrlicht einschalten sich auf das Motorrad setzen und über prüfen dasssichderScheinwerfer ...

Страница 203: ...AUSTAUSCHEN AUSWECHSELN VON TEILEN 203 5 INHALTSVERZEICHNIS Lampenwechsel im Scheinwerfer Wechseln der Rücklichtlampen Wechseln der Blinker ABSCHNITT 5 ...

Страница 204: ... Wechseln der Standlichtlampe C muss diese nur aus der Lampen fassung herausgezogen und durch eine neue Lampe ersetzt werden ZumWechselnderScheinwerferlam pedenKabelsteckerDvonderLam pe trennen und die Gummikappe E entfernen Die Befestigungsflansch F gegen den Uhrzeigersinn drehen und die Lampe aus dem Parabolspiegel entfernen Eine neue Lampe einsetzen 12V 55 60W BeimEinsetzendaraufach ten dass de...

Страница 205: ...HEN AUSWECHSELN VON TEILEN 205 5 Die Gummikappe E und den Kabel stecker wieder anbringen DieScheinwerfermaskewiederindie LöcherBamKotflügeleinhakenund mit den Befestigungs Gummi knöpfen A am Rahmen befestigen B ...

Страница 206: ...n Die beiden Schrauben A und das Bremslichtglas B entfernen Die defekte Lampe C auswechseln 12V 5 21 DasBremslichtglasBmitdenbeiden Befestigungsschrauben A wieder einbauen Die Lampe hat ein Bajonettver schluss d h zumAusbauleichtdrük ken um ungefähr 30 gegen den Uhrzeigersinn drehen und anschlie ßend herausziehen A C B ...

Страница 207: ...n Blinker ge hörende Mutter A an der Innenseite der Maske abschrauben Die Blinkereinheit herausziehen und vom Kabelstecker trennen Den neuen Blinker anschließen und an der Halterung anbringen Die Mutter A festschrauben Hintere Blinker Die zum ausgefallenen Blinker ge hörende Mutter B unterhalb des Kotflügels abschrauben Die Blinkereinheit herausziehen und vom Kabelstecker trennen Den neuen Blinker...

Страница 208: ......

Страница 209: ...WAS IST BEI EINEM NOTFALL ZU TUN 209 6 INHALTSVERZEICHNIS Fehlersuche ABSCHNITT 6 ...

Страница 210: ...sich bitte an einen unserer Vertragshändler Bei vollständig geöffnetem Gasgriff einige Startversuche unternehmen Kann nicht gestartet werden muss die Zündkerze ausgebaut und getrocknet werden INSTÖRUNG URSACHE ABHILFE Der Motor startet nicht Benzin Versorgungsanlage Leitungen Benzintank Benzinhahn verstopft Luftfilter übermäßig verschmutzt Kein Strom an der Zündkerze Motor abgesoffen ...

Страница 211: ...n der Zündkerze Der Motor überhitzt Auslassöffnung teilweise verstopft und verliert Leistung Benzingemisch zu mager Zündung nachverstellt Den richtigen Elektrodenabstand einstellen Reinigen oder wechseln Die Zündeinstellung prüfen Wenden Sie sich bitte an einen unserer Vertragshändler Wenden Sie sich bitte an einen unserer Vertragshändler Die Düse kann teilweise verstopft sein Wenden Sie sich bitt...

Страница 212: ...händler Wenden Sie sich bitte an einen unserer Vertragshändler Wenden Sie sich bitte an einen unserer Vertragshändler Unzureichende Bremsbeläge verschlissen Bremsleistung der Vorderradbremse Luft oder Feuchtigkeit im Bremsflüssigkeitskreislauf Unzureichende Bremsbeläge verschlissen Bremsleistung der Hinterradbremse Luft oder Feuchtigkeit im Bremsflüssigkeitskreislauf ...

Страница 213: ...gspiel 198 Einfahren 176 Elektrische Bauteile 168 Empfohlene Schmiermittel und Flüssigkeiten 172 Fehlersuche 210 Hinterradbremse 187 Inhaltsverzeichnis 213 Kontrolle und Einstellung Lenkerspiel 199 Kontrollen und Wartung vor und nach dem Einsatz 174 Lampenwechsel im Scheinwerfer 204 Leerlaufeinstellung 198 Lenkerarmaturen 152 Lenkradschloss 162 Motoröl 180 Öldampf sammelleitung 188 Rahmen und Moto...

Страница 214: ......

Отзывы: