background image

OSD (On-Screen Display) menu

25

Eng
lish

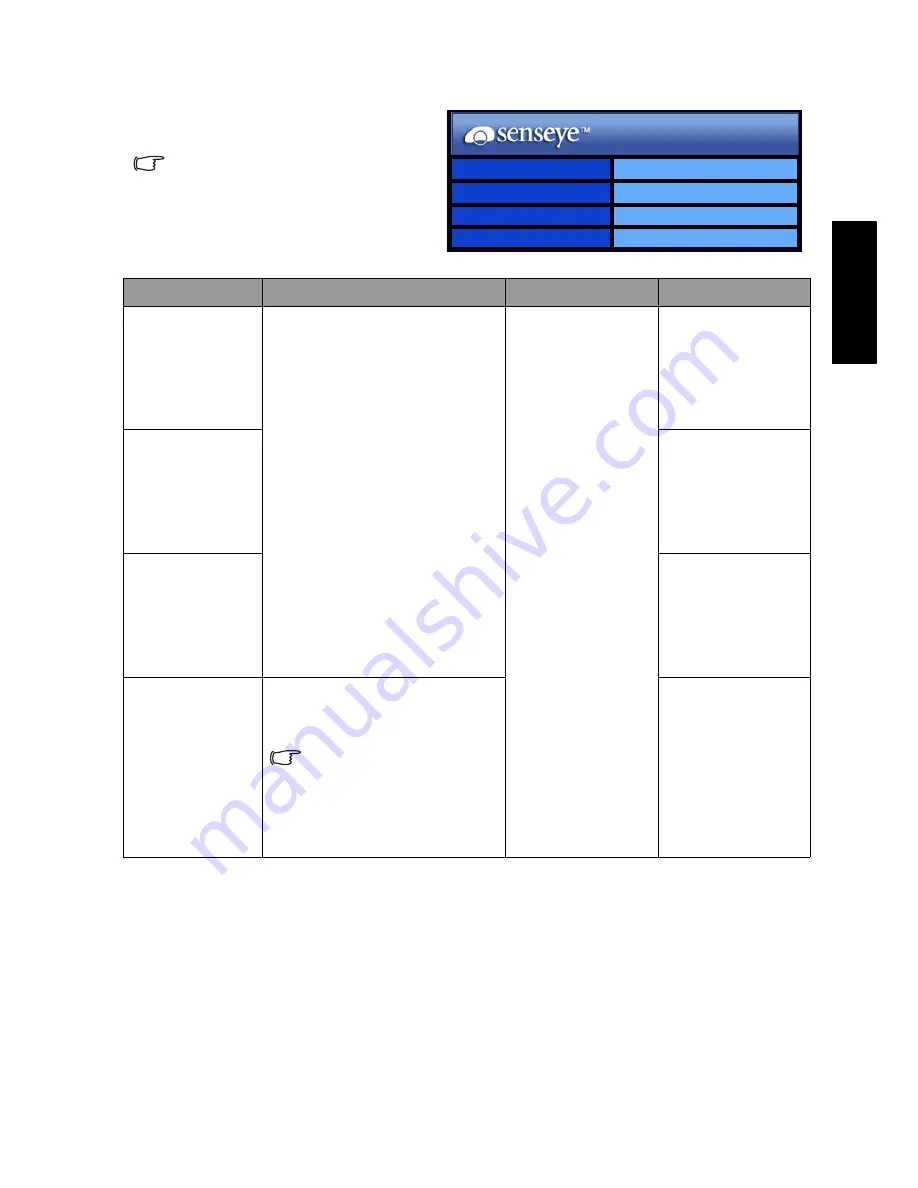
Senseye menu

The available menu items are 

dependent on the input source 
being selected.
The illustration is for reference 
only.

Item

Function

Operation

Range

Color Style

The Senseye technology 

allows you to change the 

representation of images 

freely using the Color Style, 

Gamma Style and ACE (Auto 

Contrast Enhancement) 

functions, making it possible 

to find a best setting to 

match your viewing 

preferences.

Press 

VOL

 or 

VOL

to change 

selection.

• Color 1
• Color 2
• Color 3
• Color 4
• Off

Gamma Style

• Gamma 1
• Gamma 2
• Gamma 3
• Gamma 4
• Off

ACE (Auto 
Contrast 
Enhancement)

• Low
• Middle1
• Middle2
• High
• Off

Noise 
Reduction

Adjusts the image noise 

reduction function that helps 

to remove noise in images.

This function is only 

available when AV1, AV2, 
or AV3 (AV3-S)


is the 

input source with the 
resolution no higher than 
576i.

• Low
• Middle
• High
• Off

Color Style

Color 1

Gamma Style

Gamma 1

ACE

Low

Noise Reduction

Low

Содержание SH Series

Страница 1: ...input 10 Connecting the Component Video input 11 Connecting the PC input 11 Connecting the DVI input 12 Connecting the HDMI input 12 Connecting the stereo audio output 13 Connecting the headset audio output 13 6 Connect the power cable 14 7 Adjust the viewing angle 14 8 Basic operations 15 Power on off and standby 15 Switching inputs 15 Adjusting volume 15 Care and cleaning information 16 What s n...

Страница 2: ... PIP Picture In Picture function 27 Setup menu 28 Reference 29 Disclaimer 29 Copyright 29 Dimensions 29 Specifications 31 Supported PC D Sub DVI input signal resolutions 32 Supported Component Video input signal resolutions 32 Supported HDMI input signal resolutions 33 Setting up appropriate output resolution on PC 33 Troubleshooting 34 ...

Страница 3: ...Welcome English SH Series LCD Display Section 1 Quick Start Guide ...

Страница 4: ...luded The type of power cable supplied may differ from that illustrated dependant upon your region of purchase If any item is missing or damaged contact your place of purchase immediately and notify them of the discrepancy Please keep the product documentation in a safe place for later reference Dispose of packaging wisely The cardboard carton can be recycled Do not leave plastic bags within reach...

Страница 5: ...ect sun or where direct sun or spot lighting will shine onto the display as the heat may damage the display and the bright light will make viewing the display more difficult than necessary Do NOT cover or block the vents and openings while the display is switched on as the heat may accumulate inside the display and result in danger Do NOT place the display in an enclosed place without allowing for...

Страница 6: ...in the power saving mode See ECO on page 28 Off when the display is powered off See Power on off and standby on page 15 for more information 3 Ambient light sensor If activated this sensor detects ambient lighting condition and adjusts the brightness of the display automatically See Backlight on page 28 for more information 4 Remotecontrol sensor window Receives command signals from the remote con...

Страница 7: ...n highlight left or right or changes settings See Navigating the OSD menu on page 19 3 CH Selection button In the OSD menu moves the selection highlight up or down or changes settings See Navigating the OSD menu on page 19 4 INPUT button Cycles through possible input signal sources See Switching inputs on page 15 In the OSD menu selects the highlighted menu item or enters a submenu if available Se...

Страница 8: ...ite Video input on page 10 and Connecting the S Video input on page 10 Connect your external AV device using either the Composite Video or S Video inputs If both are connected to an AV source at the same time S Video input takes preference over Composite Video input S Video will provide a better quality image 2 Headset socket This socket is an audio output for connecting an external headset The di...

Страница 9: ...Section 1 Quick Start Guide 7 English Rear view SH3742 SH4242 ...

Страница 10: ...Y CB PB CR PR output of an appropriate video source device See Connecting the Component Video input on page 11 AV 2 AUDIO INPUT L R Connect each to the audio output of an appropriate video source device to match that of each Component Video input See Connecting the Component Video input on page 11 5 AUDIO OUTPUT L R Connect to the audio input of an audio or sub woofer amplifier This output is alwa...

Страница 11: ...t on page 11 Of the analog video signal types mentioned above Component Video offers the best quality Graphic source inputs You can connect a PC video card graphic source if available like a VGA output or a digital DVI output If your device supports HDMI output you can also use the HDMI input on the display for connection Select the PC DVI or HDMI input respectively to view the display See Connect...

Страница 12: ... Video signal inputs If you use S Video you cannot use Composite Video for that input 1 Connect the S Video output of your output equipment to the display s AV3 S VIDEO terminal using an S Video cable not provided Pay attention to the alignment of the plugs on the S Video cable when inserting so as not to damage any pins 2 Connect the corresponding audio output of the output equipment to the S Vid...

Страница 13: ...nalog video signal types Component Video offers the best quality See Supported Component Video input signal resolutions on page 32 for supported resolutions 1 Connect the VGA D Sub output of your PC to the PC D SUB terminal on the display using a mini D Sub 15 pin cable not provided 2 Connect the audio output of your PC to the display s PC AUDIO terminal using an appropriate 3 5mm diameter Mini ja...

Страница 14: ... PC D Sub DVI input signal resolutions on page 32 on other supported resolutions 1 Connect the HDMI output of your output equipment to the HDMI DVI or HDMI terminal on the display using an HDMI cable not provided 2 Set the type of input signal according to the device connected See HDMI DVI Input on page 28 To view video image from this input press INPUT and select HDMI1 or HDMI2 HDMI High Definiti...

Страница 15: ... is fixed and cannot be adjusted by the Volume setting of the display Do not connect a headset to this output Use the headset output socket instead See Connecting the headset audio output below This display provides a stereo headset output socket for delivering the audio signal to a stereo headset Connect the stereo headset plug 3 5mm Mini jack type to the stereo headset output socket on the displ...

Страница 16: ...e for your region Never use a power cable which appears damaged or frayed Never change the plug type on a power cable Be aware of total loading when using extension cords or multiple outlet power boards WARNING This display has been engineered and manufactured with the highest priority on safety however IMPROPER HANDLING OR USE CAN RESULT IN POTENTIAL ELECTRICAL SHOCK OR FIRE HAZARD Please handle ...

Страница 17: ...to view the current selected input Press the button repeatedly until your desired input is displayed The sequence is as follow These options will only appear when corresponding signals are connected to the display If both Composite Video AV and S Video signals are connected to the AV3 input at the same time only S Video input will be displayed If you wish to view the Composite Video AV input in su...

Страница 18: ...n both sides of the screen and burn mark of a TV station logo that result from the following improper usage of the display 1 Displaying still images for more than two hours 2 Viewing images in 4 3 aspect ratio over a long period of time Please fill the entire screen with the image or change the aspect ratio from time to time Otherwise visible burn marks will remain on the screen as two vertical li...

Страница 19: ...Welcome English SH Series LCD Display Section 2 User Manual ...

Страница 20: ...ype Steady Sound Surround Speaker Out Advanced Audio Settings Picture Picture Mode Contrast Brightness Color Sharpness Color TEMP Picture Mode Contrast Brightness Color Sharpness Color TEMP NTSC Tint NTSC Setup Contrast Brightness Color TEMP Auto Adjust Frequency Phase H Position V Position Contrast Brightness Color TEMP Picture Mode Contrast Brightness Color Sharpness Color TEMP Senseye Color Sty...

Страница 21: ...seye Picture Press CH Selection CH Selection VOL Volume or VOL Volume to make selections or change settings Press INPUT to confirm your selection or enter an submenu if available Press MENU to return to the previous menu level or close the OSD menu For example to adjust picture sharpness 1 Press MENU to display the OSD menu on screen 2 Press VOL Volume or VOL Volume to select Picture 3 Press INPUT...

Страница 22: ...on the received signal Press VOL or VOL to change selection Stereo Mono SAP Sound 1 Sound 2 Steady Sound If set to Auto the display automatically adjusts the sound level to be constant amongst different channels Auto Off Surround Activates or deactivates the SRS TruSurround XT sound effect SRS TruSurround XT Off Speaker Out Enables or disables sound output to the built in speakers of the display O...

Страница 23: ...then press VOL or VOL to select Personal 5 Press CH or CH to select Treble Mid Treble Middle Mid Bass Bass and then press VOL or VOL to adjust the settings to your satisfaction 6 Press MENU to save the settings and close the OSD menu Treble Adjusts treble tones for the Personal EQ Mode Press VOL or VOL to make adjustment 12 to 12 Mid Treble Adjusts mid treble tones for the Personal EQ Mode Middle ...

Страница 24: ...ture Mode on page 24 Press VOL or VOL to change selection Standard Cinema Dynamic Game Personal Contrast Adjusts image white level so that whites do not wash out surrounding colors See Adjusting the contrast on page 24 Press VOL for brighter whites VOL for darker whites 0 to 64 Brightness Adjusts image black level so that detail in the dark areas of an image can be seen See Adjusting the brightnes...

Страница 25: ... place the PC input image on the screen Press INPUT to begin the auto adjustment function Frequency Adjusts the display clock frequency Press VOL or VOL to change selection Dependent upon the resolution of the input signal Phase Adjusts the display clock phase H Position Adjusts the horizontal position of the image V Position Adjusts the vertical position of the image Picture Mode Description Stan...

Страница 26: ...until you reach the point where the details in the dark areas of the image can be seen clearly Do not further increase the brightness level to avoid the black areas from looking grayish Setting up the Personal Picture Mode 1 Press MENU to display the OSD menu on screen 2 Press VOL or VOL to select Picture and then press INPUT to enter the Picture menu 3 Press CH or CH to select Picture Mode and th...

Страница 27: ...ons making it possible to find a best setting to match your viewing preferences Press VOL or VOL to change selection Color 1 Color 2 Color 3 Color 4 Off Gamma Style Gamma 1 Gamma 2 Gamma 3 Gamma 4 Off ACE Auto Contrast Enhancement Low Middle1 Middle2 High Off Noise Reduction Adjusts the image noise reduction function that helps to remove noise in images This function is only available when AV1 AV2...

Страница 28: ...on The DVI input image will be displayed only when a DVI input in PC mode is connected to the display and the HDMI DVI Input option in the Setup menu see HDMI DVI Input on page 28 is set to PC PC DVI Sub Input Select the video signal input source for the PIP function This option is available only if the PIP item is set to Picture in Picture The Component Video AV1 and AV2 input image cannot be dis...

Страница 29: ...Press INPUT on the display to select a image source for the sub picture Component Video inputs AV1 and AV2 cannot be selected as the source of the sub picture Changing the setting of the PIP item to Off or Picture in Picture allows you to toggle the screen display between these two modes To select audio from the main or sub picture set the PIP Audio item in the Window menu to Main or Sub The table...

Страница 30: ...l Once the time expires the display will be put to the standby mode automatically 0 30 60 90 120 150 180 minutes ECO Once set to On the display will activate the Display Power Management System DPMS and enter power saving mode when no PC input signal is detected for 5 seconds or enter standby mode automatically if no Video signal is detected for 10 minutes Off On HDMI DVI Input Select an input mod...

Страница 31: ...person of such revision or changes Copyright Copyright 2008 BenQ Corporation All rights reserved No part of this publication may be reproduced transmitted transcribed stored in a retrieval system or translated into any language or computer language in any form or by any means electronic mechanical magnetic optical chemical manual or otherwise without the prior written permission of BenQ Corporatio...

Страница 32: ...Reference 30 English Unit mm SH4242 ...

Страница 33: ...angle 89 89 89 89 Response time Gray to Gray 6 5 ms Built in speakers 12W 2 Signal input Video Composite Video AV 1 S Video 1 Component Video Y CB PB CR PR 2 Composite Video S Video audio 1 Component Video audio 2 Graphic HDMI DVI 2 PC D Sub 1 DVI audio 1 PC audio 1 Signal output Stereo audio 1 Headset 1 Power supply AC 100 240V 50 60 Hz Power consumption 240W 250W Operating temperature 0 C 40 C a...

Страница 34: ...024 768 48 4 60 65 VESA 1024 768 56 5 70 75 VESA 1280 768 47 4 60 68 25 VESA 1280 768 60 3 75 102 25 VESA 1280 1024 64 60 108 VESA 1280 1024 80 75 135 VESA 1360 768 47 7 60 85 8 VESA 1920 1080 67 5 60 148 5 VESA Resolution Horizontal Frequency KHz Vertical Frequency Hz Dot Clock Frequency MHz Note 720 480 15 735 60i 13 5 SDTV 480i 720 480 31 25 60p 27 SDTV 480p 720 576 15 625 50i 13 5 HDTV 576i 72...

Страница 35: ... XP for example to setup appropriate output resolution 1 On Windows Desktop right click and select Properties from the menu that appears 2 Click the Settings tab in the window that follows 3 Drag the Resolution slider and select a compatible resolution according to Supported PC D Sub DVI input signal resolutions on page 32 If your PC supports it select 1920 1080 as the output resolution for the be...

Страница 36: ...ether the source is at fault Check for mis connection of cables for that input Adjust the volume control to check that isn t turned down Make sure that the Speaker Out option in the Audio menu is not set to Off The image appears too washed out or the darkest areas of the image appear too bright Check the picture properties in the Picture menu Reduce the brightness level until the black areas of th...

Страница 37: ...or window Check that the remote control sensor window is not under strong fluorescent lighting or in direct sunlight Check for any devices PC or personal digital assistant PDA nearby that transmit infrared signals which may cause interference to signal transmission between the remote control and the display Turn off the infrared function of these devices Picture is not clear when viewing PC input ...

Страница 38: ...Reference 36 English Memo ...

Отзывы: