background image

Camera Operating Mode

14

Eng
lish

3.3

Playback Mode

In the Playback mode, you can view, magnify, delete images, play video clips, or run a slide 
show. Playback mode also provides a thumbnail image display, allowing you to quickly search 
for the image you want.

3.3.1 Viewing Images

When you take a still image or movie, it is immediately stored in internal memory or on an SD 
memory card. Still images and movie in internal memory or on an SD memory card can be 
displayed on the LCD monitor.
 To view still images, follow the steps below:

1.

Open the lens cover.

2.

Press the 

POWER 

button.

3.

Press the 

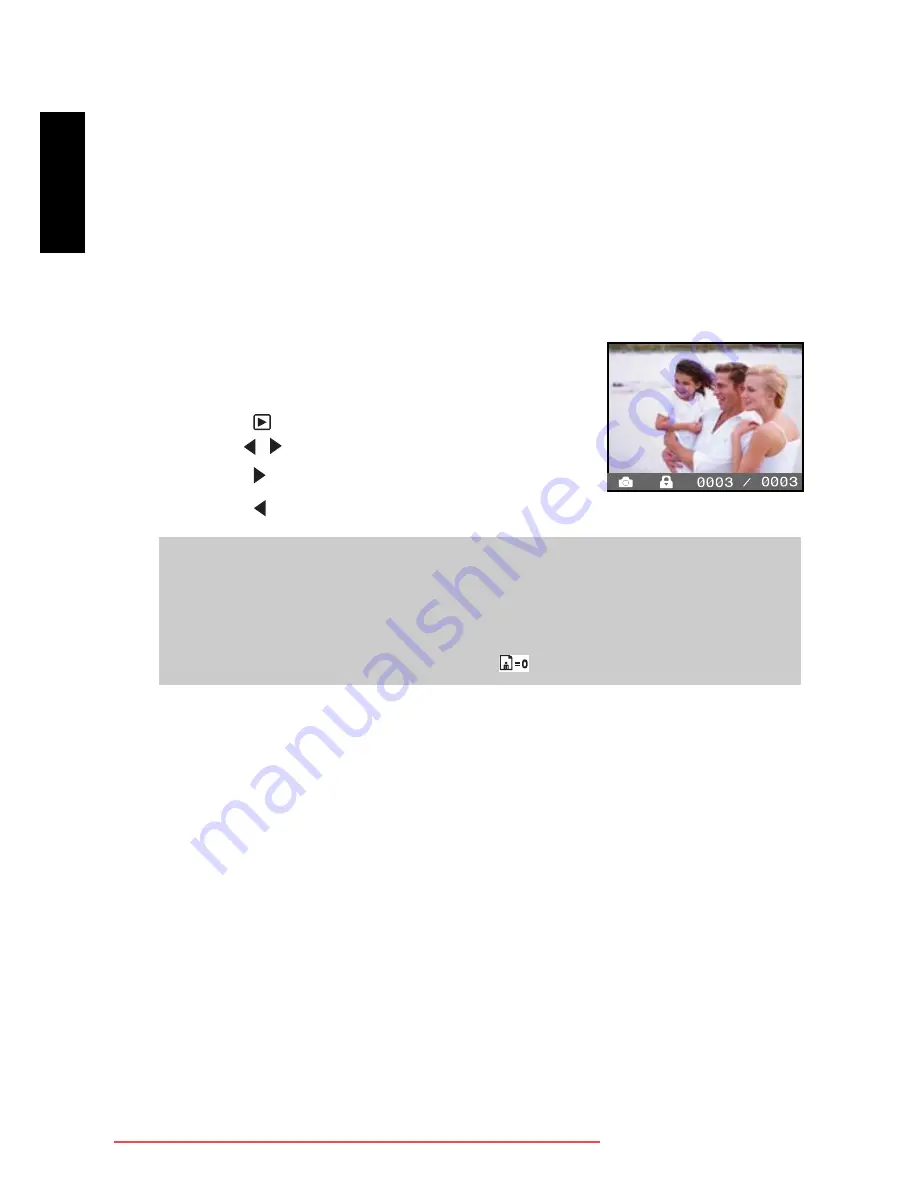
 button. The last image appears on the screen.

4.

Use the  /   buttons to choose the video you want to see.

• Press the   button to view the next still image.

• Press the   button to view the previous still image. 

Note

• 

Images are played back from the following recording media:

 * When no memory card is loaded, it plays back from internal memory.
 * When an SD memory card is loaded, it plays back from SD memory card.

• 

If there are no images stored in memory, the 

 will appear on the LCD monitor.

Downloaded from ManualsCamera.com Manuals

Содержание DC E310

Страница 1: ...Welcome DC E310 Digital Camera User Manual Downloaded from ManualsCamera com Manuals ...

Страница 2: ...e Salt or seawater may cause severe camera damage Do not use organic solvents such as alcohol etc to clean your camera If the lens or viewfinder is dirty use a lens brush or soft cloth to clean the lens Do not touch the lens with your fingers To prevent electrical shock do not attempt to disassemble or repair your camera by yourself Water may cause a fire or electric shock Therefore store your cam...

Страница 3: ...ing the Power On Off 7 2 6 Choosing the Language 7 2 7 Formatting the Memory Card 8 2 8 Setting Image Resolution and Quality 9 3 Camera Operating Mode 10 3 1 Capture Mode 10 3 1 1 Normal Mode 10 3 1 2 Macro Mode 10 3 1 3 Digital Zoom 11 3 1 4 Shooting Mode 11 3 1 5 Flash 12 3 2 VIDEO MODE 13 3 2 1 Recording Video Clips 13 3 3 Playback Mode 14 3 3 1 Viewing Images 14 3 3 2 Viewing Video Clips 15 3 ...

Страница 4: ...Off 20 4 4 4 Beeper 20 4 4 5 Format 20 4 4 6 Reset 20 5 Connecting to a Computer 21 5 1 Installing the Digital Camera Software 21 5 2 Bundled Software 21 5 3 Transferring Files To From a Computer 22 5 3 1 Transferring Photos and Movie Clips 22 5 4 USING THE CAMERA AS A PC CAMERA 23 6 Troubleshooting 25 7 Specifications 26 8 Service Information 27 Downloaded from ManualsCamera com Manuals ...

Страница 5: ...cessories and components may vary by retailer 16MB internal memory lets you capture and store images without the need for an additional memory card However you may wish to expand the memory capacity up to 1GB capacity by using an external memory card Common Product Components 1 User manual 2 Digital camera 3 USB cable 4 Camera strap 5 Camera software CD ROM 6 Camera pouch 7 Batteries Common Option...

Страница 6: ... button 7 Shutter button 1 Focus switch Normal mode Macro mode 2 Status LED 3 button Playback button 4 Arrow button right MODE button 5 SET Set button Flash button 6 Arrow button down MENU button 7 Arrow button left Zoom button 8 LCD monitor 9 USB connector 10 Battery cover 11 Memory card cover 12 Tripod socket Downloaded from ManualsCamera com Manuals ...

Страница 7: ... balance A Auto Daylight Cloudy Tungsten Fluorescent 5 Image size VGA 1 3MP 3MP 4MP 5MP 6 Image quality Normal Fine Super fine 7 Possible number of shots 8 Digital zoom indicator 9 Flash mode Flash off Auto flash 10 Battery level Full battery power Medium battery power Virtually no battery power 11 Memory card indicator No icon Internal memory SD memory card 1 2 3 4 5 6 7 8 9 11 10 2x Downloaded f...

Страница 8: ...e 2 Memory card indicator 3 Battery level 4 Possible recording time 5 Image size 6 Focus mode at preview mode only 1 2 3 4 5 6 1 Capture mode 2 Protection icon 3 File number total number of files 1 2 3 1 Total record time 2 Video mode 3 Protection icon 4 File number total number of files 5 Video playback stop indicator 1 2 3 4 5 Downloaded from ManualsCamera com Manuals ...

Страница 9: ...perature will also influence Alkaline battery performance therefore Ni MH rechargeable batteries are highly recommended If you are using the new rechargeable batteries or rechargeable batteries that have not been used for an extended period of time batteries that pass the expiry date are exceptions might affect the number of pictures that can be taken Therefore to maximize their performance and li...

Страница 10: ...ace towards the rear side of the camera If the card cannot be inserted check the orienta tion 2 3 To remove a memory card Make sure the camera is turned off Press lightly on the edge of the memory card and it will eject Note Be sure to format the memory card with this camera before its initial usage Refer to section in this manual titled 2 7 Formatting the Memory Card for further details Note To p...

Страница 11: ...a will start in the mode 2 6 Choosing the Language Specify in which language menus and messages are to be displayed on the LCD monitor of your camera To choose the language setting 1 Toggle the MODE button to and press the SET button 2 Select Language and toggle the SET button to select the displayed language 3 Press the MENU button to exit Note If the camera goes unused for a certain period of ti...

Страница 12: ...e button and press the SET button 3 Select with the button and press the SET button To cancel formatting select and press the SET button 4 Press the MENU button to exit Note To format the internal memory do not insert an SD card into the camera Otherwise you will format the SD memory card Formatting the SD memory card also erases the protected images and video clips Make sure that all files have b...

Страница 13: ...hotographic results but produce large files sizes Therefore few images will take up a lot of memory space High resolution and quality settings are recommended for printed output and situations requiring the finest detail Lower resolution quality images take up less memory space and may be quite suitable for sharing images via e mail in a report or on a web page To change image resolution or image ...

Страница 14: ...witch to 3 Toggle the MODE button to and press the SET button 4 Compose your shot on the display screen 5 Place the subject of your photo at the center and press the shutter button 3 1 2 Macro Mode For close up subjects such as flowers or insects shoot with the Macro mode This feature can be used for close ups of subjects up to the distances from 0 4 to 0 6m 1 Open the lens cover 2 Set the focus s...

Страница 15: ...MENU button 3 Select Shooting using the buttons and press the button 4 Toggle the SET button to choose the desired option 5 Press the MENU button to exit from the menu mode 6 Compose your image and press the shutter button Note Digital zoom is not automatically cancelled after an image is captured Digital zoom is only available in single and self timer shooting modes Digital zoom is not available ...

Страница 16: ...l not fire Select this mode when taking images in a place where flash pho tography is prohibited or when the distance to the subject is beyond the effective range of the flash Red eye reduction Use this mode to reduce the red eye effect when you want to capture natural looking photographs of people and animals in low light conditions 3 Compose the image and press the shutter button Note If you wil...

Страница 17: ...t audio at a resolution of VGA QVGA pixels 1 Open the lens cover 2 Press the POWER button 3 Toggle the MODE button to and press the SET button 4 To start recording a video clip press the shutter button 5 Pressing the shutter button again stops recording Note Flash self timer cannot be used Downloaded from ManualsCamera com Manuals ...

Страница 18: ... can be displayed on the LCD monitor To view still images follow the steps below 1 Open the lens cover 2 Press the POWER button 3 Press the button The last image appears on the screen 4 Use the buttons to choose the video you want to see Press the button to view the next still image Press the button to view the previous still image Note Images are played back from the following recording media Whe...

Страница 19: ...s function allows you to view as many as six thumbnail images on the LCD monitor simultaneously so you may search for a particular image To view still images follow the steps below 1 Press the button 2 Press the MENU button 3 Select Thumbnail using the buttons and press the SET button 4 To view a full size image select the image with the buttons and then press the SET button The selected image wil...

Страница 20: ...lideshow function enables you to playback your images back automatically in sequential order as a slide show This is a very useful and entertaining feature for reviewing recorded images and for presentations To view still images 1 Press the button 2 Press the MENU button 3 Select Slideshow using the buttons and press the SET button The slideshow starts displaying your images on the LCD monitor one...

Страница 21: ...n 2 Press the MENU button 3 Select Delete or Delete All using the buttons and press the SET button Delete Deletes the selected last image video clip Delete All Deletes all the images video clips except for protected files 4 Select with the buttons and press the SET button To cancel the deletion select and press the SET button is displayed when no images are stored on the memory card or internal me...

Страница 22: ...1 Quality This sets the quality compression rate at which the image is captured Normal Fine Super Fine 4 1 2 Size This sets the size of the image that will be captured VGA 1 3MP 3MP 4MP 5MP 4 1 3 WB White Balance This sets the white balance capturing under a variety of lighting conditions and permits images to be captured that approach the conditions that are seen by the human eye A Auto Daylight ...

Страница 23: ...layback menus 1 Press the button 2 Press the MENU button 3 Press the buttons to select the desired setting 4 Press the SET button to enter the submenu or confirm the selection 5 Toggle the button to exit 4 3 1 Delete Refer to 3 3 7 Deleting Images for further details 4 3 2 Delete All Refer to 3 3 7 Deleting Images for further details 4 3 3 Slideshow Refer to 3 3 5 Slideshow Display for further det...

Страница 24: ...pports different lighting frequencies 50 Hz and 60 Hz When photographing under fluorescent lighting select the correct frequency setting depending on your local area s voltage This function is only effective if you set the White Balance to Fluorescent setting 50Hz 60Hz 4 4 3 Power Off If no operation is performed for a specific period of time the power of the camera is automatically switched off 1...

Страница 25: ...tware To install the software refer to the information supplied with respective CDs Software Description Ulead Photo Express Ulead Photo Express 5 0 SE is a complete photo project software for digital images Acquire photos effortlessly from digital cameras or scanners Edit and enhance images using easy to use editing tools and cool photographic filters and effects Assemble creative photo projects ...

Страница 26: ...ess the SET button 4 From the Windows desktop double click on My Computer 5 A new disk appears in Windows Explorer labelled Removable Disk This Removable Disk is actually the memory card in your camera Typically the camera will be assigned driver letter e or higher 6 Double click on the DCIM folder to view the contents of the subfolders Your recorded images and video clips are stored in these fold...

Страница 27: ...computer system must include Microphone Sound card Speakers or headphones Network or Internet connection Step 1 Install the PC Camera Driver The PC camera driver included on the CD ROM is exclusively for Windows The PC camera function is not supported for Mac platforms 1 Insert the CD ROM that came with the camera into your CD ROM drive The welcome screen appears 2 Click INSTALL USB DRIVER Follow ...

Страница 28: ...eeting program 2 Click the Start Video button to view live video 3 Click the Place Call button 4 Type the e mail address or the network address of the computer that you are calling 5 Click Call The person that you are calling must also have Windows NetMeeting running and be willing accept your call to start the videoconference Note When using camera as a PC camera there is no need to install any b...

Страница 29: ...ower The close up image is blurred Select the correct focus range If the subject is within 40 to 60 cm select Macro mode The flash does not fire The camera flash is turned off The light source is sufficient The flash is not fully charged Set the flash mode to Auto Flash mode Wait for the flash to fully charge There is something wrong with the color of the captured image White balance is not set pr...

Страница 30: ...lation to 5 Mega pixels 2304 x 1728 F W interpolation to 4 Mega pixels 2048 x 1536 pixels 1280 x 960 pixels 640 x 480 pixels Video clips VGA pixels QVGA pixels Storage Type 16MB internal memory SD memory card optional up to 1 GB capacity Interface USB connector Power Source 2 AAA batteries Dimensions WxHxD 89 5 x 56 x 24 mm W x H x D exclusive of protruding features Weight Approx 82g without batte...

Страница 31: ...ver program please visit the following website for technical support answers to frequently asked questions and download services http support BenQ com For free driver program updates product information and news release please visit the following web address http www BenQ com Downloaded from ManualsCamera com Manuals ...

Страница 32: ...Service Information 28 English Memo Downloaded from ManualsCamera com Manuals ...

Отзывы: