background image

5 -  21

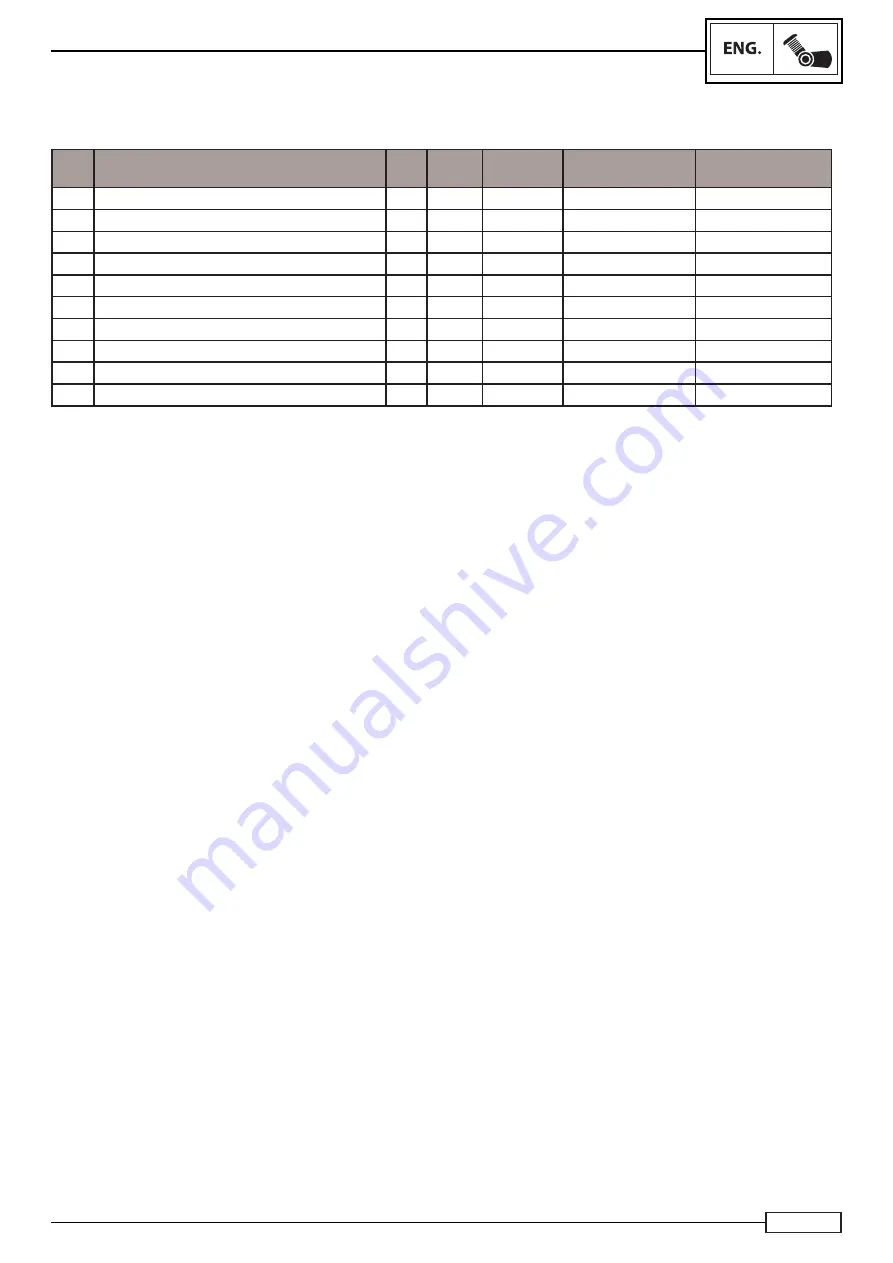
Pos.

Description

Qty.

SQ.

SYMBOLS

INTERVENTION

DESCRIPTION

REMARKS

24

PLUG

25

TAPPET VALVE

26

VALVE PAD 

27

VALVE RUBBER TIP

28

TOP SHIELDED BULB

29

EXTERNAL VALVE SPRING

30

BOTTOM SHIELDED BULB

31

EXHAUST VALVE

32

INTAKE VALVE

33

INTERNAL VALVE SPRING

HEAD DISTRIBUTION

CAMSHAFT AND VALVE PAD REMOVAL

COPY - Moto GB - Grant Martland - [email protected]

Содержание TRK 502

Страница 1: ...SERVICE STATION MANUAL code B0000941950UK Pure Passion since 1911 Translation of the original instructions Translation of the original instructions COPY Moto GB Grant Martland grantmartland motogb co uk ...

Страница 2: ... important notice indicates special precautions that need to be complied with to avoid damage to the bike A note provides key information to make processes easier or clearer warnings bide by the instructions following this symbol may lead f persons in the vicinity or people intent on inspecting or ortant notice indicates special precautions that need to be com vides key information to make process...

Страница 3: ...lants and make the different points of the various procedures clearer the start of each section about the removal or disassembly of parts will contain exploded drawings 3 The parts to be lubricated or replaced are marked with symbols See the section entitled SYMBOLS 4 The exploded drawing is accompanied by a table with the instructions for the intervention stating the order of operations the name ...

Страница 4: ...que G Grease application YVORI SIL AC Sealant paste application Thread locker application LS O OLS OL LS Recommended solvent Brake fluid General Information Specifications Checks and periodic adjustments Frame Engine Cooling system Electrical system COPY Moto GB Grant Martland grantmartland motogb co uk ...

Страница 5: ... 3 CHAPTER 4 CHAPTER 5 CHAPTER 6 ks and periodic adjustments p j Fra Engine g CH CHAP CH C me d per p nts ent ic ad perio p adju dic a od C ad nd odic H HA A H HA HA HA Eng En ng g C ng gine C C C Frame gine ecks C CH H P CH HA hec CH P HA ks C CH P CH Electrical system CHAPTER 7 COPY Moto GB Grant Martland grantmartland motogb co uk ...

Страница 6: ...1 1 1 COPY Moto GB Grant Martland grantmartland motogb co uk ...

Страница 7: ... 5 IMPORTANT INFORMATION 6 GETTING READY FOR REMOVAL AND DISASSEMBLY OPERATIONS 6 SPARE PARTS 6 GASKETS O RING OIL SEALS AND BEARINGS 7 SAFETY WASHERS PLATES COTTER PINS AND THREAD SEALANT 7 SAFETY SNAP RINGS 8 CHECKING CONNECTIONS 8 SPECIAL ENGINE TOOLS 10 SPECIAL TOOLS 10 SPECIAL FRAME TOOLS 13 COPY Moto GB Grant Martland grantmartland motogb co uk ...

Страница 8: ...ICATION Identification data are as follows 1 Frame serial No on the steering sleeve 2 Engine serial No on the lower crankcase 3 Type approval data on the frame IDENTIFICATION COPY Moto GB Grant Martland grantmartland motogb co uk ...

Страница 9: ...l unit stops the injection ignition function and it is necessary to contact an authorized service centre Benelli at soonest 5 4 6 7 8 9 16 11 10 13 14 15 12 2 1 3 17 6 LEFT DIRECTION INDICATOR LIGHT GREEN It goes on when the left direction indicator light is activated 7 HIGH BEAM INDICATOR LIGHT BLUE It goes on when the high beam light is activated 8 NEUTRAL POSITION INDICATOR LIGHT GREEN It goes ...

Страница 10: ...m the moment in which the last line starts flashing the vehi cle has a fuel range of about 3 litres 16 LIGHT ABS The anti lock braking system of brakes goes on when starting to check the system and turns off if the check outcome is positive 17 RIGHT DIRECTION INDICATOR LIGHT GREEN It goes on when the left direction indicator light is activated 5 4 6 7 8 9 16 11 10 13 14 15 12 2 1 3 17 COPY Moto GB...

Страница 11: ...led owing to the normal operating wear The matching parts must always be reused replaced collectively During the disassembly operations clean all parts and position them in a container following the disassembly order This will make the reassemble operations easier and allow a correct installation of all parts Keep all components away from any heat source SPARE PARTS Only use original Benelli spare...

Страница 12: ...ards are clearly visible To position the oil seals lubricate the lips with a layer of engine oil During installation of the bearings lubricate them thoroughly a Oil seal b Bearing IMPORTANT NOTICE Do not use compressed air to dry the bearing whilst turning them since the surface might be damaged SAFETY WASHERS PLATES COTTER PINS AND THREAD SEALANT After removal replace all safety washers A the saf...

Страница 13: ...Shaft D CHECKING CONNECTIONS Make sure there are no stains rust humidity etc on wires couplers and connectors 1 Disconnect the wire the coupler the connector 2 Check the wire the coupler the connector In presence of humidity Dry using a fan In presence of rust stains Connect and disconnect the parts several times 3 Check all connections In case of loose connections Connect them properly NOTE _____...

Страница 14: ...heck continuity using a pocket tester NOTE _________________________________ If there is no continuity clean the terminals For checking wiring follow the procedure of points from 1 to 3 As quick remedy it is advisable to use a specific product for the contacts which is available in the spare part shops 4 5 COPY Moto GB Grant Martland grantmartland motogb co uk ...

Страница 15: ...wrench This tool serves to lock the clutch drum and tighten the nut Standard tool commonly found Pad for piston pin removal This tool serves to extract the piston pin Standard tool commonly found Tool for valve oil seal removal This tool serves to extract the valve oil seal Standard tool commonly found Ring clamp tool This tool serves to assemble the piston O rings and for the subsequent insertion...

Страница 16: ...ne oil filter 0320097046001 Chain tensioner lock tool This tool serves to lock the tensioning pis ton during the assembly phase of the chain tensioner 03200097052000 Tool to remove assemble the clutch bell ring nut This tool is used to disassemble assemble of the notched ring nut which clamps the clutch bell 0320097050000 Valve spring compressor tool This tool is used to remove the valve springs S...

Страница 17: ...ommonly found This tool is used to measure thicknesses 0320097044000 Flywheel assembly tool This tool serves to tighten the engine shaft flywheel 0320097043000 Tool to remove the magnetic cap from the alternator cover This tool serves to unscrew the magnetic cap of the alternator cover 03200097053000 Toothed wrench for clutch bell lock This tool is used to disassemble the clutch bell COPY Moto GB ...

Страница 18: ...e steering sleeve lock nut Standard tool commonly found Tool to tighten the front wheel pin This tool serves to tighten the front wheel pin Standard tool commonly found Tool to extract the rear swing arm bear ings This tool serves to extract bearings Standard tool commonly found Lifting jack It allows to lift the frame and the engine COPY Moto GB Grant Martland grantmartland motogb co uk ...

Страница 19: ...2 2 1 COPY Moto GB Grant Martland grantmartland motogb co uk ...

Страница 20: ...DATA 4 ENGINE SPECIFICATIONS 4 FRAME SPECIFICATIONS 9 ELECTRICAL SPECIFICATIONS 13 GENERAL TIGHTENING SPECIFICATIONS 17 TIGHTENING TORQUES AND RELEVANT PRELOADS FOR STANDARD CONNECTIONS 18 TIGHTENING TORQUES 18 COPY Moto GB Grant Martland grantmartland motogb co uk ...

Страница 21: ...th B 915 mm Total height C 1450 mm Wheelbase D 1525 mm WEIGHT STANDARD Kerb weight with full oil and fuel tank 235 kg Empty with no oil and empty fuel tank 210 kg Max technical capacity with rider and load 217 kg B A D C COPY Moto GB Grant Martland grantmartland motogb co uk ...

Страница 22: ...TANDARD Recommended fuel premium unleaded petrol RON 95 min ENGINE OIL STANDARD Forced lubrication system with wet sump design Total amount 3 2 l Quantity without oil filter cartridge re placement 3 l Quantity with oil filter cartridge replace ment 3 2 l Recommended oil API SH 15W50 synthetic Jaso MACCMC g4 10W50 OIL FILTER STANDARD Type of oil filter Cartridge OIL PUMP STANDARD Oil pump type lobe...

Страница 23: ... camshaft cap 0 03 0 064 Clearance between camshaft and cam shaft seat 0 02 0 054mm Camshaft radial clearance 0 01mm Limit 0 02mm Camshaft lobe dimensions on intake side B A Size A 32 2 mm Size B 24 8 mm Camshaft lobe dimensions on exhaust side B A Size A 31 9 mm Size B 24 92 mm Maximum camshaft eccentricity 0 04 mm 0 00015 in FUEL STANDARD Recommended fuel lead free petrol RON 93 min TIMING CHAIN...

Страница 24: ...length Intake 1 9 2 1 mm Exhaust 1 75 1 95 mm Valve stem diameter Intake 3 965 3 98 mm Exhaust 3 965 3 98 mm Clearance between valve stem and valve guide Intake 0 05 0 075 mm Exhaust 0 04 0 065 mm Valve stem eccentricity 0 05 mm VALVE SPRING STANDARD Intake exhaust free length Outer 38 8 mm Inner 41 6 mm Intake 1 2 mm Exhaust 1 2 mm CYLINDERS STANDARD Cylinder layout perpendicular line Bore 69 00 ...

Страница 25: ... X B 2 3 x 0 8 mm Oil scraper ring B A Size A X B 2 26 x 1 93 mm CONNECTING RODS STANDARD Bearing colour code A Red B Blue C Yellow Connecting rod code K1 Black K2 Green K3 White K4 Brown K5 Orange DRIVE SHAFT STANDARD B C B B A Width A 269 5 mm Maximum eccentricity B 22 6 0 01 mm Connecting rod head side clearance C 0 1 0 25 Main bearing colour code A red B blue C yellow ENGINE SPECIFICATIONS 0 0...

Страница 26: ...RD Transmission type straight toothed gearbox Main reduction ratio 44 82 Second reduction system Transmission ratio Chain ratio 14 46 1st 13 37 2nd 19 37 3rd 18 28 4th 24 32 5th 21 25 6th 24 26 GEAR SHIFT MECHANISM STANDARD Gear shift mechanism type sequential with Desmodromic valve and prese lector Maximum deformation of shift fork guide bar Straightness 0 02 Roundness 0 005 AIR FILTER STANDARD A...

Страница 27: ...17 M Cx MT3 50 DOT D aluminium Rim Measure Material 122 mm Wheel type Wheel travel Measure STANDARD REAR TYRE 160 60ZR17 M C 73 W tubeless Tyre pressure when the tyre is being cooled Model manufacturer STANDARD REAR WHEEL 17 M Cx MT4 50 Dot D aluminium Rim Measure Material N D N D 6 spoke aluminium alloy N D 2 4 Bar N D 2 4 Bar Modular trellis frame with the front module in stainless steel and the...

Страница 28: ...thickness Minimum thickness 0 1mm 0 004in Maximum deformation 4 mm 0 15 in Thickness of worn brake pads STANDARD LIMIT F Brake type A F DOT4 12mm 0 47in Inner diameter of pump cylinder Inner diameter of caliper cylinder 32mm 1 25 in 260x 5mm 4 5mm 0 17in STANDARD LIMIT REAR BRAKE use right foot Activation single disc brake Recommended fluid DOT4 Brake discs Diameter thickness Minimum thickness 0 1...

Страница 29: ...rzocchi 19 770cc Fork oil Recommended oil Quantity per stem Level from the top of the outer side with the outer side completely compressed and without the fork spring 95 mm Angle from one end of stroke to the other left STANDARD STEERING Bearing type for steering 30 ball bearing Angle from one end of stroke to the other right 30 TECHNICAL DATA FRAME SPECIFICATIONS COPY Moto GB Grant Martland grant...

Страница 30: ...ength Installed length Flexibility K1 Spring stroke K1 0 0 Minimum Standard 10mm 0 39in Maximum 0 17 Minimum Standard 30 Maximum from the fully retracted position Quantity of chains STANDARD TRANSMISSION CHAIN Model manufacturer N D N D Slackness of transmission chain N D 167 1 5 mm 16 Nm 42 1 mm TECHNICAL DATA FRAME SPECIFICATIONS Spring preload adjustment positions Rebound damping adjust ment po...

Страница 31: ...ic AC Voltage regulation 13 5 0 5 V 3000 rpm 25 C Rated output 12 8 V a 1400 rpm 14A STANDAR D IGNITION RELAY Amperage Model manufacturer 100 A Coil resistance 4 4 Ohm a 20 C Secondary coil inductance Primary coil inductance 4 7H 1 8 mH Max allowable current value 10 A STANDAR D BATTERY Voltage of battery capacity Model manufacturer 12 V 8 Ah YTX9 BS STANDAR D HEADLAMP Headlamp type halogen lamp I...

Страница 32: ...CATIONS ELECTRIC IGNITION SYSTEM Model manufacturer STANDARD STANDARD HORN Power output 0 7 kw Model manufacturer Horn type low Performance 105 118 db A Maximum amperage 3 A STANDARD FLASHER RELAY Model manufacturer Relay type QJ 600 45 Flasher Electronic Flasher Watt 130mA x4 Blinking frequency of direction indicators 80 160 cicli min STANDARD OIL PRESSURE SENSOR Model manufacturer Calibration 0 ...

Страница 33: ...ETY SWITCHES Neutral switch Stand switch QJ N D Resistance Model manufacturer Tilt QJ 250T 3 QJ Service fuse Headlamp fuse Radiator fan fuse Backup fuse Fuel pump fuse 2 KOhm 20 STANDARD THROTTLE BODY AIR PRESSURE SENSOR Model manufacturer Power supply voltage 15 A Blue 40 A Red 15 A Blue 15 A Blue 40 A Red 15 A Blue N D N D 240600695 DELPHI 5V 12160244 PACKARD 181 8 Ohm 100 C external TECHNICAL D...

Страница 34: ...TANDARD STEPPER Model manufacturer Model manufacturer two phase STANDARD RADIATOR FAN Model manufacturer Power consumption STANDARD INJECTOR Model manufacturer STANDARD RELAY UNIT Model manufacturer CM1 NAIS Model manufacturer Phonic wheel sensor pick up 550 50Ω WC 12A QJ 100 C 178 Ohm QJ 1 1mm 2 2 mm OSM Delphi Mini Delphi 12 1Ω BOSCH MSE6 0 DELPHI LOREADA Panasonic SSW7109 2 76A 12V TECHNICAL DA...

Страница 35: ...the risk of warping cross tighten in successive stag es until you reach the required torque Unless otherwise stated the tightness torques refer to parts with clean dry threads Parts must be at ambient temperature A B B NUT GENERAL TIGHTENING TORQUES N m Kgf m 4 mm 2 3 0 23 5 mm 4 5 0 45 6 mm 10 1 01 8 mm 25 2 54 10 mm 45 4 58 12 mm 80 8 15 14 mm 130 13 25 16 mm 200 20 39 18 mm 240 24 47 COPY Moto ...

Страница 36: ...5 420 5 2 6 710 M5 X 0 8 6 6 350 7 5 7 930 9 9 520 TIGHTENING TORQUE Nm AXIAL PRELOAD N AXIAL PRELOAD N TIGHTENING TORQUE Nm AXIAL PRELOAD N M6 X 1 10 8 860 13 11 520 16 14 180 M8 X 1 25 22 14 900 30 20 330 40 27 100 M8 X 1 25 17 280 36 24 890 45 31 110 M10 X 1 5 45 24 680 65 35 640 80 43 870 M10 X 1 25 50 27 870 70 39 013 85 47 380 M12 X 1 75 80 37 640 110 51 750 135 63 510 M12 X 1 5 85 40 547 12...

Страница 37: ...3 1 3 COPY Moto GB Grant Martland grantmartland motogb co uk ...

Страница 38: ...25 ADJUSTMENT OF THE REAR BRAKE 26 FRAME CHECKING BRAKE FUID LEVEL 27 CHECKING THE FRONT BRAKE LIQUID LEVEL TOPPING UP 27 CHECKING THE REAR BRAKE LIQUID LEVEL TOPPING UP 28 FRAME CHECKING ABS HOSES 29 CHECK FOR ANY LEAKAGES OF ABS TUBES 29 FRAME BRAKE PAD CHECK 30 CHECKING WEAR OF FRONT REAR BRAKE PADS 30 FRAME CHECKING HOSES OF THE BRAKING SYSTEM 31 HOSE CHECK 31 FRAME TRANSMISSION CHAIN 32 ADJUS...

Страница 39: ...MOVAL OF THE FRONT HEADLIGHT 52 INSTALLATION OF THE HEADLIGHT 53 ADJUSTMENT OF HEADLIGHT 54 SUBSTITUTION OF THE REAR LED LIGHT 55 SUBSTITUTION OF THE REAR INDICATOR LIGHTS 56 SUBSTITUTION OF THE FRONT INDICATORS 57 SUBSTITUTION OF THE IGNITION BLOCK 58 CHAPTER 3 COPY Moto GB Grant Martland grantmartland motogb co uk ...

Страница 40: ...3 4 NOTES COPY Moto GB Grant Martland grantmartland motogb co uk ...

Страница 41: ...ating the items marked it is advisable to contact a Benelli dealer given that it is necessary to have specific equipment information and technical skills The following section shows all maintenance operations KEY I Checking adjustment cleaning lubrication or replacement as required R Replacement T Tighten Dealer NOTE ___________________________________________ AIR FILTER Replace the air filter mor...

Страница 42: ... motorcycle was used in the rain 9 Chain wheel Check Lubricate I I I I I I Replace in any case at every chain change 10 Pinion Clamping washer Check Replacement I I I I I I Replace in any case at every chain change 11 Fuel line circuit Check for faults and leakages I I I R Replace in any case every 3 years 12 Brake fluid Check Top up I I I I I I I clutch Replace Replace every 2 years 13 Front brak...

Страница 43: ... not excessive Lubricate I I I I 30 Front sus pension Check operation and make sure there are no leakages I I I I I I 31 Front sus pension oil Replacement R R 32 Rear suspen sion Checking adjustment make sure there are no leakages I I I I Before each use 33 Wheels Check they are not off centred or damaged I I I Every 18 000 km 11 184 mi 34 Tyres Check the depth of tread and make sure they are not ...

Страница 44: ...T T T T 47 Oil sump screws Replacement T T T T T 48 Clutch cover screws Replacement T T T T T 49 Catalytic converter Check for faults and leakages I I I I R No maintenance required In case of malfunction replace 50 Cannister USA version Check for faults and leakages I I I I R No maintenance required In case of malfunction replace 51 Brake hoses clutch Check for faults and leakages I I I I I I I Ov...

Страница 45: ... 2 SCREW M6X16 2 3 AIR TEMPERATURE SENSOR 2 4 SCREW BAND 2 5 SLEEVE 1 6 Hose holder clip 2 7 CANISTER FILTER 1 8 SPRING BAND 4 9 PIPE 1 10 CHECK VALVE 1 11 PIPE 1 12 VALVE 1 13 SPRING BAND 4 14 PIPE 1 15 PIPE 1 16 PLATE 1 17 SCREW M6X16 2 18 AIR FILTER 1 COPY Moto GB Grant Martland grantmartland motogb co uk ...

Страница 46: ...in the air filter ele ment more frequently Check If the air filter element is faulty replace or wash it 1 Wash the element using specific solvents 2 Air dry 3 Apply a specific oil on the whole surface of the air filter element IMPORTANT NOTICE Before installing the air filter element of the air box remove the excess oil making sure it does not drip any longer Install 1 During the installation stag...

Страница 47: ...4 SCREW 5 GRIP CAP 6 GRIP END 7 THREADED INSERT 8 LEFT HANDGRIP 9 THREADED INSERT 10 LEFT LIGHT SWITCH 11 RIGHT LIGHT SWITCH 12 ACCELERATOR CONTROL 13 ACCELERATOR CONTROL PIPE 14 FUEL OPEN CABLE 15 FUEL CLOSE CABLE 16 CLUTCH CABLE 17 CLUTCH CONTROL 18 RUBBER BAND 19 SCREW 20 BUSHING 21 ELASTIC WASHER 22 BRAKE PEDAL CONTROL 23 SCREW 24 NUT COPY Moto GB Grant Martland grantmartland motogb co uk ...

Страница 48: ...KE PEDAL CONTROL 27 NUT 28 BALL JOINT 29 NUT 30 ADJUSTMENT ROD 31 SCREW 32 RETURN SPRING 33 THREADED PIN 34 GEAR PEDAL 35 SCREW 36 TUBE GUIDE 37 ABS SWITCH ENGINE THROTTLE CABLE CLEARANCE ADJUSTMENT OF THROTTLE CABLE CLEARANCE COPY Moto GB Grant Martland grantmartland motogb co uk ...

Страница 49: ...e specifications adjust Fig A Throttle cable clearance A Dimensions Throttle cable 2 3 mm Adjust the throttle cable clearance Handlebar side 1 Loosen the locknut D 2 Rotate the adjusting nut C clockwise or counter clockwise up to the specified throttle cable clearance Fig B Throttle cable clearance Clearance Clockwise The gap is increased Anticlockwise The gap is decreased 3 Tighten the lock nut D...

Страница 50: ...ted range Adjust again if neces sary Throttle cable clearance mm Throttle cable clearance on the accelerator grip 3 5 mm 0 11 0 19 in Idle speed rpm STANDARD 1 400 1 600 WARNING If the handlebar movement leads to variations in the idle speed the throttle cables may be adjusted or routed improp erly or be damaged Correct these anomalies before use IMPORTANT NOTICE The use of the vehicle with damage...

Страница 51: ...ch cable clearance Fig B Clutch cable clearance Clearance Clockwise The gap is increased Anticlockwise The gap is decreased 4 Tighten the ring nut C NOTE ___________________________________________ If the specified clearance of the clutch cable cannot be ob tained on the handlebar side use the adjusting nut on the engine side E Fig C 1 Prise the dust seal in the middle of the clutch cable 2 Loosen...

Страница 52: ...tall 1 Screw the mirror 15 on the lever body 32 2 Move the nut B until it stops 3 Adjust the mirror position by rotating it 4 Tighten the lock nut C NOTE ___________________________________________ Carry out the same procedure also with the right mirror B C COPY Moto GB Grant Martland grantmartland motogb co uk ...

Страница 53: ...ORTANT NOTICE Owing to the fact that the engine oil lubricates also the clutch it may cause the clutch slipping if it is not suitable or contains additives Therefore it is advisable not to add chemical additives and not to use types of oil other than the one indicated in the table of the engine technical specifica tions The engine oil whether new or waste can be hazardous In case of swallowing it ...

Страница 54: ..._________________________________ Replace also the oil filter cartridge Replace the magnetic cap seal Install the new seal the magnetic cap Tighten the magnetic cap to the following torque T R Torque 22 N m Fill the crankcase with the recommended engine oil with the specified amount Install the oil cap A Fig A Start the engine allow it to warm up for some minutes and then turn it off NOTE ________...

Страница 55: ..._________ Before fitting a new oil filter apply a fine layer of engine oil to the contact surfaces of the filter to lubricate it Fig A 1 Proceed using the opposite order to removal Tighten the filter 2 to the following torque T R Torque 22 N m IMPORTANT NOTICE Always use original Benelli oil filters Other brands of oil filters can be different in terms of thread diameter and pitch The use of other...

Страница 56: ...ont fairing Chap ter 4 Tank fairing see chapter Removal of tank fairing Chap ter 4 Tank see chapter Fuel tank removal Chapter 4 The two side guards A left and right Fig A Loosen the claps of the two rubber sleeves B Fig B Disconnect the breather hose C from the filter casing Release the filter box D IMPORTANT NOTICE Before disassembly of spark plug remove any dirt from the groove of the seats with...

Страница 57: ...r Replace the spark plug Generally the colour is a light medium brown Clean the spark plug using a cleaner for spark plugs or a metal brush Check Measure the distance between electrodes D using a thickness gauge If the distance between electrodes is not correct replace the spark plug Distance between spark plug electrodes mm D 0 8 0 9 Spark plug type NGK CR8E E A B ENGINE SPARK PLUGS F D COPY Moto...

Страница 58: ...Long sections at low speed Spark plug too cold The fuel carburettor system needs to be fine tuned Check the coil connections and relevant impedance Èvery so often the bike needs to be taken to speeds of about 80 km h Use a warmer spark plug as per specifications Ignition too advanced Insufficient air fuel mix Insufficient coolant and or lubricant Spark plug torque too low The spark plug used is to...

Страница 59: ...park plug to the head tightening it by hand until it comes into contact with the base of the head Tighten to torque T R Torque 12 N m Install the coil 1 The rubber tips 2 and the O rings 3 Fig D Connect the coil connector Install The screw 6 The bracket 8 Tighten the torque T R Torque 10 N m NOTE _________________________________ Numbers marked are part of the spare parts table in Chap ter 5 Engin...

Страница 60: ...er 4 Movable windscreen see chapter Removal of movable windscreen Chapter 4 Front fairing see chapter Removal of front fairing Chap ter 4 Check the coolant level The coolant level must be within the maximum level reference MAX and the minimum one MIN If below the minimum notch top up with the recommended coolant up to the correct level Fig A Remove the expansion tank cap add coolant liquid up to t...

Страница 61: ...s more gap from the handlebar Position 4 there is less gap from the handlebar WARNING If the brake lever is soft or spongy to the touch there might be air in the braking system Before using the vehicle it is necessary to exhaust air by bleeding the braking system The presence of air in the braking system significantly re duces the system performance and ultimately may cause a loss of control of th...

Страница 62: ...e touch there might be air in the braking system Before using the vehicle it is necessary to exhaust air by bleeding the braking system The presence of air in the braking system significantly re duces the system performance and ultimately may cause a loss of control of the motorcycle and accidents Therefore check and exhaust air in the braking system if necessary IMPORTANT NOTICE After adjusting p...

Страница 63: ...ays clean up any brake fluid spills immediately Apply the vacuum device to the drain screw C Fig B Top the liquid up to the level indicated on the pump sight glass Fig C Pump the brake fluid by moving the brake lever After topping up place the cap and tighten the two fasten ing screws WARNING Only use the prescribed fluid Other brake fluids may cause the deterioration of the rubber seals causing l...

Страница 64: ... order to raise the caliper and carry out a complete exhaust without air bubbles Apply the vacuum device to the drain screw E and loosen the latter Top the liquid up to the MAX level indicated on the graduat ed container F Pump the brake fluid by moving the brake lever After topping up lower the caliper and tighten the two fas tening screws to the following torque T R Torque 22 N m Close the pump ...

Страница 65: ...Seat removal Disassemble the passenger s seat see section Passen ger s seat removal Remove the fuel tank see section Fuel tank removal By means of the brake lever pedal check for brake fluid leakages from the hoses A the tubes models equipped with ABS B and the fittings C In case of fluid leakage in any point check or replace the faulty component B E C D A A C A A A B C C C C COPY Moto GB Grant Ma...

Страница 66: ...r brake pads Fig B The wear limit for the front rear brake pads If the wear reaches the limit please replace all brake pads Pads Wear limit A Front 1 mm Rear 1 mm NOTE __________________________________________ For replacing the pads refer to the chapter Frame section Removal installation of front brake pads A A B B COPY Moto GB Grant Martland grantmartland motogb co uk ...

Страница 67: ...ring trace replace Check The hose clamp of the front brake C Fig A If loosened tighten the clamp bolt Check The hose clamp D of the rear brake Fig B If loosened tighten the clamp bolt T R Torque 25 N m Keep The motorcycle in a upright position Activate The brake several times Recheck The brake hose If there is any brake fluid leakage replace the damaged hose B A B A C D COPY Moto GB Grant Martland...

Страница 68: ...Fig A Transmission chain slack ness 10 15 mm Adjust slackness of transmission chain Fig B If the chain tension is not correct adjust it as follows Loosen the wheel axle nut on the left side of the swing arm To tension the transmission chain turn the tension adjust ment bolt on each side of the swing arm counter clockwise To loosen the transmission chain turn the tension adjust ment bolt clockwise ...

Страница 69: ...or brushes with too rough bristles to prevent damaging these O rings Therefore we recommend exclusive use of recommended prod ucts to clean the transmission chain Wipe the chain and lubricate it thoroughly using engine oil or specific lubricant for chains with O rings Do not use other kinds of lubricants on the transmission chain as they might contain solvents that would damage the O rings Apply A...

Страница 70: ...s B In the event of damage replace the transmission chain The transmission chain rollers D In the event of damage wear replace the transmission chain The side plates of the transmission chain C In the event of damage wear replace the transmission chain If there are any cracks replace the transmission chain and make sure that the bleeder pipe from the battery is correct and sufficiently distant fro...

Страница 71: ...entation plate Chapter 4 Loosen The stop screws on the top steering plate 1 Fig B Remove the upper u clamps 2 Fig B The bolt cap of the steering head 3 Fig B Slide out the plate 4 Fig C Adjust the steering sleeve Remove the steering pin ring nut 5 Fig C Loosen the steering ring nut 6 then tighten at the speci fied value using the apposite wrench 7 Tool to tighten the steering sleeve lock nut Code ...

Страница 72: ...alls Replace if worn or damaged Fig C Insert the balls with some grease then apply a thin layer of grease on the outer top bottom races Assemble Once assembled tighten the steering ring nut to the following torque Tool to tighten the steering sleeve lock nut Code R180297129000 T R Torque 60 N m G Specific grease Assemble the steering ring nut support with the apposite tool to the following torque ...

Страница 73: ... oil seal If there is any leakage replace Keep The motorcycle in a upright position Activate The front brake Check The fork operation Push hard on the handlebar several times to check that the front fork returns to the stationary position in a smooth way If the movement is not smooth replace see chapter FRAME CHECK AND ADJUSTMENT OF STEERING SLEEVE section STEERING SLEEVE BEARING LUBRICATION A A B...

Страница 74: ...aking the suspen sion softer turn the adjustment ring nut A to direction C At the end of adjustment tighten the return ring nut D IMPORTANT NOTICE To avoid damaging the mechanism do not try turning over the maximum or minimum setting Position Gap MIN 0 mm MAX 10 mm Adjustment Adjustment of the hydraulic braking device in extension Fig B It is possible to adjust the hydraulic braking device using t...

Страница 75: ...ad See general specifications COLD TYRE PRES SURE FRONT REAR Up to 90 kg load 2 20 bar 2 50 bar 90 kg max load 2 20 bar 2 50 bar Including baggage driver passenger and accessories WARNING It is dangerous to drive with the worn tread If the tread reaches the wear limit replace the tyre immedi ately Check The tyre surface Fig B If there is any damage or wear replace A Depth of tread pattern B Side w...

Страница 76: ...er jets for 15 minutes and seek imme diate medical attention SWALLOWING Drink large quantities of water or milk milk of magnesia beaten egg or vegetal oil Seek immediate medical atten tion IMPORTANT NOTICE This battery is sealed Do not remove the sealing caps in any case to preserve the equilibrium between the cells and not to affect the battery performance The time the amperage and the voltage fo...

Страница 77: ...ay overheat and its parts may be damaged If it is not possible to adjust the charging current of the bat tery charger be careful to prevent the battery overcharge For charging disconnect the battery from the vehicle Should it be necessary to recharge with the battery mount ed on the vehicle disconnect the negative cable from the battery terminal To reduce the risk of sparks connect the battery cha...

Страница 78: ... process dis connect the battery charger and allow it to cool down before proceeding again The batteries that overheat may explode As shown in Fig F the open circuit voltage of a battery sta bilises 30 minutes after the charging end before measuring the open circuit voltage Tensione a circuito aperto V Controllare la tensione a circuito aperto 0 10 20 30 40 50 60 10 11 12 13 14 15 16 17 18 ricaric...

Страница 79: ... iniziare la ricarica Verificare che la corrente sia più elevata del valore standard della corrente di ricarica riportato sulla batteria Regolare la tensione in modo tale che la corrente sia al livello di carica standard Impostare il tempo in base al tempo di ricarica adatto per la tensione a circuito aperto Vedere le istruzioni incluse alla batteria NO NO SI SI A Caricabatterie Amperometro Measur...

Страница 80: ...elevata del valore standard della corrente di ricarica riportato sulla batteria Caricare la batteria finché la tensione di carica non arriva a 15 V Misurare la tensione a circuito aperto dopo aver lasciato la batteria per più di 30 minuti inutilizzata 12 8 V o superiore La ricarica è completa 12 7 V o inferiore Ricarica necessaria Inferiore a 12 0 V Sostituire la batteria NO SI A V Voltometro Cari...

Страница 81: ... B only immediately before use Use the apposite container to be sure to insert the correct amount of electrolyte IMPORTANT NOTICE The sulfuric acid present in the battery electrolyte may cause severe burns To prevent burns from sulfuric acid before handling the electrolyte wear protective clothing and safety goggles If the electrolyte comes into contact with eyes wash the area with plenty of water...

Страница 82: ... bubbles A that go up through the filling ports or the cells do not fill completely tap the bottle B some times Fig C NOTE __________________________________________ Ba careful to prevent the battery from falling Leave the bottle in its place Do not remove the bottle from the battery since it is necessary that all electrolyte passes into the battery for its proper operation WARNING The removal of ...

Страница 83: ...30 minutes and then check the voltage with a voltmeter The voltage is temporarily high immediately after charge For a precise measurement leave the battery to rest for the fixed period of time NOTE __________________________________________ The charging values change according to the storage duration the temperature and the type of battery charger used If the voltage does not reach at least 12 6V ...

Страница 84: ...es to the terminals IMPORTANT NOTICE Connect the positive cable of the battery B first and then the negative cable B Fig G Check The battery terminals If it is dirty remove the dirt using a metal brush In case of loose connections connect them properly G A B D ELECTRICAL SYSTEM BATTERY CHECK AND CHARGING COPY Moto GB Grant Martland grantmartland motogb co uk ...

Страница 85: ... the fuse Replace The blown fuse Position the main selector switch at OFF Install a new fuse with the correct amperage Switch on the switches to check that the electrical circuit functions If the fuse blows immediately check the electrical circuit WARNING Never use fuses with aN amperage different from those specified The use of improvised techniques or fuses with different amperages could cause i...

Страница 86: ...STEM FUSE CHECK FUSE LEGEND Refer to Fig C 1 Petrol pump 15 00 A 2 Fan 15 00 A 3 ECU1 15 00 A 4 Services 10 00 A 5 Lights 15 00 A B B 10A 15A 15A 15A 15A 1 2 3 4 5 C COPY Moto GB Grant Martland grantmartland motogb co uk ...

Страница 87: ...nnectors C Fig C Install Insert the new lamp Connect Connect the new lamp to the connectors C Fig C Replace the cover Position the protection of the ignition block and replace the two locking screws IMPORTANT NOTICE Avoid touching the glass part of the projector lamp keep it clean and remove any traces of oil If this is not done the transparency of the glass will not be as it was before by the dur...

Страница 88: ...re Remove The mobile windscreen refer to chapter Removal of mo bile windscreen Chapter 4 Front fairing see chapter Removal of front fairing Chap ter 4 Instrumentation panel plate refer to chapter Removal of the instrumentation panel plate Chapter 4 side locking screws D front locking screws E Fig C Disconnect the connector of the LED headlight F the cables of the right and left front indicator lig...

Страница 89: ...rts so that it cannot fall Install Proceed using the opposite order to removal Install the side locking screws D Fig A the front locking screws E Fig A to the following torque T R Torque 10 N m ELECTRICAL SYSTEM INSTALLATION OF THE HEADLIGHT A D D E COPY Moto GB Grant Martland grantmartland motogb co uk ...

Страница 90: ...1 10 in respect of horizontal axis of the headlights If the luminous beam does not conform to this indication carry out the adjustment until the luminous beams are in the correct position Adjust The light beams of the two headlights by adjusting the reg ister screw A positioned down below on the right and left side of the rear of the projector lamps Fig B Rotating the screw in an anticlockwise dir...

Страница 91: ...e motorcycle on a flat level floor IMPORTANT NOTICE Prop the motorcycle on suitable supports so that it cannot fall To substitute the rear LED light refer to Chapter 4 Fair ings paragraph Removal of the rear light COPY Moto GB Grant Martland grantmartland motogb co uk ...

Страница 92: ...Remove Rider and passenger seats refer to chapter Removal of rider and passenger seats Chapter 4 Rear handles refer to chapter Removal of the rear han dles Chapter 4 Side fairings refer to chapter Removal of the side fair ings Chapter 4 Disconnect the indicator cables Remove the nuts of the rear indicator supports E Fig D Remove the indicators and substitute them with the new ones Install Proceed ...

Страница 93: ...windscreen Chapter 4 Front fairing refer to chapter Removal of front fairing Chapter 4 Lighting unit refer to chapter Removal of the lighting unit Chapter 4 NOTE _________________________________ The following procedure is applicable to both front indica tors Remove the support of the front indicators 1 Fig A Remove the indicators Install Proceed using the opposite order to removal A 1 1 COPY Moto...

Страница 94: ... the steering head Fig A Remove the ignition block and disconnect the connector B Fig B Install Proceed using the opposite order to removal NOTE _________________________________________ Each time a new ignition block is installed it is necessary to carry out the mapping of the new block A B A B COPY Moto GB Grant Martland grantmartland motogb co uk ...

Страница 95: ...4 1 4 COPY Moto GB Grant Martland grantmartland motogb co uk ...

Страница 96: ...OMPONENTS 30 ROTATION SENSOR CHECK 32 CHECK OF THE PHONIC WHEEL AND ABS OF THE FRONT AND REAR WHEEL 33 PRECAUTIONS 34 REMOVAL OF THE ABS HYDRAULIC UNIT 36 INSTALLATION OF THE ABS HYDRAULIC UNIT 37 REMOVAL OF THE ABS ROTATION SENSORS FRONT REAR WHEEL 38 FRONT BRAKE CALLIPER TIGHTNESS 39 REAR BRAKE CALLIPER 40 CHECK THE FRONT AND REAR CALLIPERS 41 FRONT BRAKE CALLIPER INSTALLATION 42 REAR BRAKE CALL...

Страница 97: ...F THE RIGHT LEFT REAR FOOTREST 95 INSTALLATION OF THE LEFT RIGHT REAR FOOTRESTS 96 RIGHT FRONT FOOTREST REMOVAL 97 RIGHT FRONT FOOTREST FITTING 98 LEFT FRONT FOOTREST REMOVAL 99 LEFT FRONT FOOTREST INSTALLATION 100 REMOVAL OF THE GEAR LEVER 101 INSTALLATION OF THE GEARCHANGE LEVER 102 EXHAUST SYSTEM 103 EXHAUST ASSEMBLY 103 EXHAUST ASSEMBLY REMOVAL 104 EXHAUST INSTALLATION 106 FRONT MUD GUARD 107 ...

Страница 98: ...2 INSTALLATION OF THE AIR FILTER 143 INSTALLATION OF THE AIR FILTER BOX 145 SIDE FAIRINGS 146 REMOVAL OF THE SIDE FAIRINGS 147 INSTALLATION OF THE SIDE FAIRINGS 148 UPPER TAIL FAIRING 149 TAILPIECE REMOVAL 150 REMOVAL OF THE REAR PASSENGER HANDLES 152 INSTALLATION OF THE REAR HANDLES 153 REMOVAL OF THE REAR LIGHT 154 INSTALLATION OF THE REAR LIGHTS 156 CHAIN PINION COVER 157 REMOVAL OF THE CHAIN P...

Страница 99: ...e bracket C Fig A Detach the left front calliper NOTE _________________________________ Repeat the above mentioned procedure for the opposite front brake calliper NOTE _________________________________ Do not pull the front brake lever while removing the callipers Loosen the setscrews B Fig B Remove the front wheel pin C Fig C front wheel The left shim D Fig C The spacer E Fig C B B B C C D A C E ...

Страница 100: ...2 12 2 6 13 Pos Description Sq SYMBOLS CONTENTS DESCRIPTION REMARKS 1 SCREW 2 FRONT BRAKE DISC 3 LEFT SHIM 4 BEARING 5 FRONT WHEEL RIM GREY 6 FRONT WHEEL AXLE 7 VALVE 8 SHIM 9 INTERNAL SHIM 10 OIL SEAL 11 FRONT WHEEL ABS SENSOR 12 SCREW 13 FRONT TIRE COPY Moto GB Grant Martland grantmartland motogb co uk ...

Страница 101: ...___ Repeat the above mentioned procedure for the opposite front disc brake AREXON SYSTEM 52A43 MEDIUM GRADE BRAKE THREAD SEALANT The procedure below applies to both brake discs NOTE _________________________________ Tighten the bolts of the brake disc in successive passes op erating in a criss cross sequence Fig A Tighten the torque T R Torque 22N m NOTE _________________________________ The numbe...

Страница 102: ...f the front brake disc turn the handlebar right and then left to make sure that the front wheel stops To remove the disc brake refer to chapter Removal of the disc brake Keep the gauge at a right angle to the surface of the brake disc Measure the bending 1 5 mm 0 05 in under the edge of the brake disc Fig A Brake disc Deformation limit Front 0 1 mm Rear 0 15 mm Measure Brake disc thickness Measure...

Страница 103: ...r and lower detections of the comparator represents the measurement of the misalignment Substitute the wheel axle if the misalignment exceeds the service limit Wheel shaft runout 100 mm STANDARD LIT 0 1 mm or less Service limit LIT 0 2 mm IMPORTANT NOTICE Do not try to straighten the wheel axle if it is warped If there is any warping replace Check Tyre Front wheel If there is any warping replace M...

Страница 104: ...g ex tractor Fig B Fit the new wheel bearing following the removal steps in re verse order IMPORTANT NOTICE When inserting the bearings do not touch the internal ring B or the ball bearings of the wheel bearings Contact must be made only by the external ring NOTE _________________________________ Use a wrench that adapts to the diameter of the external edge of the wheel bearing A B A COPY Moto GB ...

Страница 105: ... position in a smooth way Install right brake calliper Fig C tube guide bracket Fig C screw E Fig C ABS sensor A Fig C screws B Fig C Tighten the torque T R Torque 50 N m NOTE _________________________________ Repeat the above mentioned procedure for the opposite brake calliper Ensure that there is enough space between the brake pads before fitting the callipers on the relative brake discs Check t...

Страница 106: ...os Description Sq SYMBOLS CONTENTS DESCRIPTION REMARKS 1 REAR WHEEL AXLE 2 BUSHING 3 SCREW 4 REAR BRAKE DISC 5 VALVE 6 REAR WHEEL RIM BLACK 7 INTERNAL SHIM 8 DUST COVER 9 NUT 10 FLEXIBLE COUPLING 11 SHIM 12 O RING 13 BEARING 14 OIL SEAL 15 SCREW 16 SPROCKET SUPPORT FLANGE 17 CROWN Z42 18 NUT M10 19 SHIM COPY Moto GB Grant Martland grantmartland motogb co uk ...

Страница 107: ...RIPTION REMARKS 20 BEARING 21 ELASTIC RING 22 TRANSMISSION CHAIN 23 REAR TYRE 160 60 R17 24 CALLIPER HOLDER PLATE 25 REAR WHEEL ABS SENSOR 26 SCREW REAR WHEEL AND BRAKE DISC REAR WHEEL REMOVAL COPY Moto GB Grant Martland grantmartland motogb co uk ...

Страница 108: ...nsor B Fig B The nut 21 the pin 1 the register slide D Fig C NOTE _________________________________ During this phase be careful in separating the components such as the chain tensioner register on the crown wheel side and the brake disc side and brake calliper support plate E Fig C Remove The bush 20 Fig D the spacer 2 Fig D NOTE _________________________________ The numbers marked are a part of ...

Страница 109: ...heel 25 Fig A loosen the screws 3 Fig A the nuts 18 the crown wheel 17 the flange 16 the screws 15 the flexible couplings 10 Check the crown wheel holder flange 16 If there is any cracking damage replace The flexible couplings 10 If there is any damage or wear replace NOTE _________________________________ The numbers marked are a part of the Rear wheel and brake disc table COPY Moto GB Grant Mart...

Страница 110: ...t try to straighten the wheel axle if it is warped Check Tyre Front wheel If there is any warping replace Measure The radial eccentricity of the wheel B Fig B The lateral eccentricity of the wheel C Fig B If the specified limit is exceeded replace Eccentricity Limit Radial B 0 05 mm Side C 0 05 mm A A B B C COPY Moto GB Grant Martland grantmartland motogb co uk ...

Страница 111: ...r Fig B Fit the new wheel bearing following the removal steps in re verse order IMPORTANT NOTICE During the bearing insertion do not touch the inner seat B or the ball bearings of the wheel C Contact must only oc cur with the outer seat of bearing D Fig C NOTE _________________________________ Use a wrench that is adapted to the diameter of the outer edge E of the wheel bearing Fig C A B A C E D C...

Страница 112: ...wheel holder flange 16 using a clean cloth especially surfaces that touch the crown wheel Recommended solvent TUTELA MOTOR CLEAN Install the new crown wheel tighten the self locking nuts 18 to the following torque pressure T R Torque 45 N m NOTE _________________________________ Tighten the self locking nuts in several stages proceeding with a crossover sequence NOTE ______________________________...

Страница 113: ... T R Torque 10 N m Use Loctite thread locker to secure Loctite 243 NOTE _________________________________ Tighten the self locking nuts in several stages proceeding with a crossover sequence NOTE _________________________________ The numbers marked are a part of the Rear wheel and brake disc table 3 3 25 26 3 A COPY Moto GB Grant Martland grantmartland motogb co uk ...

Страница 114: ...ig D T R Torque 80 N m Install the brake calliper screws tighten to the following torque pressure Fig D T R Torque 80 N m NOTE _________________________________ Make sure that there is enough space between the brake pads before fitting the calliper to the relevant brake discs IMPORTANT NOTICE Check that the travel of the flexible brake hose is correct NOTE _________________________________ The num...

Страница 115: ...s as a block Pads Wear limits Front 1 mm Clean press the pistons of the calliper inside to permit the installa tion of the new brake pads Install the brake pads in reverse order of disassembly the brake calliper Check The brake fluid level B Fig C If below the minimum notch top up with the recommended brake fluid until it is at the correct level Refer to Chapter 3 Periodic maintenance paragraph Ch...

Страница 116: ...ads in reverse order of disassembly screws the brake calliper tighten to the following torque T R Torque 22 N m Check The brake fluid level E Fig D Top up with brake fluid if the level is less that the minimum level mark Brake pedal operation IMPORTANT NOTICE Do not utilise the motorcycle if full efficiency of the brake pedal cannot be obtained Full efficiency is activated by op erating the brake ...

Страница 117: ...IPTION REMARKS 1 PIPE 2 BRACKET 3 REAR BRAKE HOSE 4 REAR BRAKE CALLIPER HOSE ABS CEN TRAL UNIT 5 FRONT BRAKE PUMP 6 REAR BRAKE CALLIPER 7 REAR BRAKE PADS A PAIR 8 REAR IDROSTOP 9 GASKET 10 FRONT BRAKE CALLIPER HOSE ABS CEN TRAL UNIT 11 FRONT BRAKE HOSE 12 FRONT BRAKE HOSE 13 COMPLETE FRONT BRAKE PUMP 14 LEFT FRONT CALLIPER RADIAL COPY Moto GB Grant Martland grantmartland motogb co uk ...

Страница 118: ...KE CALLIPER RADIAL 16 ABS CENTRAL UNIT 17 SCREW 18 FRONT BRAKE PADS A PAIR 19 SPECIAL SCREW 20 SPECIAL SCREW 21 SCREW 22 SPECIAL SCREW 23 SPECIAL SCREW 24 SPECIAL SCREW 25 FRONT BRAKE LEVER 26 SELF LOCKING NUT 27 SCREW 28 MICROSWITCH 29 ELASTIC WASHER 30 SPRING BAND COPY Moto GB Grant Martland grantmartland motogb co uk ...

Страница 119: ...sealing washer 9 Remove the front brake hose 10 Detach the front brake hose 10 disconnect the connector of the front brake switch 1 Fig A screw 27 micro switch 28 nut 26 screw 23 front brake lever 25 screws 21 clamp 2 remove the pump IMPORTANT NOTICE during the disassembly stage do not allow any brake fluid remaining in the circuit to drip onto the vehicle NOTE _________________________________ Th...

Страница 120: ...6 7 9 9 9 9 9 16 17 20 21 29 30 5 8 NOTE _________________________________ The above exploded view is part of the spare parts table of the chapter Front and rear brakes paragraph Removal of the front brake pump COPY Moto GB Grant Martland grantmartland motogb co uk ...

Страница 121: ...op 8 Fig B sealing washer 9 Release the main brake hose 3 Release the brake reservoir hose 1 Remove the brake pump 5 IMPORTANT NOTICE During the disassembly stage do not allow any brake fluid remaining in the circuit to drip onto the vehicle surfaces NOTE _________________________________ The numbers marked are a part of the table at the begin ning of the chapter FRONT AND REAR BRAKES REAR BRAKE P...

Страница 122: ...ecial screw 22 Tighten to the following torque T R Torque 26 N m Position the front brake lever 25 Fig A screw 23 tighten Fig A nut 26 Fig A Tighten to the following torque T R Torque 7 N m WARNING To guarantee the safety of the bike it is essential for the path of the brake hose to be correct NOTE _________________________________ Once topping up operations of the brake fluid has finished refer t...

Страница 123: ...brake pump A Fig A screws 10 Fig A Tighten to the following torque T R Torque 12 N m IMPORTANT NOTICE When assembling the pump avoid spilling brake fluid that has remained in the system onto the surfaces of the motor cycle NOTE _________________________________ The numbers marked are a part of the table at the begin ning of the chapter FRONT AND REAR BRAKES REAR BRAKE PUMP INSTALLATION A 10 B 1 8 ...

Страница 124: ...i lock braking system are phonic wheel sensor A front wheel Fig A phonic wheel B front wheel Fig A phonic wheel sensor C rear wheel Fig B phonic wheel D rear wheel Fig B ABS yellow warning light E Fig C ABS hydraulic unit F Fig D A B B C D C E D COPY Moto GB Grant Martland grantmartland motogb co uk ...

Страница 125: ...4 31 ABS ANTI LOCK BRAKING SYSTEM POSITION OF THE COMPONENTS Fuse box 1 Fig E Connector of the ABS diagnostic system 2 Fig F E F 1 2 COPY Moto GB Grant Martland grantmartland motogb co uk ...

Страница 126: ... Disconnect the connector of the phonic wheel 6 Fig D Carry out a visual check of the rotation sensor of the phonic wheel Substitute the wheel rotation sensor if it is cracked bent or damaged in anyway If an electrical fault in the sensors is suspected check the electrical circuit NOTE _________________________________ Place the motorcycle on a suitable support so that the front wheel is raised Ch...

Страница 127: ... substitute the phonic wheel as follows SUBSTITUTION OF THE PHONIC WHEEL ABS OF THE FRONT AND REAR WHEEL Remove Front wheel refer to the chapter removal of the front wheel screws 12 the phonic wheel 11 Fig F Rear wheel refer to the chapter removal of the rear wheel NOTE _________________________________ The numbers marked are a part of the spare parts table chapter Front wheel and brake discs para...

Страница 128: ...ponents The ABS components cannot be disassembled Even if there is a fault substitute the ABS unit do not try to disassemble and repair the components The ABS system is made up of numerous circuits tubes and cables of the brakes Furthermore the ABS system is not capable of detecting problems of the conventional braking system abnormal wear of the brake discs brake pads and other mechanical faults ...

Страница 129: ...n if the tyre pressures are not correct if tyre not rec ommended has been fitted or if the wheel is deformed If the warning light comes on solve the problem by cancelling the maintenance code ABS ANTI LOCK BRAKING SYSTEM PRECAUTIONS COPY Moto GB Grant Martland grantmartland motogb co uk ...

Страница 130: ...it The nuts of the rigid tubing B Fig B the screws D Fig C Disconnect The connector of the ABS hydraulic unit C Fig B by rotat ing the lever as indicated in the figure Remove Remove the ABS hydraulic unit NOTE _________________________________ Be careful to not bend the brake hose when removing it ABS hydraulic unit Close the oil passage holes A of the ABS hydraulic unit B with a cloth to avoid di...

Страница 131: ...B rear brake calliper hose E Fig B rear brake pump hose F Fig B the screws 1 Fig A to the following torque T R Torque 10 N m Tighten the union nuts of the rigid tubing Fig B to the fol lowing torque pressure T R Torque 18 N m Connect The connector of the ABS hydraulic unit H Fig C Install To install reverse the order of the removal operation Bleed the air from the brake circuit refer to chapter Fr...

Страница 132: ...ats see chapter Removal of the rider and passenger seat Chapter 4 Side fairings see chapter Removal of the side fairings Chapter 4 For the fuel tank refer to chapter Removal of the fuel tank Chapter 4 For the front wheel rotation sensor refer to chapter ABS anti lock braking system paragraph rotation sensor check Disconnect the connector of the front wheel rotation sensor 5 Fig A Remove the cable ...

Страница 133: ...IMPORTANT NOTICE Never try to prise out the calliper pistons NOTE _________________________________ Repeat the above mentioned procedure to force the pistons out from the opposite brake calliper Check The ring seal of the damaged brake calliper The ring seal piston seal 2 Fig C that are found inside the piston to maintain the play between the pads and the disc If the seal is in bad condition it ca...

Страница 134: ...NT NOTICE Never try to prise out the calliper pistons Replace the seals C Fig B Substitute the seal if it shows signs of the following Brake fluid leak around the brake pads Brakes overheating Notable difference of wear between the internal and exter nal brake pads If the seal and piston are stuck to each other Substitute the seals when substituting the brake pads IMPORTANT NOTICE When the repair ...

Страница 135: ...rake fluid delivery passages brake calliper body In the event of obstruction clean with a jet of compressed air The seals 2 and 3 Fig A If there is any rust lines signs of wear replace the brake calliper insulation The sliding pins 4 and 5 the rear calliper Fig B If there are any lines signs of wear replace the whole brake calliper The rear brake calliper bracket and the couplings on the front for...

Страница 136: ...e largest seals of the pistons E Fig A the smallest seals of the pistons F Fig A The pistons on the brake calliper B Fig A Install The brake calliper 1 Fig B the screws 2 Fig B to the following torque T R Torque 50 N m Recommended lubricant G MR2 TUTELA grease Install The brake hose 10 Fig C the sealing washers 9 Fig B the special screws 20 Fig B to the following torque T R Torque 18 N m IMPORTANT...

Страница 137: ...e the brake calliper is removed replace the piston gaskets Recommended brake fluid TUTELA BRAKE FLUID TOP4 DOT4 Install the largest seals of the pistons D Fig A the smallest seals of the pistons C Fig A The pistons on the brake calliper B Fig A Install The brake calliper 6 Fig B the screws 21 Fig B to the following torque T R Torque 22 N m Install The sliding pins 3 and 4 Fig D ear protectors agai...

Страница 138: ...ormance Top up with the same type of brake fluid in the system The brake fluid must never be mixed with fluids of other brands since this could cause a dangerous chemical reaction with a drop in brake performance as a result While topping up brake fluid take care not to let any water enter the container Water would considerably reduce the boiling point of the flu id and may lead to the formation o...

Страница 139: ...ESCRIPTION REMARKS 1 SCREW 2 UPPER U CLAMP 3 LOWER U CLAMP 4 BUSHING 5 HANDLEBAR FIXING PIN 6 WASHER 7 NUT 8 SCREW 9 STEERING HEAD 10 SPECIAL SCREW 11 STEERING PIN RING NUT 12 STEERING RING NUT 13 DUST SEAL 14 BEARING 15 WASHER COPY Moto GB Grant Martland grantmartland motogb co uk ...

Страница 140: ...S CONTENTS DESCRIPTION REMARKS 16 SCREW 17 SEEGER RING 18 STEERING BASE 19 SCREW 20 LEFT RADIAL STEM ASSEMBLY 21 RIGHT RADIAL STEM ASSEMBLY 22 SCREW 23 SCREW 24 SCREW 25 COVER 26 ABS SPEED SENSOR REAR WHEEL 27 SCREW COPY Moto GB Grant Martland grantmartland motogb co uk ...

Страница 141: ...el see procedure Front mudguard see procedure Loosen the screws 8 Fig A the screws 19 Fig B IMPORTANT NOTICE Before loosening the setscrews on the top and bottom brackets fit a support for the front fork stem NOTE _________________________________ The numbers marked are a part of the spare parts table of the chapter Front fork paragraph Removal of the front fork stems A B FRONT FORK FRONT FORK STE...

Страница 142: ...ly unscrew the cap assembly 1 from the support tube using a 4 mm pin and hook wrench B Lower the fork sleeve 10 IMPORTANT NOTICE The fork spring is compressed Push down The spring 5 Fig B The preload shim so as to be able to insert a 17 mm wrench in the nut 4 Hold the cap assembly 1 in place with a 4 mm pin and hook wrench and use a 17 mm wrench to loosen the nut 4 Unscrew and remove the top cap a...

Страница 143: ...to flow out Fig D NOTE _________________________________ To help drain the rod it is necessary to pump a few times by pushing the pump rod forwards and backwards 15 Fig D IMPORTANT NOTICE This operation is only necessary after draining the oil from inside the rod Lock the wheel shoe A in a clamp Fig E Remove The screw 18 fastening the pump unit 15 The washer 17 The pump unit 15 C D 8 9 2 5 7 6 15 ...

Страница 144: ...e these two elements it is necessary to pull them apart with a little force Oil seal 12 Retaining ring 11 The bottom guide bushing 8 Manually remove The top guide bushing 6 NOTE ________________________________ If this operation becomes difficult it is possible to use a flat head screwdriver in the slot in the bushing to make it easier The bottom guide bushing 8 Retaining ring 11 Oil seal 12 Dust ...

Страница 145: ...5 If outside specifications replace Detail The full length of the spring Spring 295 mm Check Damper shaft 15 Fig C If there is any damage or wear replace If there are any obstructions free all oil passages with com pressed air IMPORTANT NOTICE The pump unit contains elements that are very sensitive to foreign bodies While disassembling and refitting the front fork stem never let foreign bodies ent...

Страница 146: ...TANT NOTICE Take note of the direction in which the oil filter is facing 12 as it needs to be inserted with the hollow part facing the re taining ring 11 Remove the adhesive tape applied at the end of the fork stem together with any traces of adhesive remaining Insert The upper guide bush 6 Fig C using the appropriate tool X Fig C Tool for stem guide bush insertion NOTE ___________________________...

Страница 147: ...ace the following in the seat The dust seal 14 by pressing down manually Fig F Insert The assembled pump unit 15 into the fork sleeve 10 Fig G Fit the fork in a clamp by the wheel foot Fig H Lower the fork sleeve over the stem Insert The washer 17 The screw 18 fastening the pump unit Use an 8 mm Allen key to tighten to the following torque T R Torque 50 N m E F G 13 14 15 10 H 17 18 COPY Moto GB G...

Страница 148: ...into the fork sleeve Spring tip 2 Fork spring 5 Top spring guide bushing 6 Shim 7 Bottom spring guide bushing 8 Spring tip 9 IMPORTANT NOTICE In the same direction as spring insertion The narrowest section must be facing upwards Screw the following fully Closing cap 1 Fig M Push down The spring 5 Fig N The preload shim Insert a 17 mm wrench in the nut 4 Hold the cap in place with a 4 mm pin and ho...

Страница 149: ...ess of the dust seal Tighten The stop screws of the lower steering plate 19 to the fol lowing torque pressure T R Torque 8 N m NOTE ________________________________ Tighten in three steps Tighten The stop screws 8 of the upper steering plate 9 Fig C to the following torque pressure T R Torque 22 N m recommended lubricant G MR2 TUTELA grease IMPORTANT NOTICE Check that the path of the brake hoses i...

Страница 150: ... REAR VIEW MIRROR RIGHT 3 HANDLEBAR 4 SCREW 5 GRIP CAP 6 GRIP END 7 THREADED INSERT 8 LEFT HANDGRIP 9 THREADED INSERT 10 LEFT LIGHT COMMUTATOR SWITCH 11 RIGHT LIGHT COMMUTATOR SWITCH 12 ACCELERATOR CONTROL 13 ACCELERATOR CONTROL HOSE 14 FUEL OPEN CABLE 15 FUEL CLOSE CABLE COPY Moto GB Grant Martland grantmartland motogb co uk ...

Страница 151: ...CLUTCH CONTROL 18 RUBBER CLIP 19 SCREW 20 BUSHING 21 ELASTIC WASHER 22 BRAKE PEDAL 23 SCREW 24 NUT 25 SCREW 26 BRAKE PEDAL 27 NUT 28 BALL JOINT 29 NUT 30 REGISTER ROD 31 SCREW 32 RETURN SPRING 33 THREADED PIN 34 GEAR PEDAL 35 SCREW 36 TUBE GUIDE 37 ABS SWITCH COPY Moto GB Grant Martland grantmartland motogb co uk ...

Страница 152: ...sert 9 Fig A left handgrip 8 Fig A screws B left commutator switch C Fig B left commutator switch 10 Fig A screws 1 clutch control Fig B U clamp 2 clutch control 3 Fig B clutch control 17 NOTE ________________________________ Disconnect the connector of the LEFT STOP light switch Remove right commutator switch screws Right commutator switch 11 screws 1 Fig D accelerator control 12 accelerator cont...

Страница 153: ...VAL screws 1 handlebar u clamp 2 Fig C Detach the handlebar 3 NOTE ________________________________ The numbers marked are a part of the spare parts table chapter Handlebar 1 2 1 COPY Moto GB Grant Martland grantmartland motogb co uk ...

Страница 154: ...N Check Handlebar 3 Fig D If there is any warping cracking damage replace WARNING Do not try to straighten the handlebar if bent since it will become weaker and could be dangerous D COPY Moto GB Grant Martland grantmartland motogb co uk ...

Страница 155: ...__________ Install the brake pump clevis with UP facing upwards Fig F tighten the upper screw first then the lower screw Accelerator handgrip 13 accelerator control 12 fuel open cable 14 fuel close cable 15 clutch control 17 tighten to the following torque T R Torque 8 N m left selector switch 10 left handgrip 8 handgrip terminal 6 right rear view mirror 2 and left rear view mirror 1 Position the ...

Страница 156: ...cated order Removal of the mobile and fixed head light fairing Re fer to paragraph Removal of the front wheel Refer to paragraph Removal of the front fork stems Refer to paragraph Removal of the mudguard Refer to paragraph Removal of the handlebar Refer to paragraph The screws 8 Fig A the two upper u clamps 3 8 3 COPY Moto GB Grant Martland grantmartland motogb co uk ...

Страница 157: ...00097146000 Pull out the upper steering base Loosen the steering pin ring nut B the steering ring nut C using the steering lock nut spanner D Tool to tighten the steering sleeve lock nut Code R180297129000 WARNING Firmly support the bottom steering base so that it cannot fall C A B C D 10 COPY Moto GB Grant Martland grantmartland motogb co uk ...

Страница 158: ... from the lower bracket using a chisel D and a hammer Fig B Fit a new rubber gasket and new bearing tracks IMPORTANT NOTICE If the bearing track is not correctly fitted this could damage the steering head tube NOTE ________________________________ The ball bearings and the relative races must always be substituted together and greased as necessary Fig C Every time the steering sleeve is removed a ...

Страница 159: ...ring ring nut the steering ring nut 1 Fig C Position the upper steering base 9 Fig B the cap 4 Fig B using the special tool and tighten to the following torque pressure T R Torque 60 N m the set screws 3 Fig B to the following torque pressure T R Torque 22 N m Check The steering sleeve Fig C Gently oscillate the front fork holding it by the ends of the tubes If there is any jamming loosening adjus...

Страница 160: ...ON REMARKS 1 SWINGING ARM PIN 2 BUSHING 3 OIL SEAL 4 SEEGER RING 5 BEARING 6 BEARING 7 INTERNAL SHIM 8 NUT 9 SWINGING ARM 10 CHAIN SLIDE 11 SCREW 12 SHIM 13 VIBRATION DAMPING RUBBER 14 SCREW 15 GUIDE BUSHING 16 SCREW 17 SCREW 18 NUT 19 REAR SHOCK ABSORBER COPY Moto GB Grant Martland grantmartland motogb co uk ...

Страница 161: ...OVAL Pos Description Qty Sq SYMBOLS CONTENTS DESCRIPTION REMARKS 20 SCREW 21 NUT 22 SCREW 23 CHAIN TENSIONER SLIDE 24 PLATE 25 ABS PHONIC WHEEL SENSOR REAR WHEEL 26 SCREW 27 CHAIN COVER 28 WASHER COPY Moto GB Grant Martland grantmartland motogb co uk ...

Страница 162: ...eat Elevated overheating could cause an explosion due to the excessive pressure of the gas Do not deform or damage the rear shock absorber or the gas cylinder in anyway If the rear shock absorber gas cylin der or both are damaged the damping performance will be prejudiced Remove the screws A Fig A The upper panels B on both sides Fig A the lower screw 17 of the rear shock absorber unit Fig B the r...

Страница 163: ...bsorber If there is any gas oil leak replace the rear shock absorber as sembly Spring If there is any damage wear replace the rear shock absorber assembly Bushing If there is any damage or wear replace Dust seal If there is any damage or wear replace Screws If there is any warping damage signs of wear replace C COPY Moto GB Grant Martland grantmartland motogb co uk ...

Страница 164: ...install the rear shock absorber unit Insert the lower screw 17 of the rear shock absorber unit Tighten the lower nut 18 of the rear shock absorber unit Fig D to the following torque pressure T R Torque 80 N m Install the upper screw 20 of the rear shock absorber unit Tighten the upper nut 18 of the rear shock absorber unit to the following torque T R Torque 80 N m NOTE ____________________________...

Страница 165: ...fall Remove the parts in the indicated order Chain pinion cover refer to chapter Removal of the chain pinion cover Chapter 4 Detach The transmission chain with a suitable tool for transmission chains A Fig A or with the dedicated tool according to the transmission chain manufactur er s specifications A A COPY Moto GB Grant Martland grantmartland motogb co uk ...

Страница 166: ...nd the O rings Insert The master link A Fig A The O Rings B Fig A The clip link C Fig A IMPORTANT NOTICE Insert the master link from inside the transmission chain then fit the clip link with the ID mark facing out Mount and fix the set of tools for the transmission chain Ensure that the pins of the master link are mounted correct ly Rivet the master link pins laterally Ensure that the pins are tap...

Страница 167: ... arm pin 1 NOTE ________________________________ Position a stand B to support the rear swinging arm 9 Fig A Remove the rear brake tube ties C Fig B the rear brake support the screw 17 Fig B the swinging arm pivot 1 Fig C IMPORTANT NOTICE During the removal stage the swinging arm bushes 2 and the spacers 5 could fall to the ground Fig D Utilise the appropriate tool for the removal of the internal ...

Страница 168: ...ARKS 1 FRAME 2 SCREW 3 NUT 4 SCREW 5 LEFT ENGINE PROTECTION 6 SCREW 7 SCREW 8 SCREW 9 RUBBER BUSHING 10 SHIM 11 SHIM 12 SCREW 13 RIGHT ENGINE PROTECTION 14 SCREW 15 SCREW 16 PLATE 17 LEFT RADIATOR BRACKET 18 RIGHT RADIATOR BRACKET 19 HOMOLOGATION PLATE COPY Moto GB Grant Martland grantmartland motogb co uk ...

Страница 169: ...q SYMBOLS CONTENTS DESCRIPTION REMARKS 20 RIVET 21 PAD 22 FRONT FRAME 23 METRIC RAPID FIXING CLIP 24 SCREW 25 BRACKET 26 SCREW 27 HEADLIGHT FAIRING SUPPORT 28 SCREW 29 ELASTIC WASHER 30 SCREW 31 SCREW 32 WASHER 33 SCREW COPY Moto GB Grant Martland grantmartland motogb co uk ...

Страница 170: ... Fig A to the following torque pressure T R Torque M6 screw 10 N m the right engine protection 13 the screws 7 and 6 to the main frame Fig A to the following torque pressure T R Torque M8 screw 22 N m NOTE ________________________________ The numbers marked are a part of the spare parts table chapter Frame paragraph Installation of frame parts A FRAME LEFT RIGHT ENGINE PROTECTION INSTALLATION COPY...

Страница 171: ...GHT ENGINE PROTECTION Park the bike on a level surface IMPORTANT NOTICE Prop the bike on suitable supports so that it cannot fall Remove Proceed using the opposite order to removal COPY Moto GB Grant Martland grantmartland motogb co uk ...

Страница 172: ... movable windscreen Chapter 4 Front fairing see chapter entitled Removal of front fair ing Chapter 4 the screws 26 Fig A the front frame 22 Fig A Remove the screws 28 B the screws 30 Fig B the windscreen support 27 Fig B NOTE ________________________________ The numbers marked are a part of the spare parts table chapter Frame paragraph Installation of frame parts A B COPY Moto GB Grant Martland gr...

Страница 173: ...FRAME WINDSCREEN SUPPORT Park the bike on a level surface IMPORTANT NOTICE Prop the bike on suitable supports so that it cannot fall Install proceed using the opposite order to removal COPY Moto GB Grant Martland grantmartland motogb co uk ...

Страница 174: ...20 21 21 22 22 23 23 24 27 29 29 25 25 26 28 Pos Description Qty Sq SYMBOLS CONTENTS DESCRIPTION REMARKS 1 REAR FRAME 2 SCREW 3 SCREW 4 NUT 5 LEFT BAG SUPPORT FRAME 6 RIGHT BAG SUPPORT FRAME 7 SCREW 8 BUSHING 9 RUBBER TIP 10 SCREW 11 PLATE 12 CASE RELEASE 13 SCREW 14 SCREW 15 SCREW 16 SCREW 17 NUT 18 PLATE COPY Moto GB Grant Martland grantmartland motogb co uk ...

Страница 175: ...iption Qty Sq SYMBOLS CONTENTS DESCRIPTION REMARKS 19 SCREW 20 ELASTIC CLIP 21 PIN 22 SCREW 23 SCREW 24 REAR TOP BOX RACK 25 TWO REAR SIDE BAGS 26 REAR TOP BOX 27 BRACKET 28 REAR TOP BOX SUPPORT PLATE 29 NUT COPY Moto GB Grant Martland grantmartland motogb co uk ...

Страница 176: ...r to chapter Removal of the rider and passenger seat Chapter 4 Rear handles refer to chapter Removal of the rear han dles Chapter 4 Side fairings refer to chapter Removal of the side fair ings Chapter 4 the screws 3 Fig A the nuts 4 Fig A the screws 2 the rear frame 1 Fig A NOTE ________________________________ The numbers marked are a part of the spare parts table chapter Frame paragraph Installa...

Страница 177: ...e supports so that it cannot fall Install Proceed using the opposite order to removal Install the rear frame 1 Fig A the screws 2 Fig A to the following torque T R Torque 25 N m the screws 3 Fig A to the following torque T R Torque 25 N m 2 2 3 3 4 A COPY Moto GB Grant Martland grantmartland motogb co uk ...

Страница 178: ...n suitable supports so that it cannot fall Remove the screws 14 Fig A the nut 17 Fig A the screw 15 Fig A NOTE _________________________________ The numbers marked are a part of the spare parts table chapter Frame paragraph Installation of the rear frame A 17 COPY Moto GB Grant Martland grantmartland motogb co uk ...

Страница 179: ...E BAGS SUPPORT FRAME Park the bike on a level surface IMPORTANT NOTICE Prop the bike on suitable supports so that it cannot fall Install Proceed using the opposite order to removal COPY Moto GB Grant Martland grantmartland motogb co uk ...

Страница 180: ... METRIC RAPID FIXING CLIP 3 SCREW 4 SNAP ON CLIP 5 SCREW 6 SCREW 7 PLATE 8 LICENCE PLATE HOLDER SUPPORT 9 VIBRATION DAMPING RUBBER 10 REFLECTOR 11 REFLECTOR BRACKET 12 NUMBER PLATE HOLDER 13 SCREW 14 NUT 15 REAR MUD GUARD 16 SCREW 17 SCREW 18 NUT 19 COVER COPY Moto GB Grant Martland grantmartland motogb co uk ...

Страница 181: ...e on suitable supports so that it cannot fall Remove the screws 6 Fig A The complete number plate holder support 8 Fig A NOTE _________________________________ The numbers marked are a part of the spare parts table chapter Frame paragraph Number plate holder COPY Moto GB Grant Martland grantmartland motogb co uk ...

Страница 182: ...UMBER PLATE HOLDER Park the bike on a level surface IMPORTANT NOTICE Prop the bike on suitable supports so that it cannot fall Install Proceed using the opposite order to removal COPY Moto GB Grant Martland grantmartland motogb co uk ...

Страница 183: ...KS 1 LEFT FRONT FOOTREST SUPPORT 2 PIN 2 PIN 3 PLATE 4 LEFT FRONT FOOTREST 5 ANTI SLIP RUBBER 6 NUT 7 ELASTIC RING 7A COTTER PIN 8 SCREW 9 RIGHT FRONT FOOTREST SUPPORT 10 RIGHT FRONT FOOTREST 11 LEFT REAR FOOTREST SUPPORT 12 SCREW 13 PIN 14 PEDANA POSTERIORE SINISTRA 15 SPRING COPY Moto GB Grant Martland grantmartland motogb co uk ...

Страница 184: ...ER 22 RIGHT REAR FOOTREST SUPPORT 23 RIGHT REAR FOOTREST 24 RH FOOTREST RUBBER STOP 25 RIGHT RUBBER FOOTREST COVER 26 SPECIAL SCREW 27 WASHER 28 SIDE STAND 29 SCREW 30 SIDE STAND SUPPORT PLATE 31 SCREW 32 SIDE STAND SWITCH 33 BELLEVILLE WASHER 34 NUT 35 EXTERNAL SCREW 36 INTERNAL SPRING 37 SCREW 38 SCREW 39 WASHER 40 WASHER COPY Moto GB Grant Martland grantmartland motogb co uk ...

Страница 185: ...he side stand sensor 32 Fig A Remove the internal spring 36 Fig B the external spring 35 Fig B the screws 37 Fig B C the screw 38 Fig B C The stand support plate 30 Fig B C NOTE _________________________________ The numbers marked are a part of the spare parts table chapter Cycling paragraph Stand footrests B C 38 37 A 32 COPY Moto GB Grant Martland grantmartland motogb co uk ...

Страница 186: ...all Proceed using the opposite order to removal Tighten the screw 37 Fig B C the screw 38 Fig B C to the following torque T R Torque 45 N m Utilise Loctite Loctite 243 NOTE _________________________________ The numbers marked are a part of the spare parts table chapter Cycling paragraph Stand footrests COPY Moto GB Grant Martland grantmartland motogb co uk ...

Страница 187: ... 12 Fig A The right rear footrest support 22 Fig A The left rear footrest support 11 Fig A NOTE _________________________________ If the motorcycle is equipped with a side bag frame Remove the screw 1 Fig B NOTE _________________________________ The numbers marked are a part of the spare parts table chapter Cycling paragraph Stand footrests COPY Moto GB Grant Martland grantmartland motogb co uk ...

Страница 188: ...orque 25 N m Use Loctite thread locker to secure Loctite 243 NOTE _________________________________ If the motorcycle is equipped with a side bag frame Tighten the screw X Fig B to the following torque pressure T R Torque 25 N m Use Loctite thread locker to secure Loctite 243 NOTE _________________________________ The numbers marked are a part of the spare parts table chapter Cycling paragraph Sta...

Страница 189: ...Fig A the footrest 14 Fig B the plate 18 Fig B the ball 17 Fig B the spring 16 Fig B NOTE _________________________________ Carry out the following operation for the left rear footrest 23 NOTE _________________________________ The numbers marked are a part of the spare parts table chapter Cycling paragraph Stand footrests A 7 13 B 16 17 18 14 COPY Moto GB Grant Martland grantmartland motogb co uk ...

Страница 190: ...T RIGHT REAR FOOTRESTS Park the bike on a level surface IMPORTANT NOTICE Prop the bike on suitable supports so that it cannot fall Install Proceed using the opposite order to removal COPY Moto GB Grant Martland grantmartland motogb co uk ...

Страница 191: ...e special screw 4 Fig B the brake pedal 5 Fig B NOTE _________________________________ Substitute the rubber cover of the right footrest 5 if it is worn Remove the two screws 8 the right front footrest holder plate 9 Fig C NOTE _________________________________ The numbers marked are a part of the spare parts table chapter Cycling paragraph Installation of the stand foot rests 1 B COPY Moto GB Gra...

Страница 192: ...cure Loctite 243 Tighten the screws 4 Fig B to the following torque T R Torque 25 N m Use Loctite thread locker to secure Loctite 243 Tighten the screw 2 and the related fastening nut Fig C to the following torque T R Torque 12 N m Use Loctite thread locker to secure Loctite 243 NOTE _________________________________ The numbers marked are a part of the spare parts table chapter Cycling paragraph ...

Страница 193: ...ews 8 Fig A the left front footrest holder plate 1 Fig A NOTE _________________________________ Substitute the left anti slip rubber cover 5 if it is worn NOTE _________________________________ The numbers marked are a part of the spare parts table chapter Cycling paragraph Installation of the stand foot rests 5 COPY Moto GB Grant Martland grantmartland motogb co uk ...

Страница 194: ...o the following torque T R Torque 25 N m Use Loctite thread locker to secure Loctite 243 NOTE _________________________________ Before installing the left front footrest ensure that the gearchange lever has been installed NOTE _________________________________ The numbers marked are a part of the spare parts table chapter Cycling paragraph Installation of the stand foot rests A 8 COPY Moto GB Gran...

Страница 195: ...el surface IMPORTANT NOTICE Prop the bike on suitable supports so that it cannot fall Remove The left front footrest refer to chapter Removal of the left front footrest Chapter 4 the screw 1 Fig A the lever 2 Fig A COPY Moto GB Grant Martland grantmartland motogb co uk ...

Страница 196: ...upports so that it cannot fall Install Proceed using the opposite order to removal Tighten the screw 1 Fig A to the following torque T R Torque 10 N m NOTE _________________________________ Make use of grease during the assembly G Recommended lubricant MR2 TUTELA GREASE A 1 COPY Moto GB Grant Martland grantmartland motogb co uk ...

Страница 197: ...LS CONTENTS DESCRIPTION REMARKS 1 EXHAUST GASKET 2 LAMBDA PROBE 3 NUT 4 EXHAUST MANIFOLD 5 GRAPHITE GASKET 6 SILENCER 7 RUBBER TIP 8 SCREW 9 SCREW 10 BUSHING 11 RUBBER TIP 12 LEFT FLANGE 13 RIGHT FLANGE 14 SCREW CLIP COPY Moto GB Grant Martland grantmartland motogb co uk ...

Страница 198: ...NOTICE Prop the bike on suitable supports so that it cannot fall Disconnect the Lambda sensor 2 Fig A Remove the screws 8 Fig B the screws 9 Fig B the screw 9 Fig C the screw 6 Fig C the nuts 2 of the corresponding studs Fig D A B 2 9 2 8 C 6 8 COPY Moto GB Grant Martland grantmartland motogb co uk ...

Страница 199: ...__ To make extraction easier it is advisable to loosen the silenc er joint band A to the exhaust manifold Fig E NOTE _________________________________ The numbers marked are a part of the spare parts table chapter Exhaust system paragraph exhaust system EXHAUST ASSEMBLY REMOVAL COPY Moto GB Grant Martland grantmartland motogb co uk ...

Страница 200: ...______________ Lubricate the nuts with copper grease during the assembly phase G TUTELA grease the screws 8 Fig B C to the following torque T R Torque 12 N m the screws 9 Fig B to the following torque T R Torque 12 N m the screw 6 Fig C to the following torque T R Torque 12 N m NOTE _________________________________ The numbers marked are a part of the spare parts table chapter Exhaust system para...

Страница 201: ... WASHER 4 MUDGUARD SUPPORT PLATE 5 SCREW 6 SCREW 7 ELASTIC WASHER 8 WASHER 9 SNAP ON CLIP 10 LOWER MUD GUARD 11 SCREW 12 T BUSHING 13 NUT 14 REFLECTOR 15 LEFT RUBBER PROTECTION 16 RIGHT RUBBER PROTECTION 17 LEFT BRACKET 18 RIGHT BRACKET 19 INTERNAL SHIELD 20 ABS STICKER COPY Moto GB Grant Martland grantmartland motogb co uk ...

Страница 202: ...n suitable supports so that it cannot fall Remove the screw 6 Fig A the screw 2 from both sides Fig A the screw 11 from both sides Fig B the lower mud guard 10 Fig A Remove the screws 2 from both sides Fig C The front mud guard 1 Fig D 2 6 B 11 10 D 1 2 COPY Moto GB Grant Martland grantmartland motogb co uk ...

Страница 203: ...ve the screws 11 Fig E the mud guard support plates 4 Fig E NOTE _________________________________ The numbers marked are a part of the spare parts table chapter Fairing paragraph Front mud guard 11 COPY Moto GB Grant Martland grantmartland motogb co uk ...

Страница 204: ...D INSTALLATION Park the bike on a level surface IMPORTANT NOTICE Prop the bike on suitable supports so that it cannot fall Install Proceed using the opposite order to removal COPY Moto GB Grant Martland grantmartland motogb co uk ...

Страница 205: ...ot fall Remove the screws 1 Fig A The flap guard 2 Fig A the screws 16 Fig B C The rear mudguard 27 Fig B NOTE _________________________________ The numbers marked are shown in the replacement parts table in the Rear shock absorber chapter Rear shock ab sorber removal section B 16 27 C 16 COPY Moto GB Grant Martland grantmartland motogb co uk ...

Страница 206: ...el surface IMPORTANT NOTICE Prop the bike on suitable supports so that it cannot fall Install Proceed using the opposite order to removal Tighten the screws 8 Fig A to the following torque T R Torque 10 N m A 1 COPY Moto GB Grant Martland grantmartland motogb co uk ...

Страница 207: ... on suitable supports so that it cannot fall Remove the screws 11 Fig A The chain guard 10 Fig A NOTE _________________________________ The numbers marked are shown in the replacement parts table in the Rear shock absorber chapter Rear shock ab sorber removal section COPY Moto GB Grant Martland grantmartland motogb co uk ...

Страница 208: ...ceed using the opposite order to removal Tighten the screws 11 Fig A to the following torque T R Torque 10 N m Use Loctite thread locker to secure Loctite 243 NOTE _________________________________ The numbers marked are shown in the replacement parts table in the Rear shock absorber chapter Rear shock ab sorber removal section COPY Moto GB Grant Martland grantmartland motogb co uk ...

Страница 209: ... bike on a level surface IMPORTANT NOTICE Prop the bike on suitable supports so that it cannot fall Remove the passenger seat 1 using the supplied spanner 2 Fig A the screws 3 Fig A the rider seat 4 Fig A A 3 1 2 4 COPY Moto GB Grant Martland grantmartland motogb co uk ...

Страница 210: ...ke on a level surface IMPORTANT NOTICE Prop the bike on suitable supports so that it cannot fall Install Proceed using the opposite order to removal Tighten the screws 3 Fig A to the following torque T R Torque 10 N m A 3 COPY Moto GB Grant Martland grantmartland motogb co uk ...

Страница 211: ...ER TIP 5 SCREW 6 METRIC RAPID FIXING CLIP 7 LEFT AIR DUCT 8 RIGHT AIR DUCT 9 SCREW 10 LEFT RETINA 11 RIGHT RETINA 12 LEFT SIDE WHITE 13 RIGHT SIDE WHITE 14 WASHER 15 DIRECTION INDICATOR FRONT LEFT 16 DIRECTION INDICATOR FRONT RIGHT 17 LEFT AIR INTAKE 18 RIGHT AIR INTAKE 19 SCREW COPY Moto GB Grant Martland grantmartland motogb co uk ...

Страница 212: ... the screws 5 6 Fig D the left air duct 7 Fig B NOTE _________________________________ Carry out the same procedure for the right side 13 and the right air duct 8 the screws 7 8 Fig E the front fairing 1 Fig E NOTE _________________________________ The numbers marked are a part of the spare parts table chapter Fairings paragraph Front fairing 12 7 C D FAIRING REMOVAL OF THE FRONT FAIRING E 1 2 2 3...

Страница 213: ...INSTALLATION OF THE FRONT FAIRING IMPORTANT NOTICE Prop the bike on suitable supports so that it cannot fall Install Proceed using the opposite order to removal COPY Moto GB Grant Martland grantmartland motogb co uk ...

Страница 214: ...DAMPING PAD 5 COMPLETE INSTRUMENT 6 NUT 7 LEFT HEADLIGHT FAIRING 8 RIGHT HEADLIGHT FAIRING 9 SPECIAL SCREW 10 LEFT HAND GUARD 11 LEFT SUPPORT BRACKET 12 SCREW 13 BUSHING 14 METRIC RAPID FIXING CLIP 15 RIGHT HAND GUARD 16 RIGHT SUPPORT BRACKET 17 FIXED HEADLIGHT FAIRING 18 SCREW 19 WINDSCREEN 20 HEADLAMP COPY Moto GB Grant Martland grantmartland motogb co uk ...

Страница 215: ...HEADLIGHT AND WINDSCREEN Pos Description Qty Sq SYMBOLS CONTENTS DESCRIPTION REMARKS 21 SCREW 22 TOP BUSHING 23 RUBBER TIP 24 INSTRUMENTATION PLATE 25 LAMP 26 ADHESIVE COPY Moto GB Grant Martland grantmartland motogb co uk ...

Страница 216: ... on a level surface IMPORTANT NOTICE Prop the bike on suitable supports so that it cannot fall Remove the screws 9 the screws 2 The movable windscreen 1 together with the left right headlight fairing 2 9 1 COPY Moto GB Grant Martland grantmartland motogb co uk ...

Страница 217: ...BILE HEADLIGHT FAIRING Park the bike on a level surface IMPORTANT NOTICE Prop the bike on suitable supports so that it cannot fall Install Proceed using the opposite order to removal COPY Moto GB Grant Martland grantmartland motogb co uk ...

Страница 218: ...hapter entitled Removal of front fair ing Chapter 4 the screws 12 Fig A Disconnect the instrument board wiring B Fig B Remove the instrument board 24 Fig B NOTE _________________________________ The numbers marked are a part of the spare parts table chapter Fairings paragraph Front headlight and wind screen A 12 B B B FAIRING REMOVAL OF THE INSTRUMENTATION PLATE 24 COPY Moto GB Grant Martland gran...

Страница 219: ...INSTRUMENTATION PLATE Park the bike on a level surface IMPORTANT NOTICE Prop the bike on suitable supports so that it cannot fall Install Proceed using the opposite order to removal COPY Moto GB Grant Martland grantmartland motogb co uk ...

Страница 220: ...itled Removal of movable windscreen Chapter 4 Front fairing see chapter entitled Removal of front fair ing Chapter 4 the screws 1 Fig A the screw 2 underneath the small front frame 3 Fig B Disconnect the cables of the left and right front indicators 4 Fig C the connector 5 from the instrument panel as indicated in Fig C A B 1 1 2 3 C 4 5 COPY Moto GB Grant Martland grantmartland motogb co uk ...

Страница 221: ...HE HEADLIGHT UNIT Park the bike on a level surface IMPORTANT NOTICE Prop the bike on suitable supports so that it cannot fall Install Proceed using the opposite order to removal COPY Moto GB Grant Martland grantmartland motogb co uk ...

Страница 222: ...G 4 RUBBER TIP 5 SCREW 6 SCREW 7 METRIC RAPID FIXING CLIP 8 LEFT FUEL TANK CAP 9 RIGHT FUEL TANK CAP 10 LEFT PANEL 11 RIGHT PANEL 12 SCREW 13 LEFT COVER 14 RIGHT COVER 15 SCREW 16 NYLON WASHER 17 STICKER BENELLI BLACK 18 STICKER BENELLI WHITE 19 WINDSCREEN 20 HEADLAMP COPY Moto GB Grant Martland grantmartland motogb co uk ...

Страница 223: ... fall Remove Rider and passenger seats see chapter entitled Removal of rider and passenger seats Chapter 4 Movable windscreen see chapter entitled Removal of movable windscreen Chapter 4 Front fairing see chapter entitled Removal of front fair ing Chapter 4 the screws 1 Fig A B the tank cap 2 Fig C C COPY Moto GB Grant Martland grantmartland motogb co uk ...

Страница 224: ...HE FUEL TANK COVER Park the bike on a level surface IMPORTANT NOTICE Prop the bike on suitable supports so that it cannot fall Install Proceed using the opposite order to removal COPY Moto GB Grant Martland grantmartland motogb co uk ...

Страница 225: ...titled Removal of rider and passenger seats Chapter 4 Movable windscreen see chapter entitled Removal of movable windscreen Chapter 4 Front fairing see chapter entitled Removal of front fair ing Chapter 4 Tank fairing see chapter entitled Removal of tank fairing Chapter 4 The fixing screws of the tank 10 and 1 to the frame Fig C C 10 1 COPY Moto GB Grant Martland grantmartland motogb co uk ...

Страница 226: ...e connector of the level sensor 1 Fig E Disconnect The tubing of the valve 12 of the fuel pump NOTE _________________________________ The numbers marked are a part of the spare parts table chapter Tank paragraph Tank parts F 10 D E 1 12 COPY Moto GB Grant Martland grantmartland motogb co uk ...

Страница 227: ...ing the opposite order to removal Tighten the screws 10 Fig A to the following torque T R Torque 10 N m the screws 1 Fig A to the following torque T R Torque 10 N m NOTE _________________________________ The numbers marked are a part of the spare parts table chapter Tank paragraph Tank parts A 10 1 COPY Moto GB Grant Martland grantmartland motogb co uk ...

Страница 228: ...ION DAMPING RUBBER 6 FUEL TANK 7 FUEL TUBE HOSE 8 CENTRAL FAIRING CLOSURE 9 SCREW 10 SCREW 11 PLATE 12 BUSHING 13 RUBBER TIP 14 WASHER 15 SCREW 16 FUEL TANK LEVEL PROBE 17 O RING 18 SCREW 19 FUEL PUMP 20 SCREW 21 FUEL FILTER 22 FILTER SUPPORT 23 FUEL TUBE HOSE 24 PIPE 25 SPRING COPY Moto GB Grant Martland grantmartland motogb co uk ...

Страница 229: ...al of movable windscreen Chapter 4 Front fairing see chapter entitled Removal of front fair ing Chapter 4 Tank fairing see chapter entitled Removal of tank fairing Chapter 4 the fixing screws 9 Fig A the central fairing closure 8 Fig A NOTE _________________________________ The numbers marked are a part of the spare parts table chapter Tank paragraph Tank parts TANK REMOVAL OF THE TANK CAP SUPPORT...

Страница 230: ... TANK CAP SUPPORT Park the bike on a level surface IMPORTANT NOTICE Prop the bike on suitable supports so that it cannot fall Install Proceed using the opposite order to removal COPY Moto GB Grant Martland grantmartland motogb co uk ...

Страница 231: ...ter entitled Removal of movable windscreen Chapter 4 Front fairing see chapter entitled Removal of front fair ing Chapter 4 Tank fairing see chapter entitled Removal of tank fairing Chapter 4 Tank see chapter entitled Fuel tank removal Chapter 4 the screws 20 Fig A the petrol pump 19 Fig B NOTE _________________________________ The numbers marked are a part of the spare parts table chapter Tank pa...

Страница 232: ... thread locker to secure Loctite 243 NOTE _________________________________ At the moment of reassembly of the pump grease must be smeared around the base of the pump housing A and the pump must be inserted into the housing in reverse order of removal Fig B G Recommended lubricant MR2 TUTELA GREASE NOTE _________________________________ The numbers marked are a part of the spare parts table chapte...

Страница 233: ...entitled Removal of movable windscreen Chapter 4 Front fairing see chapter entitled Removal of front fair ing Chapter 4 Tank fairing see chapter entitled Removal of tank fairing Chapter 4 Tank see chapter entitled Fuel tank removal Chapter 4 the fastening screws 18 Fig A the fuel level sensor 16 Fig B NOTE _________________________________ The numbers marked are a part of the spare parts table cha...

Страница 234: ...he screws 18 Fig A to the following torque T R Torque 10 N m Use Loctite thread locker to secure Loctite 243 NOTE _________________________________ At the moment of reassembly insert the sensor with the con necting lead A pointing upwards Fig B NOTE _________________________________ The numbers marked are a part of the spare parts table chapter Tank paragraph Tank parts A COPY Moto GB Grant Martla...

Страница 235: ...S 1 COMPLETE AIR FILTER BOX 2 SCREW 3 AIR TEMPERATURE SENSOR 4 SCREW CLIP 5 SLEEVE 6 HOSE HOLDER CLIP 7 CARTRIDGE FILTER 8 SPRING BAND 9 PIPE 10 NON RETURN VALVE 11 PIPE 12 VALVE 13 SPRING BAND 14 PIPE 15 PIPE 16 PLATE 17 SCREW 18 AIR FILTER COPY Moto GB Grant Martland grantmartland motogb co uk ...

Страница 236: ...if it is damaged If it is not dam aged wash it Wash the filter element with specific solvents produced for that use Leave it to dry in the open air Apply a specific oil over all surfaces of the filter element NOTE _________________________________ Before installing the filter element into the air box remove any excess oil and making sure that there are no more drips of oil IMPORTANT NOTICE Never s...

Страница 237: ...OF THE AIR FILTER Park the bike on a level surface IMPORTANT NOTICE Prop the bike on suitable supports so that it cannot fall Install Proceed using the opposite order to removal COPY Moto GB Grant Martland grantmartland motogb co uk ...

Страница 238: ...air ing Chapter 4 Tank fairing see chapter entitled Removal of tank fairing Chapter 4 Tank see chapter entitled Fuel tank removal Chapter 4 the screws 1 Fig D the two side covers right and left 2 Fig D Loosen the two screw clips 4 Fig E Disconnect the manifold 5 Fig F Remove the filter box Fig F NOTE _________________________________ The numbers marked are a part of the spare parts table chapter A...

Страница 239: ... THE AIR FILTER BOX Park the bike on a level surface IMPORTANT NOTICE Prop the bike on suitable supports so that it cannot fall Install Proceed using the opposite order to removal COPY Moto GB Grant Martland grantmartland motogb co uk ...

Страница 240: ... Sq SYMBOLS CONTENTS DESCRIPTION REMARKS 1 LEFT PANEL 2 FAIRING CLOSURE 3 SCREW 4 METRIC RAPID FIXING CLIP 5 VIBRATION DAMPING RUBBER 6 LEFT TAIL FAIRING WHITE 7 RIGHT TAIL FAIRING WHITE 9 TOP BUSHING 10 RUBBER TIP 11 LEFT LOWER SIDE 12 RIGHT LOWER SIDE 13 WASHER 14 LEFT REAR DIRECTION INDICATORS 15 RIGHT REAR DIRECTION INDICATORS 16 REAR CENTRAL FAIRING 17 CENTRAL COVER 18 REAR LIGHT 19 SCREW 20 ...

Страница 241: ...es Chapter 4 the fastening screws 3 Fig A the rear central fairing 16 Fig A the central cover 17 Fig A the upper fixing screws 8 Fig B the lower fixing screws 33 Fig B the left tail fairing 6 Fig B the right tail fairing 7 Fig B Disconnect the left right indicator leads of the tail fairing 1 Fig D NOTE _________________________________ The numbers marked are a part of the spare parts table chapter...

Страница 242: ...THE SIDE FAIRINGS Park the bike on a level surface IMPORTANT NOTICE Prop the bike on suitable supports so that it cannot fall Install Proceed using the opposite order to removal COPY Moto GB Grant Martland grantmartland motogb co uk ...

Страница 243: ...2 METRIC RAPID FIXING CLIP 3 SCREW 4 SNAP ON CLIP 5 SCREW 6 SCREW 7 PLATE 8 LICENCE PLATE HOLDER SUPPORT 9 VIBRATION DAMPING RUBBER 10 REFLECTOR 11 REFLECTOR BRACKET 12 NUMBER PLATE HOLDER 13 SCREW 14 NUT 15 REAR MUD GUARD 16 SCREW 17 SCREW 18 NUT 19 COVER COPY Moto GB Grant Martland grantmartland motogb co uk ...

Страница 244: ...ear han dles Chapter 4 Side fairings refer to chapter Removal of the side fair ings Chapter 4 Disconnect the rear light connector 1 Fig C Remove the screws 2 Fig C the headlight support bracket 3 Fig C Disconnect the central light unit 5 Fig D the injection central unit 4 Fig D Disconnect the fuse box 6 Fig E the starter relays 7 Fig E the relay box 8 Fig F FAIRING TAILPIECE REMOVAL C 1 2 3 D 4 5 ...

Страница 245: ...ws 17 Fig H the upper fairing 1 Fig I NOTE _________________________________ The numbers marked are a part of the spare parts table chapter Fairings paragraph Upper fairings tail fairing FAIRING TAILPIECE REMOVAL G 3 1 H I 17 1 COPY Moto GB Grant Martland grantmartland motogb co uk ...

Страница 246: ...e IMPORTANT NOTICE Prop the bike on suitable supports so that it cannot fall Remove Rider and passenger seats see chapter entitled Removal of rider and passenger seats Chapter 4 the screws 1 Fig A the rear handles 2 Fig B B 2 B 1 COPY Moto GB Grant Martland grantmartland motogb co uk ...

Страница 247: ...level surface IMPORTANT NOTICE Prop the bike on suitable supports so that it cannot fall Install Proceed using the opposite order to removal Tighten the screws 1 Fig A to the following torque T R Torque 10 N m B 1 COPY Moto GB Grant Martland grantmartland motogb co uk ...

Страница 248: ...d passenger seats see chapter entitled Removal of rider and passenger seats Chapter 4 Rear handles refer to chapter Removal of the rear han dles Chapter 4 the fixing screws 3 Fig A the rear central fairing 16 Fig A the central cover 17 Fig B Disconnect the rear light connector 1 Fig C Remove A C 16 3 3 B 17 1 COPY Moto GB Grant Martland grantmartland motogb co uk ...

Страница 249: ...Remove the rear light 18 Fig E NOTE _________________________________ The numbers marked are a part of the spare parts table chapter Fairings paragraph Side fairings FAIRING REMOVAL OF THE REAR LIGHT E D 2 3 18 COPY Moto GB Grant Martland grantmartland motogb co uk ...

Страница 250: ...l surface IMPORTANT NOTICE Prop the bike on suitable supports so that it cannot fall Install Proceed using the opposite order to removal FAIRING INSTALLATION OF THE REAR LIGHTS COPY Moto GB Grant Martland grantmartland motogb co uk ...

Страница 251: ...ion Qty Sq SYMBOLS CONTENTS DESCRIPTION REMARKS 1 BUSHING 2 O RING 3 THREADED CAP 4 MAGNETIC CAP 5 O RING 6 SCREW 7 PHASE SENSOR 8 SCREW 9 ALTERNATOR COVER 10 PINION COVER 11 PLATE 12 SCREW 13 FLY WHEEL COVER GASKET 14 SCREW 15 SCREW COPY Moto GB Grant Martland grantmartland motogb co uk ...

Страница 252: ...Fig A NOTE ________________________________ The numbers marked are a part of the spare parts table chapter Fairings paragraph Removal of the chain pinion cover FAIRING REMOVAL OF THE CHAIN PINION COVER COPY Moto GB Grant Martland grantmartland motogb co uk ...

Страница 253: ... torque T R Torque 8 N m NOTE ________________________________ The numbers marked are a part of the spare parts table chapter Fairings paragraph Removal of the chain pinion cover FAIRING INSTALLATION OF THE CHAIN PINION COVER COPY Moto GB Grant Martland grantmartland motogb co uk ...

Страница 254: ...5 1 5 COPY Moto GB Grant Martland grantmartland motogb co uk ...

Страница 255: ...RING TEST 29 VALVE AND VALVE SPRING INSTALLATION 30 CYLINDER CHECK 31 HEAD INSTALLATION 32 PISTONS 33 PISTON REMOVAL 35 PISTON PIN CHECK 36 PISTON RINGS CHECK 37 PISTON CHECK 38 PISTON ASSEMBLY 39 PISTON INSTALLATION 40 REMOVAL OF CONNECTING RODS 41 CRANKCASE 41 CHECK OF CONNECTING ROD AND CONNECTING ROD BEARING SHELLS 43 INSTALLATION OF CONNECTING ROD AND CONNECTING ROD BEARING SHELLS 44 MAIN BEA...

Страница 256: ...RTER REMOVAL 77 STARTER INSTALLATION 78 FLYWHEEL REMOVAL 79 FLYWHEEL INSTALLATION 82 STARTER GEAR REMOVAL 83 STARTER GEAR ASSEMBLY 84 PHASE SENSOR 85 PHASE SENSOR REMOVAL 86 PHASE SENSOR INSTALLATION 87 POWER SYSTEM 88 THROTTLE BODY 88 THROTTLE VALVE REMOVAL 90 THROTTLE VALVE INSTALLATION 91 COPY Moto GB Grant Martland grantmartland motogb co uk ...

Страница 257: ...OVAL HEAD DISTRIBUTION 1 2 3 4 5 6 7 8 9 10 1 COIL 2 RUBBER TIP 3 O RING 4 SCREW 5 BUSHING 6 SCREW 7 SPECIAL WASHER 8 BRACKET 9 TIMING GEAR COVER 10 TIMING GEAR COVER GASKET COPY Moto GB Grant Martland grantmartland motogb co uk ...

Страница 258: ...wrench NOTE _________________________________ Numbers marked are part of the spare parts table in Chapter 5 Engine section entitled Timing gear cover removal NOTE _________________________________ To check the spark plugs see the chapter entitled Routine maintenance spark plug removal section 1 6 A B 7 8 COPY Moto GB Grant Martland grantmartland motogb co uk ...

Страница 259: ... seal Install the spark plug to the head tightening it by hand until it comes into contact with the base of the head Tighten to torque T R Torque 12 N m Install The rubber tips 2 the OR seals 3 Fig D the coils 1 Fig the screws 6 the washers 7 the brackets 8 Fig Tighten to torque T R Torque 10 N m NOTE _________________________________ Numbers marked are part of the spare parts tables in Chapter 5 ...

Страница 260: ...n case of seal breakage on the timing gear cover 10 replace During the assembly of the cover install sealing paste on the surface as shown in Fig F NOTE _________________________________ Numbers marked are part of the spare parts tables in Chapter 5 Engine section entitled Timing gear cover removal E 10 F 9 COPY Moto GB Grant Martland grantmartland motogb co uk ...

Страница 261: ...gear cover repla cement of the rubber tips 5 is recommended Tighten Tighten the screws 4 to the following torque T R Torque 12 N m NOTE _________________________________ Numbers marked are part of the spare parts table in Chapter 5 Engine section entitled Timing gear cover removal E 2 3 4 5 9 HEAD DISTRIBUTION COPY Moto GB Grant Martland grantmartland motogb co uk ...

Страница 262: ..._______________________ Operation to perform with the engine in TDC Using the special tool during the removal stage keep the tensioner retracted Fig I then remove the two screws C Fig G Tool Chain tensioner lock tool Code 0320097046001 G A C B HEAD DISTRIBUTION I COPY Moto GB Grant Martland grantmartland motogb co uk ...

Страница 263: ...etracted position and insert it into its hou sing using the special tool Tool Chain tensioner lock tool Code 0320097046001 Insert the tensioner into the seat and housing Tighten The fastening screws C Fig I to the following torque T R Torque 10 N m The screws B to the following torque T R Torque 8 N m HEAD DISTRIBUTION I A C B COPY Moto GB Grant Martland grantmartland motogb co uk ...

Страница 264: ...ng the removal stage use a marker pen to mark the position of the holders since when reinstalling they need to be in their original positions Fig E The arrows pressed into the holders show the direction in which they need to be installed towards the timing gear Remove the fastening screws of the holders 1 Fig B The holders 2 the intake camshaft Fig C the exhaust camshaft A Fig D B 1 2 1 2 C D A E ...

Страница 265: ...shaft Eccentricity limit Camshaft exhaust side 0 05 mm Camshaft intake side 0 05 mm Measurement of clearance between camshaft main bearing bolts and holder If the measures taken Fig G are not compliant with specifica tions replace the head gear and holder block Specifications Table Camshaft Clearance between bearing journals and camshaft Camshaft outlet side 0 012 mm Camshaft intake side 0 012 mm ...

Страница 266: ... aligned as in Fig B NOTE _________________________________ When assembling the holders it is necessary to lubricate them with special grease to prevent the shafts from rotating dry during initial starting G Sintoflon Grease When installing the holders proceed in the opposite direction to removal tightening the screws to the following torque T R Torque 13 N m NOTE _________________________________...

Страница 267: ...______________________ When assembling the holders it is necessary to lubricate them with special grease to prevent the shafts from rotating dry during initial starting G Sintoflon Grease When assembling the holders proceed in the opposite direction to removal tightening the screws to the following torque T R Torque 10 13 N m NOTE _________________________________ Lubricate the screws with copper ...

Страница 268: ...see chapter entitled Intake camshaft removal 5 Flywheel see chapter entitled Flywheel removal 6 Starter gear assembly see chapter entitled Starter gear assembly removal Remove the fixed chain slide 4 sliding it towards the other the safety plate 5 Fig H the mobile chain slide 6 Fig I the fixing pin 7 Fig I CHECK OF THE TIMING CHAIN SLIDES Check the contact surface of the fixed slide The contact su...

Страница 269: ...e removal process in the opposite order NOTE _________________________________ Operation to perform with the engine in TDC At the end of assembly proceed to load the timing chain tensio ner See chapter Timing chain tensioner installing COPY Moto GB Grant Martland grantmartland motogb co uk ...

Страница 270: ...el removal 7 Starter gear removal see chapter entitled Starter gear assembly removal 8 Chain slides see chapter entitled Chain slide removal Once the parts listed above have been removed proceed to take out the same Fig I TIMING CHAIN CHECK The following process applies to all of the toothed wheels on the camshafts and all of the timing chain guides Check timing chain 2 Fig C In case of damage lac...

Страница 271: ..._____________________ Assembly of the timing chain must always take into account the fact that the motor must be in the TDC condition Fig B see chapter entitled installation of intake camshaft Engine tuning tool Code R180197022000 NOTE _________________________________ During this operation it is necessary to lubricate the chain and timing gears with engine oil NOTE _______________________________...

Страница 272: ...e to check the clearance between the cam and the valve tappets as shown in Fig A If the measurement is outside specifications replace the calibra ted pad NOTE _________________________________ The measurement must be taken on all cams and tappets Camshaft Tappet cam clearance Camshaft exhaust side 0 19 0 25 mm Camshaft intake side 0 13 0 19 mm NOTE _________________________________ In case of valv...

Страница 273: ...MBOLS INTERVENTION DESCRIPTION REMARKS 1 BUSHING M20 2 SCREW 3 BUSHING 4 WASHER 5 VALVE RUBBER TIP 6 CYLINDER HEAD 7 STUD BOLT 8 SCREW 9 THERMOSTAT CUP 10 THERMOSTAT 11 GRUB SCREW 12 HEAD GASKET 13 WATER TEMPERATURE SENSOR 14 COUPLING 15 RETAINING WASHER 16 SCREW 17 O RING 18 SUCTION PIPE 19 WASHER 20 SCREW 21 SCREW CLIP 22 SCREW 23 CAP COPY Moto GB Grant Martland grantmartland motogb co uk ...

Страница 274: ...5 TAPPET VALVE 26 VALVE PAD 27 VALVE RUBBER TIP 28 TOP SHIELDED BULB 29 EXTERNAL VALVE SPRING 30 BOTTOM SHIELDED BULB 31 EXHAUST VALVE 32 INTAKE VALVE 33 INTERNAL VALVE SPRING HEAD DISTRIBUTION CAMSHAFT AND VALVE PAD REMOVAL COPY Moto GB Grant Martland grantmartland motogb co uk ...

Страница 275: ...he calibrated pad 5 Fig A Make a visual check of the tappet valve lifter ensuring that there is no damage or lines and if not replace Check the outside diameter using a micrometer to exclude any deformation Fig B NOTE _________________________________ During installation lubricate the tappet valve lifter using G Sintoflon Grease NOTE _________________________________ At the end of the check of the...

Страница 276: ...pter entitled Chain tensioner removal 4 Exhaust camshaft see chapter entitled Intake and exhaust camshaft removal 5 Chain slides see chapter entitled Chain slide removal Remove the screws 6 Fig C the fastening screws 7 Fig D NOTE _________________________________ Loosen each screw by 1 2 turn then remove all screws Head gasket C D 6 7 HEAD DISTRIBUTION COPY Moto GB Grant Martland grantmartland mot...

Страница 277: ...val 4 Exhaust camshaft see chapter entitled Exhaust camshaft removal 5 Intake camshaft see chapter entitled Intake camshaft removal Use the special tool to remove the valves Fig A Valve removal tool Code 0320097050000 Remove Tappet valve Pad Cotters Top door Spring Bottom plate Oil seal NOTE _________________________________ During removal of the two cotters to lock the valve use a magnet 1 to rec...

Страница 278: ... 2 Fig A Replace the valve guide NOTE _________________________________ To make valve guide removal and installation operations easier and to maintain correct assembly heat the head in an oven taking it to 100 C 212 F Remove the valve guide with a special extractor 3 Fig B Install the new valve guide with the special installer 4 and extractor 3 Fig C After installing the valve guide bore it with a...

Страница 279: ...shape or a diameter of the mushroom that is larger than the body of the valve stem replace the valve Measure the eccentricity of the valve stem Fig G If not compliant with specifications replace the valve NOTE _________________________________ If installing a new valve always replace the relevant guide If the valve is removed or installed always replace the oil seal Valve Valve stem eccentricity I...

Страница 280: ...ve face are in contact with one another the Prussian blue liquid will have been removed Lap the valve contact surfaces the valve seat Fig L NOTE _________________________________ After replacing the head or the valve and the relevant guide it is necessary to lap the seat and contact surfaces of the valve Apply a paste for rough lapping of the valve contact surfa ces C Fig I IMPORTANT NOTICE Do not...

Страница 281: ...he special tool to take out the oil seal AA Fig B Tool for valve oil seal removal Install Proceed to install the oil seal AA Fig D using the special tool Fig C Valve oil seal insertion pad Code R180197025000 B AA C HEAD DISTRIBUTION D COPY Moto GB Grant Martland grantmartland motogb co uk ...

Страница 282: ...e the free length of the valve springs A Fig A If not compliant with specifications replace the valve spring Valve spring Dimension A Intake 38 8 mm 37 3 mm Exhaust 41 6 mm 40 1 mm NOTE ________________________________ If outside specification replace COPY Moto GB Grant Martland grantmartland motogb co uk ...

Страница 283: ...___ Reinstall the valve cotter pin pressing the spring on each valve with the special compression tool Fig B Valve spring compressor tool Code 0320097050000 Secure the cotters on the valve stems Gently tap on the valve tip with a soft hammer Fig C IMPORTANT NOTICE Hitting the valve tip with too much force could damage the valve Install the calibrated pad 1 the tappet valve 2 NOTE _________________...

Страница 284: ...rtical lines replace the cylinder and the piston all together and the relevant clips Measure The cylinder bore Fig B Make different measurements at different distances of 10 43 90 mm from the head coupling surface The highest value is considered when calculating wear limits CYLINDER bore C 69 0 01 0 02 C Max D1 or D2 65 Limit conicity Max D1 0 5 mm Max D2 0 5 mm Max D3 0 5 mm Max D4 0 5 mm Max D5 ...

Страница 285: ...crews with copper grease G Copper grease Tighten the screws 8 Fig D to torque in three steps T R Step one Torque 12 5 N m Step two Torque 25 N m Step three Torque 55 N m Tighten the screws 4 Fig E to torque T R Torque 12 N m To assemble the head tighten the fastening screws 3 Fig E after the screws 4 Fig NOTE _________________________________ During assembly of the head lubricate the head screws w...

Страница 286: ...ON DESCRIPTION REMARKS 1 PISTON SEGMENT SERIES 2 PIN RETAINING RING 3 PISTON PIN 4 PISTON 5 COMPLETE CONNECTION ROD 6 PLUG 7 SCREW 8 GUIDE BUSHING 9 CONNECTING ROD MAIN BEARING SHELL 10 COUNTERSHAFT 11 NUT 12 WASHER 13 FULL DRIVE SHAFT 14 SPLINE 15 PLUG 16 GEAR 17 DRIVE SHAFT GEAR COPY Moto GB Grant Martland grantmartland motogb co uk ...

Страница 287: ...Description Qty SQ SYMBOLS INTERVENTION DESCRIPTION REMARKS 18 WASHER 19 NUT 20 BEARING 21 NUT 22 COUNTERSHAFT GEAR 23 GUIDE BUSHING 24 BEARING 25 BEARING RETAINER COPY Moto GB Grant Martland grantmartland motogb co uk ...

Страница 288: ...oval 3 Head see chapter entitled Head removal 4 Top base see chapter entitled Connecting rod remo val Remove the outer elastic ring 2 Fig A the piston pin 3 Fig A The piston 4 Fig A the inner elastic ring 2 Fig A NOTE _________________________________ To remove the piston pin use a pad Fig B NOTE _________________________________ Never use hammers to remove the pins B 1 1 2 2 2 3 3 4 A COPY Moto G...

Страница 289: ...he lubrication system Measure the outer diameter of the piston pin Fig B If not compliant with specifications replace the pin using the measuring tool A Measure the inner diameter of the piston pin bore Fig C If outside specifications replace the piston Internal bore A Size Pin bore Ø17 mm 0 0 0 006 B C A PISTONS COPY Moto GB Grant Martland grantmartland motogb co uk ...

Страница 290: ...n deposits from the piston clips and grooves Measure the side clearance between piston clips using a thickness gauge Fig B If outside specifications replace the piston and the relevant clips all together Clip Piston clip side clearance Top clips 0 04 0 08 mm Clips 0 05 0 09 mm Measure The thickness of the top clip The thickness of the second clip See Fig C Clip Piston clip thickness Top clips 0 8 ...

Страница 291: ...irt B with a micrometer considering a distance from the bottom edge of around 10 5 mm Fig E CLASS Piston skirt A Ø69 0 025 0 03 B Ø69 0 02 0 025 If outside specifications replace the cylinder and the relevant clips all together IMPORTANT NOTICE The piston is marked by a letter stating its class The cylinder piston coupling must be made between the same classes D E B PISTONS COPY Moto GB Grant Mart...

Страница 292: ...tters are facing upwards Lubricate the clips with engine oil during the insertion stage The first element to insert in the oil scraper slot is the shim D After positioning the shim insert its side rings E Fig B NOTE _________________________________ The shim and side rings have no top or bottom side mea ning they can be inserted in any way IMPORTANT NOTICE When installing the shim D make sure that...

Страница 293: ...s necessary to use a specific piston clamp to hold the clips General piston clamp NOTE _________________________________ During this stage lubricate parts with engine oil IMPORTANT NOTICE The pistons must be inserted in the sequence in which they were removed Do not change the assembly order and abo ve all make sure that the mark on the piston Fig D is facing the intake side 1 D COPY Moto GB Grant...

Страница 294: ...ft removal 6 Head see chapter entitled Head removal 7 flywheel see chapter entitled Flywheel removal 8 Mobile chain slides see chapter entitled Mobile chain slides removal 9 Clutch see chapter entitled Clutch removal 10 Oil sump see chapter entitled Oil sump removal 11 Oil pump see chapter entitled Oil pump removal Remove Base screws Fig F raise the top base Remove the gearbox output shaft 1 Fig G...

Страница 295: ...ING RODS H Remove Take out the drive shaft and slide out the connecting rod including the pistons from the cylinder group Remove the pistons see the chapter entitled PISTON REMOVAL COPY Moto GB Grant Martland grantmartland motogb co uk ...

Страница 296: ...suring assemble the big end tightening the fastening screws to the following torque T R Torque 25 N m It is also necessary to measure the dimensions of the small end and check for any anomalies with the relevant tool commercially available Fig B Item Reference size Steering head Ø 32 6 mm 0 0 0 1 Small end Ø 16 6 mm 0 0 0 1 Before installing the bushings 8 of the big end measure them with a specif...

Страница 297: ...Install the top and bottom bearing shells and bottom bearing of the big and and connecting rod cap NOTE _________________________________ Align the projections A on the bearing shells of the big end with the slots B in the connecting rod and cap D B A CRANKCASE COPY Moto GB Grant Martland grantmartland motogb co uk ...

Страница 298: ...Ø std seat A green Ø 33mm 0 008 0 Ø std seat B blue Ø 33 mm 0 008 0 016 Ø std seat C yellow Ø 33 mm 0 034 0 041 According to the class shown on the side of the connecting rod Fig F combine the different types according to the table below SELECTION TABLE Connecting rod internal Ø 1 2 33 000 33 008 mm 33 008 33 016 mm Crank pin external Ø A Ø 30 A yellow B green B Ø 30 B green C brown After all of t...

Страница 299: ...5 45 37 43 44 34 36 38 39 38 40 40 40 42 41 41 41 40 40 40 40 40 Pos Description Qty SQ SYMBOLS INTERVENTION DESCRIPTION REMARKS 1 ENGINE CASING 2 O RING 3 IDLE SENSOR 4 SCREW 5 CAP 6 OIL SEAL 7 PLATE 8 SCREW 9 SCREW 10 PLATE 11 PLUG 12 SPECIAL SCREW 13 RETAINING WASHER 14 COUPLING 15 O RING 16 SPECIAL SCREW 17 RUBBER TIP 18 CENTERING BUSHING 19 BUSHING 20 O RING 21 WATER FITTING 22 SCREW COPY Mot...

Страница 300: ...25 OIL PRESSURE SENSOR 26 WASHER 27 BEARING 27 BEARING 27 BEARING 27 BEARING 28 DISTRIBUTOR 29 SCREW 30 FLANGE 31 GASKET 32 OIL PRESSURE VALVE 33 SPECIAL SCREW 34 SCREW 35 JOINT 36 SCREW 37 WASHER 38 SCREW 39 SCREW 40 SCREW 41 SCREW 42 SCREW 43 GRUB SCREW 44 INSERT 45 CENTERING BUSHING 46 O RING COPY Moto GB Grant Martland grantmartland motogb co uk ...

Страница 301: ...r origi nal positions The crankshaft bearing shells are in different sizes marked with different letters and colours as shown in the table MAIN BEARING SHELLS STD COLOUR THICKNESS A Green 1 5 0 0 0 003 mm B Blue 1 5 0 0 0 006 mm C Yellow 1 5 0 0 0 009 mm Ø std seat A green Ø 41 0 007 0 14 Ø std seat B blue Ø 41 0 0 007 Ø std seat C yellow Ø 41 0 014 0 021 Ø std seat only A Ø 41 0 0 007 B Ø 41 0 00...

Страница 302: ...e shaft Drive shaft eccentricity Size Drive shaft A Ø 30 0 005 0 017 mm B Ø 32 0 028 0 042 mm Check The surfaces of the shaft supports A Fig A The surfaces of the connecting rod supports A Fig A If there is any rust lines signs of wear replace the drive shaft A A B COPY Moto GB Grant Martland grantmartland motogb co uk ...

Страница 303: ..._______________________________ Lubricate the big end pins with copper grease Measure Once the big end has been assembled use a thickness gauge to measure the drive shaft big end collar Fig C Measuring Size Drive shaft steering head 0 1 0 25 mm NOTE _________________________________ Measure both big ends B C CRANKCASE COPY Moto GB Grant Martland grantmartland motogb co uk ...

Страница 304: ...ERVENTION DESCRIPTION REMARKS 1 RING NUT 2 SCREW 3 FLANGE 4 SPRING 5 PUSHER DISC PLATE 6 CLUTCH DISCS 7 BELLEVILLE WASHER 8 RING 9 CLUTCH DRUM 10 WASHER 11 BEARING 12 CLUTCH BELL 13 GUIDE BUSHING 14 ROLLER BEARING 15 PINION 16 SHIM COPY Moto GB Grant Martland grantmartland motogb co uk ...

Страница 305: ... shaft 2 Fig B Remove the bearing 11 Fig C Remove the fastening nut 1 and ring 10 as shown in the figure Fig D Tool for clutch bell ring nut removal assembly Code 03200097052000 Toothed wrench for clutch bell lock Code 03200097053000 NOTE _________________________________ Part numbers marked are part of the spare parts table in Chapter 5 Clutch CLUTCH A B 1 2 C 7 D 1 10 COPY Moto GB Grant Martland...

Страница 306: ...out the disc pack 6 washer and clutch drum 9 and the guide shim 13 NOTE _________________________________ Numbers marked are part of the spare parts table in Chapter 5 Clutch E F 8 11 6 3 COPY Moto GB Grant Martland grantmartland motogb co uk ...

Страница 307: ... wear replace the friction discs Measure The thickness of the friction disc Fig A If not within specifications replace the friction discs together Disc Size Friction disc Thickness 2 7 0 05 mm NOTE _________________________________ Measure the friction disc in four points A COPY Moto GB Grant Martland grantmartland motogb co uk ...

Страница 308: ... 0 1 0 0 05 mm NOTE _________________________________ Carry out the check placing the disc on a reference surface and take the measurements using a thickness gauge DISC ASSEMBLY Assemble the discs in the opposite order to their removal star ting with the ring 8 and then the belleville washer 7 on the clutch drum 9 NOTE _________________________________ Numbers marked are part of the spare parts ta...

Страница 309: ...ch bell ring nut Code 03200097052000 Toothed wrench to lock the clutch bell Code 03200097053000 NOTE _________________________________ Use a punch driver to rebate the fastening ring nut Fig E insert the bearing 7 renstall the guide bushing and the clutch control shaft 2 on the cover insert the gasket place the clutch cover inserting and tightening the cover fastening screws to the engine casing T...

Страница 310: ...ON REMARKS 1 OIL PUMP CHAIN 2 COMPLETE OIL PUMP 3 SCREW 4 WASHER 5 OIL PUMP PINION 6 OIL PUMP COVER 7 OIL PUMP SHAFT 8 ROLLER 9 SCREW 10 OUTER ROTOR 11 INNER ROTOR 12 WASHER 13 OIL PUMP 14 BUSHING 15 SCREW 16 INTAKE FILTER FITTING 17 INTAKE FILTER 18 THREADED CAP 19 PLUG 20 O RING 21 SCREW COPY Moto GB Grant Martland grantmartland motogb co uk ...

Страница 311: ...titled Mobile chain slides removal 9 Clutch see chapter entitled Clutch removal NOTE _________________________________ Before removing the oil sump first drain out any oil in the engine removing the magnetic cap Remove the oil sump fastening screws E Fig A Check the oil sump If there is any damage replace Remove The seal A Fig B The intake filter fitting B Fig B The intake filter C Fig B The press...

Страница 312: ... the screws fastening the oil sump E to the fol lowing torque T R Torque 0 6 N m Tighten the magnetic cap complete with copper washer to the following torque T R Torque 25 N m NOTE _________________________________ Add engine oil once these steps have been completed C E COPY Moto GB Grant Martland grantmartland motogb co uk ...

Страница 313: ...e sure all the parts are free from anomalies Fig A If there is any damage or wear replace the faulty parts Installation Install the pressure relief valve A with O ring inside the bottom casing by slotting it in Fig B NOTE _________________________________ Lubricate the pressure relief valve during insertion B A A COPY Moto GB Grant Martland grantmartland motogb co uk ...

Страница 314: ...LUBRICATION SYSTEM PRESSURE RELIEF VALVE REMOVAL Remove Oil sump see section entitled Oil sump and intake filter removal The pressure relief valve A A A COPY Moto GB Grant Martland grantmartland motogb co uk ...

Страница 315: ...e chapter entitled Oil sump removal Remove the screws 1 Fig B slide out the pump body 13 Fig B Check the integrity of the two pins 19 the two O rings 20 Fig C NOTE _________________________________ Numbers marked are part of the spare parts table in Chapter 5 Lubrication circuit LUBRICATION SYSTEM OIL PUMP REMOVAL B 13 1 C 19 20 A 5 3 4 COPY Moto GB Grant Martland grantmartland motogb co uk ...

Страница 316: ...o the oil pump housing 6 C Fig C Clearance Tolerance between the inner rotor and the outer rotor A 0 15 mm between the outer rotor and the oil pump housing B 0 06 0 09 mm Check oil pump operation Turn the pump pinion 5 as shown in Fig F If the movement is not smooth check the inner outer rotor seat If there are any lines damage replace the faulty part s NOTE _________________________________ This ...

Страница 317: ... screws 3 with the pump pinion 5 to the following torque T R Torque 7 N m NOTE _________________________________ Add engine oil once these steps have been completed NOTE _________________________________ Numbers marked are part of the spare parts table in Chapter 5 Lubrication circuit B LUBRICATION SYSTEM 1 1 1 1 COPY Moto GB Grant Martland grantmartland motogb co uk ...

Страница 318: ...R SENSOR REMOVAL Remove the screws 5 Take out the pin 3 Fig A the spring 2 Fig A the neutral position gear indicator sensor 1 Fig A the gasket 4 Fig B A GEAR BOX 1 B 1 2 3 3 2 4 5 5 COPY Moto GB Grant Martland grantmartland motogb co uk ...

Страница 319: ...ear indicator sensor 1 NOTE _________________________________ Before assembly check the continuity of the sensor see the chapter entitled Electrical system Tighten the two screws 5 of the sensor to the following torque T R Torque 0 6 N m Use Loctite Loctite 243 GEAR BOX A 1 B 1 2 3 3 2 4 5 5 COPY Moto GB Grant Martland grantmartland motogb co uk ...

Страница 320: ... 44 35 35 46 47 40 33 48 45 Pos Description Qty SQ SYMBOLS INTERVENTION DESCRIPTION REMARKS 1 SELECTOR SHAFT 2 STOP SPRING 3 SHIM 4 BUSHING 5 SEEGER RING 6 SCRAPING 7 PLUG 8 SPRING 9 DESMODROMIC 10 PIN 11 BEARING 12 PLATE 13 SCREW 14 GEAR DRUM 15 WASHER 16 SCREW 17 SCREW 18 GEAR FIXING CLICK ASSEMBLY COPY Moto GB Grant Martland grantmartland motogb co uk ...

Страница 321: ...2ND 3RD 26 NUT M18 27 WASHER 28 PINION 29 OIL SEAL 30 BROACHED BUSHING 31 O RING 32 BEARING 33 BEARING RETAINER 34 COMPLETE MAIN SHAFT 35 BEARING 36 ELASTIC RING 37 SCRAPING 38 ELASTIC RING 39 NOTCHED WASHER 40 NOTCHED WASHER 41 NOTCHED WASHER 42 NOTCHED WASHER 43 NOTCHED WASHER 44 GASKET 45 WASHER 46 SCRAPING 47 COMPLETE SECONDARY SHAFT 48 SLOTTED NUT M20 COPY Moto GB Grant Martland grantmartland...

Страница 322: ...hapter entitled Head removal 7 flywheel see chapter entitled Flywheel removal 8 Mobile chain slides see chapter entitled Mobile chain slides removal 9 Clutch see chapter entitled Clutch removal 10 Neutral position gear indicator sensor see chapter entitled Neutral position gear indicator sensor removal 11 Oil sump see chapter entitled Oil sump removal 12 Oil pump see chapter entitled Oil pump remo...

Страница 323: ...nic 9 inside the casing nstall the bearing 11 Fig B T R Torque 12 N NOTE _________________________________ Numbers marked are part of the spare parts table in Chapter 5 Gears Assemble the gear drum 14 using the special tool Fig C Gear selector drum assembly tool Code 0320097051000 washer 15 screw 16 Fig C to the following torque T R Torque 12 N m Use Loctite Loctite 243 NOTE ______________________...

Страница 324: ...e plate 12 the 2 screws 13 Fig F to the following torque T R Torque 12 N m NOTE _________________________________ Numbers marked are part of the spare parts table in Chapter 5 Gears F 12 13 COPY Moto GB Grant Martland grantmartland motogb co uk ...

Страница 325: ...s of the gear shift control rod using a slide gauge Part Size Gear shift control rod 5 85 0 05 mm Check The guide pin of the gear shift control rod 23 Roll the guide pin of the gear shift control rod on a flat surface Fig H If there is any warping replace NOTE ________________________________ Do not try to straighten the control rod guide if it is warped NOTE _________________________________ Numb...

Страница 326: ... at the start of the chapter Position the full input shaft 47 the full input shaft 34 NOTE _________________________________ Make sure the grooves on the two bearings 32 and 33 match correctly NOTE _________________________________ Before assembling the two half casings top and bottom it is necessary to apply sealant paste along the whole profile of the top casing in order to achieve a good hold G...

Страница 327: ...ike pin is 0 Fig O Assemble the gear shaft as in Fig O Position the gear 2 the drive shaft gear 1 locking it into place with the spline 3 Fig Q Install the guide bushing 5 the counter shaft gear 6 the spline 7 Fig R NOTE ________________________________ Bring the two shaft phasing points into line and check the drive shaft Fig S O 2 1 0 Q R 1 2 3 5 6 7 4 S COPY Moto GB Grant Martland grantmartland...

Страница 328: ... closure tightness torque Sequence Size Phases 1 M10 1 Phase 12 N m 2 Phase 24 N m 3 Phase 45 N m 2 M8 1 Phase 12 N m 2 Phase 30 N m 3 M6 1 Phase 10 N m 2 Phase 12 N m 40 40 40 42 41 41 41 40 40 40 40 40 Q 34 36 38 39 38 R GEAR BOX GEAR BOX ASSEMBLY Install washer the counter shaft gear nut 6 T R Torque 90 100 N m Install washer drive shaft gear nut 2 T R Torque 115 125 N m NOTE __________________...

Страница 329: ... Qty SQ SYMBOLS INTERVENTION DESCRIPTION REMARKS 1 STARTER MOTOR 2 O RING 3 SCREW 4 IGNITION SHAFT 5 DOUBLE GEAR 6 START GEAR 7 FLYWHEEL ROTOR 8 SCREW 9 MAGNET FLYWHEEL 10 COMPLETE FREEWHEEL STARTER COPY Moto GB Grant Martland grantmartland motogb co uk ...

Страница 330: ...______________ If the starter motor turns with force replace the part The O ring gasket If there is any damage spotting traces of wear replace the O ring gasket NOTE _________________________________ Lubricate the O ring and take care not to damage it STARTER REMOVAL STARTING 3 B COPY Moto GB Grant Martland grantmartland motogb co uk ...

Страница 331: ...rque 12 N m Use Loctite thread sealant to secure Loctite 243 NOTE _________________________________ Once the starter motor is assembled proceed with the cur rent wire connection NOTE _________________________________ Numbers marked are part of the spare parts table in Chapter 5 Starting A 3 COPY Moto GB Grant Martland grantmartland motogb co uk ...

Страница 332: ...r Fig B Use the tool 4 for this operation Fig B Flywheel cover extractor Code 0320097042000 Remove the nut 5 Fig C the washer 6 Fig C Use the tool 7 for this operation Fig C Tool to Tighten Loosen the flywheel Code 0320097044000 Remove The flywheel rotor magnet 8 Use the tool 8 for this operation Fig D Flywheel cover extractor Code 0320097045000 A 1 2 B C D 3 4 5 6 7 8 COPY Moto GB Grant Martland ...

Страница 333: ...he 6 screws 8 Check the roller cage and support If there are any anomalies or signs of wear replace the whole freewheel 6 NOTE _________________________________ Numbers marked are part of the spare parts table in Chapter 5 Starting COPY Moto GB Grant Martland grantmartland motogb co uk ...

Страница 334: ...6 10 7 8 A Installation Proceed in the opposite order to removal Assemble the screws 8 Fig A to the following torque T R Torque 35 N m Use Loctite thread sealant to secure Loctite 243 COPY Moto GB Grant Martland grantmartland motogb co uk ...

Страница 335: ...rque T R Torque 90 N m Assemble the flywheel magnet cover gasket 7 NOTE _________________________________ When closing the magnet flywheel cover Fig B pay atten tion to the gasket If the gasket is damaged it must be replaced with a new one Assemble the screws 3 Fig C to the following torque T R Torque 12 N m A C 3 B COPY Moto GB Grant Martland grantmartland motogb co uk ...

Страница 336: ... STARTING E F 1 2 3 Remove 1 Flywheel see chapter entitled Flywheel removal Remove the satellite starter gear 1 Fig E the freewheel starter gear 2 Fig F the spline 3 Fig F COPY Moto GB Grant Martland grantmartland motogb co uk ...

Страница 337: ...5 84 STARTER GEAR ASSEMBLY STARTING To assemble the chain slides follow the removal process in the opposite order COPY Moto GB Grant Martland grantmartland motogb co uk ...

Страница 338: ...y SQ SYMBOLS INTERVENTION DESCRIPTION REMARKS 1 BUSHING 2 O RING 3 THREADED CAP 4 MAGNETIC CAP 5 O RING 6 SCREW 7 PHASE SENSOR 8 SCREW 9 ALTERNATOR COVER 10 PINION COVER 11 PLATE 12 SCREW 13 THE FLYWHEEL COVER GASKET 14 SCREW 15 SCREW COPY Moto GB Grant Martland grantmartland motogb co uk ...

Страница 339: ...ASE SENSOR REMOVAL A 6 Disconnect The connector for the phase sensor 7 Remove the screw 6 Fig A the phase sensor 7 Fig A Check the integrity of the phase sensor 7 COPY Moto GB Grant Martland grantmartland motogb co uk ...

Страница 340: ...rque 12 N m Measure the distance A between the phase sensor 7 and the pick up on the flywheel magnet Fig B NOTE _________________________________ Use a thickness gauge to take this measurement B A STARTING PHASE SENSOR INSTALLATION 7 6 COPY Moto GB Grant Martland grantmartland motogb co uk ...

Страница 341: ...50 17 52 Pos Description Qty SQ SYMBOLS INTERVENTION DESCRIPTION REMARKS 1 NUT 2 SCRAPING 3 FLANGE 4 WASHER 5 WASHER 6 OIL SEAL 7 SHAFT 8 THROTTLE VALVE FLANGE 9 SCREW 10 BUSHING 11 SPRING 12 SCREW 13 BRACKET 14 STEERING RING NUT 15 SCREW 16 INSERT 17 CAP 18 INJECTOR 19 BRACKET 20 MAP SENSOR 21 SCREW 22 PIPE 23 PIPE GLAND CLIP 24 INSERT THROTTLE BODY COPY Moto GB Grant Martland grantmartland motog...

Страница 342: ...GER 30 PLATE 31 SCREW 32 POTENTIOMETER 33 WASHER 34 SCREW 35 SCREW 36 THROTTLE VALVE 37 PIPE 38 CLIP 39 PIPE 40 PIPE 41 SPECIAL PLATE 42 O RING 43 STEPPER MOTOR 44 SPECIAL WASHER 45 BUSHING 46 PIPE 47 DISTRIBUTOR 48 VIBRATION DAMPING RUBBER 49 SCREW 50 O RING 51 SCREW 52 THROTTLE VALVE COPY Moto GB Grant Martland grantmartland motogb co uk ...

Страница 343: ... 1 Fig A the gaskets the screws 2 Fig A loosen the screw clips 3 Fig A Disconnect the injector connections 3 the connections of the pressure sensor 4 from the electric backbone to the throttle valve assembly Fig B the connection 5 of the distributor Fig C Disconnect the bottom ends of the accelerator cable 6 before loose ning the cable nut supports 7 the bottom nuts 8 Fig D take out the throttle v...

Страница 344: ...LATION Installation Proceed using the opposite order to removal IMPORTANT NOTICE During assembly of the accelerator cables take care to insert the hood 9 on the control line 10 Fig E 9 10 COPY Moto GB Grant Martland grantmartland motogb co uk ...

Страница 345: ...6 1 6 COPY Moto GB Grant Martland grantmartland motogb co uk ...

Страница 346: ...OSTAT REMOVAL 6 THERMOSTAT INSTALLATION 7 WATER MANIFOLD 8 WATER MANIFOLD REMOVAL 8 WATER MANIFOLD INSTALLATION 9 HEAT EXCHANGER 10 HEAT EXCHANGER REMOVAL 10 HEAT EXCHANGER INSTALLATION 11 RADIATOR 12 DISASSEMBLE THE RADIATOR 13 RADIATOR INSTALLATION 15 COPY Moto GB Grant Martland grantmartland motogb co uk ...

Страница 347: ...MP IMPELLER 2 SEALING RING 3 OIL SEAL 4 WATER PUMP COVER 5 O RING 6 BEARING 7 SEEGER RING 8 WATER PUMP SHAFT 9 SCREW 10 COMPLETE WATER PUMP 11 L SHAPED JOINT 12 SCREW 13 WASHER 14 WATER PUMP BODY 15 SCREW 16 BUSHING 17 SEEGER RING 18 SLEEVE 19 SCREW CLIP 20 PIPE 21 SPRING WATER PUMP COPY Moto GB Grant Martland grantmartland motogb co uk ...

Страница 348: ... the ex ploded drawing then check the entirety of each single part If any of the parts should show signs of wear replace IMPORTANT NOTICE In case of faulty seals 2 it is possible to notice leaks from the howl shown in Fig B NOTE _________________________________ Numbers marked are part of the spare parts table in the Chapter entitled Cooling Circuit in the radiator removal section Check Water pump...

Страница 349: ...s 6 NOTE _________________________________ When inserting the pump take care to ensure that the groove on the water pump shaft 8 is facing in the direc tion shown in Fig A Install the screws 9 and tighten to the following torque T R Torque 12 N m Use Loctite thread locker to secure Loctite 242 A COPY Moto GB Grant Martland grantmartland motogb co uk ...

Страница 350: ...the thermostat and on the temperature shown on the thermometer 5 When the water reaches a temperature of 75 C the thermo stat valve will start to open reaching a temperature of 90 C The thermostat valve reaches an opening of 7 mm Key to Fig D 1 Thermometer 2 Container 3 Water 4 Thermostat Thermostat opening closure chart Fig E A Fully closed B Fully open IMPORTANT NOTICE If there are any doubts ab...

Страница 351: ... is facing upwards the screws 3 and tighten to the following torque T R Torque 12 N m Use Loctite thread locker to secure the screws Loctite 242 NOTE _________________________________ Fill with coolant after completing these operations A A 5 COPY Moto GB Grant Martland grantmartland motogb co uk ...

Страница 352: ...ssem bly removal in Chapter 4 the bands 1 Fig A the screws 3 Fig A the water manifold 2 Fig A the seal 4 Fig B If there is any damage breakage replace the above parts A 1 2 WATER MANIFOLD WATER MANIFOLD REMOVAL B 3 4 COPY Moto GB Grant Martland grantmartland motogb co uk ...

Страница 353: ...reverse order the screws 3 and tighten to the following torque T R Torque 12 N m Use Loctite thread locker to secure the screws Loctite 242 NOTE ________________________________ Fill with coolant after completing these operations A 3 COPY Moto GB Grant Martland grantmartland motogb co uk ...

Страница 354: ...tributor cap the seal 6 Fig B NOTE ________________________________ If any of the parts should show signs of damage breakage replace Remove the special screw 7 Fig C the distributor 8 Fig C the fitting 9 Fig C the seal 10 Fig C NOTE ________________________________ If any of the parts should show signs of damage breakage replace 2 A B 3 4 1 1 4 6 C 7 8 9 10 HEAT EXCHANGER HEAT EXCHANGER REMOVAL CO...

Страница 355: ... the following torque T R Torque 60 N m the distributor cap to the following torque T R Torque 25 N m NOTE ________________________________ If not worn re use the previously removed bands other wise fit new ones NOTE ________________________________ Fill with coolant after completing these operations A C COPY Moto GB Grant Martland grantmartland motogb co uk ...

Страница 356: ... RUBBER TIP 4 WATER RADIATOR 5 BUSHING 6 INTAKE HOSE 7 WATER TANK CAP 8 WATER TANK 9 SCREW 10 VIBRATION DAMPING RUBBER 11 PIPE 12 PIPE 13 CLIP 14 PIPE 15 SCREW CLIP 16 SLEEVE 17 SLEEVE 18 CLIP 19 PINION COVER 20 SCREW 21 ELECTRIC FAN RADIATOR COPY Moto GB Grant Martland grantmartland motogb co uk ...

Страница 357: ...ig A screws 9 Fig A NOTE ________________________________ To make it easier to drain out coolant it is necessary to open the radiator cap at the same time Remove the screws 3 fastening the radiator bracket to the frame Fig B the fastening screws on the opposite side the fastening bands 4 and 5 Fig C Disconnect the recirculation hose of the expansion tank 6 from the coolant expansion tank Fig D The...

Страница 358: ..._________ Straighten any bent fins using a fine flathead screwdriver Check the radiator hoses the radiator pipes If there is any cracking damage replace the radiator fan If there is any damage replace In case of malfunction check and repair E DISASSEMBLE THE RADIATOR RADIATOR COPY Moto GB Grant Martland grantmartland motogb co uk ...

Страница 359: ...ening to the following torque T R Torque 10 N m The bands must always be replaced once they have been opened Once the parts have been assembled connect the wiring to the radiator bulb and fan and proceed to fill the circuit Fig F NOTE ________________________________ While filling pinch the manifold close to the fluid inlet mani fold in order to eliminate any air bubbles Fig F COPY Moto GB Grant M...

Страница 360: ...ELE 16 7 COPY Moto GB Grant Martland grantmartland motogb co uk ...

Страница 361: ...TCH 18 HORN 19 INSTRUMENTATION DASHBOARD 20 MASTER SWITCH 21 VOLTAGE REGULATOR 22 LEFT ELECTRIC DEVICE 23 CONVERTER OF CAN BUS SIGNALS 24 INJECTION ECU 25 INJECTION ECU CONNECTIONS 27 INDICATOR LIGHT INTERMITTENCE 28 ABS BUTTON 29 SERVICES RELAY 30 STATOR 31 ACTUATORS 32 POSITION OF ACTUATORS 32 IDLE AIR CONTROL SYSTEM STEPPER 33 INJECTORS 34 IGNITION COILS 35 COOLING FAN 36 FUEL PUMP 37 FUEL LEVE...

Страница 362: ... hardware diagnostic functions in compliance with the provisions of the US State of California for on board diagnostics In the event of a system failure this function ensures that the type of fault and the engine data at the time of fault are stored in the ECM memory The stored data can be recovered by means of an apposite service equipment available at any Benelli s Dealer see Texa instruction ma...

Страница 363: ... Fig A and calculates the information of temperature and coolant re ceived from the ECM that are used to optimize the supply to all engine temperatures and to calculate the supply requirements in the heat and cold setting off CHECKLIST COPY Moto GB Grant Martland grantmartland motogb co uk ...

Страница 364: ...The electrical coupling Remove The gear position sensor from the half casing Check The continuity Ø 3 Neutral Ø 3 5 Grey for Neutral 1 brown yellow first gear 2 green black second gear 3 green blue third gear 4 yellow blue fourth gear 5 brown red fifth gear 6 yellow red sixth gear SENSORS COPY Moto GB Grant Martland grantmartland motogb co uk ...

Страница 365: ... is used by the ECM to fix the position of the drive shaft in relation to the point in which fuel is injected and to the requirements of fuel ignition Disconnect The main wiring connector Measure The resistance value at points A and B of engine Fig B Standard 550 50 Ω 20 C NOTE ________________________________ If the measured resistance is lower than the stipulated val ue the inner coil might be a...

Страница 366: ...the various temperature It is distinguished by the negative temperature coefficient resistor It is a part that can not be maintained Appearance of intake air temperature sensor see Fig A Measured temperature C Resistance value Ω 0 9 399 5 7 263 10 5 658 15 4 441 20 3 511 25 2 795 30 2 240 A SENSORS COPY Moto GB Grant Martland grantmartland motogb co uk ...

Страница 367: ...ore the circuit is open the ECU prevents starting or shuts off the engine if rotating Check The continuity using the multitester STAND PIN 1 PIN 2 Raised Lowered NOTE ________________________________ When the above conditions are fulfilled the sensor is work ing otherwise replace the part SENSORS COPY Moto GB Grant Martland grantmartland motogb co uk ...

Страница 368: ...case of air excess The probe transmits the electric signal to the ECU which con trols the insertion of fuel and air into the combustion chamber Threshold value of air fuel ratio 750 mVcc Dilute threshold of air fuel ratio 120 mVcc Heating power of lambda probe 7 0 W 450 C exhausted gas temperature 70 duty ratio 10Hz 13 5V voltage Heating power 9 6 1 5Ω measured at 21 C Operating temperature range ...

Страница 369: ...m the half casing Check The continuity between the PIN1 and the sensor ground by means of an air pressure regulator with insertion on the detection hole Set the air pressure regulator at 2 bar Reduce pressure gradually to reach 0 2 0 3 bar Continuity between PIN1 and ground 0 2 0 3 bar NOTE ________________________________ If there is no continuity between PIN1 and engine ground replace the part M...

Страница 370: ...ity by positioning the multitester on the symbol function diode continuity test to check operation as shown in the table SENSOR PIN 1 PIN 2 Brake lever Pulled Brake lever Released NOTE ________________________________ When the above conditions are fulfilled the front brake sen sor is working properly otherwise replace the part N A COPY Moto GB Grant Martland grantmartland motogb co uk ...

Страница 371: ...on A Fig O Check The continuity by positioning the multitester on PIN 1 and PIN 2 and checking the table BRAKE PIN 1 PIN 2 Pulled Released NOTE ________________________________ When the above conditions are fulfilled the front brake sen sor is working properly otherwise replace the part A SENSORS COPY Moto GB Grant Martland grantmartland motogb co uk ...

Страница 372: ...connect The clutch switch cables Use The tester and check the clutch switch pins referring to the table CLUTCH PIN 1 PIN 2 Pulled Released NOTE ________________________________ When the above conditions are fulfilled the front brake sen sor is working properly otherwise replace the part P A SENSORS COPY Moto GB Grant Martland grantmartland motogb co uk ...

Страница 373: ...e to the throttle body and serves to detect the absolute pressure on the intake manifold It reflects the size of inlet pressure which can be converted to air intake volume accessing the combustion chamber of the engine COPY Moto GB Grant Martland grantmartland motogb co uk ...

Страница 374: ...ometer controlled and supplied directly by the ECM gives out a signal which identifies the throttle opening position used by the ECM to determine fuel dosage and ignition advance A Fig Q Disconnect The electrical coupling Check The resistance using the multitester on symbol Ω between pin 1 and pin 2 TOTAL RESISTANCE 2K Ω 20 A SENSORS COPY Moto GB Grant Martland grantmartland motogb co uk ...

Страница 375: ...LECTRIC DEVICE 2 STARTING RELAY 3 HORN 4 INSTRUMENTATION 5 IGNITION SWITCH 6 REGULATOR 7 LEFT ELECTRIC DEVICE 8 INJECTION ECU 9 LIGHT CONTROL RELAY 10 SERVICES RELAY 11 STATOR 12 CONVERTER OF CAN BUS SIGNALS 12 9 10 Ω 11 COPY Moto GB Grant Martland grantmartland motogb co uk ...

Страница 376: ...ine Hazard lights switch B it serves to activate the hazard lights in case of emer gency Check The continuity by positioning the multitester on RUN OFF button located on ON Check The continuity by positioning the multitester on the ignition button pressed on ON Check The continuity by positioning the multitester on the hazard lights switch located on ON Refer to the table 1 A B C AR BL AR GR N R M...

Страница 377: ...ls In presence of continuity the starter relay works properly WARNING Do not apply the battery voltage to the starter relay for more than 5 seconds to prevent overheating and damages to winding Check If the winding Fig B is open or grounded and if there is resistance The winding is in good working order if the resistance is Starting relay resistance 3 6 Ω A 1 B 3 2 B COPY Moto GB Grant Martland gr...

Страница 378: ...electromechanical device which serves as acoustic warning device Connect PIN1 and PIN2 to the battery and check Check After the external horn being connected to rechargeable battery if there is any sound it refers to normal operation Resistance value 3 2 Ω 1 COPY Moto GB Grant Martland grantmartland motogb co uk ...

Страница 379: ...ral position indicator light injection fault indicator light ABS light oil pressure warning light COOLANT TEMPERATURE GAUGE It indicates the coolant temperature TACHOMETER It indicates the number of revolutions per minute of the engine SPEED It indicates the vehicle speed in km or miles TRIP It indicates the distance travelled from the reset TOTAL It indicates the total distance travelled Pin out ...

Страница 380: ...N 2 Key ON Key OFF Lock When the above conditions are fulfilled the ignition switch is working properly otherwise replace the part Key in position ON All electric circuits are activated the instrumentation and the lights carry out the self diagnostics The engine can be started The key cannot be removed Key in position OFF All electric circuits are deactivated the key can be removed Key in position...

Страница 381: ...e 1 white 2 and white 3 The pointer shows a certain value value range 0 1 0 5V indicating the need of replacing the regulator 3 Connect the red probe to the red line terminal of voltage regulator port Connect the black probe to the white line terminal of voltage regulator white 1 white 2 and white 3 The pointer shows a certain value value range 0 3 0 8V indicating the need of replacing the regulat...

Страница 382: ...e vant terminals with the button pressed Check The continuity by positioning the multitester on the relevant terminals with the button pressed Check The continuity using the multitester positioned on the relevant terminals accord ing to selection left right Check The continuity using the multitester positioned on the relevant terminals accord ing to selection how low beam A 7 Refer to the table WI...

Страница 383: ... BUS SIGNALS It is situated on the left front side of the vehicle and serves to collect and convert the digital analogue signals into CAM BUS for the instrument panel Fig A A B C COPY Moto GB Grant Martland grantmartland motogb co uk ...

Страница 384: ...r abnormal circuit on positive 274 Air temperature sensor output voltage too low 275 Air temperature sensor output voltage too high 278 ECT Engine coolant temperature abnormal response out of range 279 ECT Engine coolant temperature abnormal response too low voltage 280 ECT Engine coolant temperature abnormal response too high voltage 290 TPS abnormal response too low voltage 291 TPS abnormal resp...

Страница 385: ...trol system 1288 IAC idle air control short circuit to ground 1289 IAC idle air control positive short circuit 1297 IAC idle air control open circuit 1376 Abnormal system voltage response out of range 1378 Too low system voltage 1379 Too high system voltage 1538 ECU map coding error 1575 Fuel pump relay check open circuit 1576 Fuel pump relay check short circuit to ground 1577 Fuel pump relay chec...

Страница 386: ...R LAMP DUMP SENSOR 38 E A DUMP 38 倾倒 开关 HR MAIN RELAY 30 86 85 87 A S HR 112 113 114 112 14 114 113 14 主继电器 FUSE U U UBR 8 8 E_F_VFZ 41 VEHICLE SPEED SIGNAL 车速信号 41 VFZ 82 82 点火线圈1 ZS K1X1 82 1 3 IGNITION COIL 2 点火线圈2 ZS K1X1 82 2 7 3 A P ZUE1 7 A P ZUE2 Zyl 2 Zyl 1 1 2 2 1 GND TO ENGINE GND TO ENGINE 3 3 IGNITION COIL 1 EV14 2 1 83 83 47 A_T_EV2 47 喷油器2 INJECTOR 2 CYL 2 U_U_UBR 8 8 29 10 6 进气温度 传...

Страница 387: ...NDICATOR LIGHT INTERMITTENCE It is situated inside the storage compartment underneath the vehicle seat and allows to control the indicator flashers DEVICES COPY Moto GB Grant Martland grantmartland motogb co uk ...

Страница 388: ...rol handlebar 3 Fig A and allows to manage the insertion release of ABS control Disconnect The electrical coupling Check The resistance using the multitester on symbol Ω between pin 1 and pin 2 Resistance 0 Ω 1 2 A 3 COPY Moto GB Grant Martland grantmartland motogb co uk ...

Страница 389: ... storage and setting of the parameters in the standstill phase by continuing its self powering for some seconds after the instrument panel shutdown Services All devices with ignition on as dashboard various safety devic es and lighting system are connected to the services relay Check The resistance using the multitester on symbol Ω between pin 85 and pin 86 Fig B Resistance 12 2 Ω Use The tester a...

Страница 390: ...e resistance between every single black wire and frame grounding with a multimeter in the highest resis tance range Use tester coil to check whether the engine is through If yes it refers to short circuit of coil and engine and the charge coil shall be checked If the resistance of stator coil is normal but the voltage check detects a failure of the magnetoelectric generator the rotor magnets might...

Страница 391: ... 47 ACTUATORS POSITION OF ACTUATORS 1 3 5 Position Device 1 STEPPER 2 INJECTORS 3 IGNITION COILS 4 COOLING FAN 5 FUEL PUMP 6 STARTER 7 ABS ECU 2 6 4 7 COPY Moto GB Grant Martland grantmartland motogb co uk ...

Страница 392: ...l Adjustment of air fuel ratio in cold hot setting off When the stepper motor is activated it opens the valve that controls the air flow and allows a certain air flow to run off along a series of hoses in the throttled body unit Operating voltage 12V DC Minimum maximum operat ing voltage 14V DC 7 5V DC Impedance per coil 27 C 53 5 3Ω Minimum impedance 35 Ω Distance 0 04167 mm Maximum travel 8 5 mm...

Страница 393: ...g which each injector remains open is variable The duration of each injection is calculated via ECM according to the data received from the various system sensors Disconnect The electrical coupling Check The resistance using the multitester on symbol Ω between PIN1 and PIN2 2 Fig B Resistance 12 2 Ω MULTIMETER 0 1 0 2 0 3 0 1 2 ACTUATORS A B 1 2 COPY Moto GB Grant Martland grantmartland motogb co ...

Страница 394: ...ks between the elec trodes of the spark plug Check The measurement of the coil terminal impedance Primary coil 0 65 0 07Ω Secondary coil 4 0 5 kΩ The optimal condition is achieved when the resistance value is within the standard value Resistance value indicates coil wire disconnection therefore it is necessary to replace the ignition coil 1 COPY Moto GB Grant Martland grantmartland motogb co uk ...

Страница 395: ...re activated via command by the ECM Check The load current of the fan motor by connecting an amme ter as shown in Fig B The voltmeter serves to check that the battery powers the 12 volt motor When the fan rotates at the highest speed the ammeter must show no more than 5 Amps If the motor does not rotate replace the motor unit of the fan NOTE ________________________________ It is not necessary to ...

Страница 396: ...nsuring the correct fuel pressure necessary for starting the engine from the first activation of the instrument panel via a timed function and a continuous operation for the normal use of the vehicle Check The fuel pump 1 Put an outlet pipe into a container to let the fuel flow out Fig A 2 Connect the battery 12 V to the fuel pump RED BLACK positive wire BLACK negative wire 1 COPY Moto GB Grant Ma...

Страница 397: ...on fuel level Fig B by position ing the multitester on symbol Ω between the PIN1 PIN2 1 Indicated level 6 5 4 3 2 1 0 Resistive value Ω 0 18 19 24 25 36 37 52 53 69 70 89 90 95 Tank fuel Lt 20 15 3 12 7 10 7 7 5 1 2 7 Extension mm 262 228 3 207 3 186 3 165 3 144 3 112 3 MULTIMETER 0 1 0 2 0 3 0 Marrone Nero Rosso Blu B ACTUATORS COPY Moto GB Grant Martland grantmartland motogb co uk ...

Страница 398: ...ing the allowed limit Brush wear limit length Standard 10 mm Service Limit 5 0 mm Check The switch surface for wearing or discoloration The framework test Make sure the insulating washer of the terminal bolt is inserted properly into its housing and the tab on the brush holding plate engages the housing notch of the plate Remove the magnet housing by keeping the framework and the brush holder unit...

Страница 399: ...the starter Position the framework in a short circuit detector Switch on the detector and position longitudinally a saw blade or a thickness gauge for 3 mm 1 8 above the lami nates of the framework coil Turn the framework by 360 NOTE ________________________________ If the saw blade is attracted towards a pole of the frame work the latter has a short circuit and must be replaced Check The permanen...

Страница 400: ...S system Keep antennas as far away from ABS ECU as possible Switch the master switch before disconnecting the ABS electrical parts Never strike the ABS parts with a hammer or leave them fall on hard surfaces to prevent damages to the ABS parts Do not disassemble or try to repair the ABS parts even in case of malfunctioning of the ABS The ABS system cannot detect malfunctioning of the conventional ...

Страница 401: ...ns 5055 Replace ABS unit 5019 5017 5013 5018 5014 5053 Check battery voltage 5052 5035 Replace ABS unit 5043 Check connection of the speed sensors using a new sensor 5045 5042 Check phonic wheel for deformation or faults 5044 5025 Check speed sensors distance phonic wheel and tyre specifications 5122 Replace ABS unit 5223 ACTUATORS ABS ECU COPY Moto GB Grant Martland grantmartland motogb co uk ...

Страница 402: ... GND_ECU 2 CAN1P 3 WSS_F 4 WAU_IN1 5 DIAGK 6 BLS input_PD SW2H_NO 7 DIAGL 8 WSO_F 9 UB_VR 10 GND_MR 11 CAN1M 12 WSP_F 13 WSP_R 14 WSS_R 15 ABS_OFF input_PU SW2L_NO 16 WSO_R 17 NABS_SLAMP 18 UB_MR COPY Moto GB Grant Martland grantmartland motogb co uk ...

Страница 403: ... a standard one Therefore do not replace the MF battery with a standard one The recommended battery is 12V 9Ah IMPORTANT NOTICE Hydrogen is not produced during the normal recharge of the battery but it can be produced when the battery is recharged excessively Please keep flames away from battery during recharge In case of corroded terminals remove the battery pour warm water on it and clean using ...

Страница 404: ...ultitester first to prevent damages Do no position the ignition switch to ON whilst measuring the current When the panel is off the current losses must be à 2 2 5 mA Otherwise find out the source of such absorption by dis connecting the connectors of each utility powered by the battery directly NOTE ________________________________ In the event an anti theft device is installed disconnect it befor...

Страница 405: ...ELE 61 DIAGNOSTICS VEHICLE DIAGNOSTICS Refer to the Texa diagnostic instructions COPY Moto GB Grant Martland grantmartland motogb co uk ...

Страница 406: ...7 62 ELECTRICAL SYSTEM WIRING DIAGRAM OF TRK502 ELECTRICAL SYSTEM COPY Moto GB Grant Martland grantmartland motogb co uk ...

Страница 407: ...LE 63 ELECTRICAL SYSTEM COLOUR KEY CODE COLOUR B Black BL Blue GR Green W White Y Yellow O Orange R Red Dg Dark grey P Purple N Brown G Grey LR Pink COPY Moto GB Grant Martland grantmartland motogb co uk ...

Страница 408: ... Q J s r l 1st edition April 2017 All rights reserved Reprinting or unauthorised use are expressly prohibited without the written consent of Benelli Q J s r l Pure Passion since 1911 COPY Moto GB Grant Martland grantmartland motogb co uk ...

Отзывы: