background image

97

OmniView IP 5000 HQ

abOUT

sections

table of contents

1

3

5

7

9

11

13

15

17

19

2

4

6

8

10

12

14

16

18

20

21

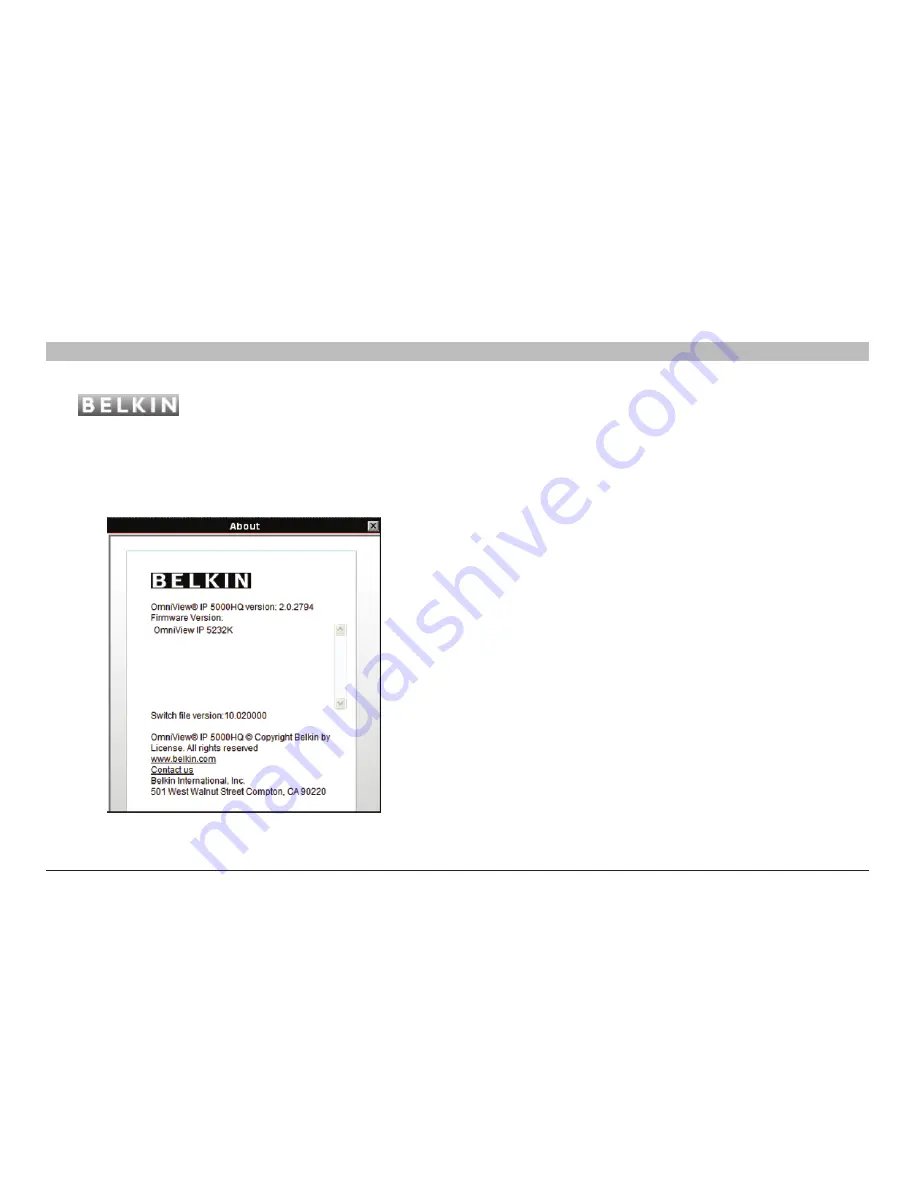
Click       

     at the top of the page and the “About” page 

appears; see Figure 108. This contains information about the version  

of the:

•  OmniView IP 5000HQ firmware

•  KVM-over-IP devices firmware

•  Switch definition file 

Figure 108 About page

Содержание F1DP101C

Страница 1: ...OmniViewIP 5000HQ User Manual 8820 00058 F1DP101C OmniView is a registered trademark of Belkin International Inc ...

Страница 2: ...her Devices Console Server 35 8 3 Setting each OmniView KVM over IP Switch to be OmniView IP 5000HQ enabled 36 8 4 Configuring the KVM IP devices in the OmniView IP 5000HQ 37 8 4 1 The Advanced button 37 1 Introduction 1 1 1 Key features 1 1 2 System components 2 1 3 Terminology 2 1 4 System diagram 2 2 Pre Installation Guidelines 3 2 1 Access Services details 4 2 1 1 Adding user defined Access Se...

Страница 3: ...ring Access Services Introduction 55 11 1 Access Services default values 55 11 1 1 General note about application paths 55 11 1 2 Belkin Serial Console Server 56 11 1 3 Web 57 11 1 4 ILO 57 11 1 5 RDP 59 11 1 6 SSH 60 11 1 7 VNC 61 11 1 8 Telnet 63 11 1 9 VMware Server 64 11 1 10 New Access Services 65 12 Configuring Access Services for Individual Targets 67 12 1 Default Access Service 67 12 1 1 S...

Страница 4: ...5000HQ configuration 87 16 3 Firmware upgrade 88 16 3 1 Upgrading the the KVM over IP device firmware 88 16 4 Replication 89 16 4 1 Connecting the secondary unit to the network 89 16 4 2 Configuring the secondary unit 89 16 4 3 Configuring the primary unit 90 16 4 4 Promoting a secondary unit to a standalone unit 90 16 4 5 Reconfiguring the primary and secondary units 90 16 4 6 Primary unit and se...

Страница 5: ... secure yet highly adaptable administration Designed to work across LAN or WAN OmniView IP 5000HQ monitors and auto configures KVM IP devices whether residing on the local enterprise network or in remote branches OmniView IP 5000HQ delivers the most advanced solution for enterprise IT management and remote control It supports multiple servers in different locations in an environment that is comple...

Страница 6: ...ail 1 2 System components The OmniView IP 5000HQ system comes with the following OmniView IP 5000HQ Manager appliance IEC 10A 125V Power Cord Rack Mounting Kit 1 3 Terminology Below are some terms and their meanings used in this manual Term Meaning Targets Computers servers and other devices e g printers firewalls PDUs etc that are accessed remotely via the OmniView IP 5000HQ Client computer The P...

Страница 7: ...figure the system Appendix A a separate file on this CD contains three lists of the details you need to prepare for Belkin OmniView KVM over IP devices power distribution units PDUs and Serial Console Servers Photocopy or print out Appendix A For other Access Services see the Access Services details section on the next page The lists should include the IP device name and MAC address KVM switch and...

Страница 8: ... Services through OmniView IP 5000HQ Belkin Serial Console Server Web ILO RDP SSH VNC Telnet VMware Server These services are elaborated on in the Access Services section All service applications must be installed on the local client computers See the Configuring Access Services section on page 55 which sets out the details required for each of the above Access Services 2 1 1 Adding user defined A...

Страница 9: ...arious permission types The system works as follows Data centers in locations throughout the world are connected to Belkin IP devices and to other third party Access Services The Belkin IP devices are HQ enabled allowing the OmniView IP 5000HQ to access control the targets connected to all IP devices via IP Users access the OmniView IP 5000HQ web interface and depending on their level of access pe...

Страница 10: ...sions 3 3 Creating targets An administrator creates targets corresponding to the physical servers connected to the IP devices explained in the Configuring Targets section and also to targets corresponding to printers firewalls PDUs etc accessed via Access Services see page 8 In the example below four targets are created and given identifying names They can be named by location server type or opera...

Страница 11: ... group 3 4 Forming targets into sets Targets can be formed into sets For example you can create a set of all financial servers In the example below three targets are formed into target set Finance Figure 7 Forming targets into sets Figure 8 User group target set association In the example above the Finance group is associated with the target set Finance This means that The Finance group has access...

Страница 12: ...s enables the assignment of multiple services to a single target so you have the option of in band or out of band access to the same device KVM over IP is a hardware method of accessing and controlling a target The other Access Services encompass gaining remote access and control of a target through the Internet or LAN network via Belkin Serial Console Server or third party software Both hardware ...

Страница 13: ...a VNC server on any other operating system There are clients and servers for almost all GUI operating systems Telnet TELecommunication NETwork Telnet is a network protocol used on the Internet or LAN connections VMware Server VMware Server is a free virtualization product for Windows and Linux servers with enterprise class support It enables companies to partition a physical server into multiple v...

Страница 14: ...ne either by Manager Auto Discovery When checked OmniView IP 5000HQ automatically detects the IP device if it resides on the same network segment Manager IP If the IP device resides on a different segment type the static IP address of the OmniView IP 5000HQ Manager We advise typing the static IP address of the OmniView IP 5000HQ Manager even if the IP device resides on the same network segment as ...

Страница 15: ...etwork follow the steps in the section below to display the OmniView IP 5000HQ interface You can then change the IP address of the OmniView IP 5000HQ Manager in the Network tab under Settings Unit Maintenance see the Network tab section on page 95 4 2 1 Changing the OmniView IP 5000HQ Manager network parameters 1 Open your web browser Internet Explorer version 6 0 or higher 2 Type in the IP addres...

Страница 16: ... Explorer as Administrator To do this right click the Internet Explorer icon and select Run as administrator See figure below Figure 11 Running IE in Vista 2 Type in the IP address of the OmniView IP 5000HQ Manager default IP address https 192 168 2 200 and press Enter Note The IP address must begin with https and not http The login page appears Bookmark it for easy reference 3 Type the login name...

Страница 17: ...at Figure 12 is sub divided into three sections Management which includes the configuration pages for IP devices targets and users groups Access which contains access pages to all allowed targets and target groups Settings which contains two configuration sections Application and Maintenance This guide explains the menu sections from the point of view of first setting up the system and then operat...

Страница 18: ...ator appears on the viewer s local mouse pointer View only has no effect on Access Services With local authentication once you have created users you can form them into groups This makes management changes easier by for example adding or deleting permitted targets per group rather than per individual user Creating groups is explained in the Creating a user group section on page 19 In LDAP mode go ...

Страница 19: ...entical to any other existing User name It can contain uppercase or lowercase characters except for the following A user name cannot include spaces Full Name Type the user s real name Password Retype Password Type a password E mail address Phone Number Description These are optional fields Block Account To prevent a user from entering the system select the Block Account check box To re enable the ...

Страница 20: ... on page 19 explains how to create a user group To add a user to an existing user group or groups 1 Press the Users Group tab Figure 16 appears All existing groups appear in the All User Groups list Figure 16 New User Group tab 2 Select the groups of which the new user will be a member The groups appear in the Member of list 6 2 1 Removing users from a group To remove users from a group In the All...

Страница 21: ...ts When a user logs in to the OmniView IP 5000HQ web interface he sees only targets and target sets to which he has been associated See the Accessing the System as a User section on page 81 To choose which targets target sets the user will have access to 1 Press the Access Permissions tab The following appears The All Targets and All Target Sets lists show the targets and all target sets in the sy...

Страница 22: ...lder in the menu Creating user groups is explained below By clicking a user name an administrator can access the General User Group and Access Permissions tabs of this user and change any of the parameters Figure 18 List of users in the system 6 4 1 Deleting a user Deleting a user instantly removes the user s authorization from the OmniView IP 5000HQ system and all IP devices To delete a user 1 On...

Страница 23: ...through the process for each individual user To create a user group 1 From the menu click Users or User Groups On either of these pages click The New User Group page appears see Figure 20 Figure 20 Creating a New User Group Members tab 2 Name Type a unique name for the group You can add a description 3 Select the check boxes of the users to be part of the group They appear in the Group members lis...

Страница 24: ... appears in the Targets and Target Sets list To remove targets sets deselect the check boxes Figure 21 Creating New Users Access Permissions tab 6 5 2 Allowed Services tab Click the Allowed Services tab The following appears Figure 22 Creating a New User Group Allowed Services tab Here you can assign Access Services to group members If a group member has permission to access a target but there are...

Страница 25: ...r as icons To see which service the icon represents hold the mouse over the icon and a tool tip appears with the name of the service You can create different access profiles You can give permission to targets and define different access rights through the Allowed Services Figure 23 User Groups page 6 5 4 Deleting a user group To delete a group 1 On the Users Group page select the check boxes of th...

Страница 26: ...ng information Name Name of target You can search for a target by typing the target name in the Find a Target field and clicking You can sort the names in alphabetical order A Z or Z A by clicking the top of the Name column You can also select which targets to display from the Show by Service drop down list You can show all targets or just show targets with a particular Access Service to do so cho...

Страница 27: ...e appears in the Active Services list Note Below discusses how to configure Belkin IP devices Configuring other Access Services is discussed in the Configuring Access Services for Individual Targets section on page 67 The pre installation guidelines on page 3 explained what information you need to configure each target 7 1 1 Default Access Service You can set any of the Access Services to be the d...

Страница 28: ...argets 7 1 2 Belkin OmniView KVM Switch KVM IP Device Port Number Assign the IP device and KVM switch port number where relevant to which this target is physically connected On the New Target page click The Assign Device window appears see Figure 28 Figure 28 Assign Device window Figure 27 Assigning KVM port to a target ...

Страница 29: ... 29 Figure 29 Assigning targets to devices 4 Double click the port number row to which the target is connected The name of the target appears in that row 5 Click Save The changes are saved and the New Target page reappears showing the assigned IP device and port number see Figure 30 Figure 30 KVM over IP Device Port number To remove an assigned target from an IP device KVM switch port click The as...

Страница 30: ...a server via a USB to PS 2 adapter ROC RICC USB or X RICC USB or Specter USB select the USB Converter check box The USB conversion affects the mouse emulation and the USB Converter helps to synchronize the mouse Also when an IP device is connected to a Linux server select the USB Converter check box Absolute Mouse Select the Absolute Mouse check box for a target connected to USB which has a Window...

Страница 31: ...ions Table of Contents 1 3 5 7 9 11 13 15 17 19 2 4 6 8 10 12 14 16 18 20 21 13 Configuring Targets Figure 33 Power outlet to target selection Click and the outlet number will appear Figure 34 Current power outlet selection Click ...

Страница 32: ...rent Access Permissions tab 7 4 Access Permissions tab You can choose which users and groups can have access permission to the target Press the Access Permissions tab The following appears 7 3 Target Sets tab Creating target sets is explained in the Creating a target set section on page 29 Once you have created target sets you can put targets into target sets giving access rights to all targets in...

Страница 33: ...ets to be deleted Press 7 7 Creating a target set You can group targets into sets e g make a set of all financial servers in the system You can then give users access rights per the target set rather than per individual targets Target sets appear as a Favorites folder for users on the Access page To create a new target set 1 From the Targets page click The following appears Figure 37 Creating New ...

Страница 34: ...ar in the All Groups list To choose which users groups have access to the target set 1 Select the check boxes of the users or groups They appear in the Users and Groups list To disassociate a user group from a target set Deselect the user group check box from the relevant list 7 7 2 Saving the target set Click The target set details are now in the system Repeat this process to add more target sets...

Страница 35: ... a target set will not delete the individual targets To see all the targets in a target set click the target set name either from the menu or on the page see Figure 40 From this page you can at any time assign or remove targets from the target set From the Access Permissions tab you can choose which users and groups can have access permissions to the target set You can access target properties by ...

Страница 36: ...mns on the Devices page display the following information Name Once IP devices are given an identifying name they appear here Type Connected IP device type Connected User User currently operating the remote session Status Under the Status column there are the following possibilities Online The device is up and running and is ready to be configured or is available for a remote session Alarm Device ...

Страница 37: ...d console servers Note In order to use PDUs and console servers these devices have to be configured under Settings Attached Devices please see page 51 8 2 1 Other Devices PDU Select Power Distribution Units and the following screen with the current PDUs will appear Figure 43 Current Other Devices Figure 44 Current PDUs To add a new PDU click The New PDU dialog window appears Enter all PDU related ...

Страница 38: ...the right side s current targets list to the left side s corresponding power outlet Double click on the target name on the right side to remove the selection Repeat for each power outlet and click when you re done Your PDU has been configured and the power option becomes available from the Access tab Figure 46 Adding new PDUs Outlets tab Figure 47 Performing power commands The following commands c...

Страница 39: ...en with the current console servers will appear To add a new console server to the setup click The New Console Server dialog window appears Enter all console server related information Figure 50 Adding new console servers General tab Next configure the console server s serial connections according to the physical connection to the server or other equipment by clicking on the tab Figure 49 Current ...

Страница 40: ...k when you re done Your console server has been configured and the console server becomes available from the Access tab Figure 52 Using console servers 8 3 Setting each OmniView KVM over IP Switch to be OmniView IP 5000HQ enabled In order to be managed by OmniView IP 5000HQ all Belkin KVM IP devices must be configured to be HQ See the Setting Up the System section on page 10 Tip Since KVM IP devic...

Страница 41: ...cted targets or KVM switches Type a name for the device Description These are optional fields used for device identification Status This is the connection status Device Info Contains information about the device including its operational status and version numbers of firmware KME keyboard mouse emulation hardware SDF switch definition file and date and time of last configuration update 8 4 1 The A...

Страница 42: ...ption to manually choose both the compression and colors 8 4 3 Mouse Select the appropriate values according to the type of mouse connected to the device Type Select the mouse type you would like the IP device to emulate When setting the mouse emulation type set it to match the mouse connected to the local console port on the IP device e g if the local mouse is a 2 button mouse but not from Micros...

Страница 43: ...ears Figure 55 Configuring KVM over IP KVM Ports tab The KVM switch drop down list consists of pre selected KVM switches You must select all the KVM switch types physically connected to the system this is done in the Settings part of the menu and is explained in the KVM switches section on page 52 Select the KVM switch model if any physically connected to this IP device The number of ports in the ...

Страница 44: ... the above step for all targets connected Ensure the right target assigns to the correctly numbered port To remove a target from a port Double click the target in the Ports section The target name moves to the Target section and is now unassigned Note Deleting a target removes its association with the KVM port number 8 7 Network tab In the Network tab you configure and modify network parameters of...

Страница 45: ... the CFG and SDF updates 8 9 Deleting KVM over IP devices IP devices can be deleted from the OmniView IP 5000HQ system from the Devices page To delete IP devices 1 From the Management menu click Devices and the Devices page appears 2 Select the check boxes of the units to be deleted or select the top check box to select or deselect all check boxes 3 Click The devices are deleted 4 Uncheck Enable H...

Страница 46: ...s follows Web Service IP Enabled Power Distribution Units Console Servers ILO HP Integrated Lights Out iLO RDP Remote Desktop Protocol SSH Secure Shell VNC Virtual Network Computing Telnet TELecommunication NETwork VMware Server See pages 57 64 for an elaboration of the above services From the Access Services page you can configure Access Services for targets in the system You can also add new Acc...

Страница 47: ...m is Windows 2003 Server Windows XP This setting is suitable for Windows XP Vista 2003 Server and 2008 Server If the large majority of the targets in the system have a different operating system select it from the drop down list The mouse parameter options adjust to match the operating system Acceleration Threshold When the target s mouse settings are not default select the appropriate values Matc...

Страница 48: ...exity levels External authentication interfaces with the organizational Active Directory server for user list importation In local authentication mode the administrator creates users and groups and assigns permissions via the OmniView IP 5000HQ interface In LDAP authentication mode server option authentication is done through an LDAP server You import users and groups from the LDAP server To set t...

Страница 49: ...characters or more Must include at least 1 digit and 1 uppercase letter and 1 special character as follows _ Must not include the user name Standard policy password 6 characters or more Must not include the user name Note You can write any character except the special characters and any number of characters for the password 9 2 1 1 Account blocking You can block entry into the system after a numbe...

Страница 50: ...LDAP server only Only the admin account remains as a backdoor account This user has OmniView IP 5000HQ local access Admin account is allowed to manage OmniView IP 5000HQ with Administrator access privileges However admin is not permitted to connect to targets This account will allow changing OmniView IP 5000HQ to local authentication mode at any time There is no direct access to any IP device Omni...

Страница 51: ...LDAP port 389 which is the default port for most LDAP servers including Microsoft Active Directory Bind DN Also known as User DN or Append The Bind DN is a distinguished name of an LDAP object which serves a gateway to the LDAP directory Prior to sending the account password pair OmniView IP 5000HQ initiates a conversation handshake with LDAP This handshake protocol in general needs a Bind DN Bind...

Страница 52: ...ssign permissions is explained in the Creating Users section on page 14 By default all users have user permission status Also assign their target permissions and allowed Access Services 9 2 2 5 Synchronization Synchronization does two things Keeps the exact group structure maintained on the LDAP servers Whenever a user is added or removed from the LDAP server group it will be synchronized with the...

Страница 53: ...min account is allowed to manage OmniView IP 5000HQ with administrator access privileges However admin is not permitted to connect to targets This account will allow reversing the external authentication mode at any time to local authentication mode There is no direct access to any IP device even to its Configuration page OmniView IP 5000HQ will act as a gateway When changing OmniView IP 5000HQ to...

Страница 54: ...separately By selecting the check box OmniView IP 5000HQ will not overwrite local mouse and performance settings made in the client toolbar Allow all Access Services for users without group assignment For users not assigned to any user groups select the check box to allow all Access Services by default Deselecting this option prevents access to any service for individual users that don t belong to...

Страница 55: ... of currently supported models appears 2 From the list select the PDU brands and models physically connected to your devices 3 Press The selection is saved 10 1 1 Uploading a new PDU model If a PDU model is not listed contact Belkin at support belkin com to obtain a new PDU definition file SDF When you receive the file do the following 1 Save the PDU model file on your computer s hard disk 2 Log i...

Страница 56: ... Switches A list of KVM switches appears the columns show the following Model KVM switch model Manufacturer KVM switch manufacturer Ports the number of server ports Matrix The number of simultaneous users this switch supports Note If you know a KVM switch has matrix capabilities but no number appears in the Matrix column contact the Belkin Support team to obtain the updated SDF of the KVM switch U...

Страница 57: ...ard disk 2 Log in to OmniView IP 5000HQ as an administrator 3 From the KVM Switches page press to locate the KVM switch file SDF XML 4 Press The file uploads with the new switch type added to the list 5 Select the KVM switch type and click 10 3 Console server Configuring console servers is relevant when there are serial console servers connected to the system You must select all console server typ...

Страница 58: ...in com to obtain a new console server definition file SDF When you receive the file do the following 1 Save the console server model file on your computer s hard disk 2 Log in to OmniView IP 5000HQ as an administrator 3 From the Console Servers page see figure on previous page press to locate the console server model file SDF XML 4 Press The file uploads with the new switch type added to the list ...

Страница 59: ...s Service application on his computer Note Access Service settings can also be changed if necessary for individual targets explained on page 67 All the Access Services are reached from the Access Services page see page 42 11 1 Access Services default values Below are the factory included Access Services and their default values If these values are not suitable you can change them If an Access Serv...

Страница 60: ... Server URL Host IP address of Console Server Port For Belkin Serial Console Server TCP port number is 4000 Application PuTTy exe is application used and it must be installed on all client computers see the paragraph below The PuTTy application can be obtained from http www chiark greenend org uk sgtatham putty download html Path PuTTy application must be installed on all client computers preferab...

Страница 61: ...s 1 3 5 7 9 11 13 15 17 19 2 4 6 8 10 12 14 16 18 20 21 11 1 3 Web Click Web The web settings appear see Figure 69 Figure 69 Web Target 11 1 4 ILO Click ILO The ILO settings appear see Figure 70 Figure 70 ILO SSH mode Description Default description Set the URL for each individual web page ...

Страница 62: ...e server In SSH mode the PuTTy application must be installed on all client computers preferably in the same path In the default path ProgramFiles PuTTy see Figure 70 the application could be in any drive in the Program Files PuTTy folder See the general notes above about variables The PuTTy application can be obtained from http www chiark greenend org uk sgtatham putty download html In SSH mode th...

Страница 63: ...ription of the access service RDP URL Host Type the URL host of the RDP resource Mode RDP Client or Web These are explained below Web mode default Web mode uses a remote console with power management options In Web mode there is no need for an executable application Screen Size Select the screen size from the drop down menu Login Method Prompt for Credentials This means the RDP login page appears ...

Страница 64: ...ting system For Windows 2000 download the client portion of the remote desktop software from the Microsoft website RDP Application Path The RDP application must be installed on all local computers preferably in the same path In the default path SystemRoot System32 the application could be in any drive in the Windows System32 folder See the general notes above about variables In RDP Client mode the...

Страница 65: ...ype the URL host of the SSH resource Port The SSH port number is 22 default Login Method Prompt for Credentials This means the SSH login page appears and you log in manually Use OmniView IP HQ Credentials This means OmniView IP 5000HQ logs in to SSH with the currently logged user credentials Ensure that SSH is configured to recognize the same user name and password Use the Following Credentials Wh...

Страница 66: ... on the type of VNC RealVNC TightVNC or UltraVNC See the general notes above about variables The VNC application can be obtained from RealVNC http www realvnc com TightVNC http www tightvnc com UltraVNC http www uvnc com In VNC Client mode the port number should correspond to the VNC listening port Login Method Prompt for Credentials This means the VNC login appears and you log in manually Use Omn...

Страница 67: ...s the application used for telnet access The PuTTy application can be obtained from http www chiark greenend org uk sgtatham putty download html PuTTy Application Path PuTTy application must be installed on all client computers preferably in the same path In the default path ProgramFiles PuTTy see Figure 77 the application could be in any drive in the Program Files PuTTy folder See the general not...

Страница 68: ...les VMware VMware Server Console see Figure 78 the application could be in any drive in the Program Files VMware VMware Server Console folder See the general notes above about variables Virtual Machine Path Type the Virtual Machine Path on the VMware Server Login Method Prompt for Credentials This means the VMware Server Console login appears and you log in manually Use OmniView IP HQ Credentials ...

Страница 69: ...ess Service URL If the Access Service resource can be reached via a web browser type the URL here HTTP or HTTPS etc You may incorporate variables into the URL as follows ProgramFiles Program Files folder SystemRoot Windows folder IP IP address IP check box must be selected Port TCP port number Port check box must be selected UserName Login user name Password Login password Login Method check box m...

Страница 70: ...000HQ logs in to the Access Service with the currently logged user credentials Ensure that the Access Service is configured to recognize the same user name and or password Use the Following Credentials Where the user name and password are different for OmniView IP 5000HQ and the Access Service select this option User name and password fields appear Type the Access Service user name and or password...

Страница 71: ...om the Access Services tab as follows 1 From the Management menu select Targets and the Targets page appears see Figure 80 Figure 80 Targets page 2 For new targets click the New Target button for existing Targets click the target name in the name column The Access Services tab appears 12 1 Default Access Service You can set any of the Access Services to be the default service This means that the s...

Страница 72: ...eck box Single Port Console Server now appears in the Active Services list 2 Click Single Port Console Server The Single Port Console Server settings appear see Figure 81 Figure 81 Single Port Console Server settings Description Description of the Access Service Console Server Application PuTTy exe This application must be installed on all client computers Path Path of the PuTTy application Only c...

Страница 73: ...t select the Web check box Web appears in the Active Services list Click Web The Web settings appear see Figure 82 Figure 82 Web Target Description Description of the web service URL Set the URL for each individual web page here 12 1 3 ILO From the All Services list select the ILO check box ILO appears in the Active Services list Click ILO The ILO settings appear see Figure 83 Figure 83 ILO ...

Страница 74: ...ined from http www chiark greenend org uk sgtatham putty download html In SSH mode the port number is 22 default See below for login method Web mode Web mode uses a remote console with power management options In Web mode there is no need for an executable application Figure 84 illustrates the ILO fields in Web mode Login Method Prompt for Credentials This means the ILO login appears and you log i...

Страница 75: ...u Web mode default In Web mode there is no need for an executable application When selecting Web mode the page appears as in Figure 85 Login Method Prompt for Credentials This means the RDP login appears and you log in manually Use OmniView IP HQ Credentials This means OmniView IP 5000HQ logs in to RDP with the currently logged user credentials Ensure that RDP is configured to recognize the same u...

Страница 76: ... on all client computers preferably in the same path In the default path SystemRoot System32 see Figure 86 the application could be in any drive in the Windows System32 folder Figure 86 RDP RDP Client mode In RDP Client mode there is only manual login 12 1 5 SSH From the All Services list select the SSH check box SSH appears in the Active Services list Click SSH The SSH settings appear see Figure ...

Страница 77: ...ls This means the SSH login appears and you log in manually Use OmniView IP HQ Credentials This means OmniView IP 5000HQ logs in to SSH with the currently logged user credentials Ensure that SSH is configured to recognize the same user name and password Use the Following Credentials Where the user name and password are different for OmniView IP 5000HQ and SSH select this option User name and passw...

Страница 78: ...of the VNC application The installation folder depends on the type of VNC RealVNC TightVNC or UltraVNC The VNC application can be obtained from RealVNC http www realvnc com TightVNC http www tightvnc com UltraVNC http www uvnc com In VNC Client mode the port number should correspond to the VNC listening port Login Method Prompt for Credentials This means the VNC login appears and you log in manual...

Страница 79: ... the Access Service Telnet Application PuTTy exe is the application used for telnet access The PuTTy application can be obtained from http www chiark greenend org uk sgtatham putty download html PuTTy Application Path PuTTy application must be installed on all client computers preferably in the same path In the default path ProgramFiles PuTTy see Figure 90 the application could be in any drive in ...

Страница 80: ...nstalled on all local computers preferably in the same path In the default path ProgramFiles VMware VMware Server Console the application could be in any drive in the Program Files VMware VMware Server Console folder Virtual Machine Path Type the Virtual Machine Path on the VMware Server Login Method Prompt for Credentials This means the VMware Server login appears and you log in manually Use Omni...

Страница 81: ...ess page columns The Access page columns contain the following 13 1 1 Power management column When there are power management devices connected to the targets a Power icon appears in this column from which you can power manage the target 13 1 2 Name column This column includes the name of the target and the default Access Service icon This icon represents the Access Service that is used by default...

Страница 82: ...VM switch A user or users are currently accessing other servers connected to that KVM switch and no more servers can be accessed Local active session Only appears for matrix switches A local user is currently connected Idle All targets assigned to non Belkin KVM over IP Access Services display Idle in the Status column 13 1 4 More Access Services column All configured Access Services appear here T...

Страница 83: ...the system tray Or press F9 To display the toolbar repeat the above action 13 2 3 Switching to a different server There are two methods of switching to a different server A Select a different target from the OmniView IP 5000HQ Access page B When the target to which you wish to switch is connected to the same KVM IP device as the current target 1 From the toolbar click or right click A list of avai...

Страница 84: ... 3 5 7 9 11 13 15 17 19 2 4 6 8 10 12 14 16 18 20 21 13 4 Exiting the OmniView IP 5000HQ system To exit the system Just below the OmniView logo click Logout The login screen appears and you are logged out Note Exiting the OmniView IP 5000HQ Manager has no effect on open user sessions ...

Страница 85: ...he targets a Power icon appears in this column from which you can power manage the target 14 2 Status column The Status column gives the user the current status of the target as follows Available The user can click the target name or Access Service icon and establish the remote session to that target Remote Active Session A user is currently connected He can be disconnected by an administrator The...

Страница 86: ...e 14 3 2 Connecting to a non KVM over IP device target To connect to a non KVM over IP device target Default Access Service Where the non KVM over IP Access Service is the default Access Service its icon appears in the Name column on the Access page To access the target Click the icon or the target name on the Access page Not default Access Service Where the non KVM over IP Access Service is not t...

Страница 87: ... 8 10 12 14 16 18 20 21 14 3 3 Changing the password Click the user name below OmniView IP 5000HQ The Change Password window appears see Figure 95 Figure 95 Change Password window Type and retype a new password and then press Save The new password is saved An administrator can change his password in the same way ...

Страница 88: ... of each KVM over IP device remains You can access a KVM over IP device unit directly by entering its IP address into your web browser Note This is only if the system is working in local authentication mode and not in external authentication LDAP mode To change any hardware elements and user authorization from the KVM over IP device you must first uncheck Enable HQ in the KVM over IP device Networ...

Страница 89: ...e includes the following Back Up Restore Restore Settings Firmware Upgrade Replication Event Log Unit Maintenance 16 1 Backup Restore You can set up an automatic backup schedule for the OmniView IP 5000HQ Manager database To do so From the Maintenance menu click Backup Restore and the Backup page appears see Figure 96 Figure 96 Backup page ...

Страница 90: ... must be set in the Unit Maintenance Network tab To validate the destination path click Backup schedule Select the check box to activate the backup schedule Select time Select the time hour and minute that the backup should initiate Select days Select which days the backup should be performed Click to save the settings The scheduled times work according to the internal clock of the OmniView IP 500...

Страница 91: ...000HQ to factory default settings To restore the OmniView IP 5000HQ Manager to its factory default settings Figure 98 Restore Settings Click A prompt appears notifying you that all database configurations will be lost Click OK OmniView IP 5000HQ system restarts with the restored factory settings 16 2 2 Resetting OmniView IP 5000HQ configuration You can reset all configurations without deleting the...

Страница 92: ...he OmniView IP 5000HQ Manager 1 Obtain the latest firmware version from Belkin 2 Save the file on the client computer 3 Log in to the OmniView IP 5000HQ Manager Web interface 4 From the Settings Maintenance menu click Firmware Upgrade Figure 99 appears Figure 99 Firmware upgrade 5 Press Browse and locate the upgrade file 6 Press OmniView IP 5000HQ loads the firmware and initiates the upgrade When ...

Страница 93: ...ng the secondary unit IP address so as not to cause a network conflict by having the same IP address as the primary unit and assigning the unit to be the secondary unit 1 From the secondary unit log in to the OmniView IP 5000HQ Manager web interface See the Displaying the OmniView IP 5000HQ Web Interface section on page 12 to display the OmniView IP 5000HQ web interface 2 Change the IP address of ...

Страница 94: ...o a standalone unit When a primary unit is down or malfunctioning you can promote the secondary unit to be a standalone unit To do so 1 At the secondary unit log in as an administrator to the OmniView IP 5000HQ web interface 2 From the Settings Maintenance menu click Replication Figure 100 appears 3 Select Standalone Unit The unit restarts in standalone mode 4 Re log in to the unit 5 Change the IP...

Страница 95: ...000HQ web interface 4 Restore database on the primary unit machine 5 Configure the original secondary unit to be the secondary unit and configure the original primary unit to be the primary unit as explained above Once completed the continuous database replication starts between primary unit and secondary unit 16 4 5 2 Option 2 The original secondary unit is the primary unit and the original prima...

Страница 96: ...at the unit is in secondary unit mode If it is not follow the steps in the Configuring the secondary unit section on page 89 16 4 8 Redoing the secondary and primary unit configuration Where the secondary unit is verified as up and running and is in secondary unit mode but the Secondary unit not responding or Secondary unit not replicating notification persists do the following 1 Convert both the ...

Страница 97: ...the Settings Maintenance menu click Event Log The Event Log page appears see Figure 103 Figure 103 Event Log The columns display the following information Severity Activities are recorded as either Alarm Warning or Info Event A brief description the event Category Type of event Access System or Configuration User User name that caused the event Source Source of the event Date Time Exact date time ...

Страница 98: ... time period in the From To fields and clicking You can fine tune the search by selecting Event User or Source in the in drop down menu Once you select the parameters click The search results appear 16 5 2 Access System or Configuration tabs For convenience use the Access System or Configuration tabs to see events in one of these categories only 16 5 3 Advanced button Click and the Log Settings wi...

Страница 99: ...arameters Power control 17 1 Date Time tab Set the server date and time and choose the time zone Figure 105 Unit Maintenance 17 2 Network tab Click the Network tab and the following appears Figure 106 Network tab Here you can change the network parameters of the OmniView IP 5000HQ unit The unit restarts after changing the IP settings Important For computer name resolving and operation in LDAP mode...

Страница 100: ...5 7 9 11 13 15 17 19 2 4 6 8 10 12 14 16 18 20 21 17 3 Power Control tab Click the Power Control tab and the following appears Figure 107 Power Control tab For maintenance purposes To shut down the OmniView IP 5000HQ unit click To restart the OmniView IP 5000HQ unit click ...

Страница 101: ...11 13 15 17 19 2 4 6 8 10 12 14 16 18 20 21 Click at the top of the page and the About page appears see Figure 108 This contains information about the version of the OmniView IP 5000HQ firmware KVM over IP devices firmware Switch definition file Figure 108 About page ...

Страница 102: ...ersion compatible with OmniView IP 5000HQ D When controlling a target the mouse cannot be synchronized 1 Make sure that the operating system selection and the mouse acceleration threshold settings on the OmniView IP 5000HQ target properties match the server parameters 2 If using a KVM switch with USB dongle or USB to PS 2 adapter ensure that the USB Converter check box is checked in the OmniView I...

Страница 103: ... working properly 2 Restore the unit to factory default settings Log in with the admin SMBremote account and then restore the OmniView IP 5000HQ database backup J All devices display Alarm mode after a firmware upgrade of the OmniView IP 5000HQ Manager Restart the OmniView IP 5000HQ Manager After the upgrade the OmniView IP 5000HQ had not completed the restart process K I am unable to see the Omni...

Страница 104: ... Temperature Operating 10 to 35 C 50 to 95 F Storage 40 to 65 C 40 to 149 F Relative humidity Operating 20 to 80 non condensing with a maximum humidity gradation of 10 per hour Storage 5 to 95 non condensing Maximum vibration Operating 0 26 Grms at 5 350Hz for 15 min Storage 1 54 Grms at 10 250Hz for 15 min Maximum shock Operating One shock pulse in the positive z axis one pulse on each side of th...

Страница 105: ...ive and implementing regulations when customers buy new electrical and electronic equipment from Belkin International Inc they are entitled to Send old equipment for recycling on a one for one like for like basis this varies depending on the country Send the new equipment back for recycling when this ultimately becomes waste Instructions to both customers and recyclers treatment facilities wishing...

Страница 106: ... harmful interference when the equipment is operated in a commercial environment This equipment generates uses and can radiate radio frequency energy and if not installed and used in accordance with the instruction manual may cause harmful interference to radio communications Operation of this equipment in a residential area is likely to cause harmful interference in which case the user will be re...

Страница 107: ...ng information a The part number of the Belkin product b Where you purchased the product c When you purchased the product d Copy of original receipt 2 Your Belkin Customer Service Representative will then instruct you on how to forward your receipt and Belkin product and how to proceed with your claim What this warranty covers Belkin International Inc Belkin warrants to the original purchaser of t...

Страница 108: ...ce policies the purchaser may have How state law relates to the warranty THIS WARRANTY CONTAINS THE SOLE WARRANTY OF BELKIN THERE ARE NO OTHER WARRANTIES EXPRESSED OR EXCEPT AS REQUIRED BY LAW IMPLIED INCLUDING THE IMPLIED WARRANTY OR CONDITION OF QUALITY MERCHANTABILITY OR FITNESS FOR A PARTICULAR PURPOSE AND SUCH IMPLIED WARRANTIES IF ANY ARE LIMITED IN DURATION TO THE TERM OF THIS WARRANTY Some...

Страница 109: ...1933 35 2000 44 0 1933 31 2000 fax Belkin B V Boeing Avenue 333 1119 PH Schiphol Rijk The Netherlands 31 0 20 654 7300 31 0 20 654 7349 fax Belkin Ltd 4 Pioneer Avenue Tuggerah Business Park Tuggerah NSW 2259 Australia 61 0 2 4350 4600 61 0 2 4350 4700 fax 2009 Belkin International Inc All rights reserved All trade names are registered trademarks of respective manufacturers listed Windows Windows ...

Отзывы: