background image

5.3

EMC

The BA364G complies with the requirements of the
European EMC Directive 2014/30/EU. For specified
immunity all wiring should be in screened twisted
pairs, with the screens earthed at one point in the
safe area.

5.4

Units of measurement and tag marking
on scale card.

The Counter's units of measurement and tag
information are shown on a scale card which slides
into the instrument.

New Counters are supplied with a printed scale card
showing the requested units of measurement and
tag information. If this information is not supplied
when the instrument is ordered, a blank scale card
will be fitted which can easily be marked on-site with
a dry transfer or a permanent marker.

Custom

printed scale cards are available from BEKA
associates as an accessory.

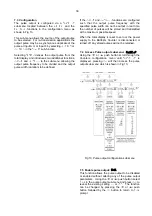
To remove the scale card from a Counter carefully
pull the transparent tab at the rear of the instrument
assembly away from the assembly as shown
in Fig 8a.

Fig 8a Removing scale card

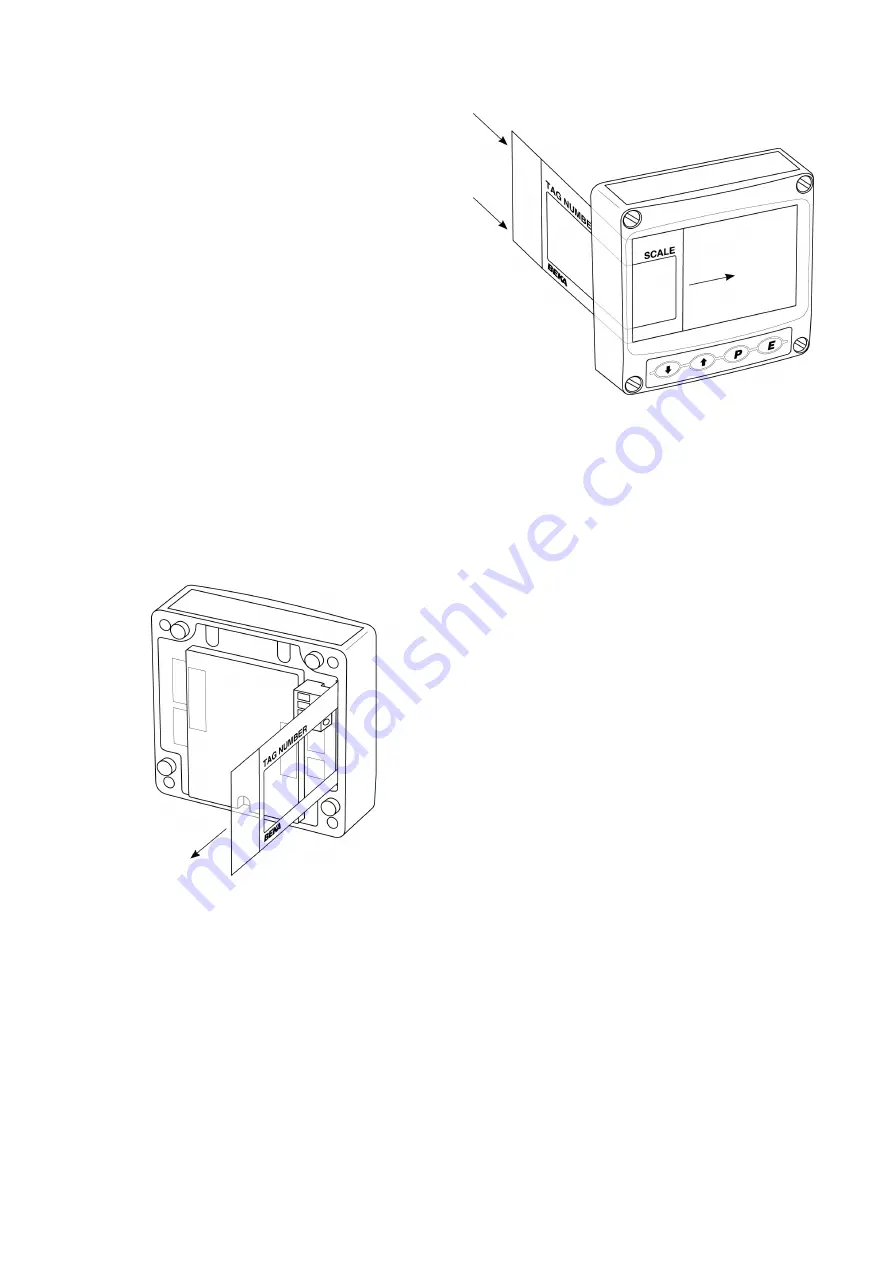
To replace the scale card carefully insert it into the
slot on the right hand side of the input terminals as
shown in Fig 8b. Force should be applied evenly to
both sides of the scale card to prevent it twisting.
The card should be inserted until about 2mm of the
transparent tab remains protruding.

   Fig 8b Inserting scale card into the


 instrument assembly.

15

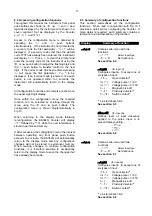
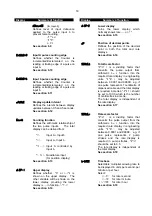
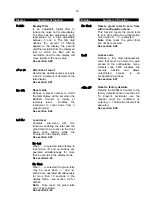
Содержание BA364E

Страница 1: ...Issue 5 9th July 2019 BA364G and BA364E Two Input Intrinsically safe Counter Issue 5 ...

Страница 2: ...ration functions 6 4 Input A inPut A 6 5 Input A type inP tYPE 6 6 Input A debounce dEbouncE 6 7 Input b inPut b 6 8 Input b type inP tYPE 6 9 Input b debounce dEbouncE 6 10 Input A pulse counting edge CntEdg A 6 11 Input b pulse counting edge CntEdg b 6 12 Display update interval uPdAtE 6 13 Counting function Count 6 14 Upper display di5P 1 6 15 Lower display di5P 2 6 16 Position of the decimal p...

Страница 3: ...tatus no nC 10 3 9 Hysteresis H5tr 10 3 10 Alarm delay dELA 10 3 11 Alarm silence time 5IL 10 3 12 Flash display when alarm occurs FL5H 10 3 13 Access Setpoint AC5P 10 3 14 Adjusting alarm setpoints from display mode 10 4 4 20mA output 10 4 1 Intrinsic safety 10 4 2 System design 10 4 3 Configuration and calibration 10 4 4 Access 4 20mAoutput sub menu 4 20 oP 10 4 5 Enable 4 20mA output EnbL 10 4 ...

Страница 4: ... Yes Certification IECEx Gas dust Gas ATEX Gas dust Gas ETL cETL Gas dust Gas dust The main sections of this instruction manual describe the BA364G but also apply to the BA364E Details of the BA364E mounting and terminals are contained in Appendix 4 The BA364G and BA364E have been ATEX certified intrinsically safe by Notified Body Intertek Testing and Certification Ltd and comply with the European...

Страница 5: ...onal pulse output See 6 24 Shows in succession firmware version number instrument function 2ch cntr and any output accessories that are fitted A Dual alarm outputs P Pulse output always fitted C 4 20mA output Access to configuration menu Note When optional alarms are fitted the BA364G Counter may be configured to provide direct access to the alarm setpoints from the display mode when the and butto...

Страница 6: ...300 C T3 200 C T4 135 C T5 100 C At ambient temperatures between 40 and 70 C The specified operating temperature of the BA364G Counter is 40 to 70 C At temperatures below 20 C the instrument will continue to count but the display digits will change increasingly slowly and the contrast will be reduced This allows the BA364G Counter to be installed in all gas Zones and to be used with most common in...

Страница 7: ...Counter pulse input to be ignored when assessing the safety of the sensor connected to the Counter input This allows almost any certified intrinsically safe voltage pulse or certified magnetic pick off to be directly connected to one of the BA364G Counter inputs The BA364G EU Type Examination Certificate specifies that the equivalent capacitance and inductance of each BA364G Counter input are Ci 2...

Страница 8: ... Zener barrier or intrinsically safe relay is required to transfer the contact closure into the hazardous area Almost any intrinsically safe relay with certification permitting the contacts to be connected to equipment in the hazardous area may be used A positive diode return Zener barrier is not suitable for this application Alternatively the BA364G Counter may be configured so that the total dis...

Страница 9: ...A364G used with Zener barriers Alternatively the pulse sources may be located in the safe area Fig 3 shows how an additional Zener barrier is used to transfer the signal to the Counter in the hazardous area When more than one Zener barrier is used in a system all must have the same polarity i e all positive or all negative barriers When designing a system it is important to remember that terminals...

Страница 10: ... 1 5 Open collector input Most certified open collector sensors located in the same hazardous area as the BA364G Counter may be directly connected to pulse input terminals 5 6 and 9 10 providing the sensor and associated wiring can withstand a 500V rms insulation test to earth The open collector device must comply with the requirements for simple apparatus or have input safety parameters equal to ...

Страница 11: ...te The BA364G can be configured to reset the total display to zero when the and push buttons are operated simultaneously for more than three seconds see 6 24 4 2 Use with Galvanic Isolators Galvanic isolators are probably the simplest intrinsically safe interface to install as they provide isolation and do not require a high integrity earth connection Any certified galvanic isolator with output pa...

Страница 12: ...er threshold Input sensor Switching thresholds Lower Upper Switch 100 1000 Proximity detector 1 2mA 2 1mA Open collector 2k 10k Magnetic pick off 0mV 40mV peak Voltage pulse low 1 0V 3 0V Voltage pulse high 3 0V 10 0V 4 2 3 Switch contact input Any mechanically activated switch contact located in the same hazardous area as the BA364G Counter may be directly connected to pulse input terminals 5 6 o...

Страница 13: ... for either of the voltage pulse ranges the pulse input terminals 5 6 or 9 10 of the BA364G Counter comply with the requirements of simple apparatus This allows direct connection to any intrinsically safe voltage source within the same hazardous area as the Counter having output parameters equal to or less than Uo 28V dc Io 200mA dc Po 0 84W The maximum permitted cable parameters will be defined b...

Страница 14: ...nsulated M4 stud is provided in the bottom right hand corner of the back box for interconnecting cable screens The BA364G Counter may be pipe mounted using a BA393G pipe mounting kit or panel mounted using a BA394G or BA395G panel mounting kit 5 2 Installation Procedure Fig 6 illustrates the instrument installation procedure A Remove the Counter assembly by unscrewing the four captive A screws B M...

Страница 15: ...strument is ordered a blank scale card will be fitted which can easily be marked on site with a dry transfer or a permanent marker Custom printed scale cards are available from BEKA associates as an accessory To remove the scale card from a Counter carefully pull the transparent tab at the rear of the instrument assembly away from the assembly as shown in Fig 8a Fig 8a Removing scale card To repla...

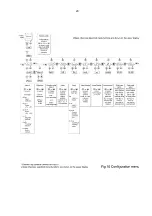
Страница 16: ...alue clr val 00000000 Local clear loc clr Local total reset Clr tot oFF Local grand total reset Clr Gtot oFF Security code CodE 0000 Note While the instrument is being configured counting continues so that any input pulses occurring during this time are recorded 6 1 Calibration structure Fig 9 shows the calibration structure of the BA364G Counter The two pulse inputs are processed by the count fun...

Страница 17: ...ory If after accessing the configuration menu the interval between operating any front panel push button exceeds one minute the BA364G will automatically return to the display mode and any configuration changes will not be stored in permanent memory When making changes to multiple configuration functions it is therefore sensible to occasionally return to the display mode to save the changes that h...

Страница 18: ...n di5P 2 Lower display Turns the lower display which normally shows rate on or oFF See section 6 15 dP Position of decimal points Defines the position of the decimal point in both the total and rate displays See section 6 16 5CALE t Total Scale Factor 5CALE t is a dividing factor that converts the pulse output from arithmetic Count function into the required total display in engineering units 5CAL...

Страница 19: ... See section 6 23 Clr tot When on is selected total display is reset when and buttons are operated simultaneously for more than 3 seconds in the display mode See section 6 24 Clr Gtot When on is selected the grand total may be reset when and buttons are operated simultaneously for more than 10 seconds in the display mode see section 2 2 for details Note Once reset the grand total can not be restor...

Страница 20: ...20 ...

Страница 21: ...21 ...

Страница 22: ... such as those resulting from a mechanical contact closing and bouncing The debounce function only applies to the input in which the function is located Three levels of protection may be independently selected for each input The amount of debounce applied depends upon the type of Counter input that has been selected for the input in the associatedinP tYPE function Select inPut A or inPut b in the ...

Страница 23: ...unt occurs to be selected It applies to input A for all counting modes except quadrature A rEL b To check or change the input A pulse edge on which the count occurs select CntEdG A from the configuration menu and press which will reveal EdGE 1 or EdGE 2 If required press the or button to change the setting followed by the button to return to the configuration menu EdGE 1 Type of input Counting edg...

Страница 24: ...c relationship between Inputs A and Input b The following four modes may be selected Display Input count mode A b Pulses at input A added to pulses at input b A b Pulses at input b subtracted from pulses at input A A Con b Input b controls count direction of input A Input b Input A Low Up counter High Down counter A rEL b Quadrature input with sensors electrically 90o apart The pulse output is not...

Страница 25: ...ional Alarm outputs Optional 4 20mA output 6 17 Total scale factor 5CALE t 5CALE t is a dividing factor adjustable between 0 0001 and 99999 that enables the total to be displayed in engineering units e g if one pulse from the arithmetic count function represents 1 centimetre of dispensed cable and the total display is required in metres 5CALE t should be set to 100 0 which is the number of centime...

Страница 26: ...defines the amount of filtering applied to the display as shown below First digit Filter time constant Seconds 0X 0 1X 1 3 2X 4 3 3X 6 5 4X 8 7 5X 11 3 6X 15 7 7X 20 9 8X 25 2 9X 31 5 The second digit defines the deviation from the displayed rate at which the filter will be overridden and the rate display will move rapidly to the new value Second digit Magnitude of step change which will produce a...

Страница 27: ...sh buttons simultaneously for more than three seconds To check or change the setting select LoC CLr in the configuration menu and press which will reveal the Clr tot prompt operating again will show if the local total reset is on or oFF If set as required operate the button twice to return to the configuration menu or the or button to change the setting followed by the button twice to enter the ch...

Страница 28: ... is lost 6 28 Reset configuration to factory defaults r5Et dEF This function returns the BA364G Counter to the factory defaults shown in section 6 0 To prevent accidental use the request must be confirmed by entering 5urE before the configuration change will be executed Select r5Et dEF from the configuration menu and press the instrument will display 0000 with the first digit flashing To confirm t...

Страница 29: ...ceed Uo 28V dc Io 200mA Po 0 84W Fig 12 Generating voltage pulse in safe area using Zener barriers The equivalent capacitance and inductance of the pulse output are both zero which allows the maximum permissible cable parameters specified by the certificate for the Zener barrier or galvanic isolator powering the pulse output circuit to be used 7 2 System design The BA364G Counter pulse output is a...

Страница 30: ...e frequency with the specified pulse width can not be output in real time the number of pulses will be stored and transmitted at the maximum possible speed When the total display is reset to zero or the power supply to the BA364G Counter is disconnected or turned off any stored pulses will not be retained 7 4 Access Pulse output sub menu PuL5E oP Using the or push button scroll through the Counter...

Страница 31: ...0 1000 10000 Using the or push button select diVidE in the pulse output sub menu and press to reveal the existing divisor The value can be changed by pressing the or push button to select the required value followed by the button to return to diVidE prompt Note This function only appears in the sub menu when the output pulse is derived from the total display 7 8 Output pulse width durAtion When th...

Страница 32: ... for a 2 wire proximity detector and then return to the inPut A prompt in the configuration menu by pressing Repeat for the second input inPut b Step 3 Select input count mode The two proximity detectors are positioned so their outputs are electrically 90 apart From this information in the quadrature input mode the BA364G Counter can sense the direction and angular movement of the wheel to which t...

Страница 33: ...button scroll through the three options and select tb 1 Return to the t bA5E prompt in the configuration menu by pressing Step 10 Adjust the rate display filter The rate display filter parameters should be adjusted experimentally after installation to provide a stable rate display with an acceptable step response During commissioning it is recommended that initially the second digit of the rate pa...

Страница 34: ...ly the same way before returning to the configuration menu by pressing the button twice Step 13 Define the security code Defining an access security code prevents unauthorised access to the configuration menu Select CodE in the configuration menu and press which will reveal the existing security code with the first digit flashing Using the and buttons enter the new code 1209 digit by digit The but...

Страница 35: ...BEKA if code is lost Alarms do not function Alarms have been disabled following calibration change Re enable both alarms 9 2 Fault finding after commissioning ENSURE PLANT SAFETY BEFORE STARTING MAINTENANCE Live maintenance is permitted on intrinsically safe equipment installed in a hazardous area but only certified test equipment should be used unless a gas clearance certificate is available If a...

Страница 36: ...a normally open or a normally closed solid state output Configurable functions for each alarm include adjustable setpoint alarm delay time and alarm silence time Hysteresis may be applied to rate alarms WARNING These alarm outputs should not be used for critical safety applications such as a shut down system When the BA364G power supply is turned off or disconnected alarm outputs will open irrespe...

Страница 37: ...bles the alarm without changing the alarm parameters See section 10 3 4 tYPE Type of alarm Defines whether the alarm operates on the rate or total display See section 10 3 5 5P1r Alarm setpoint 1 or Adjusts the alarm setpoint The 5P1t alarm is activated when the rate or total display equals the setpoint Note 5P1r is displayed for a rate alarm and 5P1t for a total alarm See section 10 3 6 HI LO Ala...

Страница 38: ...arm sub menu 10 3 5 Type of alarm tYPE Alarm 1 and Alarm 2 are totally independent both may be rate or total alarms or one may be conditioned for rate and the other for total Using the or push button select tYPE from the selected alarm sub menu and press to check or change the function The or push button will toggle the selection between rAtE and totAL when set as required press the button to retu...

Страница 39: ...ich will reveal the existing hysteresis with one digit flashing The required hysteresis can be entered using the or push button to adjust the flashing digit and the button to transfer control to the next digit When set as required press to enter the value and return to the H5tr prompt in the alarm sub menu e g A BA364G Counter configured to display a rate of 0 to 5000 with a high alarm set at 4000...

Страница 40: ...d from the sub menu and press which will cause the BA364G Counter to display 0000 with one digit flashing The flashing digit may be adjusted using the or push button when set as required operating the button will transfer control to the next digit When all the digits have been adjusted press to return to the ACCd prompt The revised security code will be activated when the BA364G Counter is returne...

Страница 41: ...ed Zener barrier or galvanic isolator providing the output parameters do not exceed Uo 28V dc Io 200mA Po 0 84W The maximum equivalent internal capacitance and inductance of the 4 20mA output is Ci 2 2nF Li 4µH To determine the maximum permissible cable parameters these figures should be subtracted from the maximum cable capacitance and inductance specified by the certificate for the Zener barrier...

Страница 42: ...ve of the instrument display 10 4 6 Select rate or total source 4 20tYPE The 4 20mA output current can represent the BA364G Counter s rate or total display and this must be defined before any other 4 20mA current output functions are configured Using the or push button select 4 20tYPE in the 4 20mA output sub menu and press to reveal the existing setting totAL or rAtE The function can be changed b...

Страница 43: ... required display can be entered using the or push button to adjust the flashing digit and the button to transfer control to the next digit When set as required press to enter the value and return to the 20 000 prompt in the 4 20mA output sub menu Note If the BA364G Counter and the 4 20mA current sink output are powered from separate supplies the 4 20mA output current will continue to flow when th...

Страница 44: ...rsist for a short period Be used with dust in subdivisions IIIA combustible flyings IIIB non conductive dust IIIC conductive dust Having a Minimum Ignition Temperature of Dust cloud 120 C Dust layer on Rate 155 C Totaliser up to 5mm thick Dust layer on Rate Refer to Totaliser over 5mm thick EN 60079 14 At an ambient temperature between 40 and 60 C A1 2 Installation and maintenance The installation...

Страница 45: ...fication codes Ex ia IIC T5 Ga Ta 40 C to 70 C Ex ia IIIC T80 C IP66 Da Ta 40 C to 60 C The specified IECEx gas and dust intrinsic safety parameters are identical to the ATEX safety parameters described in the main section and Appendix 1 of this manual The IECEx certificate may be downloaded from the BEKA associate or the IECEx websites or requested from the BEKA sales office A2 2 Installation The...

Страница 46: ...x parameters the systems shown in sections 3 and 4 of this manual may therefore also be used for US and Canadian installations subject to compliance with the local codes of practice ETL and cETL intrinsic safety codes USA Canada CL I Div 1 Groups A B C D T5 CL II Div 1 Groups E F G CL III 40ºC Ta 70ºC USA CL I Zone 0 AEx ia IIC T5 Ga Zone 20 AEx ia IIIC T80ºC Da 40ºC Ta 70ºC Canada Ex ia IIC T5 Ga...

Страница 47: ...47 ...

Страница 48: ...48 ...

Страница 49: ...49 ...

Страница 50: ...50 ...

Страница 51: ...51 ...

Страница 52: ...52 ...

Страница 53: ...53 ...

Страница 54: ...54 ...

Страница 55: ...55 ...

Страница 56: ...56 ...

Страница 57: ...57 ...

Страница 58: ...58 ...

Страница 59: ...ounting holes are located in a separate compartment with a sealed cover allowing the instrument to be installed without exposing the display assembly The enclosure is fitted with a bonding plate to ensure electrical continuity between the three conduit cable entries A4 4 BA364E Accessories A4 4 1 Units of measurement instrument identification The BA364E is fitted with a blank escutcheon around the...

Страница 60: ...ed one or both of the IP66 stopping plugs may be replaced with an appropriate IP rated cable gland or conduit fitting d Connect the field wiring to the terminals as shown in Fig A4 2 e Replace the instrument terminal cover and evenly tighten the two A screws If the BA364E is not bolted to an earthed post or structure the earth terminal should be connected to the plant potential equalising conducto...

Отзывы: