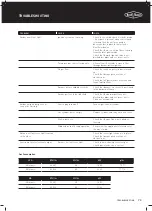
OPERATING INSTRUCTIONS
Control functions
Before lighting the barbecue:
•
Check that all hoses and gas fittings are tight
• Open the roasting hood
• Check all control knobs are in the ‘OFF’ position
• Ensure that the cooking surfaces are clean
• Turn the gas isolation valve ‘ON’
Lighting instructions
• Do not attempt to light burners with the cooking
surfaces covered
• Read instructions before lighting
• To light a burner,depress the knob and rotate to . The
starter mechanism will click and the burner will light
• If burner did not light, depress knob and turn back to the
‘OFF’ position
• Allow several minutes for gas to disperse then repeat
lighting procedure
• Once ignited, the knob can then be turned to the desired
heat setting. The knob does not need to be pushed in
while selecting the heat setting
Manual lighting
• If,in the event of the automatic ignition system not
working, the barbecue can be lit manually
• To light manually, firstly slide out the grease tray to get
access to the lighting hole. Pass the manual ignitor
through the lighting hole and up towards the burner.
Then rotate the knob to ignite. If ignition fails,turn the
knob to ‘OFF’ and allow several minutes for the gas to
disperse before attempting to light again
• Once alight, repeat for other burners as required
Manual lighting hole
To turn the burners off
•
When the cooking is complete, push the knob in and
rotate clockwise back to the ‘OFF’ position
Preheating
For best cooking results it is recommended to preheat the
barbecue prior to cooking.
•
This barbecue is fitted with high power burners. In
most conditions it will only be necessary to preheat the
barbecue for 5 minutes before cooking can commence
•
As with most things, experience will familiarise you
with the time required to achieve the desired cooking
temperature
.•
If the unit does not operate correctly refer to
troubleshooting section
Cooking methods:
Direct Cooking Method
Commonly used for traditional barbecuing. Place food over
the lit grill section. Excess flaring may occur, so care must
be taken while cooking. Check inside the roasting hood
regularly. The direct cooking method is recommended for
steaks, chops, sausages, and hamburgers.
Indirect Cooking
This method of cooking applies only if you have a roasting
hood.
Indirect cooking involves little or no heat directly underneath
the food. Instead, the food is placed on the grill, the burners
below the food are turned off or Low, and burners on either
side are used. The hood is closed to trap heat and moisture.
With this method, heat circulates around the food, cooking
by convection. By trapping the vapour inside your “outdoor
oven”, the cooking vapour will fall back on the food on all
sides, not just from underneath. The food cooks more evenly,
and stays moist in the process.
Indirect cooking is similar to using a conventional oven and
is recommended for rotisserie cooking, roasts, poultry,
casseroles, vegetables and whole fish.
When cooking a roast, it is a good idea to use a roast holder
and baking dish. Always use a baking dish with a depth
greater than 35mm. Shallower trays may fill quickly and
overflow, which may cause a fat fire.
70
OPERATING INSTRUCTIONS
Содержание 7000 Series
Страница 5: ...5 BMF7645SA PRODUCT DIMENSIONS DIMENSIONS 1602 708 1284 ...
Страница 7: ...7 BMF7655SA PRODUCT DIMENSIONS DIMENSIONS 1758 708 1284 ...
Страница 9: ...9 BMG7642SA PRODUCT DIMENSIONS DIMENSIONS 1602 685 1284 ...
Страница 11: ...11 BMG7652SA PRODUCT DIMENSIONS DIMENSIONS 1758 685 1284 ...
Страница 15: ...15 ASSEMBLING THE BARBECUE 4 18 19 3 ...
Страница 16: ...16 19 15 ASSEMBLING THE BARBECUE 5 6 11 BMF7645SA BMF7655SA ASSEMBLY ...
Страница 17: ...17 ASSEMBLING THE BARBECUE 7 8 11 ...
Страница 18: ...18 ASSEMBLING THE BARBECUE 17 9 10 BMF7645SA BMF7655SA ASSEMBLY ...
Страница 19: ...19 ASSEMBLING THE BARBECUE 11 12 13 16 ...
Страница 20: ...20 ASSEMBLING THE BARBECUE 11 13 14 23 BMF7645SA BMF7655SA ASSEMBLY ...
Страница 21: ...21 ASSEMBLING THE BARBECUE 15 16 20 22 21 ...
Страница 26: ...26 ASSEMBLING THE BARBECUE 25 26 BMF7645SA BMF7655SA ASSEMBLY ...
Страница 27: ...27 ASSEMBLING THE BARBECUE 27 28 6 7 ...
Страница 28: ...28 ASSEMBLING THE BARBECUE 29 30 BMF7645SA BMF7655SA ASSEMBLY ...
Страница 31: ...31 ASSEMBLING THE BARBECUE 35 36 1 Locate the warming rack Sliding locked Sliding unlocked ...
Страница 32: ...32 ASSEMBLING THE BARBECUE 10 37 38 9 BMF7645SA BMF7655SA ASSEMBLY ...
Страница 33: ...33 ASSEMBLING THE BARBECUE 39 40 8 Spanner 19mm Spanner 22mm ...
Страница 39: ...39 ASSEMBLING THE BARBECUE 5 Assemble the back trolley panels with M6 head screws x7 11 11 ...
Страница 40: ...40 ASSEMBLING THE BARBECUE 6 7 13 13 BMG7642SA BMG7652SA ASSEMBLY ...
Страница 41: ...41 ASSEMBLING THE BARBECUE 17 16 8 9 Assemble the trolley top panel with M6 head screws x8 ...
Страница 43: ...43 ASSEMBLING THE BARBECUE 14 12 13 ...
Страница 44: ...44 ASSEMBLING THE BARBECUE 14 15 BMG7642SA BMG7652SA ASSEMBLY ...
Страница 45: ...45 ASSEMBLING THE BARBECUE 7 6 16 17 Align side burner gas pipe through the hole pull wire through the hole ...
Страница 46: ...46 ASSEMBLING THE BARBECUE 18 19 BMG7642SA BMG7652SA ASSEMBLY ...
Страница 47: ...47 ASSEMBLING THE BARBECUE 4 20 21 ...
Страница 48: ...48 ASSEMBLING THE BARBECUE 22 23 2 3 1 Drip hole should be at front side BMG7642SA BMG7652SA ASSEMBLY ...
Страница 49: ...49 ASSEMBLING THE BARBECUE 10 24 25 ...
Страница 51: ...51 ASSEMBLING THE BARBECUE 28 29 Push down ON to brake Push down OFF to move ...
Страница 57: ...57 NATURAL GAS INSTALLATION 9 10 Disassemble the side burner and change the injector for the NG version ...
Страница 74: ...74 NOTES NOTES NOTES ...


