background image

26

>>>

GERNARAL OPERATION

> D

> GB

> F

> I

> E

> NL

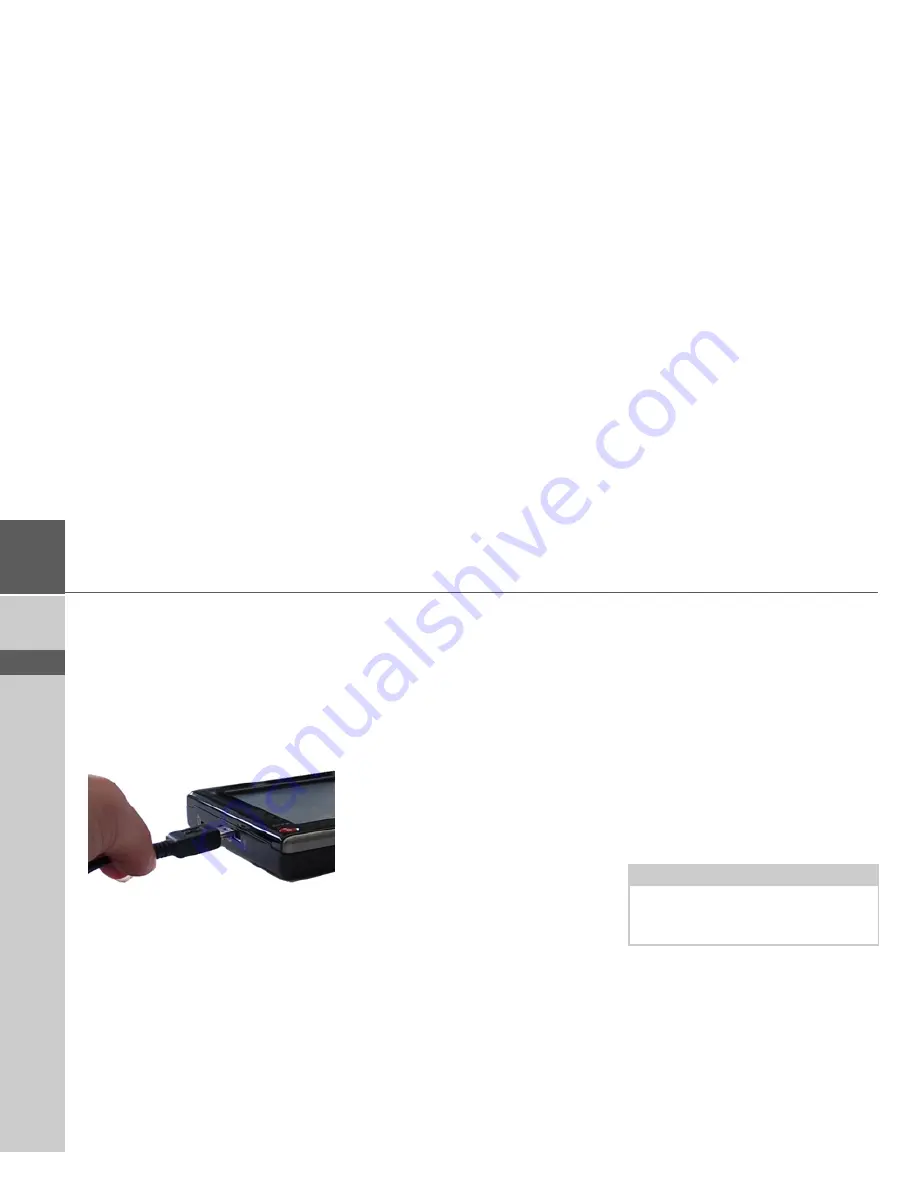
Transferring using the USB 

port

The USB port is used to link the Traffic
Assist directly to a personal computer. 
The Microsoft® Active Sync program
must be installed for transmission. Micro-
soft® Active Sync is contained on the
DVD provided.

The link then involves several steps:

>

Switch off Traffic Assist.

>

Link the Traffic Assist and computer
using the USB cable.

>

Switch on Traffic Assist again (do not
press the screen after the unit is
switched on).

ActiveSync automatically sets up a link to
the Traffic Assist.

Transferring maps

The installation software from the DVD
should be used for the transfer. This in-
volves the following stages:

>

switch off Traffic Assist.

>

connect the Traffic Assist to the compu-
ter using the USB cable.

>

boot up the computer and insert the
DVD.

>

use the installation program to transfer
the map required.

>

remove the USB cable correctly.

>

switch the Traffic Assist back on. The
new map is available right away.

Faults

Faults  in  the  operating  system  or  in  the
unit are displayed. If the desired function
cannot then be executed, the Traffic Assist
should be restarted using the On/Off
switch or the reset button. 
If the messages reappear or the unit
does not function correctly for any other
reason, please contact your local stockist.
You can also try to find a solution to your
problem in the FAQ in the Support area
on the Becker homepage (www.mybeck-
er.com). 

Note:

Never attempt to open the unit yourself.
Please contact your authorised dealer if
you are unable to remedy the fault.

Содержание TRAFFIC ASSIST Z101

Страница 1: ...Operating instructions...

Страница 2: ...8 Memory card 18 Inserting memory card 18 Ejecting memory card 18 Unit bracket 19 Fitting the unit bracket 19 On the windscreen 20 Adjusting the unit bracket 20 Adding the Traffic Assist 20 Removing t...

Страница 3: ...ating announcements 51 Map display 51 Map layout 51 Map display without driving guidance 51 Entire map with route guidance 52 Spilt screen with route guidance 53 Route guidance with arrow display 53 U...

Страница 4: ...the details given or not We accept no liability for the navigational system issuing incorrect details As a result of traffic routing changes and deviating data inaccurate or incorrect instructions ma...

Страница 5: ...rechargeable battery Any modification to the unit is also impermissible and renders the type approval invalid Use only genuine BECKER original accessories This will ensure that all the relevant regula...

Страница 6: ...depending on how the Traffic Assist is installed In such cases you will have to connect up an external antenna does not fall within the scope of supply The Traffic Assist with TMC is equipped with TM...

Страница 7: ...e packaging Keep the original packaging in a dry place at least for the warranty period Description of unit The Traffic Assist consists of the basic unit Traffic Assist and the accessories in cluded i...

Страница 8: ...arged by connect ing the Traffic Assist to the power supply For this purpose connect the unit via a car power adapter to a 12 24 V socket in a ve hicle or via the optional mains power sup ply unit to...

Страница 9: ...ed to the Traffic Assist not in cluded Information about documentation Quick start guide The Quick Start Guide is designed to pro vide a brief introduction to operating your Traffic Assist The most im...

Страница 10: ...nd other news You can register online on the Becker homepage www mybecker com The Software update menu item is lo cated under SERVICE SUPPORT Repairs The unit must not be opened if damaged Please cont...

Страница 11: ...GB F I E NL Overview Traffic Assist Scope of supply 1 Traffic Assist PND Personal Navigation Device 2 USB connection cable 3 Unit bracket 4 Cable for power supply from car s cigarette lighter 12 24 v...

Страница 12: ...t access 2 Touch screen key Press activates the corresponding key command 3 Becker key Press Back function in most applicationss Press for longer switches the Traffic Assist on and off Rear of unit 4...

Страница 13: ...nit 1 Micro SD memory card slot 2 3 5 mm connection for headset Connection socket for TMC antenna headset not included in scope of supply 3 Mini USB connection Top of unit 4 Reset button Bottom of uni...

Страница 14: ...ronic components in your unit damage the rechargeable batteries and cause certain plastics to warp or melt Do not store your mobile navigation system in cold environments During operation when the uni...

Страница 15: ...avi gation system Display quality declaration In some cases for technical reasons a few discoloured dots pixels may be visible on the display Some pixels may also appear brighter or darker However suc...

Страница 16: ...carrier plate as far as the stop without using ex cessive force Plug the plug adapter into the cigarette lighter Note Note that if the battery is completely dis charged it may take up to a minute be...

Страница 17: ...on the back of the carrier plate without using exces sive force GPS antenna Unit antenna The GPS antenna is integrated into the housing Danger of Death Make sure that your hands are not damp and that...

Страница 18: ...on the left side of the unit The card slot is equipped with a spring actuated locking and ejector me chanism Inserting memory card Remove the memory card from its packaging without touching or soilin...

Страница 19: ...atures inside the vehicle of 70 C and higher may damage parts of the bracket 2 1 3 4 6 5 1 2 3 4 5 6 Note Fasten the unit holder such that your field of vision is not impaired when the Traffic Assist...

Страница 20: ...to the re quired position and hold it in this posi tion Tighten the fastening screw suffi ciently so that the Traffic Assist is held securely in place when the vehicle is in motion Adding the Traffic...

Страница 21: ...can switch the unit off at any time If necessary new destinations should first be saved Press the button for a few seconds If you do not operate any controls Traffic Assist enters sleep mode after 5 s...

Страница 22: ...ertaken The calibration function is started from the Settings menu see also page 48 Basic information about the menus During operations you are assisted by various menus and entry windows Entries made...

Страница 23: ...in the upper dis play area after entering the first few letters or numbers you can immediately accept this suggestion To accept the suggested entry press the destination or the button OK Scrolling thr...

Страница 24: ...nge to the special character key pad press the key The special character keypad is displayed Enter the special character you want As soon as you have entered a special char acter the system automatica...

Страница 25: ...depending on the menu context if pressed briefly you will be returned to the previous entry level Transferring files Installation program There is a map installation program on the map DVD Once the D...

Страница 26: ...tages switch off Traffic Assist connect the Traffic Assist to the compu ter using the USB cable boot up the computer and insert the DVD use the installation program to transfer the map required remove...

Страница 27: ...tes are needed to establish position If four or more signals are available height above sea level can also be calculated The Traffic Assist determines the direc tion and distance from the destination...

Страница 28: ...ns The list of destinations displays all the des tinations available for quick selection line by line If you have already entered your home address you can start route guid ance to your home address i...

Страница 29: ...destination in the destinations mem ory can be displayed or edited Press the icon to the left of the destina tion required A selection menu appears Icon Meaning This destination is a standard destina...

Страница 30: ...p The destination is moved forwards by one position This function is only available in the case of protected destinations Move this en try down The destination is moved back by one position This funct...

Страница 31: ...input menu In fast access mode press the Destina tion input button at the top edge of the screen The Destination input menu appears Configuration of the Destina tion input menu Address The various st...

Страница 32: ...input menu after selection If a destination country has al ready been entered it appears in the first line and is therefore active Press the destination Country key to ac cess the selection list of co...

Страница 33: ...duce an existing town and or postcode Smart speller Select between town entry and post code entry Consecutively enter the letters for the destination town or the numbers of the post code The OK key Th...

Страница 34: ...d each time a new letter is entered Traffic Assist rules out all impossible com binations of letters and only activates those letter boxes which will produce an existing street A building number can o...

Страница 35: ...road list See Using the list of streets on page 35 Selecting a house number After entering the destination town and road you can enter a house number in order to further limit the choice Press No The...

Страница 36: ...ing profile in the address entry field Press the Options but ton for this purpose The settings made here have an effect on calculation of the estimated journey times and the length of the route Select...

Страница 37: ...stina tion begin Motorways Ferries Toll roads Select one of the options by pressing the relevant button Permitted the road type is taken into account during route calculation Avoid the road type is av...

Страница 38: ...destination in a town Press the Point of interest key to display the points of interest The search area selection window appears You can now use the buttons to select the search area you want Point o...

Страница 39: ...For information on scrolling in lists please refer to the section Scrolling through the lists on page 23 Point of interest nationwide Touch the Nationwide button Select the desired country Press the A...

Страница 40: ...from the entry menu You will find information about working with the entry menu in the Entries made with the entry menu on page 22 chapter You will find information about scrolling in lists in the Scr...

Страница 41: ...the various keys are ex plained below The Route info key In the Route info settings window you can set which additional information you would like displayed during route guidance Press Route info in t...

Страница 42: ...ane information displayed No speed or altitude information Full Info on the destination and waypoint displayed Current next road displayed Signs displayed Lane information displayed Speed and altitude...

Страница 43: ...Routing type Select one of the options by pressing the button optimum the optimal route in terms of travel time and mileage fast the fastest route in terms of travel time short the shortest route in t...

Страница 44: ...s from day to night display or vice versa The icon for the active setting is highlight ed Left icon Day display Right icon Night display Note This information can only be displayed if it is contained...

Страница 45: ...ymbol in the status display Ending the status display By pushing the button OK the status dis play is ended and the setting menu ap pears The Volume key With the Volume settings window you can set the...

Страница 46: ...for time and distance Press Format in the settings menu The Format settings menu appears Confirm your settings by hitting the OK key The Time Zone key Set the relevant time zone for your region in the...

Страница 47: ...g These buttons allow page turning in the direction shown by the ar row through the pages of the list Push the contact area of the desired lan guage The Information key Information concerning the Traf...

Страница 48: ...ft icon The function is switched on the Traffic Assist does switch off auto matically Right icon The function is switched off the Traffic Assist does not switch off automatically The Calibration key I...

Страница 49: ...e a new route to the destination Displaying TMC messages on the map Current TMC messages are displayed on the map graphically Sections of the route where there are traffic problems are high lighted bl...

Страница 50: ...ist appears You can scroll through the list using the arrow keys on the right hand edge of the screen The road number motorway A road or district roads section of road if applica ble traffic direction...

Страница 51: ...Select the key with the map icon This opens the map display Map layout The configuration depends upon the cur rent operating mode of the Traffic Assist and the settings under The Route info key on pa...

Страница 52: ...ad 9 Next driving manoeuvre If the navigation function has been acti vated the position icon will indicate your current location on the map Depending on which setting was made in option mode the posit...

Страница 53: ...not available for all roads 2 Next driving manoeuvre 3 Traffic lane recommendation only appears on some multi lane roads red arrows recommended lanes 4 Road to which the next driving ma noeuvre leads...

Страница 54: ...nd the toolbar deactivated The bar display indicates the volume Press or to increase or decrease the volume Press in order to mute the announcements Press again in order to cancel the mute function Th...

Страница 55: ...uit the menu using the button The following settings are available Option Meaning Stop guid ance You can end active route guidance by pressing this button Insert inter mediate stop If route guidance i...

Страница 56: ...he Resume button Blocking a route section In order to block route sections press the button in front of the relevant section A blocked section is marked using the button The block can be cancelled by...

Страница 57: ...oute guidance Split screen a part of the screen displays a map and the other part displays arrows Please also refer to the de scription in Map layout on page 51 and The Route info key on page 41 Orien...

Страница 58: ...t the very bottom of the list To select a POI as a stopover Press the desired POI It is set as the stopover and the Traffic Assist starts route calculation to the stopover To set a POI category You ca...

Страница 59: ...oncerning your route are shown at the top of the list Press the TMC button A list of TMC announcements opens Press the arrow buttons on the right of the screen to browse through the list The Day Night...

Страница 60: ...ee sat ellites are required and the fourth one al lows the height to be determined HDOP Horizontal Dilution Of Precision HDOP states the quality of the positional dtermination In theory values from 0...

Страница 61: ...annel Traffic announcements transmitted by most FM stations via RDS Basis for dy namic navigation USB Universal Serial Bus The Universal Serial Bus USB is a bus sytem for interconnection of a computer...

Страница 62: ...ing destinations 31 Entering address 32 F Fast route 36 43 Ferry 43 G GMT 60 GPS 60 GPS status 55 H HDOP 60 I Intended use 4 Intersecting road 35 L List of destinations 28 Lists List of destinations 2...

Страница 63: ...volume 54 Settings for navigation 31 41 Short route 36 43 Speed limit 44 Stylus 60 Switching the Traffic Assist on 20 T Time format 46 TMC 49 Display on the map 49 TMC antenna 17 Toll road 37 43 Type...

Страница 64: ...ith 24 Bit colour depth 16 7 Mio Colours Low reflection values Storage 2 GB ROM 64 MB SD RAM Micro SD Card Reader Support up to 4 GB FAT 32 formatted USB Interface USB Client 2 0 MINI USB Headphone ou...

Страница 65: ...C type approval mark E13 issued by Luxembourg s Road Traffic Registra tion Authority in accordance with European Directive ECE R10 governing the EMC of motor vehicles in its current version authorises...

Страница 66: ...roducts to communal collecting points or recycling centres for processing and salvage of materials The units will be accepted there free of charge The proper disposal of this product helps protect the...

Страница 67: ...ers to take back these batteries free of charge and to correctly recycle them or to dispose of them as hazardous waste statutory obligation to take back If you wish to return your batteries to us plea...

Страница 68: ...g screws using a small cross slot screwdriver Lever off the rear of the housing using a flat blade screwdriver levering at the slits at the side of the housing Lever off the battery bonded to the circ...

Отзывы: