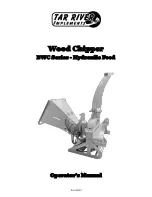
BE-WCGF4xxx USER MANUAL
11
Step 2 – Attaching the hitch arms and tralier hitch assembly
• Attach the coupler (#52 )to tow bar(#51 ), using M12×80 hex bolt(#57),flat washer 12 (#58 ),
and lock nut M12 (#59).
• Attach the tow bar (#51 ) to chassis(#1), using hex bolt M12×70(#66), flat washer 12(#58),
and lock nut M12 (#59).
• Attach the jockey wheel(#53) to tow bar (#51 ), using M10×60 hex bolt(#54) and flat washer 10 (#55)
and hex nut M10(#56).
Step 3 – Attaching the tire and tail light frame
• Attach the wheel axis(#2 ) to chassis(#1), using hex bolt M12×70(#66),flat washer 12(#58),
lock nut M12(#59 ).
• Attach the tire(#3 ) to wheel axis(#2 ), lock the hex slotted nut M24×1.5(#61 ) in place using the split pin
4 ×45(#60), install the dust cover(#4 ) on the end using rubber hammer.
• Attach the fender(#48 ) to chassis(#1 ),using hex bolt M8×20(#68 ),flat washer 8(#69),
and lock nut M8 (#70).
Содержание AgriEase BE-WCGF4 Series
Страница 23: ...BE WCGF4xxx USER MANUAL 23...