16
STEP 5:
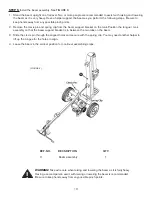
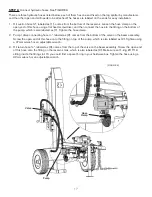
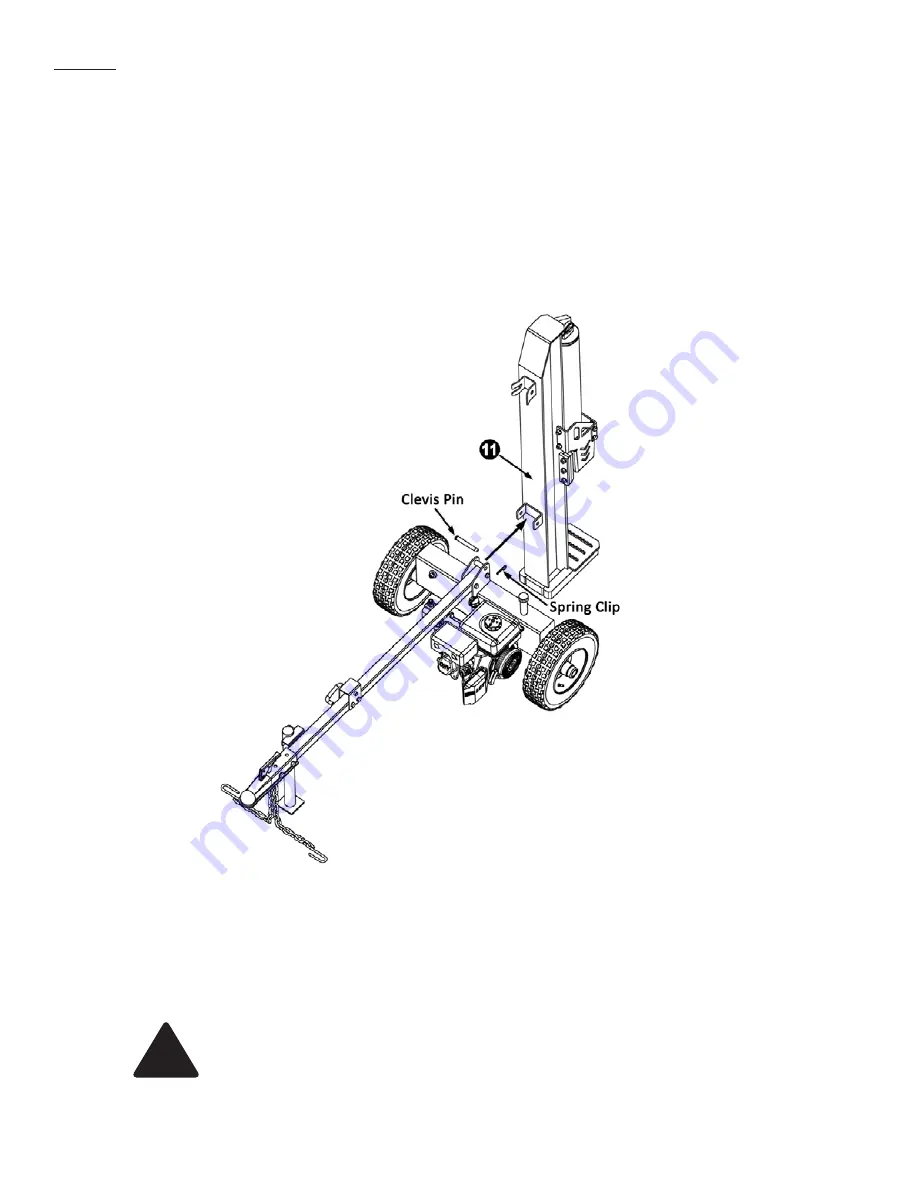
Install the beam assembly. See FIGURE 8.
1. Stand the beam upright on a flat level. Two or more people are recommended to assist with raising and lowering
the beam as it is very heavy. Have a helper support the beam as you perform the following steps. Be sure to
keep hands away from any possible pinch points.
2. Remove the clevis pin and spring clip from the beam support bracket on the tank. Position the tongue / tank
assembly so that the beam support bracket is in between the two tabs on the beam.
3. Slide the clevis pin through the aligned holes and secure with the spring clip. You may need another helper to
lift up the tongue for the holes to align.
4. Leave the beam in the vertical position for continual assembling steps.
Page 13
STEP 5:
Install the beam assembly. See FIGURE 8.
1. S
tand the beam upright on a flat level. Two or more people are recommended to assist with raising and lowering
the beam as it is very heavy. Have a helper support the beam as you perform the following steps. Be sure to keep
hands away from any possible pinch points.
2.
Remove the clevis pin and spring clip from the beam support bracket on the tank. Position the tongue / tank
assembly so that the beam support bracket is in between the two tabs on the beam.
3.
Slide the clevis pin through the aligned holes and secure with the spring clip. You may need another helper to lift
up the tongue for the holes to align.
4. Leave the beam in the vertical position for continual assembling steps.
REF. NO.
DECSRIPTION
QTY.
11
Beam assembly
1
WARNING!
Take extra care when raising and lowering the beam as it is fairly heavy. Having a
second person assist with raising or lowering the beam is recommended. Be sure to keep hands
away from any possible pinch points.
(FIGURE 8)
Page 16
WARNING!
Take extra care when raising and lowering the beam as it is fairly heavy.
Having a second person assist with raising or lowering the beam is recommended.
Be sure to keep hands away from any possible pinch points.
!
Содержание Agri Ease BE-25TLE65GX
Страница 34: ...31 EXPLODED DIAGRAM PARTS LIST Page 28 EXPLODED DIAGRAM PARTS LIST Page 31...
Страница 39: ......


