2701
4
GB
3.
INSTALLATION
3.1 BOILER FIXING
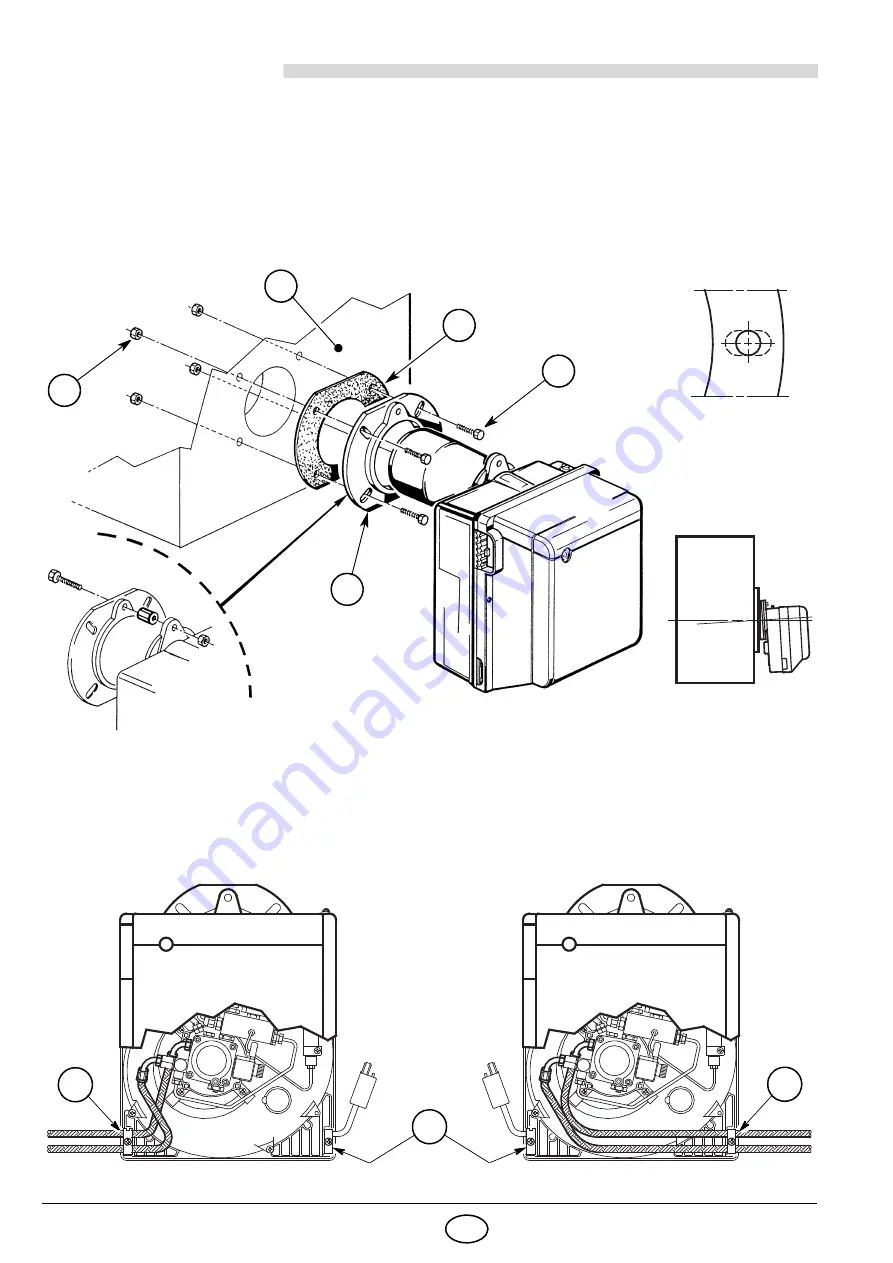
Put on the flange (1) the screw and two nuts, (see fig. 3).
Widen, if necessary, the insulating gasket holes (4), (see fig. 4).
Fix the flange (1) to the boiler door (3) using screws (5) and
(if necessary)
the nuts (2)
interposing the
insulating gasket (4)
, (see fig. 2).
After installation ensure that burner is lightly inclined as in fig. 5.
3.2 FUEL SUPPLY
The burner is designed to allow entry of the oil supply pipes on either side.
Depending on the oil supply pipes position (to the right or to the left hand side of the burner) the fixing plate
(1) and cable clamp (2) should be reversed, (see fig. 6).
Fig. 5
D5012
Fig. 4
D5025
Fig. 2
Fig. 3
S7112
4
3
2
1
5
D5392
1
1
Fig. 6
2
Содержание CRONO 10-L2
Страница 16: ......
Страница 30: ......
Страница 44: ...R 6911 10 1212 CE Baxi Calefacción S L U 2012 ...


