background image

Baxi UK Limited declare that no substances
harmful to health are contained in the appliance
or used during appliance manufacture.

NOTE:

This appliance must be installed in

accordance with the manufacturer’s instructions
and the regulations in force, and only used in a
suitably ventilated location.

All systems must be thoroughly flushed and
treated with inhibitor (see Section 6.2).

Read the instructions fully before installing or
using the appliance.

1.1

Description

1. The Baxi 100 HE is a gas fired room sealed fan
assisted condensing central heating boiler.

2. The maximum output of the boiler is preset at
75,000 Btu/hr. The boiler will automatically adjust
down to 30,000 Btu/hr according to the system
load. If required, the output can be set to 100,000
Btu/hr. Please refer to section 8.8.

3. It is designed for use on Natural Gas (G20).

4. The boiler is suitable for fully pumped open
vented central heating and domestic hot water
systems and sealed systems.

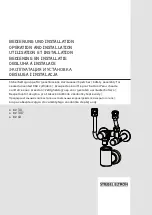
5. A label giving details of the model, serial number
and Gas Council number is situated on the rear of
the lower door panel (Fig. 1).

6. The boiler data badge is positioned on the air
box door (Fig. 2).

7. The boiler is intended to be installed in
residential / commercial / light industrial E.M.C.
environments on a governed meter supply only.

8. The boiler must be installed with one of the
purpose designed flues such as the standard
horizontal flue kit, part n

o

236921.

1.2

Important Information

This product contains Refractory Ceramic Fibres
(R.C.F.) which are man-made vitreous silicate fibres.
Excessive exposure to these materials may cause
temporary irritation to eyes, skin and respiratory tract.
Care must be taken when handling these articles to
ensure the release of dust or fibres is kept to a
minimum.
To ensure that the release of fibres from these articles
is kept to a minimum, during installation and servicing
it is recommended that a H.E.P.A. filtered vacuum is
used to remove any dust, soot or other debris
accumulated in and around the appliance. This should
be performed before and after working on the
installation.
It is recommended that any replaced item(s) are not
broken up but sealed within heavy duty polythene
bags and clearly labelled “R.C.F. waste”. This is not
classified as “hazardous waste” and may be disposed
of at a tipping site licensed for the disposal of
industrial waste.
Protective clothing is not required when handling
these articles but it is recommended that gloves are
worn and the normal hygiene rules of not smoking,
eating or drinking in the work area are followed and
always wash hands before eating or drinking.

1.0 Introduction

4

Fig. 1

HIG

H

LO

W

HIG

H

LO

W

Data Badge

Air Box Door

Lower Door Panel

Position of Label

Fig. 2

“Benchmark” Log Book

As part of the industry-wide “Benchmark” initiative all Baxi boilers now

include an Installation, Commissioning and Service Record Log Book.

Please read the Log Book carefully and complete all sections relevant to

the appliance and installation. These include sections on the type of

controls employed, flushing the system, burner operating pressure etc.

The details of the Log Book will be required in the event of any warranty

work. Also, there is a section to be completed at each subsequent regular

sevice visit.

Содержание 100 He

Страница 1: ...Baxi 100 HE Wall Mounted Powered Flue Condensing Boiler Gas Fired Central Heating Unit Installation and Servicing Instructions Please leave these instructions with the user...

Страница 2: ...buy Everyone who works at Baxi has a commitment to quality because we know that satisfied customers mean continued success We hope you get a satisfactory service from Baxi If not please let us know N...

Страница 3: ...ensions and Fixings 8 6 0 System Details 9 7 0 Site Requirements 12 8 0 Installation 17 9 0 Electrical 23 10 0 Commissioning the Boiler 25 11 0 Fitting the Outer Case 26 12 0 Servicing the Boiler 27 1...

Страница 4: ...eous silicate fibres Excessive exposure to these materials may cause temporary irritation to eyes skin and respiratory tract Care must be taken when handling these articles to ensure the release of du...

Страница 5: ...istor Red 18 Flow Switch dry fire protection HIGH LO W 1 2 3 4 5 6 7 9 8 10 11 12 13 17 16 14 15 18 Fig 4 Fig 3 Fig 5 2 2 Optional Extras KIT PART No FLUE EXTENSION KITS 110 70 Flue Extension 0 25M 24...

Страница 6: ...been made the ignition lockout occurs 5 Burner On The pump fan and gas valve are on while the spark generator is off Flow temperature is controlled by varying the fan speed and thereby the gas rate t...

Страница 7: ...5 mbar see Section 10 1 Injector Natural Gas 6 3mm Diameter Clearances For unventilated compartments see Section 7 5 Both Sides 5mm Min Above Casing 200mm Min Below Casing 50mm Min Front For Servicing...

Страница 8: ...the flue elbow should be 55mm to incorporate the 3 1 in 20 fall in the flue from the terminal to the elbow The 3 1 in 20 fall provided by the elbow is to allow condensate to run back to the boiler for...

Страница 9: ...e the likelihood of these deposits damaging new components When fitting new systems flux will be evident within the system which can lead to damage of system components All systems must be thoroughly...

Страница 10: ...r control of the boiler thermostat TRV s only does not produce the best results 6 5 Low Head Installation 1 Using a close couple arrangement the minimum head is as shown in the diagrams Figs 8 9 subje...

Страница 11: ...awn to Paragraph 24 of Schedule 2 Section 8 of the publication Water Regulations Guide which gives recommendations and guidance on approved methods for filling sealed systems The sealed primary circui...

Страница 12: ...xpress written permission of Baxi UK Limited could invalidate the appliance warranty and infringe the GAS SAFETY Installation and Use REGULATIONS 7 3 Clearances Figs 12 13 1 A flat vertical area is re...

Страница 13: ...ted to the appliance gas service cock This should extend for at least 3 meters back towards the gas meter Do not use pipes of a smaller diameter than the boiler gas connection 7 7 Electrical Supply 1...

Страница 14: ...external paint 8 If a terminal is less than 2 metres 783 4 in above a balcony above ground or above a flat roof to which people have access then a suitable terminal guard must be provided Fig 17 Fig...

Страница 15: ...practice dictate the use of terminal guards they can be obtained from most Plumbers and Builders Merchants 2 When ordering a terminal guard quote the appliance model number 3 The flue terminal guard s...

Страница 16: ...42886 Clamp 80mm 238684 7 13 Flue options Concentric The maximum equivalent lengths are 4m horizontal or vertical There lengths exclude the standard elbow and flue terminal assembly horizontal and ter...

Страница 17: ...flue minimum diameter 125mm see table for wall thicknesses and flue diameters 6 Drill and plug the wall as previously marked Secure the wall plate using the centre hole 7 Ensuring the wall plate is l...

Страница 18: ...r carton 2 Remove the internal packaging 3 Lift the outercase upwards and remove Fig 23 Baxi UK Limited declare that no substances harmful to health are contained in the appliance or used during appli...

Страница 19: ...compression nut and olive are provided in the kit for the return connection NOTE Drain cocks should be fitted to all system s low points and vents to all high points 4 Ensure that any pipework is rout...

Страница 20: ...from the terminal end as indicated in the diagram Fig 27 Check your dimensions The flue tubes are fixed together Cut through both tubes whilst resting the flue on the semi circular packing pieces Debu...

Страница 21: ...etween the wall and air duct outside the building ensuring the 3 drop between the terminal and elbow 12 The flue trim should be fitted once the installation is complete and the flue secure Fig 30 Appl...

Страница 22: ...in conjunction with a Thermal Store the boiler can be adjusted as follows a Draw the control PCB forwards out of the electrical box the control PCB is the right hand board b Remove jumper No 2 c Repla...

Страница 23: ...Orange Spark Electrode Ignition PCB Control PCB Condensate Trap Sensing Electrode Gas Valve Mains Input Optional Pump Feed Transformer Safety Stat Fan Protection Stat Thermistor Dry Fire Flow Switch...

Страница 24: ...Condensate Trap Sensing Electrode bk bk w w br r b br b br br br bk bk bk b w b y r v g o bk bk b bk r r b bk g y g y g y Flow Switch Fan Control PCB Interface PCB Mains Input Transformer Safety Ther...

Страница 25: ...ON position and check for gas soundness up to the gas valve Fig 34 6 Turn the boiler control knob fully clockwise to HIGH Fig 35 and run the system and check the boiler for correct operation NOTE The...

Страница 26: ...er controls Hand over the User s Operating Installation and Servicing Instructions and the Log Book giving advice on the necessity of regular servicing 7 Advise the user that they may observe a plume...

Страница 27: ...lower door panel see Fitting the Outercase Section 11 0 6 Release the four 1 4 turn screws securing the air box door panel and remove the door Fig 40 7 Disconnect the leads from the centre and right h...

Страница 28: ...gile handle with care Clean and if necessary replace the burner Fig 44 see note above h Loosen the two screws retaining the heat exchanger support bracket and slide to the left to remove Fig 44 i Remo...

Страница 29: ...e of the boiler Fig 45 to enable the heat exchanger to be drained 4 Place a tube on the drain point to drain water away from electrics Turn anticlockwise to open Fig 45 NOTE When reassembling always f...

Страница 30: ...h 2 3 2 Disconnect pipework loosen elbow locking nut and undo screws on support bracket 3 Remove the clip securing the flow pipe to the flowswitch 4 Remove the two screws securing the flow switch to t...

Страница 31: ...d side and disconnect the electrical connections noting their positions 2 Fit the new ignition board and reassemble in reverse order 13 7 Transformer Fig 54 1 After the removal of the control and igni...

Страница 32: ...e in reverse order NOTE The spark electrode sleeve should always cover the joint in the electrode lead to prevent tracking 13 9 Fan Fig 57 1 Loosen the screw holding the injector pipe into the venturi...

Страница 33: ...gas valve 6 Remove the gas valve from the airbox side 7 Remove the nut union aluminium spacer and its gasket from the gas valve 8 Fit the nut union aluminium spacer and its gasket to the new valve 9 F...

Страница 34: ...ase of the airbox 3 Undo the screws on the support bracket Remove the screws securing the flow switch and return connections and remove the connections Fig 64 4 Remove the electrical connections from...

Страница 35: ...e lower insulation pad 6 Fit the new insulation pad and reassemble in reverse order 13 16 Heat Exchanger Upper Insulation Pad Fig 65 1 Remove all components in the base of the airbox 2 Remove the burn...

Страница 36: ...ection of the fault finding instructions YES NO YES NO YES Lockout LED flashing once every 4 seconds Go to THERMISTOR OPEN CIRCUIT section of the fault finding instructions YES NO NO YES NO YES NO YES...

Страница 37: ...rol PCB Replace transformer Check for short circuits on control PCB and fan If OK replace fuse Rectify wiring Replace control PCB Replace interface PCB YES NO Is there 24 V at control PCB transformer...

Страница 38: ...NO NO YES YES YES Mains LED Flashing Spark Electrode Ignition PCB Control PCB Condensate Trap Sensing Electrode Gas Valve Mains Input Optional Pump Feed Transformer Safety Stat Fan Protection Stat Th...

Страница 39: ...h blocked Dry fire Lockout NO NO NO YES YES YES Spark Electrode Ignition PCB Control PCB Condensate Trap Sensing Electrode Gas Valve Mains Input Optional Pump Feed Transformer Safety Stat Fan Protecti...

Страница 40: ...Safety thermostat open circuit measured at safety thermostat NO YES YES NO NO NO YES YES NO Safety Lockout Open circuit across thermistor connections Open circuit across thermistor connections on cont...

Страница 41: ...circuit when on and open circuit when off J Replace control PCB YES YES YES NO NO NO NO No Lockout Reset No Fan YES YES NO NO Is flow temperature thermistor between 0 5k and 20k measured at flow temp...

Страница 42: ...as check at meter Is there 230V at control PCB connection to ignition PCB M Is there gas but no spark Is spark probe damaged Replace spark probe Is there spark but no gas Is there 230V at ignition PCB...

Страница 43: ...230Vdc at the end of the gas valve lead Replace gas valve lead Replace gas valve Replace control PCB Is there 230V ignition PCB burner on pin to control PCB P Replace ignition PCB Burner On wiring fro...

Страница 44: ...at Black 242235 8 E06 064 Control PCB 5106789 9 E06 065 Ignition PCB 241838 10 E06 066 Transformer 240236 21 E06 074 Fan 242472 23 E06 075 Gas Valve 242473 28 E06 079 Interface PCB 241839 38 E06 085 V...

Страница 45: ...16 0 Notes 45...

Страница 46: ...16 0 Notes 46...

Страница 47: ...the domestic heating market Gas Central Heating Boilers Wall Floor and Fireside models Independent Gas Fires Renewal Firefronts Gas Wall Heaters Solid Fuel Fires If you require information on any of...

Страница 48: ...Baxi UK Limited Brownedge Road Bamber Bridge Preston Lancashire PR5 6SN www baxi com After Sales Service 08706 096 096 Technical Enquiries 08706 049 049 Comp No 5106739 Iss 4 9 02...

Отзывы: