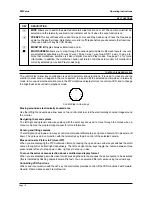
background image

Page 11

Operating Instructions

ZMX plus

MODES OF OPERATION

Your multiplexer has several modes of operation, Live, Record and Play.

Record mode 

Record mode provides a multiplexed output to the VCR. Single images from up to 10 or 16 video inputs are

assembled to form a continuous video signal which is then recorded onto the VCR - see figure 2.

Live mode 

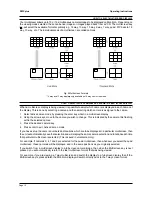
This mode displays digital live camera images on Monitor A. Several multiscreen display formats can be selected

- see figure 5.

Play mode 

This mode enables a previously recorded multiplexed tape to be played back.

HOW TO SELECT A CAMERA

Select a camera by pressing the corresponding camera key (1 to 10 or 1 to 16). This will display the selected

camera full-screen. Selecting a camera will stop a sequence that is running or change a multiscreen display

back to a full screen display.

HOW TO SELECT PLAY MODE

This mode enables a previously recorded multiplexed tape to be played back. Your VCR must be playing in order

for you to view prerecorded data. Start your VCR manually or if using a VCR connected via RS232, by using the

VCR Play macro (ALT 

 and Play 

). When Play mode is entered by pressing the Play key, the multiplexer

will automatically revert to the multiscreen format that was last selected for playback. Playback may be viewed

in full screen or multiscreen formats - see figure 5. Your multiplexer automatically reconstructs, for each camera,

its identification number, its status, and the date and time which was current at the time of recording.
Your multiplexer can decode several VCR formats. The default format decodes recordings from Baxall ZMX+

multiplexers. Other modes can decode ZMX, DM compatible recordings and Sensormatic ROBOT recordings.

When Play mode is entered, an on-screen flag is displayed for about three seconds showing the playback

format selected.

HOW TO SELECT LIVE MODE

This mode displays digital live camera images on Monitor A. Several multiscreen display formats can be selected

using the multiscreen key - see figure 5. Live mode is selected by pressing the Live key 

. Note that recordings

cannot be made whilst in Live mode on a Simplex unit.

HOW TO SELECT RECORD MODE

Simplex Record mode is selected by pressing the Record key 

. Your multiplexer will automatically select

Record mode during power up. In Record mode, cameras will be multiplexed to the VCR as previously explained

and Monitor A will display full-screen, live, analogue pictures. The following functions are not available in Simplex

Record mode: multiscreen displays, digital picture freeze, digital zoom, active cameos and the ability to change

the colour and position of on-screen titles.
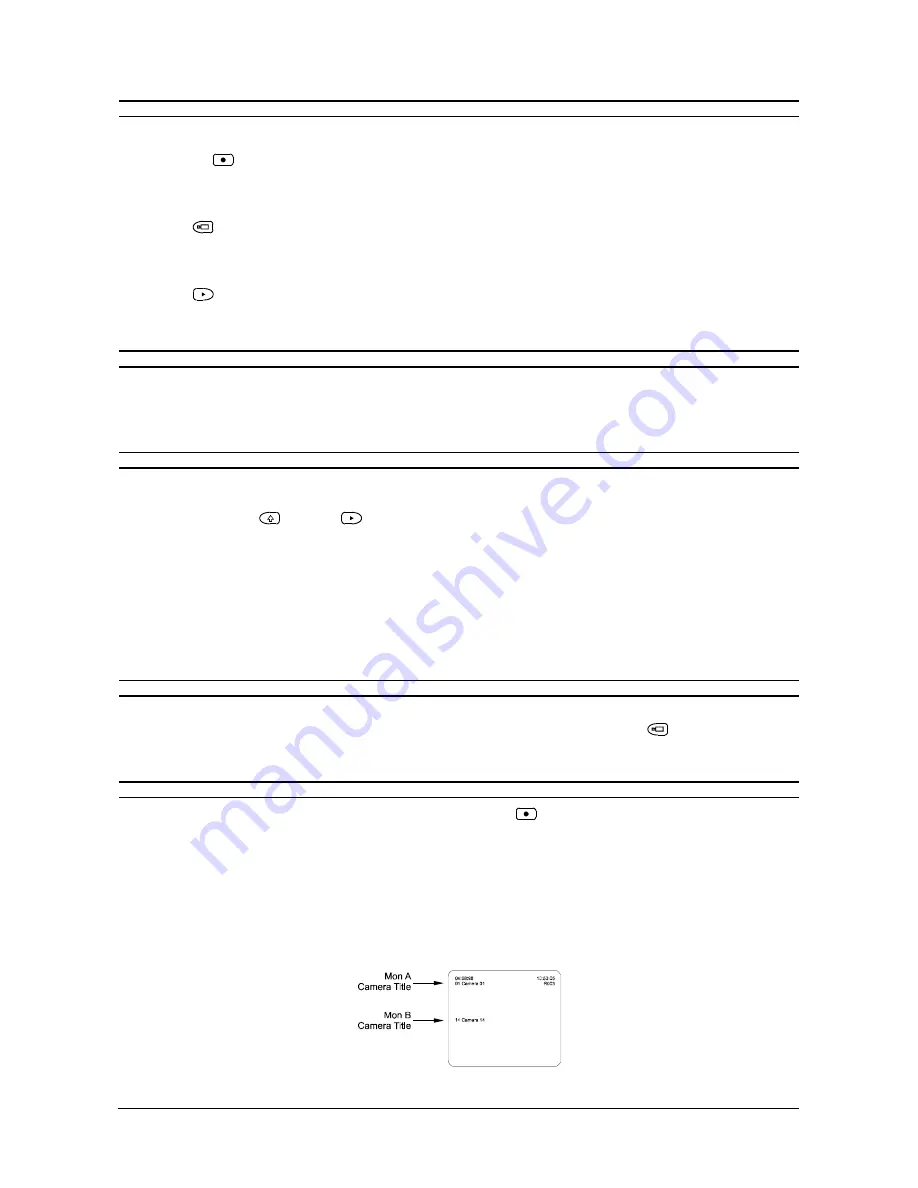
Monitor B is independent from Monitor A in Simplex Record mode but its camera titles will be shown on Monitor

A (see fig. 4). Note that if the menu system is entered whilst in Record mode, recording will stop until the menu

system is exited. An on-screen warning will appear if the menu system is entered during Record mode.

Fig 4. Monitor A display during Record mode

Содержание zmx plus

Страница 1: ...Please read this manual before operating your multiplexer...

Страница 2: ...Operating Instructions IMPORTANT The first few pages of these instructions contain important information on safety and product conformity Please read and ensure that you understand this information be...

Страница 3: ...which monitors 18 How to change the size and position of a Picture In Picture PIP Display 19 TELEMETRY FUNCTIONS How to select telemetry functions 13 How to select a Telemetry Preset 14 Recording a Te...

Страница 4: ...g a third grounding pin This plug will only fit into a grounding type power outlet This is a safety feature If you are unable to insert the plug into the outlet contact your electrician Do not defeat...

Страница 5: ...urer Dispose of unused batteries according to the manufacturer s instructions Do NOT use the 12V power leads in the RS 485 cable UNLESS it is to be used on a one to one connection between a unit with...

Страница 6: ...ated on the monitor and an LED located on the front panel of your multiplexer can be made to flash and an audible warning sounded Depending on the way in which your system has been programmed you may...

Страница 7: ...e below gives examples of how many fields can be recorded on a three hour tape per camera in various time lapse modes Time Lapse mode Fields per second Fields per second Fields per second with 1 camer...

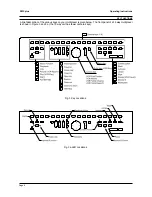
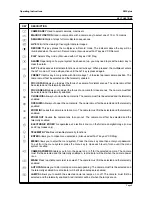
Страница 8: ...s KEY FUNCTIONS A brief description of the various keys on your multiplexer is given below The front panel of a 16 way multiplexer is shown in Figure 3 and 3a the 10 way unit has fewer camera keys Fig...

Страница 9: ...he camera iris The camera must first be selected and the telemetry enabled OPEN IRIS Allows you to open the camera iris The camera must first be selected and the telemetry enabled ZOOM IN Causes the c...

Страница 10: ...ontrol a VCR and to change the brightness and contrast in playback mode Control disk Arrow keys Moving around an electronically zoomed area Use the left right and up down arrow keys on the control dis...

Страница 11: ...a its identification number its status and the date and time which was current at the time of recording Your multiplexer can decode several VCR formats The default format decodes recordings from Baxal...

Страница 12: ...ing the arrow keys move to the cameo you wish to change This is indicated by the camera title flashing within the selected cameo 3 Press the desired camera key 4 Press enter to exit Active Cameo mode...

Страница 13: ...screen indication of which particular cameo will be affected by the next front panel keystroke Active cameos are used mainly to give you a simple way of specifying which camera is to be displayed in w...

Страница 14: ...hand cameo of the display The image from each camera will be shown for a period determined by the multiscreen dwell time setting accessed through the menu system The camera sequence is not programmabl...

Страница 15: ...Park for a camera 1 Select the camera by pressing its camera key 2 Press the Telemetry key 3 Press the Preset key 4 Press the enter key Notes 1 The key combination above has a toggle action and can b...

Страница 16: ...room and another camera covering the entrance to the room However you can initiate or force any of the alarms associated with a camera by pressing and holding the alarm cancel acknowledge key followe...

Страница 17: ...display 1 Enter active cameo mode by pressing the enter key 2 Use the arrow keys to move to the desired cameo 3 Press the zoom key once to change the screen to a full screen display of the selected ca...

Страница 18: ...t Arrow Frame Advance Up Arrow Frame Reverse Down Arrow HOW TO SELECT VCR VIEW You can view the VCR output signal in order to check its output or settings This is achieved by selecting the VCR output...

Страница 19: ...mode tells you the speed at which the tape was recorded It does not indicate the speed at which the tape is being played back To find out the playback speed you must look at the VCR s playback speed i...

Страница 20: ...mera However if sequencing was active on Monitor B before the alarm then Monitor B will continue to sequence after the alarm is cleared Alarm Displays In Play Mode Regardless of the mode selected Moni...

Страница 21: ...ted by VDL in a full screen display or V in the relevant cameo of a multiscreen display Video loss Action In digital Live Mode Monitor A If the camera is being displayed at the time that video loss oc...

Страница 22: ...Page 22 ZMX plus Operating Instructions...

Страница 23: ...Page 23 Operating Instructions ZMX plus...

Страница 24: ...ury Park Industrial Estate Stockport SK6 2SU England Tel 0161 406 6611 Fax 0161 406 7677 Visit our Web site http www baxall com Baxall Limited reserve the right to make changes to the product and spec...

Отзывы: