background image

Here


it


is,


your


Kastle


is


finally


completely


alive!


Congratulations! 


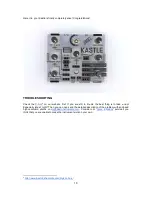
TROUBLESHOOTING 


Check the

F.A.Q.

on our website first. If you are still in trouble the best thing is to take a nap!


2

Especially late at night! Then you can can send the detailed description of the problem with enclosed


high-resolution photos on

[email protected]

. Consider our “

Come to Daddy

” service if you


think


that


you


are


unable


to


make


the


instrument


work


on


your


own.


2


​​

http://www.bastl-instruments.com/diy-kits-f-a-q/


16 

Содержание KASTLE v1.3

Страница 1: ...nents before starting this kit However if you have never soldered before check out some of tutorials here or here We also included some of the best quality solder to help you solder everything faster...

Страница 2: ...1 SPDT TOGGLE SWITCH 2PP 6 1x2pin female pinheader 8 1x3pin female pinheader 2 8 pin DIL DIL socket in foam 1 attiny 85 pre programmed VCO IC in foam 1 attiny 85 pre programmed LFO IC in foam 1 Kastle...

Страница 3: ...stors There are just two values of them 1k 11x and 100k 9x Before you will start soldering check the values by using a multimeter or you can check the color 1 codes the 100k s have the orange stripe T...

Страница 4: ...4...

Страница 5: ...5...

Страница 6: ...Add the 3 5mm jack connectors 2x 6...

Страница 7: ...ust be aware of the right direction of sockets there is a notch on the sockets that has to match with the ring on the PCB Add the ceramic capacitors now There are just four of them of the same value 4...

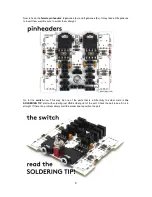
Страница 8: ...ll Be sure to solder them straight Go for the switch now This may be one of the parts that is a little tricky to solder Here is the SOLDERING TIP start with soldering just ONE solder point of the part...

Страница 9: ...the same way as with the switch install potentiometers in straight solder just one leg check the position and solder the rest if there is no problem Solder the green LED be sure to insert the longer...

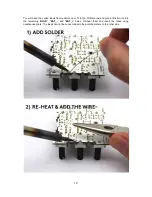
Страница 10: ...esistors now Turn the PCB around and give a little bit iron into the remaining HOLD BAT_ and BAT_ holes Re heat them and insert the leads using needlenose pliers The leads can not be connected with th...

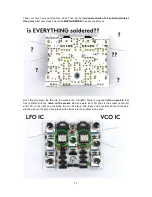
Страница 11: ...t forget to place the ICs into the sockets 2x Attiny85 There is a signed notch on each IC that has to match with the notch on the socket Be also aware that LFO goes to the socket on the left and VCO t...

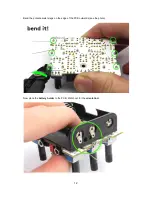
Страница 12: ...Bend the potentiometers legs on the edge of the PCB outwards see the photo Now place the battery holder to the PCB Watch out for the orientation 12...

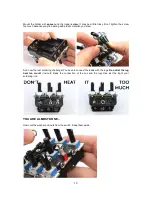
Страница 13: ...aling with plastic material you know And now the last soldering challenge You have to connect the leads with the lugs Do not let the lug heat too much it would break the connection of the coil and the...

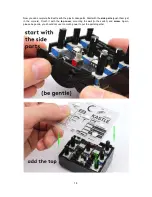
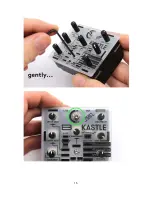
Страница 14: ...the plastic case parts Start with the side parts push them just in the corners Finish it with the top cover mounting the nut to the switch and screw Again please be gentle you should not use too much...

Страница 15: ...15...
Страница 16: ...the best thing is to take a nap 2 Especially late at night Then you can can send the detailed description of the problem with enclosed high resolution photos on diy bastl instruments com Consider our...

Отзывы: