-39-
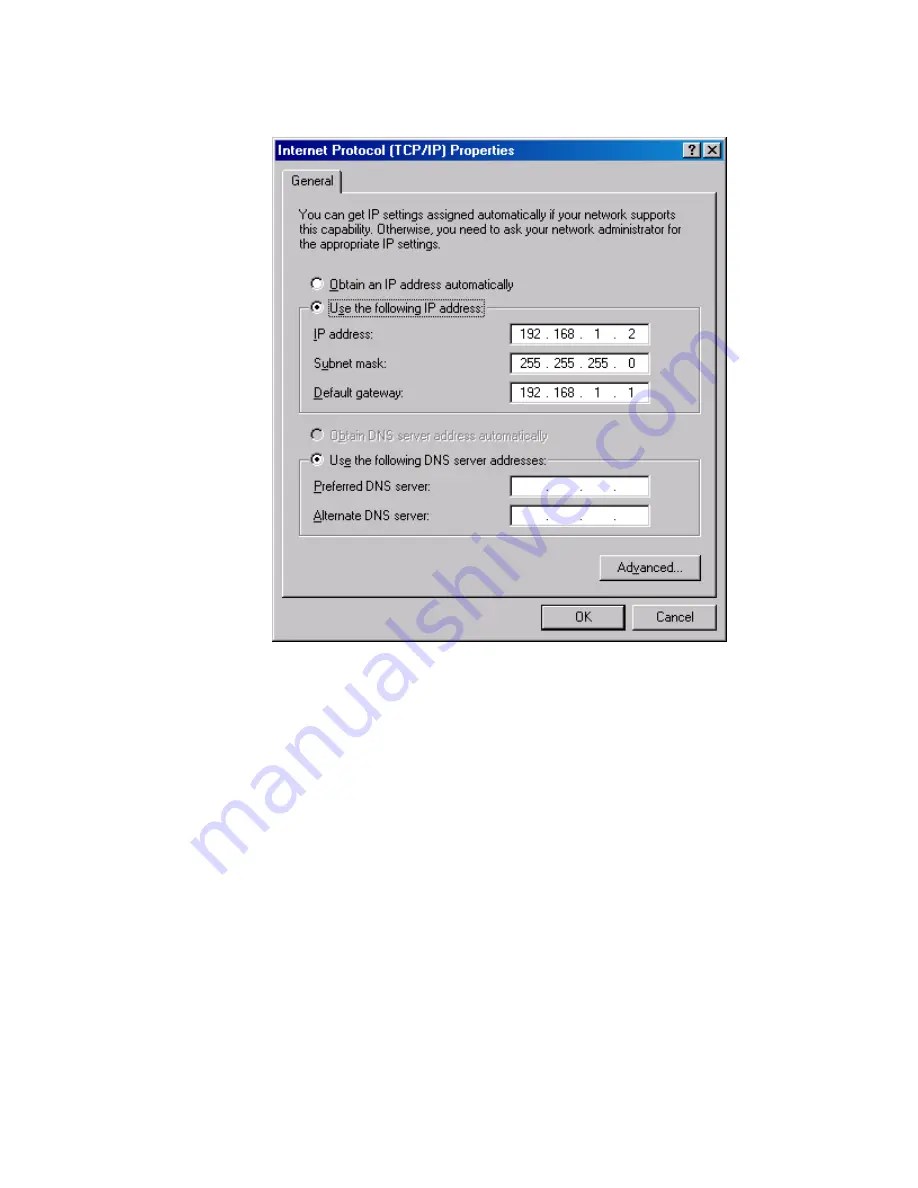
Figure A-5:
e.
Click on the radio button ‘Use the following IP address’ and then set the IP
address using the following rules:
i.
The first 3 numbers of both the IP address and the Default Gateway must
agree with the first three numbers of the Mux’s address (Default Address
= 192.168.1.80).
ii.
The last number of the IP address must not be the last number of the
Industrial Mux (e.g. if the Default Address is used, this would be ‘80’).
iii.
The last number of the Default Gateway must be 1.
iv.
The Subnet Mast must be 255.255.255.0 as shown above.
f.
Click OK on all the dialog boxes that are up. Eventually, the Network
Connections dialog (shown in Figure 2) will report that the Status is
‘Connected’
.
3.
Configure the Mux using Windows HyperTerminal
a.
Launch Windows HyperTerminal. You should be able to access it using the path
shown in Figure A-6.
Содержание EXACTUS
Страница 2: ...This page blank ...
Страница 23: ... 19 Figure 12 All Probes display Figure 13 Analog Output Setup Window ...
Страница 37: ... 33 Figure 14 Lens Collection Optics Pyrometer ...
Страница 38: ... 34 Figure 15 Probe with Lightpipe ...


