10.1 Programming the master code (programming code)
You need the master code (previously factory code) to access the programming mode. You
always have to enter this code once you have quit the programming mode to e.g. establish new
ID cards or user codes or make other modifications to the individual settings.
The user numbers / user ID cards / user codes may not be assigned twice. The
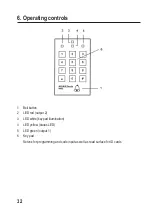
system does not accept double assignments and the following display appears: yellow
LED (4) blinks 5 x and the buzzer sounds 5 x.
If previously saved data is deleted, a new user can be saved using the old number.
In case of a wrong entry, press the button “#” or wait 10 seconds to make the new
entry!
If no other button is pressed within the next 10 seconds, the code lock
automatically returns to standby mode. Therefore, make all the following entries
as fast as possible.
• Press the “asterisk” button “ ” on the keypad (6). Now enter the factory code 1234 and
confirm this with the “number” key “#”. The yellow (4) and the green (5) LED light up and you
are in programming mode.
• Now press the key “0” on the keypad (6) and enter a new programming code (master code, at
least 4 digits, at most 8 digits). Then confirm the programming of the code with the “number”
key “#” on the keypad (6).
For security reasons, you should not pass this master code on to third parties, as this
serves as authorisation for programming and deleting the ID cards and user codes.
Input: “ ”--- “1” --- “2” --- “3” --- “4” --- “#” --- “0” ---“master code” --- “#”
10.2 Saving ID cards and user codes (output 1)
Please note that the following chapters only refer to saving ID cards and user codes for output 1!
Before saving ID Cards or User Codes, you first must assign a 4-digit User Number for the ID
Cards or User Codes (password).
Successful operation: yellow LED (4) blinks 2 x and the buzzer sounds 2 x as well
Saving ID cards
• On the keypad (6) press the key “1” and now enter a 4-digit User Number of your choice. Then
teach in the user ID card and press the “number” key “#” on the keypad (6).
37
Содержание 1892978
Страница 22: ...18 Anschlusspl ne 22...
Страница 23: ...23...
Страница 25: ...19 Tabelle f r Benutzer Nummer und Benutzer Code Name Benutzer Nummer Benutzer Code 25...
Страница 26: ...20 Tabelle f r Benutzer Nummer und ID Karte Name Benutzer Nummer Benutzer ID Karte 26...
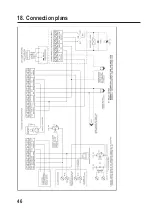
Страница 46: ...18 Connection plans 46...
Страница 47: ...47...
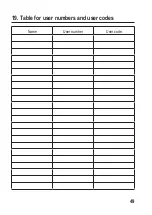
Страница 49: ...19 Table for user numbers and user codes Name User number User code 49...
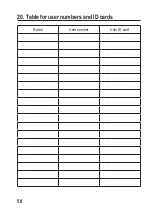
Страница 50: ...20 Table for user numbers and ID cards Name User number User ID card 50...
Страница 71: ...18 Sch mas lectriques 71...
Страница 72: ...72...
Страница 74: ...19 Tableau pour num ro et code utilisateur Nom Num ro utilisateur Code utilisateur 74...
Страница 75: ...20 Tableau pour num ro utilisateur et carte ID Nom Num ro utilisateur Carte ID utilisateur 75...
Страница 96: ...18 Aansluitschema 96...
Страница 97: ...97...
Страница 99: ...19 Tabelvoorgebruikernummersengebruikercodes Naam Gebruikernummer Gebruikercode 99...
Страница 100: ...20 Tabel voor gebruikernummers en ID kaarten Naam Gebruikernummer Gebruiker ID kaart 100...
Страница 101: ......
Страница 102: ......
Страница 103: ......


