


5. Configurator
Physical connection
Before a serial connection can be made, connect a serial cable from PC to the RS232IN connector of the
projector.
RS232
An Electronic Industries Association (EIA) serial digital interface standard specifying the char-
acteristics of the communication path between two devices using either D-SUB 9 pins or D-SUB
25 pins connectors. This standard is used for relatively short-range communications and does
not specify balanced control lines. RS-232 is a serial control standard with a set number of
conductors, data rate, word length and type of connector to be used. The standard speci
fi
es
component connection standards with regard to computer interface. It is also called RS-232-C,
which is the third version of the RS-232 standard, and is functionally identical to the CCITT V.24
standard. Logical ’0’ is > + 3V, Logical ’1’ is < - 3V. The range between -3V and +3V is the tran-
sition zone.
Necessary parts
Straight serial cable
Software connection
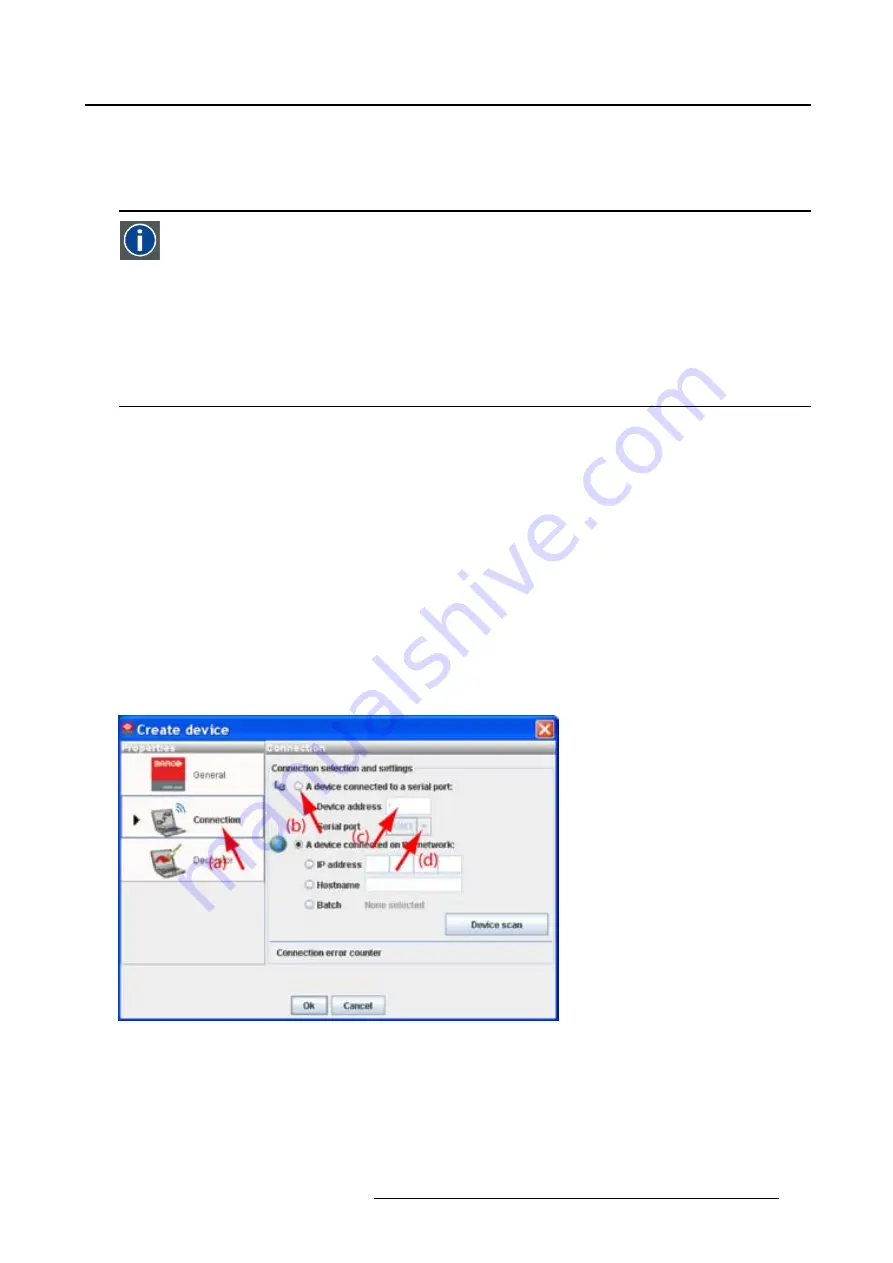
1. Select the
Connection
properties tab (a). (image 5-6)
The right pane changes to the connection setup page.
2. Click on the radio button next to
A projector connected to a serial port
to select the serial connection (b).
3. Click in the
Projector address
input
fi
eld and enter the projector address (c). (Not for RLMW projectors)
This address must be between 0 and 255.
4. Select the serial port of your PC connected with the projector. Click on the drop down box and select
the corresponding port (d).
5. Click
OK
to make the connection.
Image 5-6
Set up a serial connection
Scan projector
If the projector address and the communication port are not known, click on
Device scan
to get an
overview of the serial connected projectors (a).
R59770513 RLM W-SERIES 28/07/2010
49
Содержание RLM W Series
Страница 1: ...RLM W series Reference manual R59770513 01 28 07 2010 ...
Страница 4: ......
Страница 8: ...Table of contents 4 R59770513 RLM W SERIES 28 07 2010 ...
Страница 36: ...3 Menus Image 3 15 Clear short cut on snapshot 32 R59770513 RLM W SERIES 28 07 2010 ...
Страница 46: ...4 Preferences Image 4 13 Selecting a workspace 42 R59770513 RLM W SERIES 28 07 2010 ...
Страница 67: ...5 Configurator Image 5 21 Multi selection of projectors R59770513 RLM W SERIES 28 07 2010 63 ...
Страница 68: ...5 Configurator 64 R59770513 RLM W SERIES 28 07 2010 ...
Страница 77: ...6 General projector settings Image 6 8 Restore factory defaults R59770513 RLM W SERIES 28 07 2010 73 ...
Страница 78: ...6 General projector settings 74 R59770513 RLM W SERIES 28 07 2010 ...
Страница 97: ...8 Adjustments Image 8 15 Input balance R59770513 RLM W SERIES 28 07 2010 93 ...
Страница 98: ...8 Adjustments 94 R59770513 RLM W SERIES 28 07 2010 ...
Страница 104: ...10 Installation 100 R59770513 RLM W SERIES 28 07 2010 ...
Страница 106: ...11 Communication 102 R59770513 RLM W SERIES 28 07 2010 ...
Страница 111: ...12 Warping Image 12 5 Normal warping rotation R59770513 RLM W SERIES 28 07 2010 107 ...
Страница 146: ...12 Warping Image 12 56 Color value via HSB Image 12 57 Color value via RGB 142 R59770513 RLM W SERIES 28 07 2010 ...
Страница 150: ...Index 146 R59770513 RLM W SERIES 28 07 2010 ...


