13. Display Setup
3. Press
↓
to pull down the
Display setup
menu.
4. Use
↑
or
↓
to select
ScenergiX
.
5. Press
→
to select the
ScenergiX
item.
6. Use
↑
or
↓
to select
Border
.
7. Press
ENTER
to select.
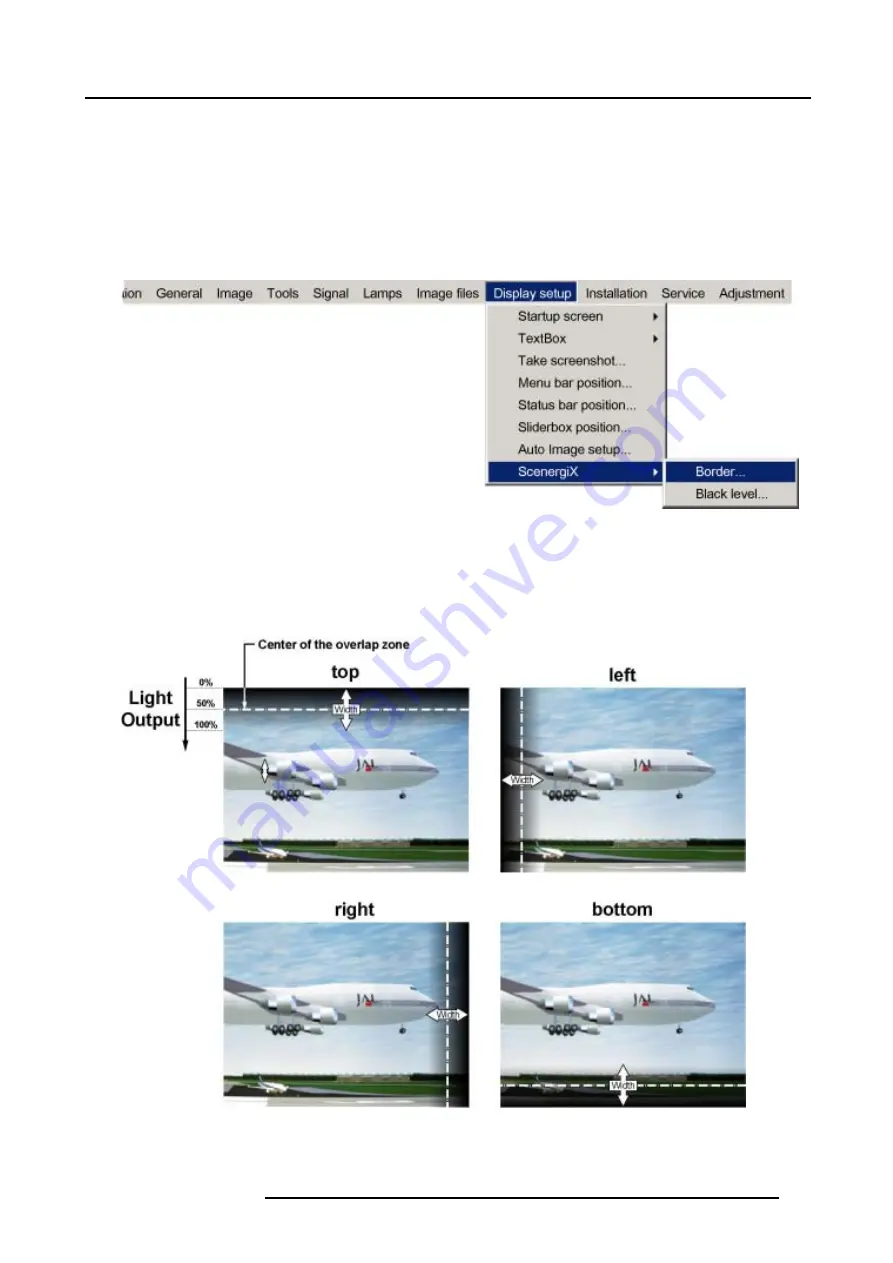
A dialog box will be displayed. The actual scenergix border will be displayed.
8. Use
↑
or
↓
to select the desired adjustment.
Image 13-16
Adjusting with the arrow keys.
1. When on an adjustment, use the
→
or
←
key to move the border line to the desired position.
The border line will move in the desired direction and the light output in the overlap area will be adapted to. (image 13-17)
Set first the width of the first projector and repeat for the second one. (image 13-18, image 13-19)
Image 13-17
Width selections
R5976817 RLM H5 02/06/2006
127
Содержание RLM H5
Страница 1: ...RLM H5 Owners manual R9010300 R5976817 03 02 06 2006...
Страница 4: ......
Страница 8: ...Table of contents 4 R5976817 RLM H5 02 06 2006...
Страница 14: ...1 Packaging and Dimensions 10 R5976817 RLM H5 02 06 2006...
Страница 54: ...5 Getting used with the menu structure 50 R5976817 RLM H5 02 06 2006...
Страница 60: ...6 Source selection 56 R5976817 RLM H5 02 06 2006...
Страница 64: ...7 General Menu Image 7 7 60 R5976817 RLM H5 02 06 2006...
Страница 93: ...8 Image Menu Image 8 51 R5976817 RLM H5 02 06 2006 89...
Страница 94: ...8 Image Menu 90 R5976817 RLM H5 02 06 2006...
Страница 104: ...9 Tools Menu 100 R5976817 RLM H5 02 06 2006...
Страница 134: ...13 Display Setup 130 R5976817 RLM H5 02 06 2006...
Страница 144: ...14 Installation menu 140 R5976817 RLM H5 02 06 2006...


