background image

8. Input menu

Genlock off

(default position) locking done on input source of main window, when automatic was selected or on the
selected input source when a speci

fi

c input was selected. Projector detects automatically the vertical

frequency and clock frequency of the input signal. A slightly difference with the source is possible.

Genlock on

locking done on indicated vertical frequency and clock frequency. This vertical frequency and clock frequency
must be exactly the same as those of the source.

Only use genlock ON for very stable sources and preferable for broadcast sources.

For Genlock on,

to change the locking frequency, use the

or

key to select

Vert freq

and press

ENTER

to activate. The

fi

rst digit is selected.

Use the

or

key to select the desired digit and press

or

key to select the next digit in the address or enter the value with

the digit keys on the remote control or local keypad. The next digit in the value will be automatically selected.

to change the clock frequency, use the

or

key to select

Clock freq

and press

ENTER

to activate. The

fi

rst digit is selected.

Use the

or

key to select the desired digit and press

or

key to select the next digit in the address or enter the value with

the digit keys on the remote control or local keypad. The next digit in the value will be automatically selected.

For older custom

fi

les, created with software packages older than package 1.5.6, the Genlock function will

be grayed out. If you want to use this genlock function, a new custom

fi

le must be created starting from the

standard

fi

le. Copying the custom

fi

le in a new

fi

le do not solve this issue.

8.4

Minimum delay

Purpose

In normal mode, the processing (scaling and de-interlacing) in DLP projectors introduces a few frames delay (from input to screen).
Setting the option

Minimum Delay

to "ON" disables all scaling and de-interlacing in the processing and reduces frame delay of the

projector (from input to screen) to ONE frame, caused by the formatter board (DLP technology restriction). The intended use of this
option is to apply native and progressive data to the projector and displaying it with minimum delay, using the full resolution of the
projector. Other formats will be displayed either unscaled and/or interlaced.

This feature can be used if additional delay in the projector is not acceptable. For instance if a projector is showing the DVI loop out
of another DLP or if an external scaler/de-interlacer does the processing.

How to toggle the delay?

1. Press

MENU

to activate the menus.

2. Use the

or

key to select

Input

and press

ENTER

.

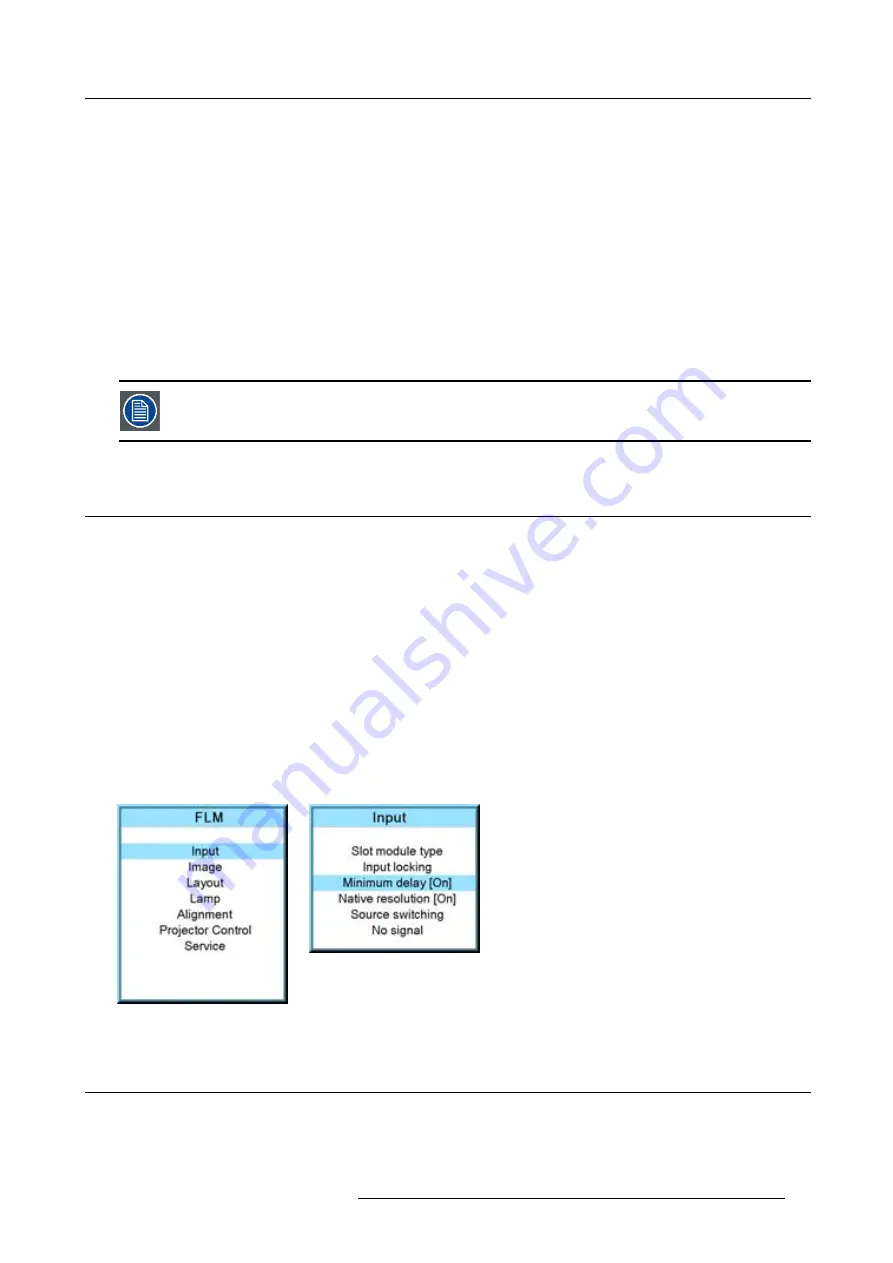
The Input menu is displayed.

3. Use the

or

key to select

Minimum delay

and press

ENTER

to toggle between [On] and [Off].

Image 8-12

Image 8-13

8.5

Native resolution

What can be done

The aim here is to always show the resolution of the source independently of the resolution of the DMD panels.

R5976921 FLM R20+ PERFORMER 15/03/2010

63

Содержание FLM R20+ Performer

Страница 1: ...FLM R20 Performer Users manual R9004430 R5976921 11 15 03 2010 ...

Страница 2: ...Barco nv Media Entertainment Division Noordlaan 5 B 8520 Kuurne Phone 32 56 36 82 11 Fax 32 56 36 883 86 E mail sales events barco com Visit us at the web www barco com Printed in Belgium ...

Страница 3: ...ed immediately in writing of any complaints The period of guarantee begins on the date of transfer of risks in the case of special systems and software on the date of commissioning at latest 30 days after the transfer of risks In the event of justified notice of complaint Barco can repair the fault or provide a replacement at its own discretion within an appropriate period If this measure proves t...

Страница 4: ...ring and mailing a CD will be charged Disposal Information This equipment has required the extraction and use of natural resources for its production It may contain hazardous substances for health and environment In order to avoid the dissemination of those substances in the environment and to diminish the pressure on natural resources we encourage you to use the appropriate take back systems Thos...

Страница 5: ...ctors 33 5 Connections 35 5 1 Power connection 35 5 2 Input source connections 37 5 3 Communication connections 38 6 Getting started 43 6 1 RCU Local keypad 43 6 2 Terminology overview 43 6 3 Operating the projector 45 6 3 1 Switching on 45 6 3 2 Errors warnings and messages during start up 46 6 3 3 Switching to standby 46 6 3 4 Switching off 47 6 4 Using the RCU 47 6 5 Quick setup adjustments 49 ...

Страница 6: ...etection 86 9 6 Image files services 88 9 6 1 Files and file manipulations 88 9 6 2 Manual Load file 88 9 6 3 Delete file 89 9 6 4 Delete all custom files 90 9 6 5 Rename a file 90 9 6 6 Copy a file 91 9 6 7 File options 92 9 7 Save custom settings 93 10 Layout menu 95 10 1 Overview flow 95 10 2 Main window 95 10 2 1 Source selection 96 10 2 2 Size adjustment 96 10 2 3 Position adjustment 99 10 3 ...

Страница 7: ...cation 148 13 3 1 Baud rate setup 148 13 3 2 Interface standard 148 13 3 3 RS422 termination 149 13 4 Network 149 13 4 1 Introduction to a Network connection 150 13 4 2 DHCP setup 150 13 4 3 IP address set up 151 13 4 4 Subnet mask set up 151 13 4 5 Default Gateway set up 152 13 5 IR control switching 153 13 6 Art Net DMX 153 13 6 1 DMX address 154 13 6 2 DMX universe 154 13 6 3 DMX monitor 155 13...

Страница 8: ... the projector covers 193 17 1 Removal of the front cover 193 17 2 Removal of the side cover 194 17 3 Removal of the lamp cover 195 17 4 Removal of the input cover 195 17 5 Installation of the front cover 196 17 6 Installation of the side cover 197 17 7 Installation of the lamp cover 198 17 8 Installation of the input cover 199 A Dimensions 201 A 1 Dimensions of the FLM R20 Performer 201 A 2 Dimen...

Страница 9: ...ingle fault condition testing ensures the safety of the equipment to the user even when the equipment s normal operation fails Restricted access location The FLM R20 Performer may only be installed in a restricted access location due to the temperature rise of parts of the equipment air outlet Restricted access location A location for equipment where both of the following paragraphs apply 1 Access...

Страница 10: ... consult your dealer If you are unable to insert the plug into the outlet contact your electrician to replace your obsolete outlet Do not defeat the purpose of the grounding type plug The wires of the power cord are colored in accordance with the following code International plug 32 ampere Green Yellow ground Blue neutral Brown line live North American plug 30 ampere Green Yellow or Green ground B...

Страница 11: ...l Industrial Hygienists ACGIH recommends occupational UV exposure for an 8hour day to be less than 0 1 microwatts per square centimeters of effective UV radiation An evaluation of the workplace is advised to assure employees are not exposed to cumulative radiation levels exceeding these government guidelines To prevent projector damage If the Air Filters are not regularly replaced the air flow ins...

Страница 12: ...ollowing conditions When the power cord or plug is damaged or frayed If liquid has been spilled into the equipment If the product has been exposed to rain or water If the product does not operate normally when the operating instructions are followed Adjust only those controls that are covered by the operating instructions since improper adjustment of the other controls may result in damage and wil...

Страница 13: ...jector must always be mounted in a manner which ensures the free flow of clean air into the projectors ventilation inlets For installations in environments where the projector is subject to airborne contaminants such as that produced by smoke machines or similar these deposit a thin layer of greasy residue upon the projectors internal optics and imaging electronic surfaces degrading performance th...

Страница 14: ...to maximum 18 meter 59 ft depending on the ambient light conditions with an aspect ratio of 4 to 3 recommended between 1 m 3 3ft 12 m 39 4ft 2 2 Unpacking the projector What has to be done At delivery the projector is packed in a carton box upon a wooden pallet and secured with banding and fastening clips Furthermore to provide protection during transportation the projector is surrounded with foam...

Страница 15: ... weight 100 kg 225 lb One Remote Control Unit RCU Two AA size batteries for the RCU One power cord of 2 5 meter with EN60 309 plug Four rigging clamps for projector suspension One user manual Initial inspection Before shipment the projector was inspected and found to be free of mechanical and electrical defects As soon as the projector is unpacked inspect for any damage that may have occurred in t...

Страница 16: ...timal for maximum utilization of the floor area of a truck The cover of the FLM flight case has four stacking dishes which allows to stack the flight cases 2400 mm 1600 mm Image 2 5 WARNING Maximum stack two 2 FLM flight cases high Never higher CAUTION Prior to inserting projector in flight case turn in the adjustable feet and interlocking adapters fully 2 5 Projector configurations The different ...

Страница 17: ... 2 6 Rear projection The projector is installed either in a table mount or ceiling mount configuration at the other side of the screen opposite the audience AUDIENCE BACKSTAGE R C R T FLOOR SCREEN Image 2 7 R5976921 FLM R20 PERFORMER 15 03 2010 13 ...

Страница 18: ...h the centre of the screen Off Axis projection is obtained by shifting the lens up down left or right Several parameters can be calculated determining the position in any installation Formula to calculate the distance CD for On Axis projection CD SH 2 B A Shift range The lens can be shifted with respect to the DMD P which result in a shifted image on the screen Off Axis A 100 shift means that the ...

Страница 19: ...ounted at any vertical angle In other words you can tilt the lens side of the projector as much as desired for your application Side to side tile however must not exceed 15 This limit ensures that the lamp in the projector operates properly and safely More tilting within area C is allowed but lamp flicker can happen MAX MAX 15 15 360 15 15 A B C A Image 2 10 A Tilting allowed without problems B No...

Страница 20: ...be controlled simultaneously Even when the configurations are connected via different ways Projector Toolset is only available in a download version no CD can be ordered Where to find the download file s The program and all necessary plug ins as well as the Reference manual can be downloaded for free from Barco s Partnerzone URLhttps my barco com Registration is necessary If you are not yet regist...

Страница 21: ...our source to the appropriate input module see Input source connections page 37 6 Switch ON the projector see procedure Switching on page 45 7 Select the input slot at which your source is connected with Do this by pressing the numeric key 1 2 3 or 4 on the remote control unit or on the local keypad see chapter Source selection page 53 8 Zoom and shift the lens until the image is properly projecte...

Страница 22: ...ies first How to install the batteries in the remote control 1 Push the battery cover tab with the fingernail a little backwards 1 and pull at the same time the cover upwards 2 1 2 Image 3 2 2 Insert the two AA size batteries making sure the polarities match the and marks inside the battery compartment Image 3 3 3 Insert 1 the lower tab of the battery cover in the gap at the bottom of the remote c...

Страница 23: ... adaptor C upon the rugged case of the remote control unit as illustrated Note Ensure that the text of the XLR adaptor is on top S C S Image 3 6 2 Fasten the two screws S of the XLR adaptor Turn each screw repeatedly one or two turns until both screws are tight 3 1 4 Using the XLR adaptor of the RCU How to use the XLR adaptor of the remote control unit 1 Connect a cable with XLR plug into the XLR ...

Страница 24: ... RCU with rugged case and XLR adaptor pulled out REMOTE and not wired The XLR adaptor must be in the pulled out position REMOTE otherwise the RCU will not function f RCU with rugged case and XLR adaptor pulled out REMOTE and wired The RCU will send the commands via infra red to the projector g RCU with rugged case and XLR adaptor pushed in WIRED and wired The RCU will send the commands via the cab...

Страница 25: ... TLD HB lenses are recommended on the FLM R20 Performer projector Note that the classical TLD lenses have approximately 20 less light output compared to the TLD HB lenses but 25 more contrast Image 3 9 R9840900 TLD fixed lens 0 8 1 R9842040 TLD HB fixed lens 0 8 1 Image 3 10 R9840770 TLD fixed lens 1 2 1 Image 3 11 R9840775 TLD 1 2 1 fixed lens Image 3 12 R9840670 TLD zoom lens 1 6 2 0 1 R9842060 ...

Страница 26: ...ratio Choose a Lens which captures the calculated throw ratio Use the lens formula of the chosen Lens to recalculate exactly SCREEN PD SW Image 3 17 3 2 3 Lens formulas Formulas Lens Throw ratio for FLM Metric formulas meter Inch formulas inch TLD 0 8 1 TLD HB 0 8 1 0 75 PD 0 77 x SW 0 05 PD 0 77 x SW 1 97 TLD 1 2 1 1 1 PD 1 11 x SW 0 01 PD 1 11 x SW 0 39 TLD 1 2 1 1 2 PD 1 23 x SW 0 11 PD 1 23 x ...

Страница 27: ...r 3 2 4 Lens installation How to install a lens into the projector lens holder 1 Remove the foam rubber in the opening of the lens holder if not removed yet 2 Take the lens assembly out of its packing material and remove the lens caps on both sides 3 Place the lens holder in the unlocked position by moving the lens lock handle A towards the lens power supply socket B as illustrated B A Image 3 18 ...

Страница 28: ...Check if the lens is really secured by trying to pull the lens out of the lens holder CAUTION Never transport the projector with a Lens mounted in the Lens Holder Always remove the Lens before transporting the projector Neglecting this can damage the Lens Holder and Prism 3 2 5 Lens removal How to remove a lens from the projector lens holder 1 Support the lens with one hand while you unlock the le...

Страница 29: ...by the foam from entering the projector 3 3 Alignment of a table mount FLM projector How to align a table mount FLM projector 1 Place the projector in the desired location Take into account the zoom range of the used lens and the size of the screen 2 Project one of the internal hatch patterns on the screen 3 Turn the adjustable feet in or out until the projected hatch pattern is perfectly rectangl...

Страница 30: ...age 3 25 When this is achieved the projector is set horizontal and vertical at right angles to the screen SCREEN SCREEN Image 3 26 5 Fasten the lock nut B of the rigging clamps 3 5 Suspension of the FLM projector with rigging clamps Rigging points and rigging clamps The carrying handle at the bottom side of the projector is provided with eight slots Four slots are longitudinally A oriented and fou...

Страница 31: ...r Ensure that the rigging points are symmetrically lined up so that the projector will hang in balance Warning Be careful while working with heavy loads Warning Always secure the rigging points after adjustment X mm N Image 3 29 3 Turn in the rigging clamps A into the rigging points using a 17 mm open ended spanner and secure the rigging clamps by turning the safety nut B on the rigging clamp agai...

Страница 32: ... clamps mounted on the projector Image 3 32 6 Lift up the projector and hook the four rigging clamps over the support bars of the truss 7 Lock all four rigging clamps 8 Install a safety chain S around both sides of the carrying handle and around the truss S S Image 3 33 9 Lift up the truss with attached projector to the desired height 28 R5976921 FLM R20 PERFORMER 15 03 2010 ...

Страница 33: ...3 Physical installation Proceed with the alignment procedure see Alignment of a ceiling mount FLM projector page 26 R5976921 FLM R20 PERFORMER 15 03 2010 29 ...

Страница 34: ...3 Physical installation 30 R5976921 FLM R20 PERFORMER 15 03 2010 ...

Страница 35: ...acked FLM projectors 4 1 Stacking FLM projectors How to stack FLM projectors 1 Turn in the four feet of the projector you want to stack 2 Place the projectors on top of each other Ensure that all three interlocking pins A match with their corresponding interlocking sockets B Tip In case of stacking projectors for a ceiling mount configuration first turn the projectors upside down before placing th...

Страница 36: ...rying handle C as illustrated C H Image 4 3 b Guide the safety cable around the carrying handle of the projector above and clasp the safety hook around the safety cable as illustrated Image 4 4 WARNING Always use both safety cables of the lowest projector to secure a stacked projector in a ceiling mount configuration How to open an interlocking adapter 1 Open an interlocking adaptor as illustrated...

Страница 37: ...djust the rotation of the stacked projector with respect to the reference projector by turning in or out the height adjustment ring of the interlocking adaptors at the rear of the stacked projector Adjust until the outline of the hatch pattern is most symmetric with the reference hatch pattern Tip You can increase leverage by using a screw driver in the holes of the adjustment ring Rotation Image ...

Страница 38: ...of the hatch pattern matches exactly the outline of the reference hatch pattern Note Note that the Zoom function is motorized which means that you have to access the projector software via the local keypad or remote control unit to operate the Zoom function Zoom Image 4 10 8 If necessary repeat from step 2 until the hatch pattern of the stacked projector is perfectly aligned with the hatch pattern...

Страница 39: ...ded with the projector How to connect your projector with the local power net 1 Ensure that the power switch S stands in the 0 OFF position 2 Connect the power cord P with the power input socket of the projector as illustrated below 3 Secure the power plug by locking the plug holder clamp H 4 Connect the other end of the power cord with the local power net Caution Ensure that the power net meets t...

Страница 40: ...nplug the power cord Fuses The projector is protected with an automatic circuit breaker of 35 A which is built in into the power switch Volt meter After starting up the projector lamp ignition check if the value indicated by the volt meter is still within the specified power range of the projector Note that in case the power net drops significantly during start up the lamp will fail the ignite If ...

Страница 41: ...t modules have two status LED s The green LED lights up if the input module is selected as the active input module The yellow LED lights up if the input module has detected valid input syncs Y 1 2 3 4 G Image 5 4 CAUTION Always install a cover plate on an unused input slot This to prevent dust intrusion into the pro jector Available input modules Image 5 5 5 Cable input Multi purpose R9854430 Imag...

Страница 42: ... the projector encounters an internal problem concerning fan speed temperature supply voltages etc These type of problems still allows the projector to operate the show can go on but an action will be required within a short time period More information about the involved problem is given on the local LCD display of the projector A two character 7 segment display C shows during normal operation th...

Страница 43: ...ace has also an active RS232 RS422 loop through output port E Whenever the projector has no power a passive loop through is created from the RS232 RS422 input port O to the RS232 RS422 output port E So the following projector in the daisy chain will still receive his RS232 RS422 commands Advantages of using RS232 RS422 serial communication easy adjustment of the projector via PC or MAC allow stora...

Страница 44: ...AN local area network using port 1 F or port 2 G on the communication interface Once connected to the LAN users are capable of accessing the projector from any location inside or outside if allowed their company network using the FLM control software Projector Toolset This toolset locates the projector on the network in case there is a DHCP server or the user can insert the correct IP address of t...

Страница 45: ...lify the service procedures for taking backup files from the projector without network connection An USB stick is plugged into the USB port and files can be transferred from or to the projector using the local or remote control unit Note that the USB stick has to be FAT16 compatible Card bus connector PCMCIA No cards supported yet R5976921 FLM R20 PERFORMER 15 03 2010 41 ...

Страница 46: ...5 Connections 42 R5976921 FLM R20 PERFORMER 15 03 2010 ...

Страница 47: ... the local keypad or by the remote control unit Location of the local keypad The local keypad is located on the input side of the projector Remote control functions This remote control includes a battery powered infrared IR transmitter that allows the user to control the projector remotely This remote control is used for source selection control adaptation and set up Other functions of the remote ...

Страница 48: ...remote control Press the recessed address key with a pencil followed by pressing one digit button between 0 and 9 5 LENS Direct access key to the lens adjustment menus Toggling this key will change the projected pattern 6 PAUSE To stop projection for a short time press PAUSE The image disappears but full power is retained for immediate restarting Shutter is closed 7 STBY Standby function switch of...

Страница 49: ...enus and adjustments remain active on the local LCD panel 17 ENTER Key to confirm an adjustment or selection in the adjustment mode 18 Cursor keys To make menu selections when in the adjustment mode 19 EXIT Key to go one menu stage higher than the actual position when in the adjustment mode 20 WINDOW Selection of the active window also in PIP mode 21 PIP Direct access key for picture in picture se...

Страница 50: ...ghts up The projector starts up on the last saved source Some lamp and runtime warnings can be displayed when an image is displayed after a start up 6 3 2 Errors warnings and messages during start up Temperature error DMD When the temperature of one of the DMD s is too low or too high the projector is switched automatically to standby An error code will be displayed on the local LCD panel For a li...

Страница 51: ...ndby 2 Let cool down the projector until the fans decrease at least 5 min 3 Switch off the projector with the power switch CAUTION Never switch off the projector while the message Save data is displayed 6 4 Using the RCU Pointing to the reflective screen 1 Point the front of the RCU to the reflective screen surface F 1 F 2 F 3 F 4 F 5 A D J E X I T E N T E R P A U S E P H A S E T E X T S H A R P N...

Страница 52: ...you are within the effective operating distance 30m 100ft in a straight line The remote control unit will not function properly if strong light strikes the sensor window or if there are obstacles between the remote control unit and the projector IR sensor 1 2 3 4 5 6 7 8 9 0 ME NU EXIT ENTE R RGB ST BY PA US E TEX T PA TT ERN W INDOW PIP L ENS RIGGING A UT O 2 1 3 P US H 2 1 3 P US H P C Ca rd Po ...

Страница 53: ... the TEXT key on the remote control or local keypad 6 5 2 Quick Lens Adjustment 6 5 2 1 Quick Lens Adjustment via LENS key Quick zoom focus adjustment 1 Press the LENS key on the remote control or local keypad The zoom focus menu will be displayed Image 6 7 2 Push the cursor key or to zoom and or to focus the image 3 When finished press EXIT key to return or ENTER to continue to the shift adjustme...

Страница 54: ... Press LENS ZOOM button or A for correct image size on the screen CONTR 1 2 LENS ZOOM LENS SHIFT LENS FOCUS LENS SHIFT A C B D Image 6 10 Direct lens adjustment keys A Zoom B Vertical shift C Focus D Horizontal shift 2 Press LENS FOCUS button or C for an overall focus of the image 3 Press LENS SHIFT button for correct vertical position of the image on the screen 4 Press LENS SHIFT button for corre...

Страница 55: ...ss only one digit the projector wait a few time to check if a second digit will follow If not it switches to the selected layout The selected layout is loaded Or press Rigging The layout selection menu is displayed on the local LCD panel Image 6 12 2 Enter the digit or the two digits of your choice The selected layout is loaded Or scroll with the arrow keys to the desired layout and press ENTER Th...

Страница 56: ...s key displays projector address 003 then press 3 digit button on the RCU to set the RCU s address to match the projector s address Do not press 003 digits This will address the remote control to 0 and control all projectors in the room If the address is not entered within 5 seconds the RCU returns to its default address zero address and control all projectors in the room How to Program an Address...

Страница 57: ...address Common address 6 7 Source selection Source selection when no picture in picture is active Use the digit keys on the remote control or local keypad to active the desired source Source selection when picture in picture is active Use the Window button on the remote control or the local keypad to select the main window or the picture in picture PiP window MENU EXIT ENTER PAUSE TEXT PHASE LENS ...

Страница 58: ...or more tint Use the button for less tint Sharpness The sharpness function is used to adjust the image sharpness of video signals Use the button for more sharpness Use the button for less sharpness Phase Use the or side of the phase control button to adjust the phase The Pause Key When the Pause key is pressed the image projection is stopped a black screen will be displayed and the projector remai...

Страница 59: ... projector onto a screen Projector control contains the accessibility settings of the projector such as address and communication setup Service contains information about how the projector is performing This information will be useful when calling for a service intervention 7 2 About the use of the remote control and the local keypad Overview All navigations and adjustments can be done either with...

Страница 60: ...e adjustment in the title bar the length of the progress bar indicates the actual value The value at the start and at the end of the progress bar indicates the adjustment ranges Image 7 2 While a bar scale is displayed it is also possible to enter the desired value directly with the digit keys Therefore press ENTER The menu changes to a Enter new value menu with the current value filled out The fi...

Страница 61: ...hen Text is in the off mode When quitting the menu structure the backlighting of the LCD panel is switched off after a few seconds 7 7 Test patterns in adjustment mode Overview When the adjustment mode is started a test pattern can be called at any moment just by pressing the Pattern key on the RCU or the local key path Press as many times on the Pattern key as necessary to display the desired tes...

Страница 62: ...7 Start up of the Adjustment Mode 58 R5976921 FLM R20 PERFORMER 15 03 2010 ...

Страница 63: ...lue Shutdown Off On Shutdown time 8 2 Slot module type Overview About Input Setup Input configuration 8 2 1 About Input Setup Overview Each input module must be configured before these module can be used This configuration is necessary so that the projector knows which type of signal is connected to its input The projector has 4 input slots and these slots can be filled up in a random order with t...

Страница 64: ...he selection menu which will be different from input type to input type except for DVI see DVI equaliza tion Image 8 1 Image 8 2 Image 8 3 For a 5 cable module When ENTER is pressed on a 5 cable module the following menu appears Image 8 4 Use the or key to select the desired configuration and press ENTER to select When e g RGB AUTO is selected the projector discovers itself which type of RGB signa...

Страница 65: ...n may be necessary even for shorter cables For longer cables adjust between 0 and 13 more equalization For shorter cables adjust between 13 and 15 least equalization 8 3 Input locking What is possible The output signal can be locked on an internal sync signal or on the sync signal of one of the input sources Input locking can avoid that some windows in the output signal are slowly moving or trembl...

Страница 66: ...pears Image 8 10 Use the or key to select Manual lock and press ENTER to toggle between On and Off Manual lock on locking is done on the indicated vertical frequency which can be changed by the user Manual lock off locking is done on an internal sync 60 Hz To change the locking frequency for manual lock on use the or key to select Vert freq and press ENTER to activate The first digit is selected U...

Страница 67: ...les created with software packages older than package 1 5 6 the Genlock function will be grayed out If you want to use this genlock function a new custom file must be created starting from the standard file Copying the custom file in a new file do not solve this issue 8 4 Minimum delay Purpose In normal mode the processing scaling and de interlacing in DLP projectors introduces a few frames delay ...

Страница 68: ...e projected UXGA 4 3 1600x1200 4 3 1600x1200 part of the image displayed image scroll possible How to toggle to native resolution 1 Press MENU to activate the menus 2 Use the or key to select Input and press ENTER The Input menu is displayed 3 Use the or key to select Native resolution and press ENTER to toggle between On and Off On images displayed in native resolution Off images scaled to fill t...

Страница 69: ...ransition and Fade No transition No source switching effect is activated Fade Fade in fade out effect is activated Transition time can be set up 5 Use the or key to select Effect time and press ENTER 6 Enter the desired time with the digit keys Or use the or key to scroll until the desired time is reached Press ENTER to activate Image 8 18 Image 8 19 Image 8 20 8 7 No signal Overview Background co...

Страница 70: ...o select Input and press ENTER The Input menu is displayed 3 Use the or key to select Shutdown and press ENTER to toggle between On and Off Image 8 24 Image 8 25 Image 8 26 8 7 3 Shutdown retarding time Only accessible when Shutdown is set to On How to set the retarding time 1 Press MENU to activate the menus 2 Use the or key to select Input and press ENTER The Input menu is displayed 3 Use the or...

Страница 71: ...Or enter the desired value with the keyboard When trying to exceed the maximum allowed value the system will set it back to the maximum value Image 8 27 Image 8 28 Image 8 29 R5976921 FLM R20 PERFORMER 15 03 2010 67 ...

Страница 72: ...8 Input menu 68 R5976921 FLM R20 PERFORMER 15 03 2010 ...

Страница 73: ...evel 2 Level 3 Level 4 Image Image settings Contrast Brightness Saturation Tint Phase Sharpness Noise reduction Color temperature Projector white Computer 9300K Video 6500K Film 5400K Broadcast 3200K Custom balance Input balance Aspect ratio 4 3 16 9 5 4 2 35 1 88 1 78 Custom Timings Total pixels Active pixels Horizontal start Period Total lines Active lines R5976921 FLM R20 PERFORMER 15 03 2010 6...

Страница 74: ...lete all Rename Copy Options Load file Save custom settings 9 2 How to select the image adjustments Start up 1 Use the or key to select Image 2 Press ENTER to select The Image menu opens Image 9 1 Image 9 2 9 3 Image Settings Overview Contrast Brightness Saturation Tint hue Phase Sharpness Noise reduction Color temperature Input balance 70 R5976921 FLM R20 PERFORMER 15 03 2010 ...

Страница 75: ...ntrast progress bar appears 5 Use or to change the contrast The higher the value the higher the contrast Image 9 3 Image 9 4 Image 9 5 Image 9 6 9 3 2 Brightness About Brightness The Brightness function is used to adjust the overall light output How to change the brightness 1 Press MENU to activate the menus 2 Use the or key to select Image and press ENTER 3 Use the or key to select Image settings...

Страница 76: ...he saturation 1 Press MENU to activate the menus 2 Use the or key to select Image and press ENTER 3 Use the or key to select Image settings and press ENTER 4 Use the or key to select Saturation and press ENTER The Saturation progress bar appears 5 Use or to change the color saturation The higher the value the higher the color saturation Image 9 11 Image 9 12 Image 9 13 Image 9 14 72 R5976921 FLM R...

Страница 77: ...e settings and press ENTER 4 Use the or key to select Tint and press ENTER The Tint progress bar appears 5 Use or to change the tint The higher the value the higher the tint Image 9 15 Image 9 16 Image 9 17 Image 9 18 9 3 5 Phase About Phase adjustment When displaying computer patterns or graphics RGB or YUV signals which are very detailed tilting vertical stripes etc jitter in picture mis samplin...

Страница 78: ... total number of pixels Best image pixel on pixel off pattern For example shut down screen of a PC Image 9 20 Image 9 21 Image 9 22 Image 9 23 9 3 6 Sharpness About Sharpness The sharpness function is used to adjust the image sharpness of video signals How to change the sharpness 1 Press MENU to activate the menus 2 Use the or key to select Image and press ENTER 3 Use the or key to select Image se...

Страница 79: ... the menus 2 Use the or key to select Image and press ENTER 3 Use the or key to select Image settings and press ENTER 4 Use the or key to select Noise reduction and press ENTER The Noise reduction progress bar appears 5 Use or to change the noise reduction The higher the value the higher the noise reduction Image 9 28 Image 9 29 Image 9 30 Image 9 31 R5976921 FLM R20 PERFORMER 15 03 2010 75 ...

Страница 80: ... greenish etc of white in an image measured using the Kelvin degrees K temperature scale Higher temperatures output more light 9 3 8 1 Predefined color temperature Projector white will provide maximum projector light output The calibrated Broadcast Film Video and Computer presets will provide optimum color tracking How to select 1 Press MENU to activate the menus 2 Use the or key to select Image a...

Страница 81: ... and press ENTER 4 Use the or key to select Color temperature and press ENTER 5 Use the or key to select Custom balance and press The Gain adjustment bar scales are displayed 6 Adjust gain red with or key and gain blue with or key Adjust gain blue in the same way as gain red 7 When gain adjustment is finished press ENTER Image 9 36 Image 9 37 Image 9 38 Image 9 39 Image 9 40 R5976921 FLM R20 PERFO...

Страница 82: ...ack Another value that is subject to alteration is the amplitude of the signal resulting in an altered Gain of the signal white level or contrast The alterations of the three color signals will happen independently i e the colors will end to be unbalanced image 9 42 B Black level 0 7V Image 9 41 Black level ΔG ΔΒ ΔR R G B Image 9 42 One can conclude here that a good color tracking can only be met ...

Страница 83: ...ge file 9 3 9 2 Adjusting the input balance How can it be done To balance the three color signals of a particular source there are conditions in fact we must know the black and the white level of the source i e 1 The source in question must be able to generate a white signal ideally a 100 white background full screen pattern 2 The source in question must be able to generate a black signal ideally ...

Страница 84: ...oggle with or key to select Black balance red Image 9 46 Image 9 47 Image 9 48 Image 9 49 Image 9 50 8 Adjust the red black level on a minimal value 9 Toggle with or key to Black balance blue and adjust the blue black level on a minimal value Note This minimal value is not necessary provided that the 2 other colors are not influencing too much the color to be adjusted in fact the aim is to minimiz...

Страница 85: ...nce red Image 9 51 Image 9 52 Image 9 53 Image 9 54 Image 9 55 9 Adjust the red white level gain on a minimal value 10 Toggle with or key to White balance blue and adjust the blue white level gain on a minimal value Note This minimal value is not necessary provided that the 2 other colors are not influencing too much the color to be adjusted in fact the aim is to minimize the effect of the two oth...

Страница 86: ...d aspect ratio Aspect ratio Description 4 3 Standard television format 16 9 Wide screen television format anamorphic format 5 4 Workstation format 2 35 Film format 1 88 1 78 Wide screen television format anamorphic format Custom Any custom format can be set up Type of input signal is indicated above each image row The image row shows how the image will be projected in the different aspect ratio se...

Страница 87: ...pixels number of pixels between the beginning of the input signal and the start of the video information in the signal Width Active horizontal pixels determine the width of the window on the screen This value is normally given in the source specifications If not adjust until full image is displayed no missing pixels Vertical start in lines number of lines between the start of the input signal and ...

Страница 88: ...justment box is displayed E g Horizontal total pixels Image 9 65 5 Use the or key or or key to change the value 6 Press ENTER to activate the new value 7 If necessary to change other settings repeat from step 4 9 5 2 Advanced settings About the advanced settings Clamp delay The time between the leading edge of the clamp pulse and the locked edge of the sync pulse Can be any value between 0 and 255...

Страница 89: ...olarity to neg or pos How to change the clamp delay clamp width 1 Press MENU to activate the menus 2 Use the or key to select Image and press ENTER 3 Use the or key to select Timings and press ENTER 4 Use the or key to select Advanced settings and press ENTER The Advanced settings menu is displayed 5 Use the or key to select Clamp delay or Clamp width and press ENTER A progress bar appears 6 Use t...

Страница 90: ...rtefact free display Note that in some cases video clips scrolling newstickers FILM and VIDEO material are mixed on one screen This may confuse the detector and cause it to go into FILM restoration mode This will cause jaggies or motion artefacts In such cases disabling FILM mode processing is the best cure Film mode detection is only for interlaced sources 3 2 pull down Method used to map the 24 ...

Страница 91: ...age How to set up 1 Press MENU to activate the menus 2 Use the or key to select Image and press ENTER 3 Use the or key to select Advanced settings and press ENTER The Advanced settings menu is displayed 4 Use the or key to select Film mode and press ENTER to toggle between auto or off Auto Detects for film and it starts to avoid deinterlacing artefacts and it results in a perfect artefact free dis...

Страница 92: ...programmed Possible file Manipulations The following file manipulations are possible Load installation of a file for a new source Rename renaming a file Delete deleting a file only custom files Delete all delete all custom files Options way of loading a file when a source is selected A loaded file can be edited via the Timings menu Once a file is edited it will be saved with the same name as the o...

Страница 93: ...ENTER to select The selected file is loaded The image is not perfect If the displayed image is not correct after selecting the best fitting file go to the Timings menu and change the file settings 9 6 3 Delete file How to delete 1 Press MENU to activate the menus 2 Use the or key to select Image and press ENTER 3 Use the or key to select File services and press ENTER The File service menu is displ...

Страница 94: ... 4 Use the or key to select Delete all and press ENTER A delete all confirmation window opens 5 Use the or key to select Yes if you are sure to delete all custom files and press ENTER to activate the selection Image 9 87 Image 9 88 Image 9 89 Image 9 90 Or if you are not sure to delete all custom files select No and press ENTER to activate the selection 9 6 5 Rename a file How to rename 1 Press ME...

Страница 95: ...ically 8 Press ENTER to finalize the rename action Image 9 91 Image 9 92 Image 9 93 Image 9 94 Image 9 95 9 6 6 Copy a file How to copy 1 Press MENU to activate the menus 2 Use the or key to select Image and press ENTER 3 Use the or key to select File services and press ENTER The File service menu is displayed 4 Use the or key to select Copy and press ENTER The copy window opens 5 Use the or key t...

Страница 96: ... Image and press ENTER 3 Use the or key to select Image services and press ENTER The Image service menu is displayed 4 Use the or key to select Options and press ENTER Image 9 101 Image 9 102 Image 9 103 The options window opens 5 Use the or key to select Load file and press ENTER to toggle between Automatic Manual and Custom only 92 R5976921 FLM R20 PERFORMER 15 03 2010 ...

Страница 97: ... auto picture alignment is executed Load file auto picture alignment executed each time a new file is loaded 9 7 Save custom settings What is done The current custom settings can be saved to the internal backup device in the same way as it would be done when the projector was switched to standby How to save 1 Press MENU to activate the menus 2 Use the or key to select Image and press ENTER 3 Use t...

Страница 98: ...9 Image menu 94 R5976921 FLM R20 PERFORMER 15 03 2010 ...

Страница 99: ...ervices Load Main full screen PIP top right Split top bottom Rename Delete Copy Save as Zoom Focus Same for each layout yes no 10 2 Main window Overview Source selection Size adjustment Position adjustment When active layout is read only When the active layout is a read only layout the projector will ask to create a new layout Use the or key to select Yes or No and press ENTER If Yes is selected a...

Страница 100: ...ct a source 1 Press MENU to activate the menus 2 Use the or key to select Layout and press ENTER 3 Use the or key to select Main Window and press ENTER The main window opens 4 Use the or key to select Source and press ENTER The source selection window opens 5 Use the or key to select the desired source and press ENTER to activate Image 10 3 Image 10 4 Image 10 5 Image 10 6 10 2 2 Size adjustment W...

Страница 101: ...to the original aspect ratio 1 Press MENU to activate the menus 2 Use the or key to select Layout and press ENTER 3 Use the or key to select Main Window and press ENTER The main window opens 4 Use the or key to select Size and press ENTER The size adjustment window opens Image 10 8 Image 10 9 Image 10 10 5 Toggle with ENTER till Lock is set to x R5976921 FLM R20 PERFORMER 15 03 2010 97 ...

Страница 102: ...opens Image 10 12 How to adjust height and width separately 1 Press MENU to activate the menus 2 Use the or key to select Layout and press ENTER 3 Use the or key to select Main Window and press ENTER The main window opens 4 Use the or key to select Size and press ENTER The size adjustment window opens Image 10 13 Image 10 14 Image 10 15 5 Toggle with ENTER till Lock is set to 98 R5976921 FLM R20 P...

Страница 103: ... and press ENTER 10 2 3 Position adjustment What can be done The main window can be repositioned on the screen The upper left corner is the reference Image 10 18 Positioning the window How to position 1 Press MENU to activate the menus 2 Use the or key to select Layout and press ENTER 3 Use the or key to select Main Window and press ENTER The main window opens 4 Use the or key to select Position a...

Страница 104: ...n Picture in Picture size of the window Picture in Picture position window 10 3 1 Introduction to PIP PiP PiP stands for Picture in Picture and allows to display multiple windows containing each of them an image The windows may be of the video or data type What are the different possibilities within the PiP mode The input section of the projector allows a combinations of different input signals wh...

Страница 105: ...age 10 27 5 Press EXIT to quit the menu When PIP is activated ON state the PIP window becomes the active window Switching to the main window is still possible with the window button on the RCU 10 3 3 Picture in Picture source selection What can be done The input source for the picture in picture window can be selected How to select a source 1 Press MENU to activate the menus 2 Use the or key to se...

Страница 106: ...10 32 Size PIP window A Width PIP window B Height PIP window The size of the picture in picture window can be changed with respect to the original aspect ratio of the PIP image Remark when e g the PIP window is a 4 by 3 window and the projected image has a 16 by 9 format then it is possible that image jumps inside the PIP window during a re scaling Due to the fact that the re scale is done on the ...

Страница 107: ...w and press ENTER The main window opens 4 Use the or key to select Size and press ENTER The size adjustment window opens Image 10 34 Image 10 35 Image 10 36 5 Toggle with ENTER till Lock is set to x Image 10 37 no lock between height and width x width and height are locked 6 Use the or key to adjust the size with respect to the aspect ratio When the desired size is reached press EXIT R5976921 FLM ...

Страница 108: ...press ENTER 3 Use the or key to select PIP Window and press ENTER The main window opens Image 10 39 Image 10 40 Image 10 41 4 Use the or key to select Size and press ENTER The size adjustment window opens 5 Toggle with ENTER till Lock is set to Image 10 42 no lock between height and width x width and height are locked 6 Use the or key to adjust the height Use the or key to adjust the width When th...

Страница 109: ...sition 1 Press MENU to activate the menus 2 Use the or key to select Window and press ENTER 3 Use the or key to select PIP Window and press ENTER The PIP window opens 4 Use the or key to select Position and press ENTER The size adjustment window opens 5 Use the or key to adjust Top Use the or key to adjust Left When the desired position is reached press EXIT A Save window opens Image 10 44 Image 1...

Страница 110: ...ayout and press ENTER The layout services window opens 4 Use the or key to select Load and press ENTER The load layout window opens Image 10 49 Image 10 50 Image 10 51 Image 10 52 5 Use the or key to select the desired layout and press ENTER to select The first 4 layouts are default layouts all others are customer created layouts The menu shows only the first 10 layouts but use the to scroll throu...

Страница 111: ...er is selected 6 Use the or key to change the selected character Use the or key to selected another character Note Digits can be entered with the digit keys on the remote control or on the local keypad When a digit is entered in that way the next character is selected automatically 7 Press ENTER to save the new name Image 10 53 Image 10 54 Image 10 55 Image 10 56 10 4 3 Delete a layout What is pos...

Страница 112: ...to select Window and press ENTER 3 Use the or key to select Layout and press ENTER The layout services window opens 4 Use the or key to select Copy Save as and press ENTER The Save layout location window opens 5 Use the or key to select the layout to copy save as and press ENTER The edit layout name window opens The first character is selected 6 Use the or key to change the selected character Use ...

Страница 113: ...se the or key to select Window and press ENTER 3 Use the or key to select Layout and press ENTER The layout window opens 4 Use the or key to select Zoom Focus as and press ENTER The Zoom Focus window opens 5 Press ENTER to toggle between No and Yes No each layout will use its own zoom focus settings Yes each layout will use the same zoom focus settings That means that the zoom focus settings of th...

Страница 114: ...10 Layout menu Image 10 65 Image 10 66 Image 10 67 110 R5976921 FLM R20 PERFORMER 15 03 2010 ...

Страница 115: ...What can be done The lamp power mode can be switched between Normal and Economic When playing in Economic mode the lamp life time will increase Normal maximum allowed powers is fed to the lamp Maximum light output is reached in this way Economic a reduced wattage is fed to the lamp Reduced light output but a longer life time for the lamp How to switch 1 Press MENU to activate the menus 2 Use the o...

Страница 116: ... mode then the power mode will be switched to the Normal mode 11 3 Lamp power What can be done Within a certain power mode the light output of the lamp can be reduced How to reduce the lamp power 1 Press MENU to activate the menus 2 Use the or key to select Lamp and press ENTER 3 Use the or key to select Power and press ENTER 4 Use the or key to select Power and press ENTER 5 Use the or key to cha...

Страница 117: ...low a normal light output curve is shown over the first 1000 hours image 11 8 By using CLO and setting the target to 60 of the maximum light output one will be able to operate during approximately 500 hours with a constant light output image 11 9 100 20 40 60 80 200 400 600 800 1000 Relative Light Output Runtime hrs Image 11 8 100 20 40 60 80 200 400 600 800 1000 Relative Light Output Runtime hrs ...

Страница 118: ...he or key to select CLO target lumens and press ENTER to activate the first digit 5 Use or the numeric keys on the remote or the keypad to change the target value Image 11 13 Image 11 14 Image 11 15 11 6 Lamp Identification About The lamp identification menu gives an overview of the most important parameters of the used lamp These parameters are Serial number lamp Article number of the used lamp R...

Страница 119: ...lamp position in the lamp casing also called Z axis adjustment of the lamp With higher run times the light output of the lamp will decrease which results in a lower light output on the screen This light output decrease can be compensated by readjusting the position of the lamp For the realignment procedure see Realignment of the lamp in its reflector page 191 How to display the light output 1 Pres...

Страница 120: ...11 Lamp menu 116 R5976921 FLM R20 PERFORMER 15 03 2010 ...

Страница 121: ...ide keystone Warp geometry settings Contrast enhancement Blanking Gamma Internal pattern Color space ScenergiX 12 1 Overview flow Overview Level 1 Level 2 Level 3 Alignment Orientation Front Table Front Ceiling Rear Table Rear Ceiling Lens Zoom Focus Shift Mid position Side keystone Warp Horizontal keystone Vertical keystone Rotation Pincushion Barrel 4 corners Load file Blanking Top Bottom Left R...

Страница 122: ...tern Reset 12 2 Orientation What can be done The way of physical installation of the projector can be defined to the projector The following installation are possible front table front ceiling rear table rear ceiling Set up the correct orientation 1 Press MENU to activate the menus 2 Use the or key to select Alignment and press ENTER 3 Use the or key to select Orientation and press ENTER 4 Use the...

Страница 123: ...lens button on the local keypad or the remote control Access to the lens adjustments 1 Press MENU to activate the menus 2 Use the or key to select Alignment and press ENTER 3 Use the or key to select Lens and press ENTER The lens adjustment menu is displayed Image 12 4 Image 12 5 Image 12 6 Zoom focus the lens 1 Use the or key to select Zoom Focus and press ENTER Image 12 7 Image 12 8 R5976921 FLM...

Страница 124: ...right Mid position 1 Use the or key to select Mid position and press ENTER The lens will move to its mid position During this operation a message is displayed Motor running Image 12 11 12 4 Side keystone Only available when the Warp status is Off What can be done The side keystone adjustment is used to align the image if the projector is mounted at a non standard projection angle Image 12 12 Side ...

Страница 125: ...sed the normal side keystone setting is disabled Overview About Warp geometry settings Warp Status Horizontal keystone correction Vertical keystone correction Rotation Pincushion Barrel correction 4 corner correction Reset warp settings Load warp file 12 5 1 About Warp geometry settings Warping Image warping is the process of digitally manipulating an image such that any shapes portrayed in the im...

Страница 126: ...g the keystone functions will gray out the 4 corners setting File an external created file is used to correct the image More precise corrections are possible on a lot of more points in the image When switching the warp status from Manual or File to Off and back again the latest used warp settings will be loaded again How to set the status 1 Press MENU to activate the menus 2 Use the or key to sele...

Страница 127: ...he aspect ratio of the image is not changed Image 12 21 Horizontal keystone correction When the keystone is adjusted the 4 corners adjustment is disabled How to set the status 1 Press MENU to activate the menus 2 Use the or key to select Alignment and press ENTER 3 Use the or key to select Warp and press ENTER The warp dialog box appears 4 Use the or key to select Horizontal keystone and press ENT...

Страница 128: ...the keystone adjustment the aspect ratio of the image is not changed Image 12 26 Vertical keystone correction When the keystone is adjusted the 4 corners adjustment is disabled How to set the status 1 Press MENU to activate the menus 2 Use the or key to select Alignment and press ENTER 3 Use the or key to select Warp and press ENTER The warp dialog box appears 4 Use the or key to select Vertical k...

Страница 129: ...ojector is slightly rotated around its axes Image 12 31 Rotation How to rotate 1 Press MENU to activate the menus 2 Use the or key to select Alignment and press ENTER 3 Use the or key to select Warp and press ENTER The warp dialog box appears 4 Use the or key to select Rotation and press ENTER 5 Use or to change the rotation angle R5976921 FLM R20 PERFORMER 15 03 2010 125 ...

Страница 130: ...tion Negative adjustments introduce more pincushion distortion Image 12 36 Barrel and pincushion distortion How to correct the distortion 1 Press MENU to activate the menus 2 Use the or key to select Alignment and press ENTER 3 Use the or key to select Warp and press ENTER The warp dialog box appears 4 Use the or key to select Pincushion Barrel and press ENTER 5 Use or to adjust the pincushion or ...

Страница 131: ... are possible Top left X Top left Y Top right X Top right Y Bottom left X Bottom left Y Bottom right X Bottom right Y Image 12 41 Once an adjustment is done in one of the 4 corners the horizontal and vertical keystone corrections are disabled How to move a corner 1 Press MENU to activate the menus 2 Use the or key to select Alignment and press ENTER 3 Use the or key to select Warp and press ENTER ...

Страница 132: ...an be done The current warp settings can be reset or returned to zero 0 At that moment all functions within the warping menu are available again How to correct the distortion 1 Press MENU to activate the menus 2 Use the or key to select Alignment and press ENTER 3 Use the or key to select Warp and press ENTER The warp dialog box appears 4 Use the or key to select Reset and press ENTER All warp set...

Страница 133: ...n about a free download of Projector Toolset see Free download of Projector Toolset page 16 Image 12 50 How to load a file 1 Press MENU to activate the menus 2 Use the or key to select Alignment and press ENTER 3 Use the or key to select Warp and press ENTER The warp dialog box appears 4 Use the or key to select Load file and press ENTER The load file menu opens 5 Use the or key to select the desi...

Страница 134: ... following settings are possible Normal contrast High contrast Custom any value between normal and high contrast can be selected Image 12 55 Image 12 56 Image 12 57 5 When Custom is selected the contrast menu is displayed 6 Use the or key to select the desired adjustment and press ENTER Press EXIT to return Image 12 58 12 7 Blanking What can be done Blanking adjustments affect only the edges of th...

Страница 135: ...lanking settings back to zero How to adjust the blanking 1 Press MENU to activate the menus 2 Use the or key to select Alignment and press ENTER 3 Use the or key to select Blanking and press ENTER 4 Use the or key to select the desired blanking adjustment and press ENTER 5 Use the or key to adjust until the desired blanking is reached 6 Press EXIT to return Image 12 60 Image 12 61 Image 12 62 R597...

Страница 136: ... one of the 8 available steps Image 12 63 Image 12 64 Image 12 65 12 9 Internal pattern What can be done with these patterns The projector is equipped with different internal patterns which can be used for measurement and alignment purposes How to select 1 Press MENU to activate the menus 2 Use the or key to select Alignment and press ENTER 3 Use the or key to select Internal patterns and press EN...

Страница 137: ...is the projector color space This color space is measured at the factory and stored inside the projector How to select a color standard 1 Press MENU to activate the menus 2 Use the or key to select Alignment and press ENTER 3 Use the or key to select Color space and press ENTER 4 Use the or key to select the On or Off selection and ENTER to toggle color space on or off 5 When color space is On use...

Страница 138: ...ze adjustment White level Adjusting the black level of the images 12 11 1 Introduction Why ScenergiX When working in a multichannel setup the Projector Toolset and its Soft Edge possibilities enable an image blending that gives the appearance of a single view thus achieving realistic immersion for the majority of wide screen applications Image 12 73 Why Soft Edge What is the Basic Principal of Sce...

Страница 139: ...e perfectly on all projectors Convergence Geometry Color Matching Color Temperature Color Standard Input Balance Gamma 12 11 3 ScenergiX activation How to activate 1 Press MENU to activate the menus 2 Use the or key to select Alignment and press ENTER 3 Use the or key to select ScenergiX and press ENTER 4 Use the or key to select Status and press ENTER to toggle between On and Off On ScenergiX is ...

Страница 140: ...solution horizontal resolution of 1 projector x 2 minus overlap Horizontal Resolution source number of active pixels of the source How to set for the first projector 1 Go to Layout Main window Size 2 Enter the value for the Width as follow Total horizontal screen resolution 2 0 5 x overlap zone 3 Position remains the same Image 12 79 Image 12 80 Image 12 81 Image 12 82 136 R5976921 FLM R20 PERFORM...

Страница 141: ...overlap zone Image 12 83 Image 12 84 Image 12 85 Image 12 86 Image 12 87 12 11 5 ScenergiX overlap zone vertical ScenergiX Definitions Image 12 88 Scenergix overlap zone vertical Overlap number of pixels that overlap Vertical resolution of 1 projector Total vertical screen resolution Vertical resolution of 1 projector x 2 minus overlap Vertical Resolution source number of active lines of the sourc...

Страница 142: ...3 Position remains the same Image 12 89 Image 12 90 Image 12 91 Image 12 92 How to set for the second projector 1 Go to Layout Main window Size 2 Enter the value for the Width as follow Total Vertical screen resolution 2 0 5 x overlap zone 3 Position original start Vertical height projector 1 overlap zone Image 12 93 Image 12 94 Image 12 95 138 R5976921 FLM R20 PERFORMER 15 03 2010 ...

Страница 143: ...items are only accessible when status is On How to set the blending zone 1 Press MENU to activate the menus 2 Use the or key to select Alignment and press ENTER 3 Use the or key to select ScenergiX and press ENTER 4 Use the or key to select White level and press ENTER 5 Use the or key to select one of the four size adjustments and press ENTER Image 12 98 Image 12 99 Image 12 100 Image 12 101 R5976...

Страница 144: ...age 12 102 Width selections 6 Use the cursor keys to move the border of the overlap area to the desired position Set first the width for the first projector and repeat for the second one Image 12 103 Width set up for projector 1 140 R5976921 FLM R20 PERFORMER 15 03 2010 ...

Страница 145: ...he leakage area must be set The white cursor line indicates the border of the overlap area The green cursor line indicates the current installed DLP leakage area border and starts at the position of the white cursor line no width installed This green line can be moved to the border of the DLP leakage area with the cursor keys Image 12 105 DLP Leakage area set up After the area is set use TEXT key ...

Страница 146: ...ze adjustments and press ENTER Image 12 106 Image 12 107 Image 12 108 Image 12 109 Image 12 110 DLP leakage area 1 Overlap area 2 DLP Leakage area 6 Use the cursor keys to move the green border line to the desired position 142 R5976921 FLM R20 PERFORMER 15 03 2010 ...

Страница 147: ...ress ENTER 4 Use the or key to select Black level and press ENTER Image 12 111 Image 12 112 Image 12 113 Image 12 114 5 Adjust the black level of area A until the black level of area A B and C are equal Use the Adjust function All Red Green and Blue in the Black level menu A C B 12 13 11 R G B RGB Image 1 Image 2 Image 12 115 Black level adjustment Use the Reset function to bring all ScenergiX set...

Страница 148: ...12 Alignment menu 144 R5976921 FLM R20 PERFORMER 15 03 2010 ...

Страница 149: ...sition Local LCD Language selection 13 1 Overview flow Overview Level 1 Level 2 Level 3 Projector control Projector address Projector address Common address Serial communication Baud rate 115200 Interface standard RS232 RS422 RS422 termination Off On Network DHCP ON OFF IP address Subnet mask Default gateway IR control IR Front On Off IR Back On Off IR Side On Off ART DMX DMX address DMX universe ...

Страница 150: ... projector via remote control or via a serial connection Next to an individual projector address each projector has also a common address for group control How to set an individual address 1 Press MENU to activate the menus 2 Use the or key to select Projector control and press ENTER 3 Use the or key to select Projector address and press ENTER 4 Use the or key to select Projector Address and press...

Страница 151: ...ivate the menus 2 Use the or key to select Projector control and press ENTER 3 Use the or key to select Projector address and press ENTER 4 Use the or key to select Common address and press ENTER The edit common address window opens 5 Use the or key to select 0 or 1 Or enter 0 or 1 with the digit keys on the remote control or local keypad 6 When the desired address is entered press ENTER to store ...

Страница 152: ... and press ENTER The serial communication menu opens 4 Use the or key to select Baudrate and press ENTER to toggle between the available baud rates The following baud rates can be selected 9600 19200 38400 57600 115200 5 Press EXIT to return Image 13 9 Image 13 10 Image 13 11 13 3 2 Interface standard What can be done The communication protocol for the communication between the projector and a com...

Страница 153: ...422 terminated ON position All others in the line should be in the OFF position How to set 1 Press MENU to activate the menus 2 Use the or key to select Projector control and press ENTER 3 Use the or key to select Serial communication and press ENTER The serial communication menu opens 4 Use the or key to select RS422 termination and press ENTER to toggle between On or Off Default On Image 13 15 I...

Страница 154: ...to the Internet MAC address Media Access Control address Unique hardware number used in combination with the IP address to connect to the network LAN or WAN What should be set up for an Ethernet address 2 ways can be used to assign an address use the DHCP setting so that an automatic address will be assigned Assign manually an IP address Net mask subnet mask default gateway address Set the IP Addr...

Страница 155: ... key to select IP address and press ENTER to select Note An address contains 4 octets with a maximum value of 255 This must NOT be 0 0 0 0 for static IP Address assignment 5 Use the or key to select the desired digit and press or key to select the next digit in the address Or enter the value with the digit keys on the remote control or local keypad The next digit in the address will be selected au...

Страница 156: ... 13 4 5 Default Gateway set up How to set up 1 Press MENU to activate the menus 2 Use the or key to select Projector control and press ENTER 3 Use the or key to select Network and press ENTER The Ethernet menu opens 4 Use the or key to select Default Gateway and press ENTER to select Note An address contains 4 octets with a maximum value of 255 Set the default gateway to the IP address of the rout...

Страница 157: ...tch 1 Press MENU to activate the menus 2 Use the or key to select Projector control and press ENTER 3 Use the or key to select IR Control and press ENTER 4 Use the or key to select the desired IR receiver and press ENTER to toggle this receiver on or off Image 13 33 Image 13 34 Image 13 35 13 6 Art Net DMX DMX DMX 512 Lighting protocol here used over Ethernet Carries information of 512 channels fr...

Страница 158: ...r This address can vary from to 512 How to set a DMX address 1 Press MENU to activate the menus 2 Use the or key to select Projector control and press ENTER 3 Use the or key to select ART DMX and press ENTER 4 Use the or key to select DMX address and press ENTER The edit DMX address window opens 5 Use the or key to select a new value Or enter a value with the digit keys on the remote control or lo...

Страница 159: ...verse value is entered press ENTER to store that value Image 13 40 Image 13 41 Image 13 42 Image 13 43 13 6 3 DMX monitor What can be done If a DMX device is connected the settings per channel can be displayed in an on screen menu How to start up the monitoring 1 Press MENU to activate the menus 2 Use the or key to select Projector control and press ENTER 3 Use the or key to select ART DMX and pre...

Страница 160: ...tly 2 channels implemented Extended which has currently 10 channels implemented Full which has currently 9 channels implemented and 10th free channel Depending on the DMX application the correct mode has to be selected For the complete DMX chart of each mode see DMX chart page 207 How to set the mode 1 Press MENU to activate the menus 2 Use the or key to select Projector control and press ENTER 3 ...

Страница 161: ...startup What can be done At power On the lens will search for its minimum and its maximum position These minimum and maximum values will be used during this sessions to control the lens exactly Once the lens limits are found the lens returns to original position This full process takes about 3 to 4 minutes During the homing cycle all functions in the projector are blocked How to set 1 Press MENU t...

Страница 162: ...hortcut keys 13 7 1 Standby button What is possible When going to standby by pressing the standby button the following can happen Only the lamp will be switched off The lamp and the power will be switched off How to set 1 Press MENU to activate the menus 2 Use the or key to select Projector control and press ENTER 3 Use the or key to select Buttons and press ENTER 4 Use the or key to select Standb...

Страница 163: ... ENTER to toggle between Align only and Auto image menu Image 13 60 Image 13 61 Image 13 62 13 7 3 Shortcut keys What can be done An overview of the shortcut allocations with the corresponding menu is given Those printed in bold are allocated The allocated shortcut keys can be cleared within this menu How to clear a shortcut key 1 Press MENU to activate the menus 2 Use the or key to select Project...

Страница 164: ... aligned Menu position Menu center Barscale center Menu position Menu top Barscale center Menu position Menu bottom Barscale center Image 13 67 Menu position How to change the position 1 Press MENU to activate the menus 2 Use the or key to select Projector control and press ENTER 3 Use the or key to select Menu position and press ENTER 4 Use the or key to select Menu and press ENTER to toggle betw...

Страница 165: ...r key to select Menu position and press ENTER 4 Use the or key to select Menu and press ENTER to toggle between Center Top and Bottom Image 13 72 Image 13 73 Image 13 74 13 9 Local LCD Overview Local LCD time out Local LCD contrast 13 9 1 Local LCD time out What can be done The backlight time of the local LCD after a command is given can be set How to change 1 Press MENU to activate the menus 2 Us...

Страница 166: ...ect Projector control and press ENTER 3 Use the or key to select Local LCD and press ENTER 4 Use the or key to select Local LCD contrast and press ENTER 5 Use the or key to adjust the local contrast Image 13 78 Image 13 79 Image 13 80 Image 13 81 13 10 Language selection What can be done The user can change the language of the on screen menus and the local display menus to one of the available lan...

Страница 167: ...tive language is indicated by an asterisk How to change the language 1 Press MENU to activate the menus 2 Use the or key to select Projector control and press ENTER 3 Use the or key to select Language and press ENTER 4 Use the or key to select the desired language The change will take effect immediately Image 13 82 Image 13 83 Image 13 84 R5976921 FLM R20 PERFORMER 15 03 2010 163 ...

Страница 168: ...13 Projector control 164 R5976921 FLM R20 PERFORMER 15 03 2010 ...

Страница 169: ...s Restore factory defaults Reset formatter Save custom settings Refill mode Broadcast mode USB memory 14 1 Overview flow Overview Level 1 Level 2 Level 3 Service Identification Diagnosis Version Voltages Temperatures Fan speeds I2C SPI Error logging Convergence Internal service patterns PNP IN OSD PMP OUT FIB Formatter Restore factory defaults Reset formatter Save custom settings Refill mode Broad...

Страница 170: ...or key to select Service and press ENTER The service window opens 3 Use the or key to select Identification and press ENTER The identification screen is displayed Image 14 1 Image 14 2 Image 14 3 Add a customer ID to identification window When on the identification window 1 Use the or key to select Customer ID and press ENTER The Customer ID input window opens Image 14 4 2 Use the or key to change...

Страница 171: ...agnosis screen will be displayed Image 14 5 Image 14 6 Image 14 7 Those menus who contain measured values indicate also the limits if these are available 14 3 2 Versions How to display an overview 1 Press MENU to activate the menus 2 Use the or key to select Service and press ENTER The service window opens 3 Use the or key to select Diagnosis and press ENTER The diagnosis screen is displayed 4 Use...

Страница 172: ...ctivate the menus 2 Use the or key to select Service and press ENTER The service window opens 3 Use the or key to select Diagnosis and press ENTER The diagnosis screen will be displayed 4 Use the or key to select Voltages and press ENTER The Voltage overview menu will be displayed Image 14 12 Image 14 13 Image 14 14 Image 14 15 168 R5976921 FLM R20 PERFORMER 15 03 2010 ...

Страница 173: ...gnosis screen is displayed 4 Use the or key to select I2C and press ENTER The I C diagnosis overview is displayed Image 14 16 Image 14 17 Image 14 18 Image 14 19 14 3 5 Temperatures How to get an overview 1 Press MENU to activate the menus 2 Use the or key to select Service and press ENTER The service window opens 3 Use the or key to select Diagnosis and press ENTER The diagnosis screen will be di...

Страница 174: ...14 3 6 Fan speeds overview How to get an overview 1 Press MENU to activate the menus 2 Use the or key to select Service and press ENTER The service window opens 3 Use the or key to select Diagnosis and press ENTER The diagnosis screen will be displayed 4 Use the or key to select Fan speeds and press ENTER The Fan speeds overview menu will be displayed 170 R5976921 FLM R20 PERFORMER 15 03 2010 ...

Страница 175: ...erview 1 Press MENU to activate the menus 2 Use the or key to select Service and press ENTER The service window opens 3 Use the or key to select Diagnosis and press ENTER The diagnosis screen will be displayed 4 Use the or key to select SPI and press ENTER The SPI overview menu will be displayed Image 14 28 Image 14 29 Image 14 30 R5976921 FLM R20 PERFORMER 15 03 2010 171 ...

Страница 176: ...age 213 Image 14 32 Image 14 33 Image 14 34 14 4 Convergence What can be done The convergence patterns can be used to check the convergence alignment of red green and blue If there is a misalignment of at least one 1 pixel an electronic realignment is possible Mechanical realignment of the convergence can only be done by a qualified service technician How to display the convergence patterns and ho...

Страница 177: ...r for a vertical adjust ment Image 14 38 Image 14 39 Adjust until the crossing of the center Green Red convergence pattern coincide with the diagonal line of the center Blue con vergence pattern 14 5 Internal service patterns How to select 1 Press MENU to activate the menus 2 Use the or key to select Service and press ENTER The service window opens 3 Use the or key to select Internal service patte...

Страница 178: ...MX settings Electronic convergence For these settings the choice exists to exclude them in the reset operation With this operation all user settings with the exception of the above mentioned are erased How to make an exception 1 Press MENU to activate the menus 2 Use the or key to select Service and press ENTER The service window opens 3 Use the or key to select Restore factory defaults and press ...

Страница 179: ...d to erase the custom settings select Yes If you are not sure select No Image 14 46 Image 14 47 Image 14 48 14 7 Reset formatter How to reset 1 Press MENU to activate the menus 2 Use the or key to select Service and press ENTER The service window opens 3 Use the or key to select Reset formatter and press ENTER The formater reset confirmation window opens 4 Use the or key to select Yes or No and pr...

Страница 180: ...vice A message menu Save data is displayed during the save operation Image 14 52 Image 14 53 14 9 Refill mode Before selecting Refill mode take first all preparations necessary to refill the cooling circuit What can be done When all preparations are taken the refill mode will automatically activate the refill process How to start the refill mode 1 Press MENU to activate the menus 2 Use the or key ...

Страница 181: ...rs What can be done Broadcast mode enables special sequences for the DMD s to support specific sources such as the Thompson Grass Valley World cam It shouldn t be used in any other circumstances as it would cause image flicker and dimmed images with normal sources Default position Off How to set up 1 Press MENU to activate the menus 2 Use the or key to select Service and press ENTER The service wi...

Страница 182: ...de dimming rs232 interface rs232 termination no signal setup settings IR receiver settings native resolution min delay current language of on screen menus customer id Network settings DHCP IP address net mask gateway address blanking keystone ScenergiX gamma color standard source switching effect settings broadcast mode menu position button settngs locking settings Saving custom settings 1 Connect...

Страница 183: ...B port 2 Press MENU to activate the menus 3 Use the or key to select Service and press ENTER The service window opens 4 Use the or key to select USB memory and press ENTER 5 Use the or key to select Load custom settings and press ENTER An list of serial numbers is given 6 Use the or key to select the serial number to start from to load the settings The settings from the selected projector on the U...

Страница 184: ...14 Service menu 180 R5976921 FLM R20 PERFORMER 15 03 2010 ...

Страница 185: ...e Replacement of the dust filter on the top side Pressure verification of the liquid cooling circuit Cleaning the lens Cleaning the exterior of the projector 15 1 Replacement of the dust filter on the front side Necessary parts New HEPA dust filter for the front side R9854470 How to replace the HEPA dust filter on the front side of the projector 1 Remove the front cover of the projector see Remova...

Страница 186: ...ide cover page 194 2 Release not remove the two wedge lock screws A using a 2 5 mm Allen key as illustrated A A Image 15 2 3 Remove the filter F on the bottom side by pulling out the filter holder H as illustrated F H H Image 15 3 4 Place a new HEPA dust filter in the filter holder Caution Make sure that the airflow indicated on the dust filter match with the airflow of the fans 5 Reinstall the fi...

Страница 187: ... by pulling out the filter holder H as illustrated F H Image 15 5 3 Place a new HEPA dust filter in the filter holder Caution Make sure that the airflow indicated on the dust filter match with the airflow of the fans 4 Reinstall the filter holder containing the new HEPA filter 5 Reinstall the side cover of the projector see Installation of the side cover page 197 CAUTION Never install a used HEPA ...

Страница 188: ... lens 1 Always wipe lenses with a CLEAN TorayseeTM cloth 2 Wipe lenses in a one single direction Warning Do not wipe back and forwards across the lens surface as this tends to grind dirt into the coating 3 Do not leave the cleaning cloth in either an open room or lab coat pocket as doing so can contaminate the cloth 4 If smears occur when cleaning lenses replace the cloth Smears are the first indi...

Страница 189: ...ot yet registered click on Partnerzone registration and follow the instructions With the created login and password it is possible to enter the partnerzone where you can find extra service information about the projector 16 1 Removal of the lamp house WARNING This procedure may only be performed by qualified technical service personnel CAUTION Never attempt to disassemble the lamp from its housing...

Страница 190: ...ols 7 mm flat screw driver How to remove the input communication unit from the projector 1 Switch off the projector and unplug the power cord at the projector side See procedure Switching off page 47 2 Ensure that no cables are connected to one of the ports of the input communication unit 3 Remove the input cover see Removal of the input cover page 195 4 Release the four captive screws in the corn...

Страница 191: ...river PH1 How to remove an input module out of the input communication unit of the projector 1 Switch off the projector and unplug the power cord at the projector side 2 Release the two captive screws of the input module using a Phillips screw driver PH1 Image 16 5 3 Pull the input module out of the input communication unit via the two knobs provided R5976921 FLM R20 PERFORMER 15 03 2010 187 ...

Страница 192: ... its housing or to dispose of it Return it to Barco Due to its high internal pressure the lamp may explode in either hot or cold states if improperly handled Necessary tools 7 mm flat screw driver How to install the lamp house of the projector 1 Ensure the projector is switched off and the power cord at the projector side is unplugged 2 Remove the lamp cover if not removed yet See Removal of the l...

Страница 193: ...ojector 16 5 Installation of the input communication unit WARNING This procedure may only be performed by qualified technical service personnel Necessary tools 7 mm flat screw driver How to install the input communication unit of the projector 1 Ensure that the projector is switched off and the power cord at the projector side is unplugged 2 Remove the input cover if not removed yet See Removal of...

Страница 194: ...ews in the corners of the unit Image 16 10 16 6 Installation of an input module The procedure below is applicable to all input modules of the input communication unit of the projector Necessary tools Phillips screw driver PH1 How to install an input module into the input communication unit of the projector 1 Switch off the projector and unplug the power cord at the projector side 2 Slide the input...

Страница 195: ...the screen This light output decrease can be compensated by readjusting the Z position of the lamp WARNING This procedure may only be performed by qualified technical service personnel How to realign the lamp in its reflector 1 Remove the cover of the lamp see Removal of the lamp cover page 195 2 Connect the projector to the local power net see Power connection page 35 3 Start up the projector ent...

Страница 196: ...e 16 13 5 Switch off the projector wait five minutes and unplug the power cord at the projector side 6 Reinstall the cover of the lamp see Installation of the lamp cover page 198 192 R5976921 FLM R20 PERFORMER 15 03 2010 ...

Страница 197: ...ojector side before removing one of the covers Overview Removal of the front cover Removal of the side cover Removal of the lamp cover Removal of the input cover Installation of the front cover Installation of the side cover Installation of the lamp cover Installation of the input cover 17 1 Removal of the front cover Necessary tools 7 mm flat screw driver How to remove the front cover of the proj...

Страница 198: ...r similar Necessary tools 7 mm flat screw driver How to remove the side cover of the projector 1 Release the captive screw at the middle bottom of the side cover using a flat screw driver Image 17 3 2 Remove the side cover from the projector doing the following a gently pull out the bottom corners A of the side cover b then gently pull out the top corners B of the side cover c then move the side c...

Страница 199: ... from the projector doing the following a gently pull out the left bottom corner A of the lamp cover b then gently pull out the left top corner B of the lamp cover c then move the lamp cover away from the projector C Image 17 6 17 4 Removal of the input cover WARNING This procedure may only be performed by qualified technical service personnel Necessary tools 7 mm flat screw driver How to remove t...

Страница 200: ...17 5 Installation of the front cover Necessary tools 7 mm flat screw driver How to install the front cover of the projector 1 Check if the front filter is present 2 Ensure that no lens is mounted 3 Install the front cover of the projector doing the following a first hook in the side of the front cover at the front filter b then gently push the other side of the front cover into position c ensure t...

Страница 201: ...resent 2 Check the pressure indicated on the internal manometer of the liquid cooling circuit This pressure should be between 0 5 and 1 bar If the pressure is out of range inform the responsible and qualified technician so he may take necessary corrective action 1 0 5 Image 17 11 3 Install the side cover of the projector doing the following a Bring the side cover towards its final position A b the...

Страница 202: ... cover of the projector 1 Install the lamp cover of the projector doing the following a Bring the lamp cover towards its final position A b then gently push the locking stud at the left top corner B into its receiver c then gently push the locking stud at the left bottom corner C into its receiver Image 17 14 2 Secure the lamp cover by locking the two captive screws at the right side of the lamp c...

Страница 203: ...projector doing the following a Bring the input cover towards its final position A b then gently push the locking stud at the right top corner B into its receiver c then gently push the locking stud at the right bottom corner C into its receiver Image 17 16 2 Secure the input cover by locking the two captive screws at the left side of the input cover R5976921 FLM R20 PERFORMER 15 03 2010 199 ...

Страница 204: ...17 Removal of the projector covers 200 R5976921 FLM R20 PERFORMER 15 03 2010 ...

Страница 205: ...ase Dimensions of the rigging clamps A 1 Dimensions of the FLM R20 Performer Dimensions 730 250 520 643 14 8 130 148 148 480 485 459 485 643 676 1 771 1 771 1 1040 598 05 483 5 512 6 310 5 47 5 115 25 78 05 47 5 43 5 9 Image A 1 Dimensions given in millimeters R5976921 FLM R20 PERFORMER 15 03 2010 201 ...

Страница 206: ...avity 233 359 224 5 Image A 2 Dimensions given in millimeters A 2 Dimensions of the FLM flight case Dimensions 1194 660 817 5 808 1175 819 800 Image A 3 Dimensions given in millimeters 202 R5976921 FLM R20 PERFORMER 15 03 2010 ...

Страница 207: ...A Dimensions A 3 Dimensions of the rigging clamps Dimensions 99 50 M10 26 5 18 SW17 40 45 30 30 75 29 82 120 Image A 4 Dimensions given in millimeters R5976921 FLM R20 PERFORMER 15 03 2010 203 ...

Страница 208: ...A Dimensions 204 R5976921 FLM R20 PERFORMER 15 03 2010 ...

Страница 209: ...68 85 84 996 68 677 94 499 1376 1024 808 768 1152x864 75 74 999 67 499 107 999 1600 1152 900 864 1280x768 60 59 870 47 776 79 499 1664 1280 798 768 1280x768 75 74 992 60 288 102 249 1696 1280 805 768 1280x768 85 84 838 68 634 117 502 1712 1280 809 768 1280x768RB 60 59 994 47 396 68 250 1440 1280 790 768 1280x960 60 59 999 59 999 107 998 1800 1280 1000 960 1280x960 85 85 005 85 940 128 505 1728 128...

Страница 210: ...0x1440 60 60 001 90 001 234 002 2600 1920 1500 1200 hd 1280x720 60p 60 001 45 000 74 251 1650 1280 750 720 hd 1920x1035 30i 60 000 33 720 74 184 2200 1920 562 517 hd 1920x1080 24p 24 000 27 000 74 250 2750 1920 1125 1080 hd 1920x1080 24sf 48 001 54 002 148 504 2750 1920 1125 1080 hd 1920x1080 25i 50 044 28 125 74 249 2640 1920 562 540 hd 1920x1080 25p 25 000 28 125 74 249 2640 1920 1125 1080 hd 19...

Страница 211: ... 7 no function 8 15 Layout 1 16 23 Layout 2 24 31 Layout 3 32 39 Layout 4 40 47 Layout 5 48 55 Layout 6 56 63 Layout 7 64 71 Layout 8 72 79 Layout 9 80 87 Layout 10 88 95 Input select 1 96 103 Input select 2 104 111 Input select 3 112 119 Input select 4 120 127 128 135 136 143 144 151 152 159 160 167 168 175 176 183 184 207 208 215 Power On Lamp On 216 223 Power Off Lamp Off 224 255 R5976921 FLM R...

Страница 212: ...5 sec 64 71 Layout 8 execution takes 5 sec 72 79 Layout 9 execution takes 5 sec 80 87 Layout 10 execution takes 5 sec 88 95 Input select 1 96 103 Input select 2 104 111 Input select 3 112 119 Input select 4 120 127 128 135 136 143 144 151 152 159 160 167 168 175 176 183 4 Input selection 184 255 No function 0 7 No function 8 15 Lens shift Right 16 23 No function 24 31 Lens shift Left 32 39 No func...

Страница 213: ... 64 144 151 Lamp power 62 152 159 Lamp power 60 160 167 No function 168 175 DMX buffer 4 Not used 176 183 DMX buffer 8 Not used 184 191 DMX buffer off Not used 192 199 DMX buffer clear Not used 200 207 No function 208 215 Power On Lamp On if held for 5 seconds 216 223 Stand by Lamp Off if held for 5 seconds 10 Control 224 255 No function C 3 DMX chart Full Overview Chan nel Function Value Default ...

Страница 214: ...ut select 3 112 119 Input select 4 120 127 128 135 136 143 144 151 152 159 160 167 168 175 176 183 4 Input selection 184 255 No function 0 31 No function 32 63 Focus motor 64 95 Zoom motor 96 127 Lens shift Right Left 128 159 Lens shift Up Down 160 191 Power On Lamp On together with channel 6 and 7 held in 255 for 5 sec 192 223 Stand By Lamp Off together with channel 6 and 7 held in 255 for 5 sec ...

Страница 215: ...at 100 27 52 Powered at 98 53 79 Powered at 96 80 105 Powered at 94 106 131 Powered at 91 132 157 Powered at 89 158 183 Powered at 86 184 209 Powered at 84 210 235 Powered at 82 9 Lamp Power 236 255 Powered at 80 10 Free 0 255 R5976921 FLM R20 PERFORMER 15 03 2010 211 ...

Страница 216: ...C DMX chart 212 R5976921 FLM R20 PERFORMER 15 03 2010 ...

Страница 217: ...n with red formatter Call a qualified service engineer 1694 Green form start failed Yes no communication with green formatter Call a qualified service engineer 1693 Blue form start failed Yes no communication with blue formatter Call a qualified service engineer 1692 Form PWRGood Yes formatter Power Good signal not OK Call a qualified service engineer 2000 No lps detected Yes no communication with...

Страница 218: ... power range Yes lamp voltage too high or too low Replace lamp 2508 Lamp power range Yes lamp voltage too high or too low Replace lamp 2808 Lamp power range Yes lamp voltage too high or too low Replace lamp 4000 Incompatible hardware Yes No Incompatible hardware used Change to correct hardware 4199 FIB reset failed Yes no communication with FIB Call a qualified service engineer 5098 Flash full Yes...

Страница 219: ...sensor on blue DMD not connected Call a qualified service engineer 7684 Blue front DMD temp short Yes Yes Temperature sensor on blue DMD shorted Call a qualified service engineer 7676 Front block temp high Yes Yes High temperature on front DMD cooling block Check if air slots are free Clean air filters If problem persists call a qualified service engineer 7675 Front block temp open Yes Yes Tempera...

Страница 220: ...igh Yes 7995 Fan speed engine too low Yes Yes fan is running too slow or not at all If problem persists call a qualified service engineer 7994 Fan speed engine high Yes 7993 Fan speed cold mirror too low Yes Yes fan is running too slow or not at all If problem persists call a qualified service engineer 7992 Fan speed cold mirror high 7991 Fan speed heat ex too low Yes Yes fan is running too slow o...

Страница 221: ...tage on fan group 3 too high Hardware problem in Fan control board call a qualified service engineer 7967 Fan 4 voltage low Yes Yes voltage on fan group 4 too low cold mirror head ex fan Hardware problem in Fan control board call a qualified service engineer 7966 Fan 4 voltage high Yes voltage on fan group 4 too high cold mirror head ex fan Hardware problem in Fan control board call a qualified se...

Страница 222: ... Yes No bad or no water flow in cooling circuit If problem persists call a qualified service engineer 7936 Tilt No Yes tilt angle is out of specifications Correct projection installation Change the tilting so that the tilt angle becomes within the specifications 7935 Engine not well inserted Yes No engine is not correctly inserted If problem persists call a qualified service engineer 7934 FIB not ...

Страница 223: ... by Action 9398 Maximum image files reached Yes No Reaching the maximum allowed number of files Delete some unnecessary files 10498 Unsupported module Yes No Module with obsolete firmware Call a qualified service engineer R5976921 FLM R20 PERFORMER 15 03 2010 219 ...

Страница 224: ...D Troubleshooting 220 R5976921 FLM R20 PERFORMER 15 03 2010 ...

Страница 225: ...oltage 200 240 V Weight 99 kg 220 lbs Dimensions WxLxH 707 x 1025 x 548 mm 27 8 x 40 3 x 21 5 inch incl carrying handle rigging points Noise Level 56 dBA at 40 C ScenergiX Standard horizontal and vertical electronic edge blending Network connection 10 100 base T Picture in picture 2 sources simultaneous Input source compatibility Max input up to QXGA 2048 x 1536 Inputs Modular Inputs Configurable ...

Страница 226: ...M NTSC in Composite S VHS Component or RGB formats All current HDTV sources All computer graphics formats from VGA SVGA XGA SXGA full HD UXGA to QXGA Most Macintosh computers Electronic workstations with a resolution up to QXGA 2048 x 1536 pixels at 60 Hz Most computer sources with a pixel clock up to 300 MHz DVI sources up to DC2K 2048x1080 Power Dissipation max 11953BTU h Features Picture in pic...

Страница 227: ...input multi purpose Front view 5 cable input SYCN OK SEL 5 CABLE INPUT R PR G Y VIDEO B PB H S V CR Image E 1 Signal connectivity Input signal R PR G Y VIDEO B PB H S V CR RGBHV R G B H V RGBS R G B S composite sync or VIDEO as sync RGsB R Gs sync on green B Composite Video VIDEO Super Video Y Luma C Chroma Component Video SS PR R Y Y PB B Y S composite sync or VIDEO as sync Component Video SOY PR...

Страница 228: ...5 Ohm termination RG s B o R 0 7Vpp 3dB 75 Ohm termination o G s 1Vpp 3dB 0 7Vpp G 0 3Vpp Sync 75 Ohm termination o B 0 7Vpp 3dB 75 Ohm termination Diagnostic LED s on front panel Green LED Lights up in case input module is selected Yellow LED Lights up in case sync detected E 3 Specifications FLM HDSDI SDI input Input front view HDSDI SDI input HDSDI SDI input Input 1 Input 2 Loop output Sync OK ...

Страница 229: ...4 Segmented SMPTE 274M o 1920x1080 23 98 Segmented SMPTE 274M E 4 Specifications FLM DVI input Input front view Sync OK Sel DVI input Image E 3 Specifications DVI type DVI I DVI Integrated but the analog signals are not supported Single link configuration Single link dvi for pixelclocks up to 165MHz Vertical frequencies 24 75 Hz Horizontal frequencies 20 90 kHz Supported resolutions up to UXGA 160...

Страница 230: ...ixel 48 Bit Dual Pixel Output Mode 16 7M Colors at 1 or 2 Pixels Per Clock Digital Visual Interface DVI and High Bandwidth Digital Content Protection HDCP Specification Compliant Vertical frequencies 24 75 Hz Horizontal frequencies 20 90 kHz Cable lengths up to 3 meter at UXGA speed Compliance DDC2B support according to VESA EDID Version 1 2 Diagnostic LED s on front panel Green LED Lights up in c...

Страница 231: ... FLM front top and bottom filters 6 pieces each R9854480 FLM front top and bottom filters 24 pieces each R9854510 FLM flight case R764988 FLM remote control unit RCU R820411 One rigging clamp for truss installations Z3499178 FLM power cord R9840900 TLD fixed lens 0 8 1 R9840770 TLD fixed lens 1 2 1 R9840775 TLD 1 2 1 fixed lens R9840670 TLD zoom lens 1 6 2 0 1 R9840680 TLD zoom lens 2 0 2 8 1 R984...

Страница 232: ...F Order info 228 R5976921 FLM R20 PERFORMER 15 03 2010 ...

Страница 233: ...sured using the Kelvin degrees K temperature scale Higher temperatures output more light Common address Projector will always execute the command coming from a RCU programmed with that common address Default Gateway A router that serves as an entry point into and exit point out of a network For example a local network LAN may need a gateway to connect it to a wide area network WAN or to the Intern...

Страница 234: ...f security and is controlled by the authority responsible for the location RS232 An Electronic Industries Association EIA serial digital interface standard specifying the characteristics of the communication path between two devices using either D SUB 9 pins or D SUB 25 pins connectors This standard is used for relatively short range communications and does not specify balanced control lines RS 23...

Страница 235: ...7 Art Net DMX 153 157 Art Net activation 157 DMX address 154 DMX mode 156 DMX monitor 155 DMX universe 154 Home lens at startup 157 Aspect ratio 82 83 Custom 83 B Background color 65 No signal 65 Blanking 130 Box content 11 Brightness 71 Broadcast mode 177 Buttons 158 159 APA 159 Auto 159 Shortcut keys 159 Standby 158 C Card bus 41 Ceiling mount 26 Align 26 cleaning 184 lens 184 Cleaning 184 Exter...

Страница 236: ...90 Image settings 70 76 78 79 Brightness 71 Color saturation 72 Color temperature 76 Contrast 71 Hue 73 Input balance 78 Input balance adjusting 79 Noise reduction 75 Phase 73 Saturation 72 Sharpness 74 Tint 73 Overview flow 69 Save custom settings 93 Source timings 83 Start up 70 Timings 83 84 Advanced settings 84 Image file services 88 Image files 205 standard 205 Image services 88 93 Copy file ...

Страница 237: ...position 160 161 Bar scale 161 On screen menu 160 Minimum delay 63 N Native resolution 63 Navigation 56 Adjustment mode 56 Network 149 152 DHCP 150 Gateway 152 Introduction 150 IP address 151 Subnet mask 151 No signal 65 66 Background color 65 Shutdown 66 Shutdown retarding time 66 Noise reduction 75 Notice on safety 5 O Off Axis 14 On screen menus 57 On Axis 14 Order info 227 Orientations 12 13 F...

Страница 238: ... factory defaults 174 Rigging clamps 26 Rigging key 51 Quick layout selection 51 Rigging points 26 RS232 39 RS422 39 S Safety 5 6 8 18 Battery explosion 18 Flight cases 8 General 5 Instructions 6 Servicing 8 Saturation 72 Save as 108 Layout 108 Save custom settings 176 ScenergiX 134 137 139 141 Activation 135 Black level 141 Horizontal overlap 136 Introduction 134 Preparations 135 Size adjustment ...

Страница 239: ...tterns 57 Adjustment mode 57 Text on off 49 Tilt range 15 Timings 83 Tint 73 Troubleshooting 213 Error codes 213 U Unpacking 10 USB memory 178 USB port 41 V Versions 167 Start up 167 Volt meter 36 Voltages 168 Start up 168 W Warp geometry settings 121 129 4 corners 127 About 121 Barrel correction 126 Horizontal keystone 123 Load warp file 129 Pincushion correction 126 Reset 128 Rotation 125 Vertic...

Страница 240: ...Index 236 R5976921 FLM R20 PERFORMER 15 03 2010 ...

Страница 241: ...umentation Noordlaan 5 B 8520 Kuurne Phone 32 56 36 82 11 Fax 32 56 36 88 24 E mail service mne barco com Web www barco com From Date Please correct the following points in this documentation R5976921 11 page wrong correct R5976921 FLM R20 PERFORMER 15 03 2010 ...

Отзывы: