7. Start up of the Adjustment Mode
How to use a shortcut key
While in the operational mode, no menu selected, just press on the desired digit key to open the menu behind that shortcut key.
How to create a shortcut key
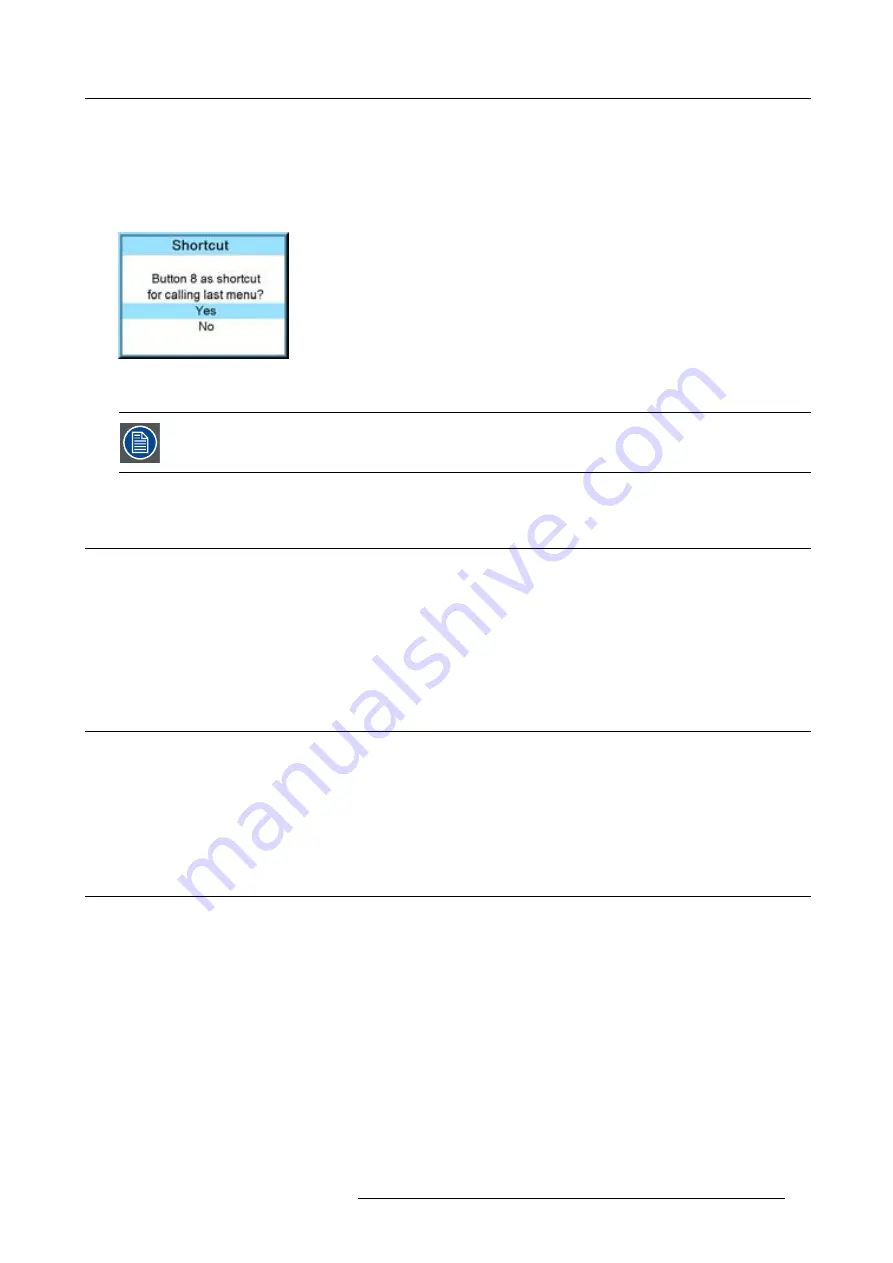
Scroll to the desired menu. Press the digit key behind which the menu must be stored for 5 seconds. When the creation is success-
fully, a con
fi
rmation message appears on the screen. E.g. :
Image 7-4
Select
Yes
to con
fi
rm the creation.
To erase the shortcut, navigate to
Projector Control
→
Buttons
.
7.6
On screen menus versus LCD display menus
Overview
As the projector is equipped with an 8 lines LCD panel, the on-screen menus are also displayed on that LCD panel in the same
structure as the on screen menus. These menus can be used in the same way as the on-screen menus.
The menus on the LCD panel are still reachable even when the projector lamp is not activated and when Text is in the off mode.
When quitting the menu structure, the backlighting of the LCD panel is switched off after a few seconds.
7.7
Test patterns in adjustment mode
Overview
When the adjustment mode is started, a test pattern can be called at any moment just by pressing the
Pattern
key on the RCU or the
local key path. Press as many times on the
Pattern
key as necessary to display the desired test pattern. The test pattern remains
on the screen as long as the adjustment mode is selected, even when selecting other menus. When leaving the adjustment mode,
the selected test pattern is cleared and the normal image is displayed again.
7.8
Menu memory
Overview
Each menu with sub menus, remembers its last selected sub item even when leaving the menu structure and that as long as the
projector is running. When restarting the projector from stand-by, the menu memory is reset.
After re-opening the main menu and selecting an item, the previous selected sub item of that selected item is highlighted and can
be opened just by pressing
ENTER
.
R5976921 FLM R20+ PERFORMER 15/03/2010
57
Содержание FLM R20+ Performer
Страница 1: ...FLM R20 Performer Users manual R9004430 R5976921 11 15 03 2010 ...
Страница 34: ...3 Physical installation 30 R5976921 FLM R20 PERFORMER 15 03 2010 ...
Страница 46: ...5 Connections 42 R5976921 FLM R20 PERFORMER 15 03 2010 ...
Страница 62: ...7 Start up of the Adjustment Mode 58 R5976921 FLM R20 PERFORMER 15 03 2010 ...
Страница 72: ...8 Input menu 68 R5976921 FLM R20 PERFORMER 15 03 2010 ...
Страница 98: ...9 Image menu 94 R5976921 FLM R20 PERFORMER 15 03 2010 ...
Страница 114: ...10 Layout menu Image 10 65 Image 10 66 Image 10 67 110 R5976921 FLM R20 PERFORMER 15 03 2010 ...
Страница 120: ...11 Lamp menu 116 R5976921 FLM R20 PERFORMER 15 03 2010 ...
Страница 148: ...12 Alignment menu 144 R5976921 FLM R20 PERFORMER 15 03 2010 ...
Страница 168: ...13 Projector control 164 R5976921 FLM R20 PERFORMER 15 03 2010 ...
Страница 184: ...14 Service menu 180 R5976921 FLM R20 PERFORMER 15 03 2010 ...
Страница 204: ...17 Removal of the projector covers 200 R5976921 FLM R20 PERFORMER 15 03 2010 ...
Страница 208: ...A Dimensions 204 R5976921 FLM R20 PERFORMER 15 03 2010 ...
Страница 216: ...C DMX chart 212 R5976921 FLM R20 PERFORMER 15 03 2010 ...
Страница 224: ...D Troubleshooting 220 R5976921 FLM R20 PERFORMER 15 03 2010 ...
Страница 232: ...F Order info 228 R5976921 FLM R20 PERFORMER 15 03 2010 ...
Страница 240: ...Index 236 R5976921 FLM R20 PERFORMER 15 03 2010 ...


