Maintenance
Procedures
8
COLD WATER BASIN
The cold water basin should be inspected regularly. Any
trash or debris which may have accumulated in the basin
or on the strainers should be removed.
Each month, the entire cold water basin should be
drained, cleaned, and flushed with fresh water to remove
the silt and sediment which normally collects in the basin
during operation. If not removed periodically, this sedi-
ment can become corrosive and cause deterioration
of the protective finish. When flushing the basin, the
strainers should be left in place to prevent the sediment
from re-entering the system. After the basin has been
flushed, the strainers should be removed, cleaned, and
replaced before refilling the basin with fresh water.
CAUTION: Do not use acid to clean the strainers.
The operating water level in the cold water basin will vary
somewhat with system thermal load (evaporation rate),
the bleed rate employed and the make-up water supply
pressure. Because the typical winter load is less than the
summer load, the winter evaporation rate is frequently
less than the summer evaporation rate. With this reduced
evaporation rate in winter, the water level in the cold water
basin will increase unless the float is re-adjusted. The
operating water level should be checked monthly and
the float re-adjusted as necessary to maintain the rec-
ommended operating level.
The water level in the basin of equipment designed for
remote sump operation is a function of the circulating
water flow rate, water outlet connection size, quantity and
location, and outlet piping size and configuration. The
remote sump unit is supplied without a water make-up
assembly and the sump operating level during remote
sump operation is not adjustable.
MAKE-UP VALVE
A float operated mechanical water make-up assembly is
furnished as standard equipment on all Series V and Low
Profile Series V equipment unless the unit has been
ordered with the optional electric water level control pack-
age or for remote sump application. It is located inside the
unit cold water basin within easy reach from the access
door at the connection end of each unit.
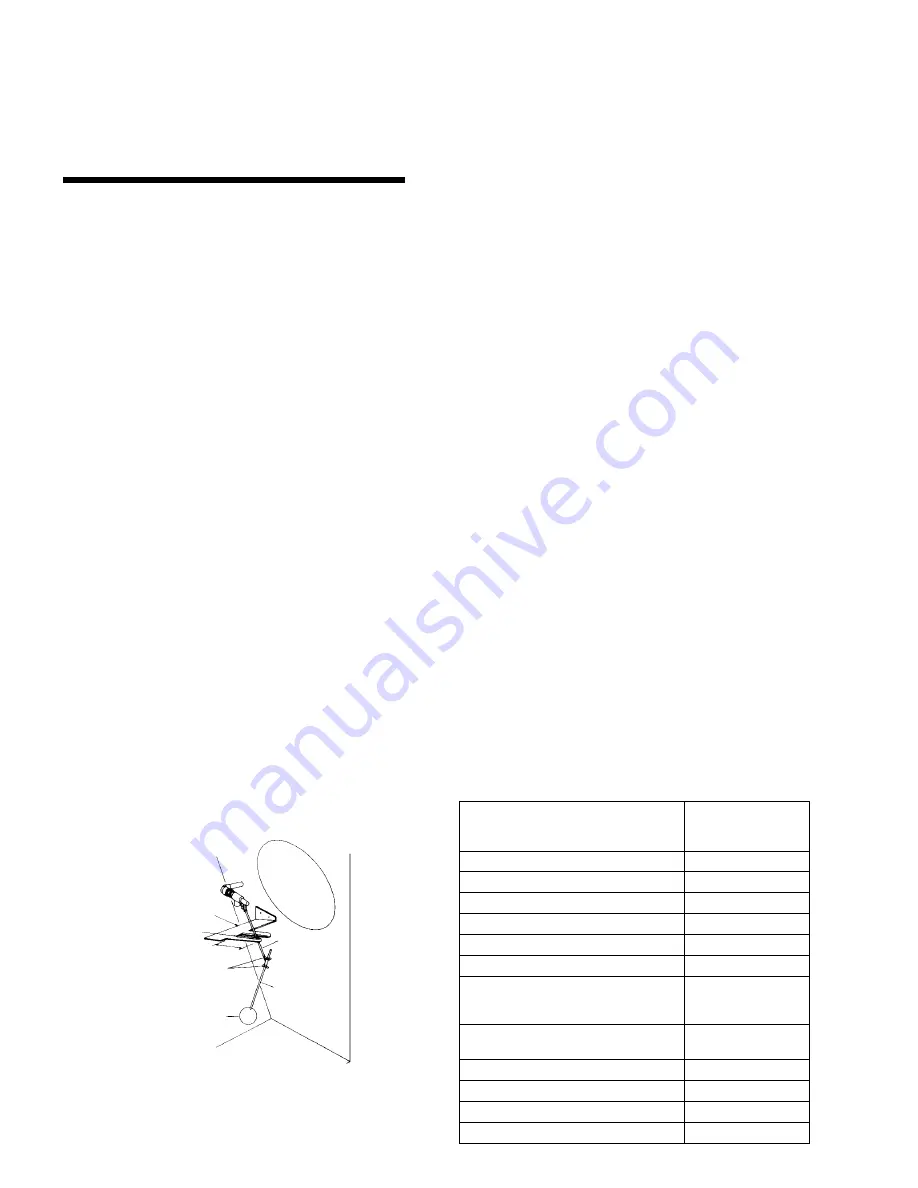
The standard make-up assembly (see Figure 1) consists
of a bronze make-up valve connected to a float arm
assembly and actuated by a large diameter polystyrene
filled plastic float. The float is mounted on an all-thread
rod which is held in place by wing nuts. The operating
water level in the cold water basin can be adjusted by
repositioning the float and all-thread rod using the wing
nuts provided.
The make-up assembly should be inspected monthly
and adjusted as necessary. The valve itself should be
inspected annually for leakage and the valve seat
replaced if necessary.
The make-up water supply pressure should be main-
tained between 15 and 50 psig for proper operation of
the valve.
To set the initial basin water level, adjust the wing nuts
so that the make-up valve is completely closed when the
water level in the cold water basin is 1/2” below the over-
flow connection. Under design thermal load and with aver-
age city water pressure (15 to 50 psig) at the valve, this
setting should produce the operating water levels stated
in Table 2. Note that if the thermal load is less than the
design load at the time of unit start-up, the procedure may
produce operating levels greater than that shown. It may
be necessary to re-adjust the float in order to attain the
recommended operating level. The unit basin should be
closely monitored and water level adjusted as necessary
during the first 24 hours of operation.
TABLE 2. Operating Water Level
Figure 1 – Water Make-Up Valve Assembly
Float Arm
Stop
Plastic U-Slip
Wing Nuts
Float Ball
Float Arm
Assembly
All Thread Rod
OPERATING
HEIGHT (measured
from basin bottom)
MODEL NO.
5
1
/
2
"
13
1
/
2
"
16
1
/
2
"
17
"
12
7
/
8
"
15
1
/
2
"
17
"
14
"
8
7
/
8
"
9
5
/
8
"
6
"
12
1
/
8
"
VTL, VFL, VCL
VF1-009 thru VF1-036, VC1-10 thru 135
VF1-048, VC1-150 thru 205
VF1-072, VC1-N208 thru N230
VTO-12 TO VTO-116
VTO-132 TO VTO-176
All VT1-N, VF1-096, VF1-144N,
VF1-192, VF1-288N, VC1-N243 thru
N470, VC1-C216 thru C469
All VT1, VTF1-144, VF1-216, VF1-288,
VF1-432, VC1-386 thru 1608
VC2-N138-N191
VC2-N206-N235
VC2-N261-N446
VC2-319-1774


