36
37
BICYCLE
ASSEMBLY
BICYCLE
ASSEMBLY
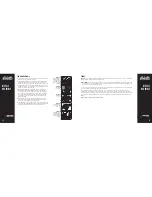
Cable head
Ferrule
Grip
Handlebar
Cable adjusting barrel
Brake lever
Fork leg
Cable
anchor bolt
DISC BRAKE
If the brake cable is not connected at the brake lever, line up brake
barrel slots with brake lever slot before installing the cable. Then
slide the head of the brake cable into the brake lever per the
diagram, and thread the cable through the slot in the brake lever so
the cable end rests squarely in the adjustment barrel or cable end
rests in the recess of the brake lever.
(Fig. M)
If the brake cable is disconnected at the disc caliper, thread the brake
wire through the adjustment barrel, loosen the cable anchor bolt
until you can see a hole through the anchor bolt for the cable wire to
attach, thread the cable wire through the cable anchor and snug the
cable anchor by hand.
(Fig. N)
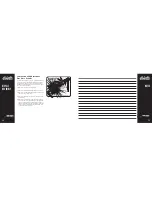
Centering brake
If you squeeze the brake and one side moves more than the other, or
one side does not move at all, then the brake is not centered, or the
wheel is not centered. First determine if the wheel is centered. Look
at the gap between the tire and the fork or frame on either side.
If it is not even, loosen wheel axle nuts and center the wheel, then
proceed to centering the brake.
(Fig. O, Fig. P)
If the brake is not centered, look at the disc brake caliper for
centering adjustment screws at the center of the brake pad on either
side.
(Fig. O)
Looking down into the brake where the brake pads
contact the disc rotor, determine which side needs to move away
or towards the disc. Turn the centering adjustment screws so that
there is about 1/32 of an inch of clearance on either side of the disc
rotor. Spin the front wheel and listen for any rubbing noise or excess
friction. Repeat the steps until the brake is centered.
Brake is correctly adjusted when:
• The brake pads do not drag on the rotor when the brake is open.
• Both brake pads move away from the rotor equally when the brake is
released.
• When the brake is applied, the brake pads contact the rim before the
brake lever reaches about 1/3 of the way to the handlebar.
(Fig. Q)
FIG. M
FIG. N
or fork. If you turn the screw clockwise it will increase spring tension
on that side, counter clockwise to decrease spring tension. Start by
increasing tension on the side that is not moving or not moving enough.
Turn only about ½ turn at a time, and try squeezing and releasing
the brake lever a few times to see the difference. Repeat until the brake
is centered. If you run out of adjustment, you can go to the other side
and loosen the screw slightly to continue adjusting the brake. When the
brake is correctly adjusted, both sides should move evenly when the
brake lever is squeezed, and when released, the wheel should rotate
with no brake shoe contact.
(Fig. K)
Brake is correctly adjusted when:
• Both brake pads move away from the rim equally when the brake is
released.
• The brake pads do not drag on the rim when the brake is open.
• When the brake is applied, the brake pads contact the rim before the
brake lever reaches about 1/3 of the way to the handlebar
(Fig. L)
After adjusting brake, squeeze the brake lever as hard as you can
several times and re-inspect the brake pads, centering, and brake lever
travel. If the brake pads are no longer square to the rim, repeat brake
pad adjustments. Be sure that brake pads return to a centered position
by spinning the wheel and listening for the brake pad rubbing the rim
on either side. Readjust as needed. Check that the brake cable tension
allows the brake lever about 1/3 of the travel before the brake pads
contact the rim. If the cable has stretched or slipped, readjust brake
cable tension by loosening cable anchor bolt and pulling more cable
through the anchor or use brake adjustment barrels for ine tuning
brake cable tension.
FIG. K
FIG. L


