background image

26

27

HANDLEBAR AND STEM 

(CONTINUED)

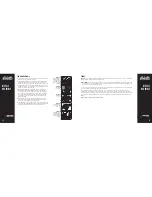
Put the handlebar in a comfortable position for the rider

WARNING: if the handlebar clamp is not tight enough, the handlebar 
can slip in the stem. This can cause loss of control.

Tighten the bolts of the handlebar clamp. If the handlebar clamp has more 
than one bolt, then tighten the bolts equally.

5.

 Test the tightness of the stem: straddle the front wheel and hold it 

between your legs.

Try to turn the front wheel by turning the handlebar. If the handlebar and 
stem turn with out turning the front wheel, realign the stem with the front 
wheel.

Tighten the bolt tighter than you did before (about half a revolution
only at a time).

Do this test again, until the handlebar and stem do not turn without
turning the wheel.

NOTE:

 the recommended torque of 14 -17 ft-lbs. Do not overtighten.

6.

 Test the tightness of the handlebar: Hold the bicycle stationary and try 

to move the ends of the handlebar forward or backward.
If the handlebar moves , loosen bolts of handlebar clamps. Put the 
handlebar in the correct position

Tighten the bolts of the handlebar clamp tighter than before If the 
handlebar clamp has more than one bolt, tighten the bolts equally

Do this test again, until the handlebar does not move in the handlebar clamp.

WARNING: 

Do not exceed 100lbs downward force.

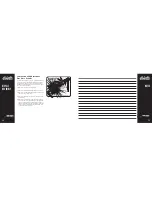
ASSEMBLE THE FRONT WHEEL TO THE FORK AS 
SHOWN:

Insert wheel into position making sure the axle (1) is aligned with the 
fork dropout (2)

- Make sure the tab of each security washer (4) is in the hole of the fork

NOTE:

 Some models have a front fork with a built in wheel retention 

feature. The security washers are not required and will not i t on a 
fork with this feature.

- Using the two axle nuts (3) with serrations, tighten axle nuts and 
secure the front wheel.

WARNING:

 Do not use the nuts without serrations to attach the 

front wheel.

NOTE:

 the recommended torque of 21 ft-lbs.

SECURITY WASHER DIAGRAM

SECURITY

WASHER

3

1

2

AXLE

NUT

AXLE

FORK

DROPOUT

4

3

HUB INSERTION DIAGRAM

BICYCLE
ASSEMBLY

BICYCLE

ASSEMBLY

WARNING: Do not overtighten 
the stem bolt. Overtightening the 

stem bolt can damage the steering 
system and can cause loss of control  
If necessary, re-adjust Handlebar. 
Tighten Clamp nut. (6)

Содержание Columbia

Страница 1: ...Quality Since 1877 Columbia Bicycles OWNER S MANUAL ...

Страница 2: ...fo Columbia bikes com For customer service questions email us at service Columbia bikes com If you have a problem do not return to the store call 1 866 424 0500 Adult Supervision Required when in use For parts or repair service call Ballard Paciic Resources Inc at 1 866 424 0500 This manual contains important safety performance and maintenance information Please read this manual before taking your...

Страница 3: ...cle must be equipped with lights so that you can see the road and avoid road hazards and so that others can see you Vehicle laws treat bicycles like any other vehicle That means you must have a white front and a red rear light operating if you are riding after dusk or before full daylight Your bike dealer can recommend a battery or generator powered lighting system appropriate to your needs WARNIN...

Страница 4: ...that risk Not the people who sold you the bike Not the people who made it Not the people who distribute it Not the people who manage or maintain the roads or trails you ride on You So you need to know and to practice the rules of safe and responsible riding AN IMPORTANT NOTE TO PARENTS In addition to The Basics page 7 the Rules of the Road page 7 the Rules of the Trail page 9 Wet Weather Riding pa...

Страница 5: ...ld look to the rear before making left turns and so on One way to get the message across is to play a game with the child similar to Simon Says In this game however the emphasis should not be on doing what Simon Says but rather have the child make a decision based on the situation The child should learn to ignore what Simon Says Children need to learn to think for themselves to ride safely SUMMARY...

Страница 6: ...Learn and obey the local laws regulating where and how you can ride off road and respect private property Don t ride where you are not welcome or where you are not allowed 4 You are sharing the trail with others hikers equestrians other cyclists Respect their rights and be tolerant if they inconvenience you 5 Yield right of way to pedestrians and animals Ride in a way that does not frighten or end...

Страница 7: ...ust ride under these conditions check and be sure you comply with all local laws about night riding follow the Rules of the Road and of the Trail even more carefully and make sure to take the following additional precautions Before riding at dawn at dusk at night or at other times of poor visibility take the following steps to make yourself more visible Make sure that your bicycle is equipped with...

Страница 8: ...bumps and other hazards stand up on your pedals Keep both hands ready to brake You may not stop in time if you brake one handed Allow extra distance for stopping in the rain since brakes are less eficient when wet Watch for chasing dogs Ignore them or try a irm No If the dog doesn t stop dismount with your bike between you and the dog Dogs are attracted to spinning wheels and feet Watch for cars p...

Страница 9: ...ty to follow all assembly and adjustment instructions exactly as written in this manual and any Special Instructions supplied with the bicycle The owner must make sure all components are securely attached If the bicycle was purchased assembled it is the owner s responsibility before riding the Bicycle for the irst time to make sure the bicycle is assembled and adjusted exactly as written in this m...

Страница 10: ...l requirement and should remain securely itted and in good clean conditions at all times Periodically inspect all relectors brackets and mounting hardware for signs of wear or damage Replace immediately if damage is found FRONT REFLECTOR BRACKET INSTALLATION NOTICE It is important to check and adjust the position of the relectors as you assemble your bike The relectors must always be vertical perp...

Страница 11: ...r to the bicycle frame Tighten the quick release lever continued Push the Quick Release Lever D to the close position Fig 3 When in the close position make sure the Quick Release Lever D lays against the Seat Post Clamp E The tightening torque of the Quick Release Lever D should be tight enough so that the seat does not move during normal operation SEAT BOLT MOUNT Fig 4 various models Some models ...

Страница 12: ...rs move the saddle slightly forward of this position NOTE Saddle should be horizontal and perfectly aligned with the bicycle 4 Tighten saddle clamp nuts securely INSTALL PEDALS All pedals have L or R stamped on the threaded spindle 1 Thread the pedal marked R clockwise into the right or chain side of the bike 2 Thread the pedal marked L counter clockwise into the left side NOTE Hand thread pedals ...

Страница 13: ...center bolt so that the handlebar assembly is in line with the fork If needed you can re check this after the front wheel is installed and re adjust Fig D THREADLESS STEMS This is a handlebar assembly that has a open ended stem with 1 or more pinch bolts that goes outside of the fork steer tube For this system it is important not to disassemble the headset and lose any parts Be sure that the end o...

Страница 14: ...amp WARNING do not overtighten the stem bolt Over tightening the stem bolt can damage the steering and cause loss of control Make sure the stem is aligned with the front wheel and tighten stem bolt MINIMUM INSERTION LINE Stem Diagram Adjuster Bolt Headset Top Cap Stem Binder Bolts Headset Frame Handlebar ADJUSTING THE HANDLEBAR STEM AND HEADSET NOTE the handlebar stem and headset are an integrated...

Страница 15: ...r clamps Put the handlebar in the correct position Tighten the bolts of the handlebar clamp tighter than before If the handlebar clamp has more than one bolt tighten the bolts equally Do this test again until the handlebar does not move in the handlebar clamp WARNING Do not exceed 100lbs downward force ASSEMBLE THE FRONT WHEEL TO THE FORK AS SHOWN Insert wheel into position making sure the axle 1 ...

Страница 16: ...g the handle until you feel comfortable DO NOT attempt to tighten the wheel by turning the handle to tighten the handle is for closing the lock nut opposite side is for adjusting the tension Fig C Next go back and check that the handlebars are perpendicular to the front wheel go back to handlebar assembly and re adjust if needed All quick release levers should be inspected before every ride to be ...

Страница 17: ...es the rider must practice and learn how each bicycle will respond in a new terrain or weather change The same bicycle will react differently if it is wet or if there is gravel on the road etc Always test the brakes and be sure you feel comfortable with the reaction If the riding conditions are too steep off road for example and you are unsure dismount the bicycle and walk past the questionable te...

Страница 18: ...ully with a wrench Fig C COASTER BRAKE APPLY PRESSURE TO SLOW DOWN OR STOP The coaster brake is a sealed mechanism which is a part of the bicycle s rear wheel hub The brake is activated by reversing the rotation of the pedal cranks see the coaster brake diagram Start with the pedal cranks in a nearly horizontal position with the front pedal in about the 4 o clock position and apply downward foot p...

Страница 19: ...ey mount to the frame FIG H FIG I FIG J 1 2 mm Brake pad aligned with the rim surface Pad and rim should be parallel CORRECT INCORRECT Equal space between the brake and the rim Rim Brake Pads Check the brake pads to be sure they are square to the rim and do not contact the tire when the brake is applied Adjust brake pads if needed Then squeeze and release the brake several times squeezing as hard ...

Страница 20: ...sted when The brake pads do not drag on the rotor when the brake is open Both brake pads move away from the rotor equally when the brake is released When the brake is applied the brake pads contact the rim before the brake lever reaches about 1 3 of the way to the handlebar Fig Q FIG M FIG N or fork If you turn the screw clockwise it will increase spring tension on that side counter clockwise to d...

Страница 21: ...lley adjustment screw Adjustment screws SIS cable adjuster Tension Pulley Guide Pulley High gear adjustment screw Low gear adjustment screw Barrel adjuster FIG A FIG B DISC GETS HOT Severe injury could result from contact with the hot disc Mind your legs as well as your hands These brakes require breaking in Ride and use the brakes gently for 13 miles before using the brakes in downhill conditions...

Страница 22: ...foot activated brakes however backpedaling should not be necessary when riding and invites the possibility of clothing being caught in the chain and should be avoided See Assembly and Maintenance for further information on proper gear adjustment FIG A FIG B FRONT DERAILLEUR Fig C Shift both shifters to the smallest number indicated and place the chain on the corresponding cog and chainwheel Discon...

Страница 23: ...fting gears This allows the chain to derail from one gear to the next Operating the shifter while sitting still or not pedaling can cause damage to the system and can be dangerous as the chain may jam and cause the bike to become unstable Fig A Avoid back pedaling on any bicycle with derailleurs Backpedaling can derail the chain and cause it to jam or fall off the gears When shifting gears make su...

Страница 24: ...and follow the given instructions for that particular brace C SHAPE BRACE Remove the outer axle nut and washer from the rear wheel axle Place the brace stabilizer washer onto the axle and align the washer so that the notch on the washer its into the rear frame drop out Next place the C shaped wheel brace onto the axle and replace the washer and axle nut Tighten the axle nut securely making sure th...

Страница 25: ...ning wheel Brace stabilizer washer Axle nut Inner axle Inner axle nut DO NOT REMOVE Training wheel Wheel brace Axle nut Washer Stabilizer bracket FIG C FIG D TRAINING WHEELS CONTINUED FLAT BRACE It is very important to check the training wheel connection to the bicycle Failure to properly tighten may cause the training wheel to dislodge Please contact Columbia Bicycles Service with any questions R...

Страница 26: ... rims the brake shoes the pedals and the tires Rinse with clean water and dry completely before you ride the bicycle REPAIR AND SERVICE WARNING Inspect the bicycle frequently Failure to inspect the bicycle and to make repairs or adjustments as necessary can result in injury to the rider or to others Make sure all parts are correctly assembled and adjusted as written in this manual and any Special ...

Страница 27: ...from the sides of the rim by pressing with your thumbs Work your way around the tire on both sides to be sure that the beads of the tire are not sticking to the rim Figure A 3 Stand the wheel up on a irm surface with the valve stem on the bottom and grasp the upper part of the tire with both hands Try to roll the tire off the far side of the rim 4 With the wheel standing as in Figure B use bicycle...

Страница 28: ...ot straight they will need to be adjusted This is quite dificult and is best left to a bicycle specialist Broken or loose spokes Check that all spokes are tight and that none are missing or damaged Caution Such damage can result in severe instability and possibly an accident if not corrected Again bicycle specialist best handles spoke repairs Loose hub bearings Lift each wheel off the ground and t...

Страница 29: ... 3 Remove the left side locknut by turning it clockwise and remove the keyed lockwasher 4 Remove the adjusting cone by turning it clockwise with a screwdriver 5 Remove the left ball retainer slide the crank assembly out of the frame to the right and remove the right ball retainer Clean and inspect all bearing surfaces and ball retainers and replace any damaged parts Pack the ball bearings retainer...

Страница 30: ...llation of parts or accessories not originally intended or compatible with the bicycle as sold The warranty does not apply to damage or failure due to accident abuse misuse neglect or theft Claims involving these issues will not be honored CONDITION OF WARRANTY 1 Your bicycle has been designed for general transportation and recreational use but has not been designed to withstand abuse associated w...

Страница 31: ...4 0500 Local 417 206 0563 Fax 775 248 5155 Monday Friday 8 00AM to 5 00PM CST For product related questions email us at info Columbia bikes com For customer service questions email us at service Columbia bikes com BALLARDPACIFIC www columbia bikes com ...

Отзывы: